How to Tile a Backsplash – Part 1: Tile Setting
This is the tutorial that I’ve been anxious to share with you! How to Tile a Backsplash! The reason I’ve been anxious to share is for two reasons!
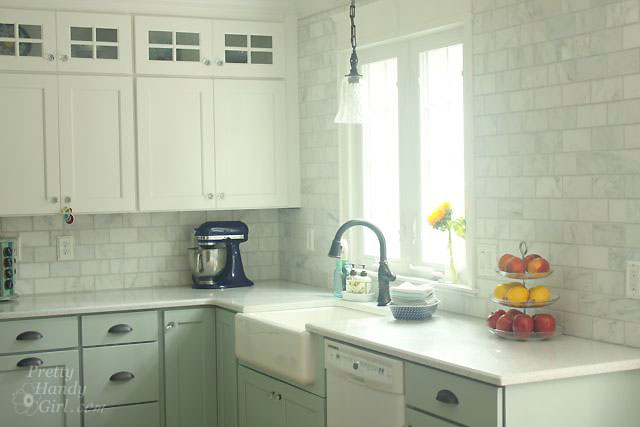
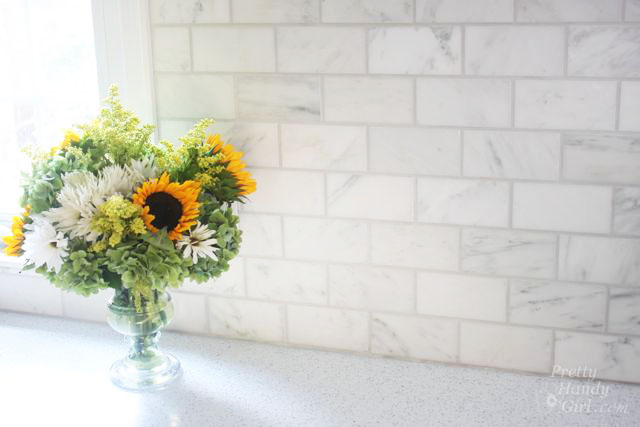
1) The backsplash and tiling truly makes my kitchen feel luxurious. In addition to the cork flooring, it was one of the things I REALLY wanted to have in our kitchen. And this is definitely a project that anyone can take on (with a good tutorial.)
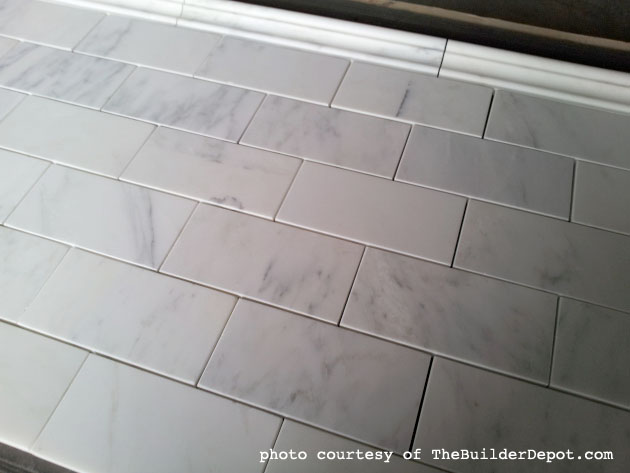
2) The source of my tiles is a best kept secret! I found the supplier online after researching and searching for affordable marble subway tiles. TheBuilderDepot.com was a site I stumbled across in my search. After contacting them and discussing my project, a response came immediately with ideas for my backsplash. My contact, David, was there for me throughout the process and gave me lots of ideas and tips along the way! He even sent me a photo of my tiles before shipping them.
But, here’s the best part, in one of our email conversations I learned a little more about TheBuilderDepot and their company’s history. I want to share his email with you because I think it’s wonderful how they run their business:
“We started our business in 2008 with $12K in sales and because of the financial meltdown and housing collapse banks told us we were crazy starting an “ecommerce” marble business. None of them would loan any money, not even $1K.
Last year we grew to a $2.4m company (this year we are on target to double), employing locals and making an impact in the way consumers buy luxury natural stone. Our vision was to offer a quality that is second to none, buy direct from Italy and quarries around the world, pay cash for everything buying 30,000 to 40,000 sq.ft. of product at a time from the quarries to keep costs low and quality high.
We have no debt as a business (that was not a plan but has worked out well) and avoid traditional marketing channels that are heavy on costs. Basically a no frills marketing strategy.
People think we are crazy when, if we cannot supply something or another supplier offers a better more affordable solution we refer them to a competitor. We do not need the sales as we never anticipated growing this big, we are just interested in people creating pretty rooms with natural stone.
Part of the success is we ask what people are planning, then come up with some ideas of our own. We are really passionate about Carrara. The only company that separates into two collections.”
A company that has good business practice is worth supporting!
As mentioned in previous posts, when choosing companies to work with, I make sure to select brands and companies that I can stand behind. I have always maintained strict criteria when selecting companies to work with, and The Builder Depot goes above and beyond my criteria:
- Great Customer Service
- Beautiful Tile Selection
- Quality Tiles
- Affordable prices!!!
Before you source your next tile job, check out TheBuilderDepot.com. I think you’ll be pleasantly surprised ;-).
Ready to get messy? Let’s tile that backsplash!
Prep-Work:
Cover EVERYTHING with plastic tarps or drop cloths. You might also want to use some big pieces of cardboard on your countertops to protect them from any falling tools or tiles.
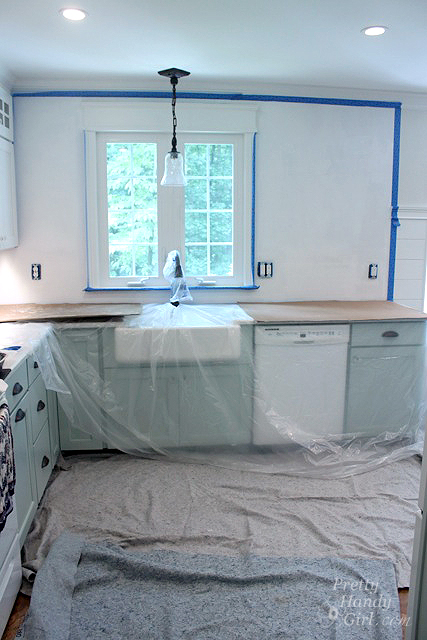
You may also choose to tape off the edges of your cabinets, walls or window trim (anywhere that you don’t want to get mortar or grout onto.)
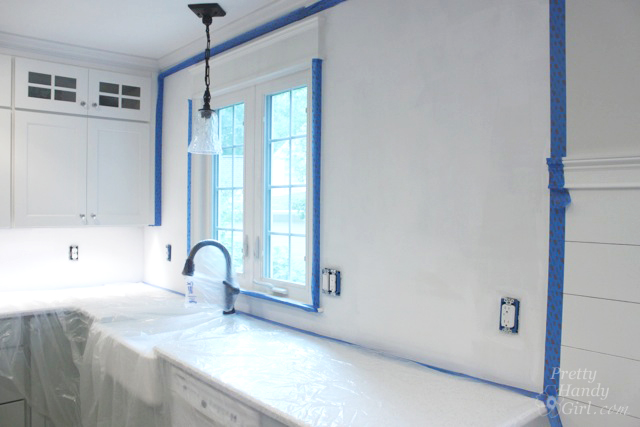
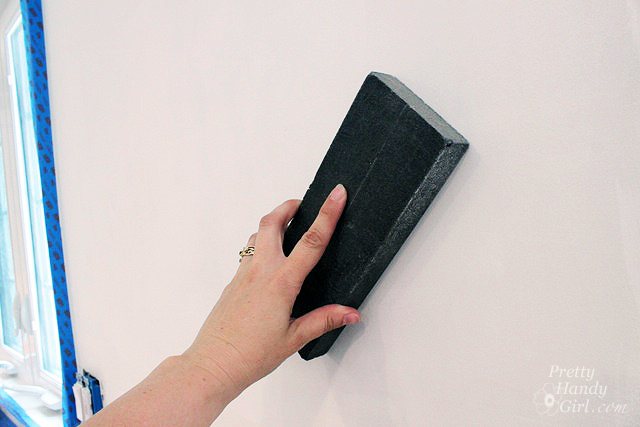
If your walls are previously primed or painted, you’ll need to rough them up with a fine grit sanding block. Then wipe the walls down with a damp cloth to remove any dirt or dust.
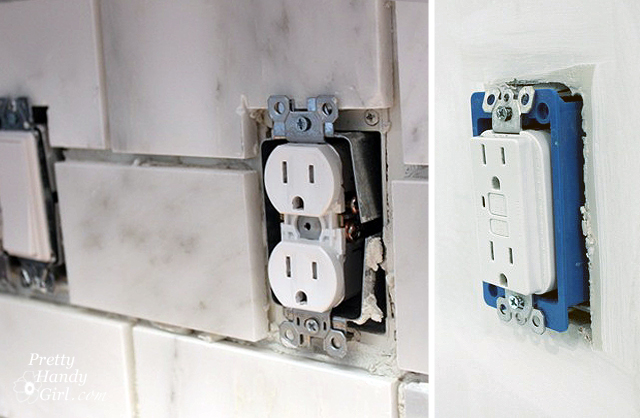
It’s also a great idea to install your outlet extenders ahead of time so you know they’ll fit after the tiles are installed. The plastic extenders are a better choice, as the metal extenders could become live with electricity of it comes in contact with loose wires.
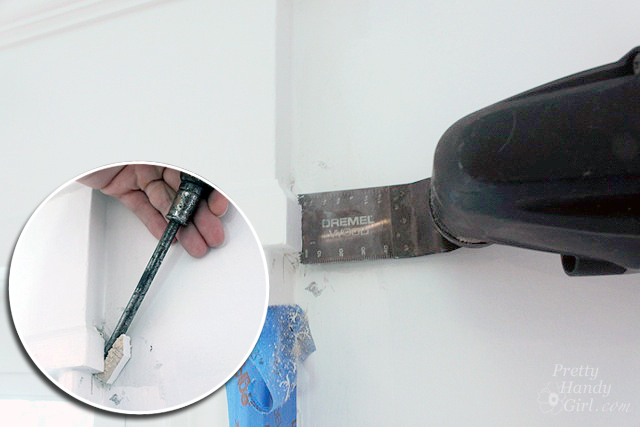
To get a professional installation look around windows, cut out a section of moulding so you can slip your tile behind the moulding. Simply hold a tile up next to the trim…
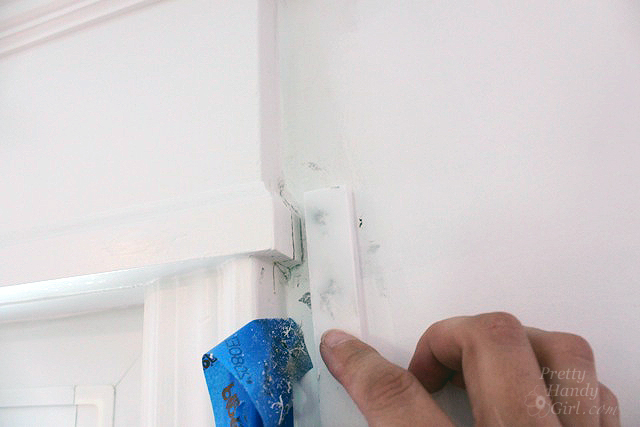
…and use a multi-tool or Japanese hand saw to cut out the trim piece. Knock out the piece with a flat screwdriver or chisel.
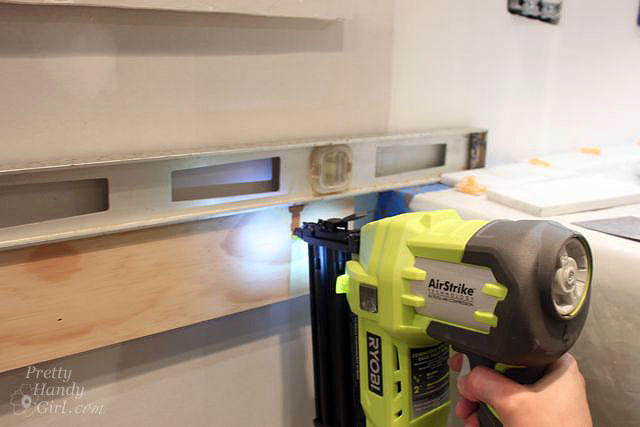
If you have any sections of missing countertop, where you want to stop the tile from sliding below a set line (like behind your stove), attach a scrap piece of wood with finish nails.
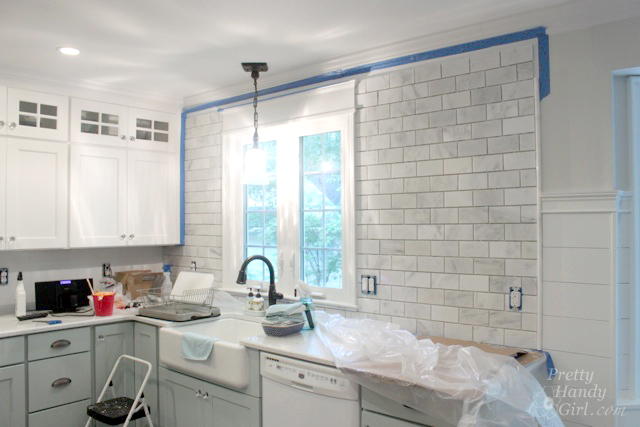
Bring several boxes of tile into the kitchen and mix tiles from all the boxes. Lay out your first row on your countertop and start your second row. Determine any cuts you need to make. I used a running bond (subway or brickwork pattern.) This results in a half tile that starts every other row.
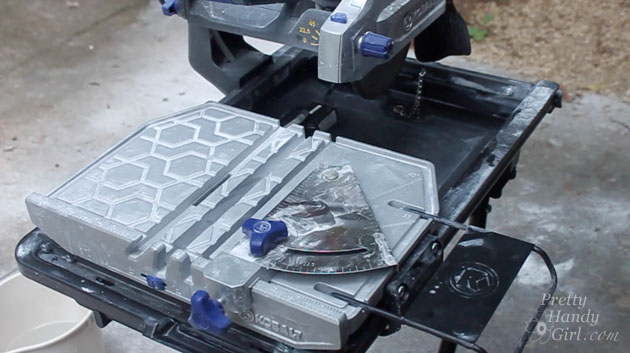
I highly recommend renting or buying a wet saw for your tiling job. (I will have a wet saw tutorial for you as soon as I can.)
(I’ve included affiliate links for your convenience. I earn a small percentage from a purchase using these links. There is no additional cost to you. You can read more about affiliate links here.)
Mixing the Mortar:
Supplies:
- Thinset (my choice: Mapei UltraFlex 2 Tile Mortar with Polymer)
- Drill that will accept a mixing paddle and has an extra handle on the drill
- Mixing paddle
- 5 Gallon Bucket
- Measuring cup
- Bucket of water to wash mixing paddle in
- Water source
Follow the instructions on your thin set package. Mix the mortar until you achieve the desired consistency.
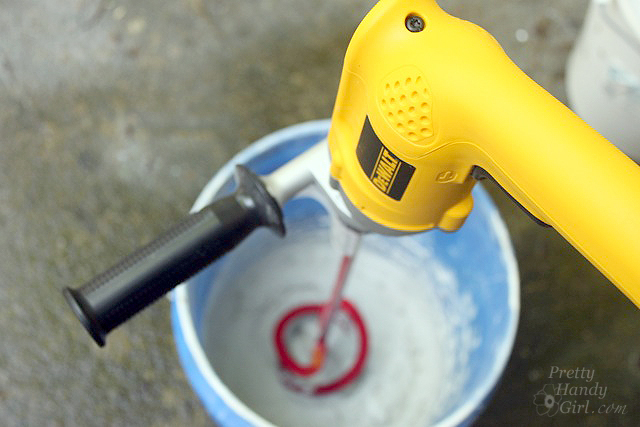
Aim for a peanut butter thick mortar:

Tiling the backsplash
Materials:
- Wet Saw
- Tile Nipping pliers
- Basin of water
- Sponge
- Rubber gloves
- Notched trowel
- Flat spatula
- Rag
- Spray bottle filled with water
- Spacers
- Flat toothpicks
- Tiles
Instructions:
I made this brief video to show you how to spread the thin set mortar and tile the backsplash:
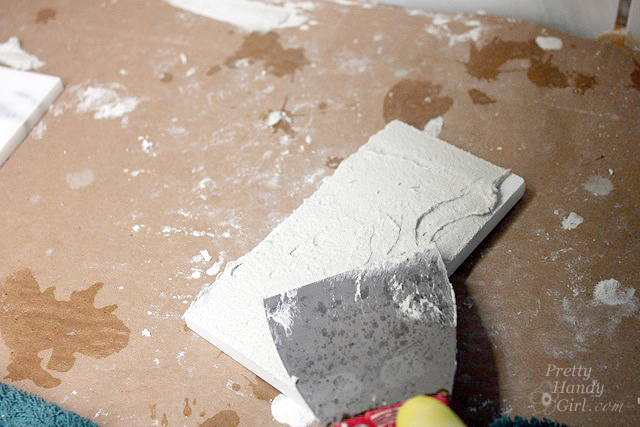
Use the spatula to spread mortar on the “un-notched” side of the notched trowel. Apply pressure and spread the mortar on to the wall. Flip the notched trowel over and scrape through the applied thin set with the notched side.
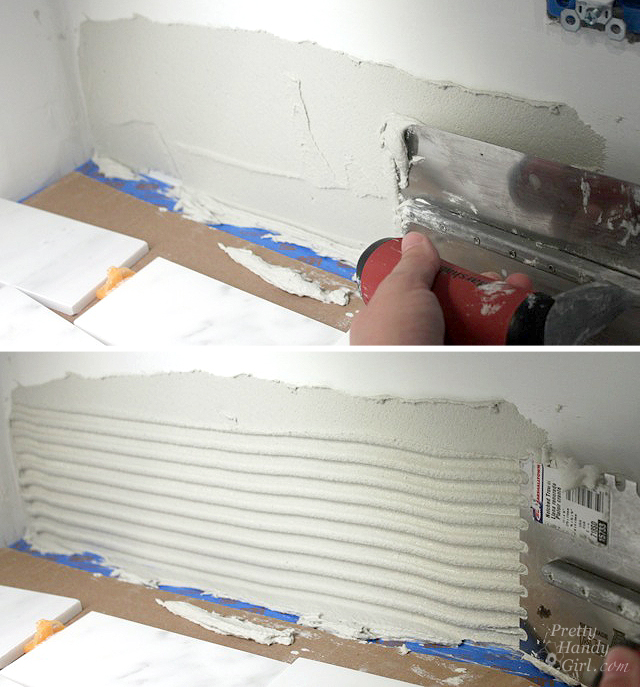
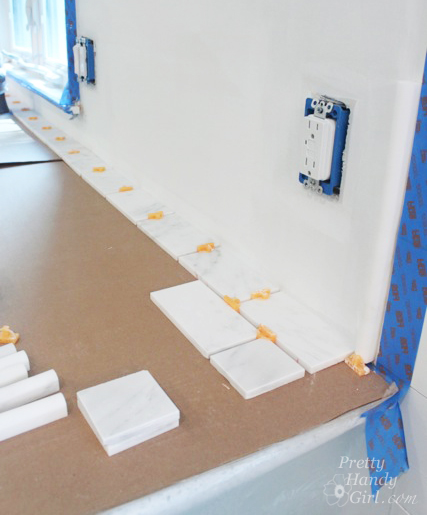
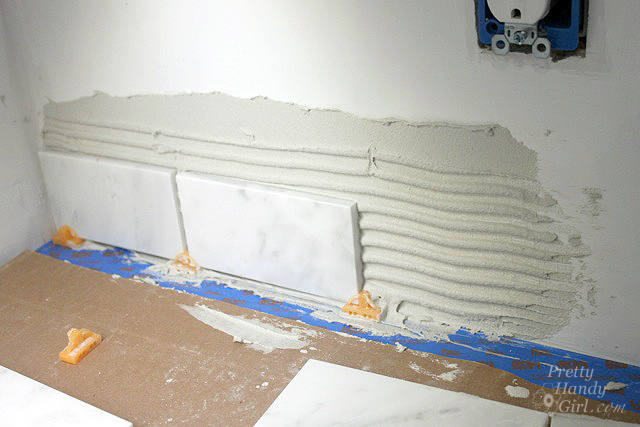
Set the first tile in place. Set spacers underneath the tile. Wiggle the tile back and forth to set it into the mortar.
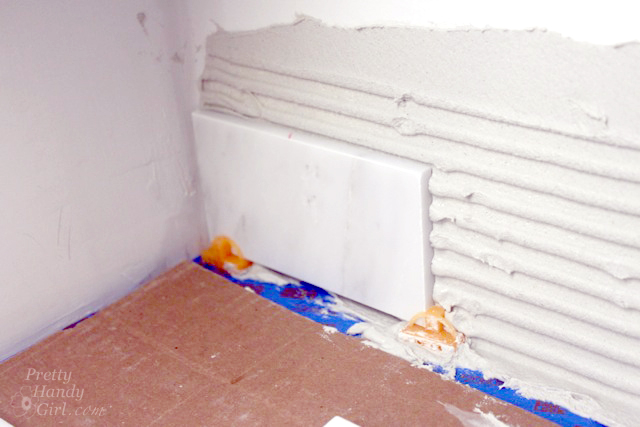
Insert a second spacer. Lay the next tile up against the spacer. Repeat until you run out of wall space.
If you get to a tight spot where you can’t fit the notched trowel, you can “back butter” the tile by spreading mortar onto the backside of the tile.
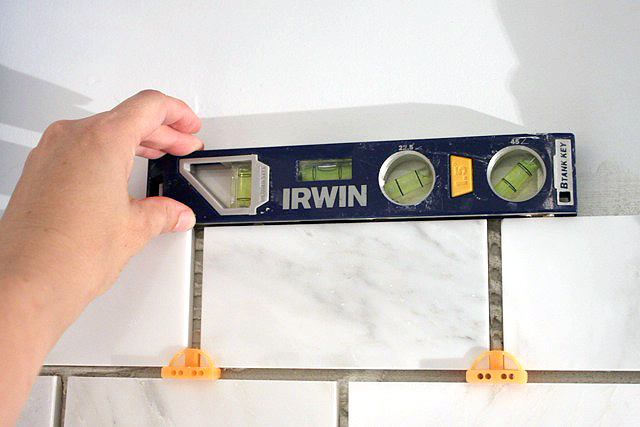
When moving to the second row, center your tile on the space between tiles on the previous row. Check the level of your tiles frequently and make adjustments with toothpicks or scraps of shim as necessary.
When working around outlets and obstacles, you’ll need to measure and cut away pieces of tile with the wet saw and/or the tile nippers.

While working, clean off your tools periodically to prevent the mortar from drying on them. Also wipe off any excess mortar that may have settled on the tiles.
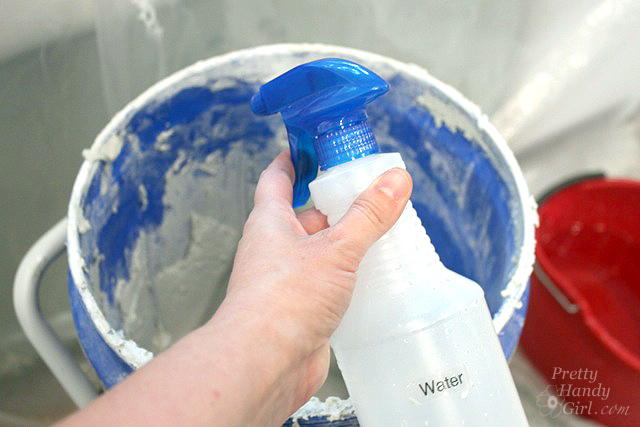
A trick to keeping the mortar from drying too fast, is to keep a spray bottle filled with water nearby. Occasionally mist the mortar and stir with your spatula.
Continue working your way up the wall.

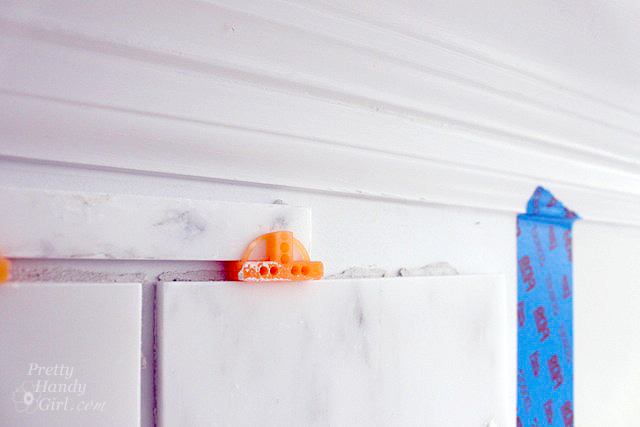
For under a window stool, you may wish to use decorative tile like these chair rail tiles or pencil bullnose tiles.
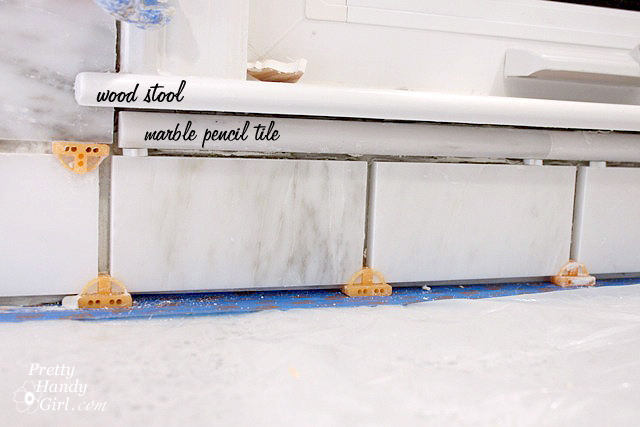
Here’s what it will look like when it’s grouted:

Pencil Bullnose tiles also look great to cap off your tiles on the sides. Use painter’s tape to help secure the pencil bullnose tiles while they set.

If you are working to the ceiling in your room, you’ll likely find you need to cut the last row of tiles short.
And, if your ceiling is like most homes, it will be far from level. Snap a chalk line at the location where you wish to end your tiles.
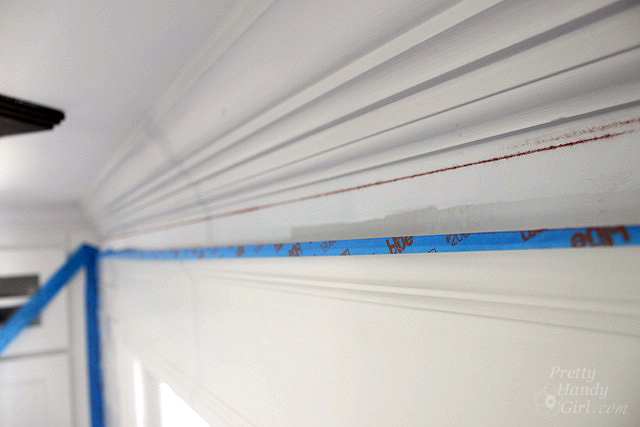
Then measure and mark your tiles as shown above. Cut your tiles.
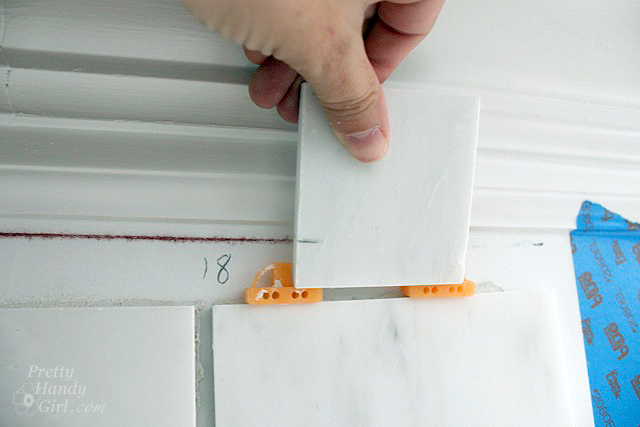
Install your last row of tiles. If you have pre-installed crown moulding, leave a gap between the tiles and the crown moulding. You can fill the gap with caulk later.
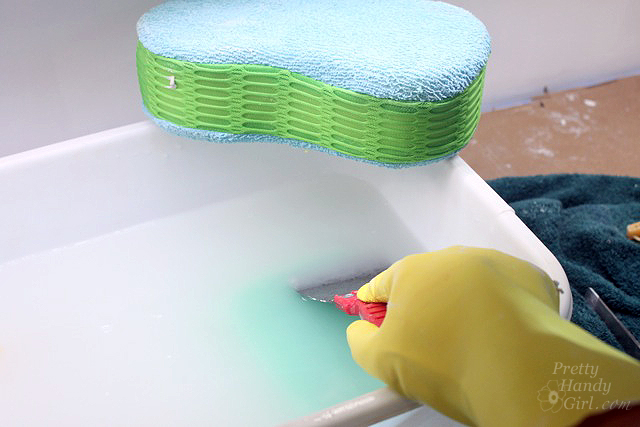
Wipe off your tiles until they are clean. Do not allow the mortar to dry on your tiles. I found this disposable cleaning rag worked extra well on cleaning because it had some texture to scrub with.

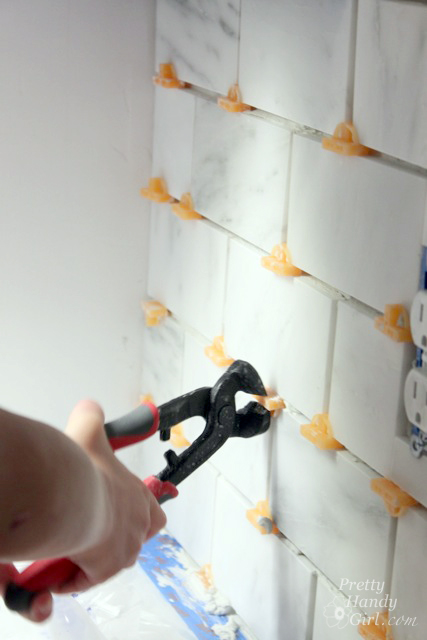
Wait 24 hours for the tiles to set. Then remove your spacers. (Child labor is totally acceptable for this task!)
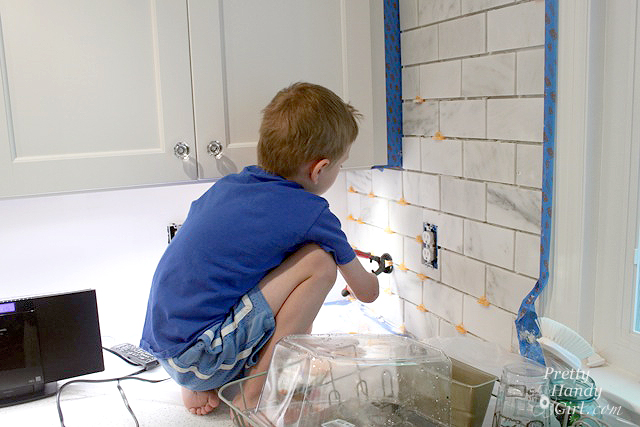
We found these tile nipper pliers worked great for grabbing stubborn spacers.
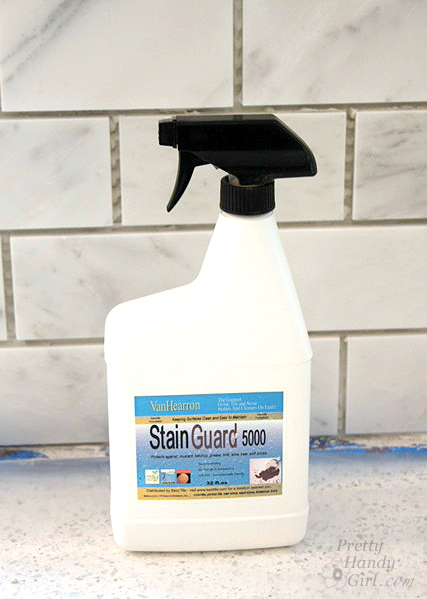
If you are using marble or other porous stone, you should consider sealing your tiles with a sealer. I used the StainGuard 5000. It was easy to wipe on and buff off. It will also help protect the stone from absorbing the grout.
Learn how to grout your new tile backsplash! Hang in there, you’re almost done.
What do you think? Do you feel like you can tackle your own tile setting project? Feel free to leave me comments or questions below.

Here are some other helpful tiling tutorials:
White Subway Tile Backsplash Tutorial using Simple Mat by Remodelaholic
How to Tile Subway Tile Backsplash using Bondera by Southern Hospitality
Installing the Tile Backsplash by Miss Mustard Seed
How to Install a Tiled Backsplash using OmniGrip Adhesive by The DIY Showoff
Subway Tile Backsplash by Infarrantly Creative
Installing a Split Travertine Backsplash
Disclosure: I was provided with complimentary tiles from TheBuilderDepot in exchange for mentioning them in this post. As with all the companies I mention, I have thoroughly researched the company and I share these resources with you because I believe in the quality of their products at an affordable price. I was not told what to say or write. All words and ideas are my own.


Hi, we did the same type of marble tile backsplash. It’s pretty, but we didn’t realize we needed to use the sealer. We now have what looks like a little splash of probably olive oil. I guess we will go ahead and seal now with the Stain Guard 5000. Any ideas what we can do about our oil stain?
Sadly, there’s not much you can do after it’s absorbed.
Beautiful job! I am having trouble finding light grey grout in the shade that you used. At the local tile stores it is either too dark a grey or more of a grey/beige. Do you remember what specific grout you used?
It is Mapei grount, I think it’s #77 Frost color.
Did you put spacers between the pencil tile used as the outer edge?
I didn’t, but I spaced it a little away from the tiles so I could add a grout line in between. Then I taped the pencil tile in place until it set.
Those marble tiles are gorgeous and look great in the kitchen. I am also a huge carerra fan and may need to steal your design.
Which marble did you used from builder depot? Venato? Or Bianco?
The Venato 😉
Great! This is what we are about to install and I am trying to pick a grout color. I read somewhere that someone though Frost is too pink. Did you find that it looked pink next to the Venato? Or does it look like a very faint gray in person?
Hi! We are currently in a kitchen remodel ourselves, and yours looks amazing! We are actually using very similar subway tile 🙂
I was wondering what size spacers you used to create your grout line?
Thanks!
They are 1/4″ spacers. I got them at Lowe’s: https://www.lowes.com/pd/TAVY-100-Pack-1-in-W-x-1-in-L-1-4-in-Orange-Plastic-Tile-Spacer/3579018
So… where’s the discount code? 🙂
Brandon, I’m sorry, the code expired a few years ago. I forgot to remove that one sentence that mentioned the code.
You wrote “And, because you know I love y’all, I asked The Builder Depot if they’d offer my readers a discount.” But I don’t see a discount code. Do you still have one? I have 40sqft of carrera marble hex in the Builder’s Depot shopping cart ready for a friendly discount! 🙂
Thanks
Amazing. Thanks for such detailed and informative photo’s. Just what I was looking for. Congrats on a great job!
Your kitchen really looks beautiful. I too am not sure I’m ready to take on this project myself. I see now that you used a sealer with your grout. I do think I will seal mine prior to grouting. But I do have a question on how you took off your blue tape from your countertop after installing the tile. Didn’t the adhesive get in the way? Were you able to get all the blue tape off or did you caulk on top of the tape?
I got most of it off, but the caulk went over that area anyway. So, yes the caulk hides any tape that pokes out from beneath the grout. Make sense?
Love the kitchen–I am ready to order the same honed marble from Builder Depot–was it Venato Carrara Stone? Did you seal your tile before installing it and again after?
Melanie, I used a mix in sealer with the grout. But, used a spray on sealer after the tiles and grout was installed.
Your kitchen looks awesome! I am working on a similar tiling project. Could you please let me know how big your spacers were for this project?
Suzanne, I ended up using 1/4″ spacers. I originally thought about smaller, but wanted to make sure I had enough grout holding the tiles on the wall. And I had heard smaller grout lines are harder to push the grout into.
So pretty! Do you mind sharing the grout color you used?
Thanks,
Kate
Kate, sure! It’s Mapei Frost. You can see the tutorial for grouting your tile here: https://prettyhandygirl.com/2013/09/tile-backsplash-part-2-grouting-sealing-backsplash.html
Hi! I found you when I was looking at tile from The Builder Depot. Great work! You answered questions that I hadn’t figured out from my last tile job 😀 I do have a couple of questions…
– Is it customary to put the pencil tile and wood stool under the window? And what is a wood stool anyway? 😉 lol I’ve never heard of either one of those…but of course, now I need to know 😀
Once again, Great Tutorial! So Helpful. I’m excited to give it another go.
Thank you!!
~Melissa
Melissa, Thanks for your comment. I don’t know if it is customary, but I liked how it looked under our casement window. A lot of what I did, I tested and used for aesthetic reasons. Stool is sold in the moulding section of your home improvement stores. It is the moulding that is at the bottom of the window casing (think window ledge.)
Messy, indeed! Arg! Grouting and caulking were the messiest parts. My fingers look awful. But I am so glad to be done. Massage scheduled for tomorrow.
Leilani, LOL! Oh yes, a massage is a definite must after tiling. Come to think of it, I still haven’t booked mine.
Brittany… you have the patience of a kitchen remodeling saint! I currently live in a small NYC apartment, with a galley kitchen that’s as big as a breadbox. I won’t be doing any tiling projects here, but I’ve been gathering ideas for the day I move to a bigger breadbox I can call my own.
I like your Builder Depot tile recommendation. The prices look pretty yummy and the shipping time ain’t bad either. I’m definitely looking forward to more.
Monique, LOL. A kitchen remodeling saint. That’s a first. Thanks for your comment and I hope to hear from you when you move into the bigger breadbox ;-D.
So glad you posted this. I had kind of an idea on how to tile but I really appreciate your more in depth explanation! I ordered the same tile as you but in the smaller 1×2 size today. I will be done painting my cabinets by next week & hopefully my tile will have arrived by then!
Liz
Your tile is gorgeous! I can’t imagine doing it myself, but maybe some day I’ll become a phg jr. 🙂
Your timing is impeccable Brittany! I’m just in the middle of a kitchen reno and having to make some decisions about the backspash. Wish you could be here in person to coach me!
Laurie, I am always here for ya’, just reach out to me via email (the best way to reach me.)
It looks great! I just love your kitchen redo and have pinned it as inspiration for our future (hopefully soon!) kitchen reno. As for tiling, I’m going to leave it to a pro. We did our shower in our master bath and I hated it (could be that I was pregnant at the time and pretty much had an attitude about a lot of things!) but we also didn’t do the best job as the grout lines look messy. It’s ok in our shower since that can be hidden by the curtain, but in our kitchen everyone will see it – so while we do most other DIY jobs, this one is going to be left to someone with more experience! But I envy you a little with all your DIY talent!
Oh Kim, please don’t say that. I bet you learned from your mistakes after the shower. Think of it as riding a bike, no one does it perfect the first time. It’s a learning process ;-).
Girl, you did a fantastic job on the marble subway. Turned out so gorgeous & I can’t believe you were ever nervous to start that one. You’re a pro! Thanks for the mention of my tile project too. xo
Thanks Rhoda. And thank you for your confidence in me ;-).
You have done a pretty awsome job over there! The tutorial is simple and very breath taking. Thanks for sharing it up 😉 .. The tiles you have finalized are very nice too.
Looking superb 😉 … I love the step by step thing that you have provided, it is very inspirational 😉
Love
Jessica x
Stunning kitchen! Thanks for the detailed tutorial. Love the tile you picked.
Thank John!