
Quick and Easy DIY Fan Trellis
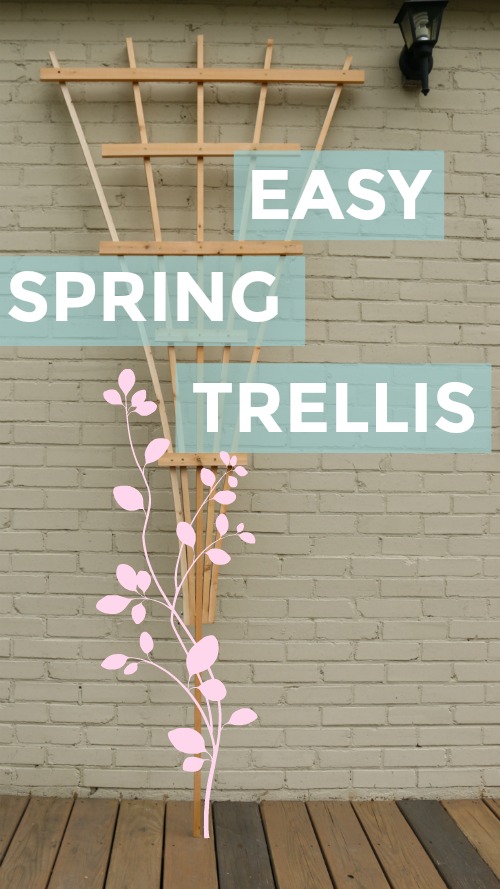
Quick and Easy DIY Fan Trellis
Every spring I find myself making a new fan trellis to replace my worn, weathered and rotting trellis that was left out over winter. This year, I am going to use the right materials (cedar and exterior screws) to allow me more than one season’s use of my trellis. This is an easy project that doesn’t require too much time, tools or money. And the best part is, you can make it exactly the size and shape that is right for your space. Follow along and you’ll be ready to plant cucumbers, clematis, or (my personal favorite) hops!
Materials:
- 6 – Cedar 1x2s (8 feet for a large trellis)
- 2 – Galvanized bolts long enough to fit through 5 of the 1x2s stacked together. (4 inches should work. Mine were too short so I had to improvise and counter sink the heads.
- 25 – 1 ½ inch exterior screws
- Drill
- Tape measure
- Pencil
- Screwdriver or impact driver
- Miter saw or hand saw
Optional: Clamp (nice to have but not totally necessary)
Instructions:
A note about lumber used for this project. It is important to use cedar because cedar resists weather and insects. You could use pressure treated lumber, but it is treated with chemicals so you may not want to use pressure treated lumber if you are growing vegetables.
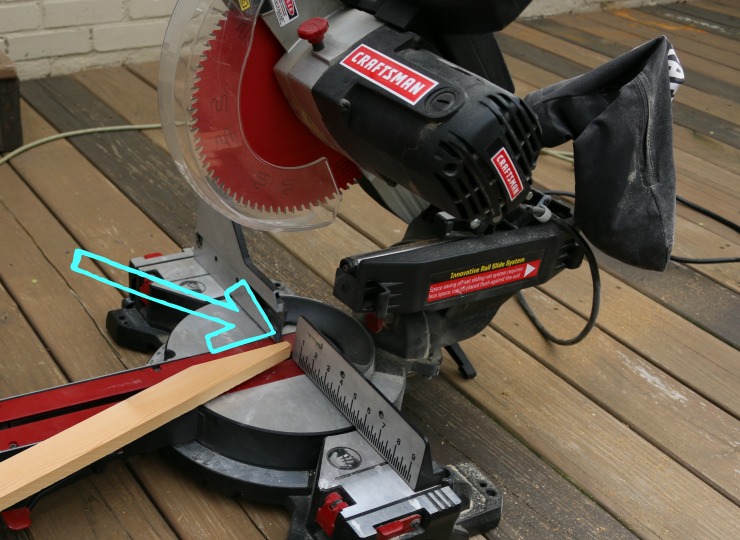
Step 1: Cut your vertical 1x2s
Cut four of your cedar 1x2s to six feet long. I like to leave the center 1×2 two feet longer than the rest of the pieces and cut it into a point (as shown below) so that I can drive it into the ground with a rubber mallet. Cut your middle 1×2 to eight feet long, unless you are not sinking your trellis into the ground. In this case, cut the fifth 1×2 to six feet long also.
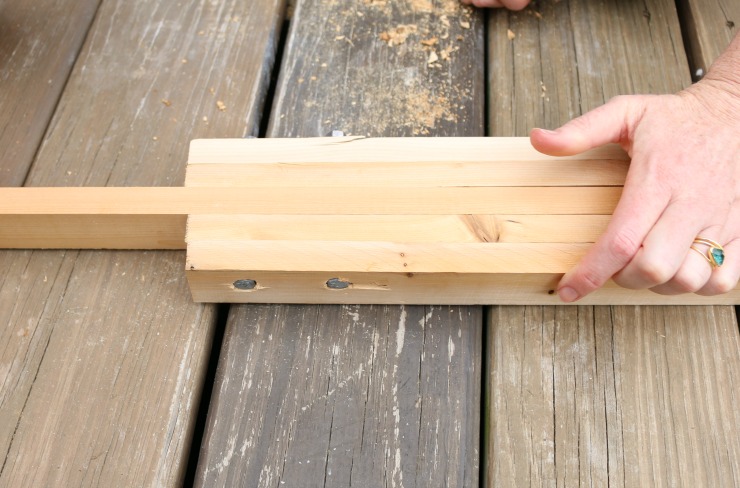
Step 2- Secure the 1x2s
Stack the five vertical pieces making sure they are equal at the top. The middle piece (if longer) will stick out at the bottom as shown below.
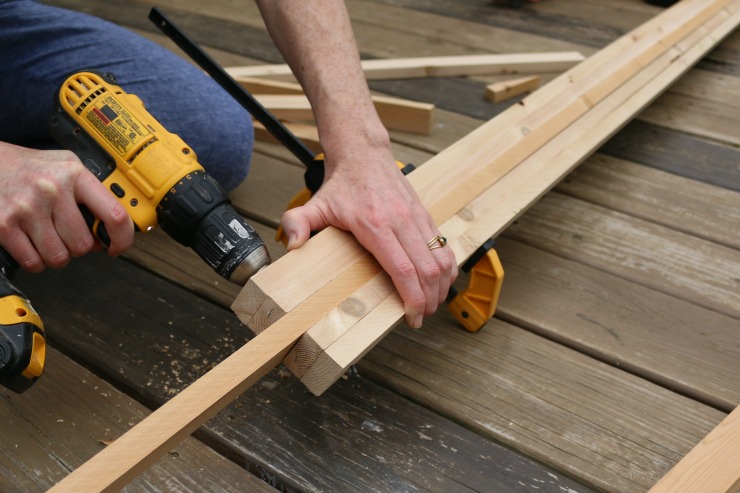
Clamp the 1x2s at the bottom and drill two pilot holes about two inches apart. Push the galvanized bolts through the stack and tighten the nuts. (You may notice my bolts were a little short, so I had to counter sink them. Get longer bolts and you won’t have to do this.)
Step 3- Create the fan
With the five 1x2s secured at the bottom, fan out the outer pieces at the top to the distance you prefer.
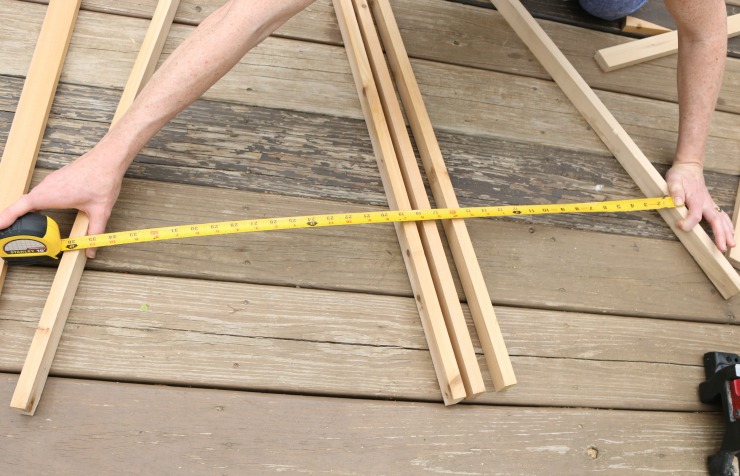
Add 6 inches to this measurement. Cut one of the remaining 1×2 to this measurement.
Using your feet to keep the outside pieces fanned out, drill pilot holes, and attach the cut piece near the top of the outer 1x2s. This will hold the trellis shape while you measure and eventually attach the rest of the horizontal trellis pieces.
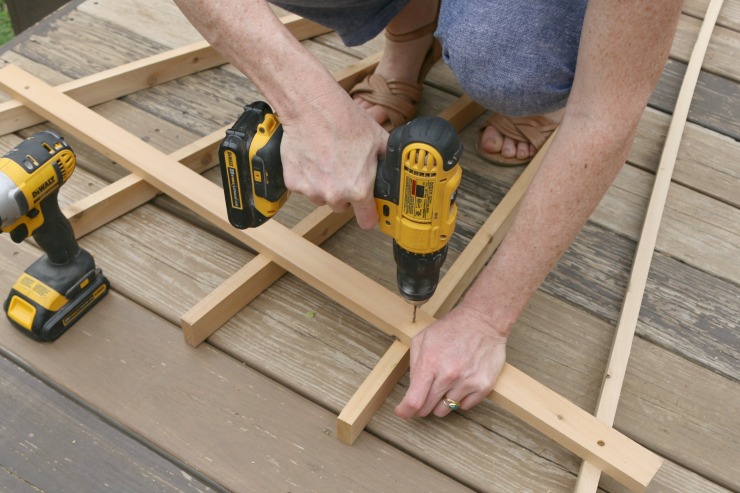
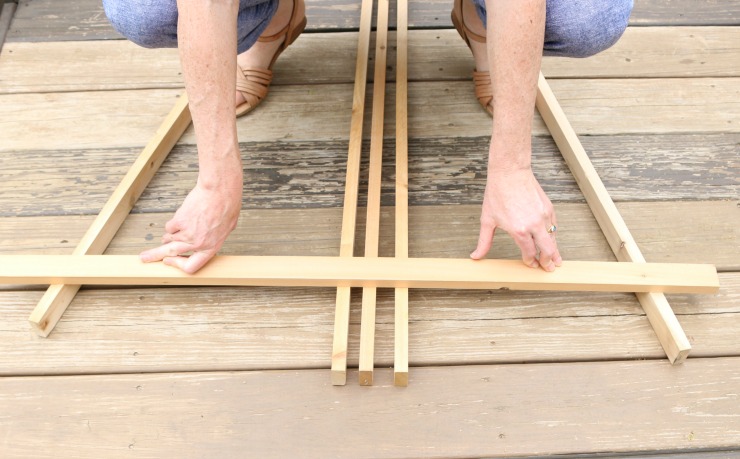
Now determine where to place the other vertical 1x2s. Feel free to skip measuring and eyeball the sizes and spacing. Nothing needs to be exact with this project, that’s what makes it fun! Cut your horizontal pieces and attach the vertical supports by pre-drilling and securing with the screws.
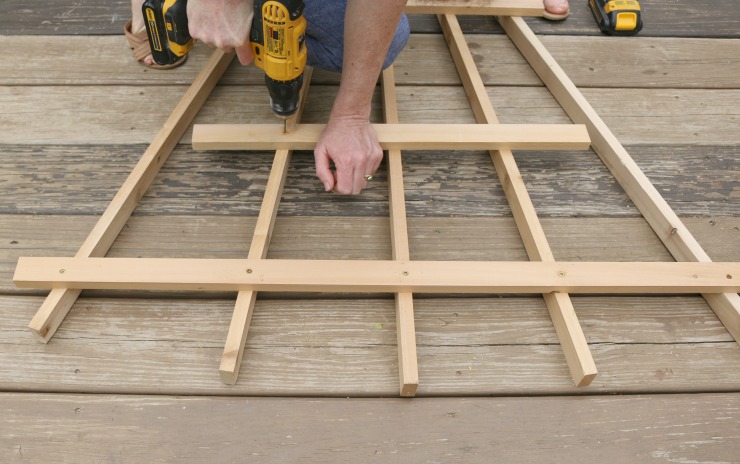
When you are done, your trellis will look something like this:
If you made your trellis to stake into the ground, pound the long, pointed piece of your trellis into the earth with a rubber mallet. For added stability, you can wrap a wire loop around one of the top supports and attach to the wall.
I wish I had an after picture of a beautiful vine covering my ugly shed, but that will have to wait a few months. Happy building and planting!
![]()
 Hi! I’m Lara, the creator of The Unprofessional blog and YouTube channel. I am an aspiring handy-woman with little to no experience building, tiling, landscaping, demolishing, and what have you. I’ve drilled holes in the wrong places, cut on the wrong lines and stripped more screws than I care to count. And yet, I’m on my way to customizing my home, project by project. I believe you can do pretty much anything with a few good tools, a stack of wood and a half-baked
idea.
I like to find challenges and solve them with my miter saw. When my 3-year-old son complained that he couldn’t reach the picnic table, I designed an easy-to-build folding booster seat perfect for camping trips and beer gardens. When the low ceilings in my cape cod wouldn’t accommodate a bulky barn door, I found an alternative approach to turn any interior door into a space-saving barn door. I love to share these solutions with others in hopes that the empowerment and love of power
tools spreads.
You can connect with me on Instagram, YouTube and Pinterest.


Leave a Reply
Want to join the discussion?Feel free to contribute!