Easy Pounded Flower Gift Ideas
Spring is here and there are countless flowers awakening from the cold winter slumber. When it happens you can pick some blooms and turn them into easy gift ideas. Today I’ll show you how to make easy pounded flower art.
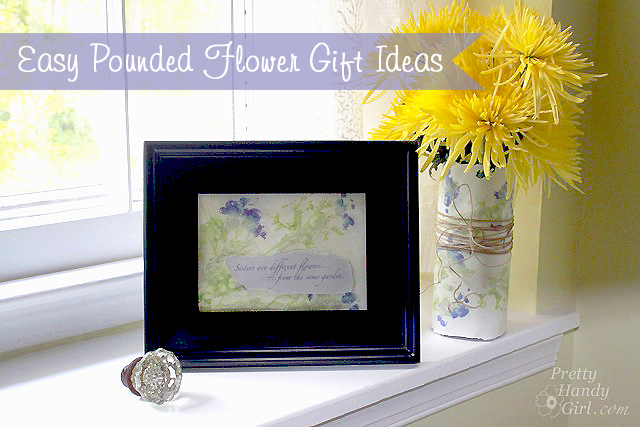
Easy Pounded Flower Gift Ideas
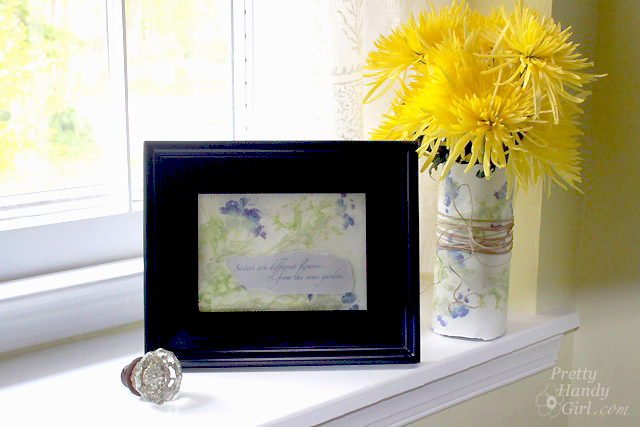
The results can be used for a framed quote, a paper-wrapped vase, notecards, and much more! I’d go so far to say, the results are close to high end (and expensive) handmade pressed flower paper.
Ready to make some beautiful pounded flower paper? I am (because I could also use an activity to get a little frustration out 😉.)
Materials:
(I’ve included affiliate links for your convenience. I earn a small percentage from a purchase using these links. There is no additional cost to you. You can read more about affiliate links here.)
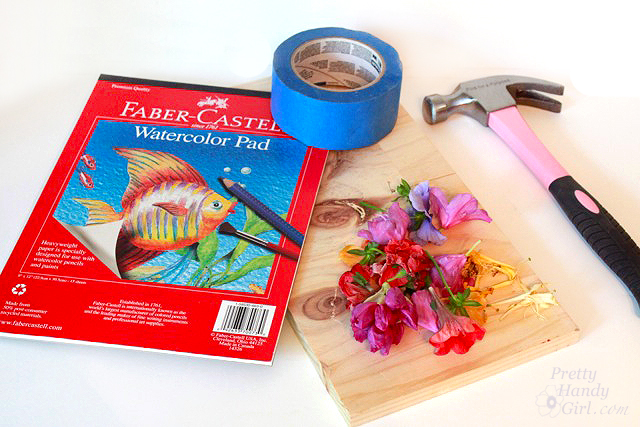
- Watercolor paper (or thick paper)
- Hammer
- Painter’s tape
- Fresh picked flowers
- Scrap board
- Scotch tape
- Twine
- Chip brush
Instructions:
First, you’ll want to collect some flowers. Smaller colorful flowers work best. But, you can collect larger ones and experiment.
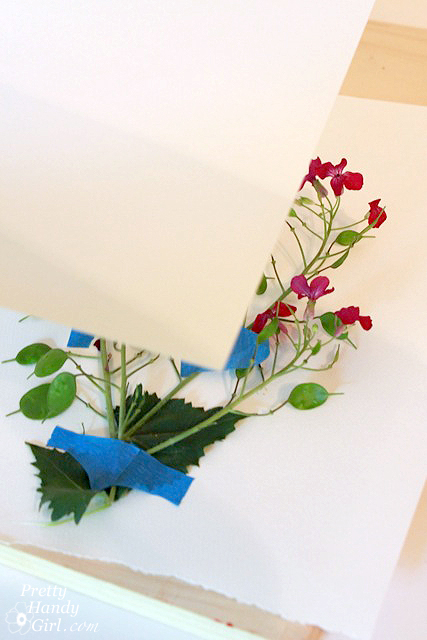
Lay one sheet of paper on top of the block of wood. Arrange your flowers on top of the paper and tape down any strands that don’t cooperate. (The flowers I picked are from a money plant that grows in our woods.)
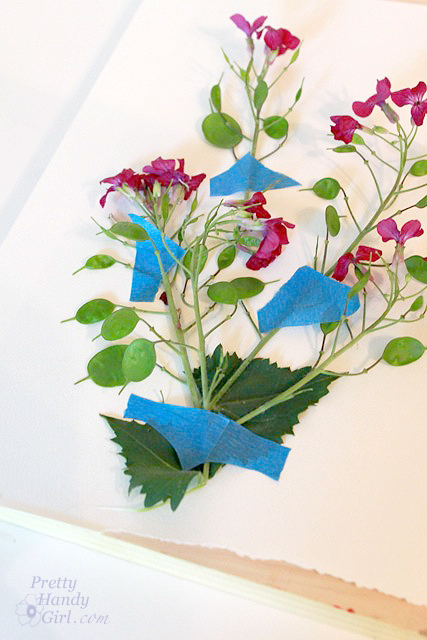
Lay a second sheet of paper on top of the flowers.
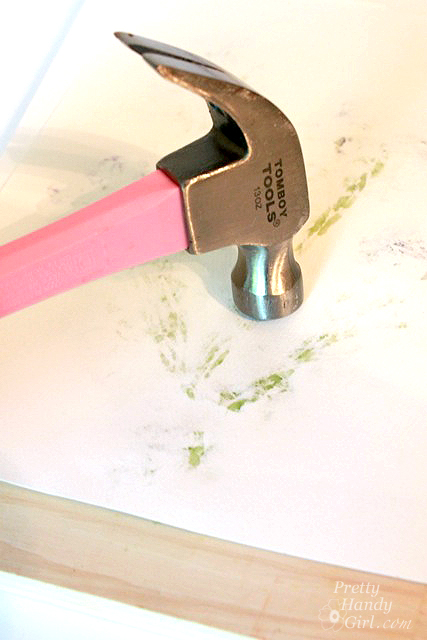
Pound the hammer around the paper until you have squished all of the flowers beneath. (This doubles as a stress relief exercise, trust me!)
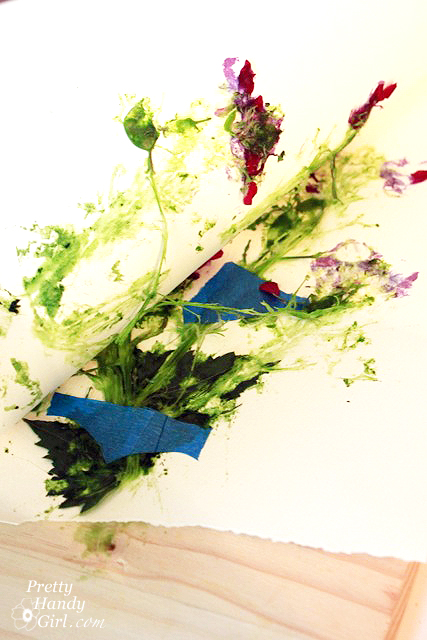
Peel apart the papers and you’ll have a pulpy mess.
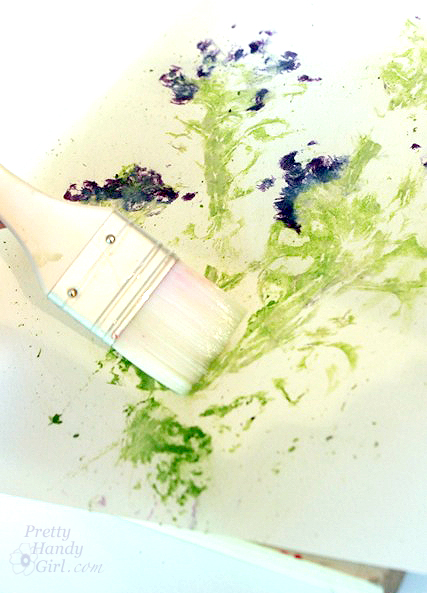
Remove the flowers and wipe off the excess bits and pieces with a clean chip brush.
Look at that! You got two prints that are a mirror image.
Print out a quote or type a message on coordinating paper and tear around it. Tape it onto flower paper.
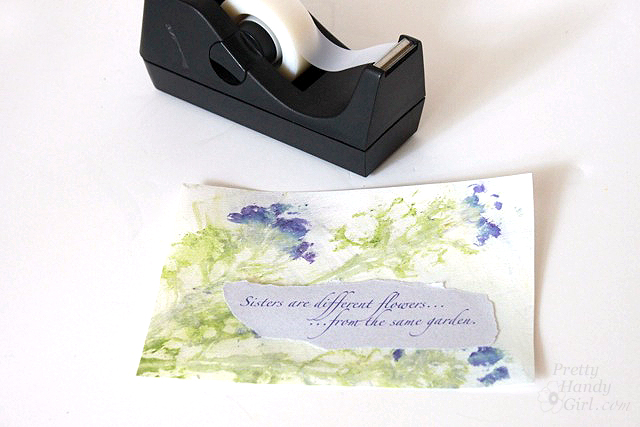
Put your verse artwork into a frame for a sweet gift to your sister, your mother, or a friend.

Take the other sheet and wrap it around a can, mason jar, or vase.
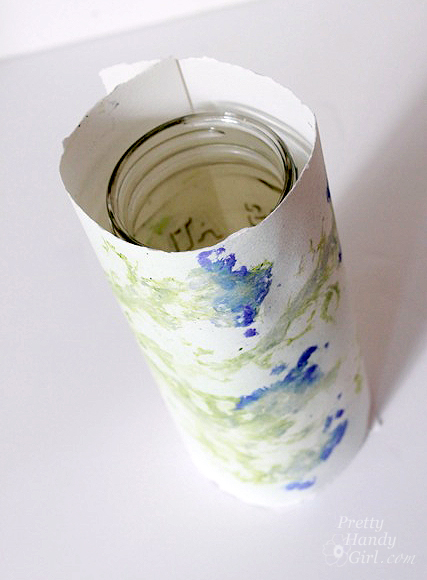
Wrap some twine around the paper to hold it in place. Add water to the vase and pop some fresh flowers in it.

Quick and easy gift idea, right?! Give a vase to brighten someone’s day. The best part of this gift is it only cost a pound! (Get it? Like a British £? I know, I have a corny sense of humor. You can blame it on my Dad, it runs on his side of the family.)
Maybe I’ve also been hammering a little too much lately. Leave me a comment if you have any corny jokes to share!
Do you have any creative ideas for using this pretty flower paper? I set some up for the kids and they had a blast pounding flowers.

So cannot wait to try this. Thank you so much for sharing. These gifts should really “hit” the spot lol. Sorry, but you asked for it hahaha. Much love to you.
LOL! Yup, I asked for it.
Love this!
I love this! How inspiring. Thank you for sharing this idea 🙂
Beautiful, thanks for sharing. The end results is so pretty and actually look like an oil painting. 🙂
Very lovely! Thanks for the instructions! And I loved your corny bit of humor!
Love it!! Thanks for sharing 🙂
can’t wait for spring so I can try this on my homemade paper! Hurry Spring!!
How clever this is Brittany! Being an artist myself I for sure thought you had painted this. It really appears that way…oh I must try this! Thank you for sharing this, so lovely!
This looks like much fun! Thanks so much for sharing. I’m going to be creating this soon.
Love this idea! Very clever and no doubt I’ll give it a try ~ thanks for sharing …
Did you do something to get the flowers to look bluer/more watercolor-ish?
Years ago out craft group made marble paper using shaving cream and stamp pad re-inkers. We’d cover the paper with a layer of shaving cream, then dot the ink on top. Using a chopstick, toothpick or end of a paintbrush, swirl ink. Be careful not to overwork or you can get mud. Lay another piece of paper on top and smooch down. Peel apart. Scrape cream off using an old credit card. Hang to dry or try a “second generation” on 2 clean sheets.
Love your site!
Cathy, no I didn’t. That’s just how it dried. Very cool surprise. Oooo, I love the marblized paper using the shaving cream idea. My kids did that in preschool, so pretty.
I love this! I’d like to feature it on my blog Tutorials and Patterns. Just a brief description with your photo and a link back to your tutorial. Give me a shout back if that is ok with you.
Marti, yes, you may do that. Thanks for asking.