The Perfect Rustic Paint Technique {with Video Tutorial}
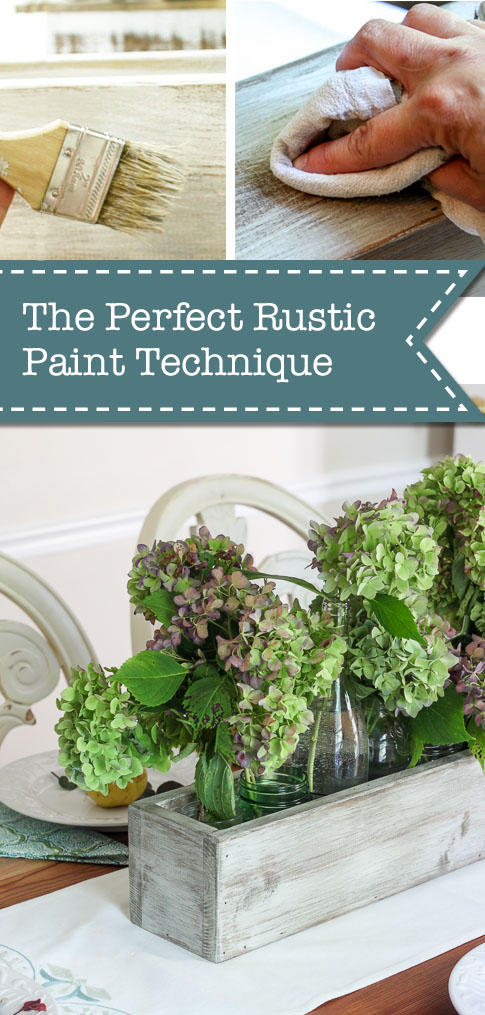 The Perfect Rustic Paint Technique {with Video Tutorial}
I have been painting and distressing furniture and home décor for almost ten years now. Over the years I’ve tried a lot of different techniques, but the one I’m going to show you today is the one I consider “The Perfect Rustic Paint Technique!” The reason I like this technique is because I get consistent results and it’s not as messy and time consuming as painting several layers and sanding back down to the raw wood. This isn’t to say that I don’t still experiment or sometimes go back to previous techniques. I just wanted to show you my tried and true technique.
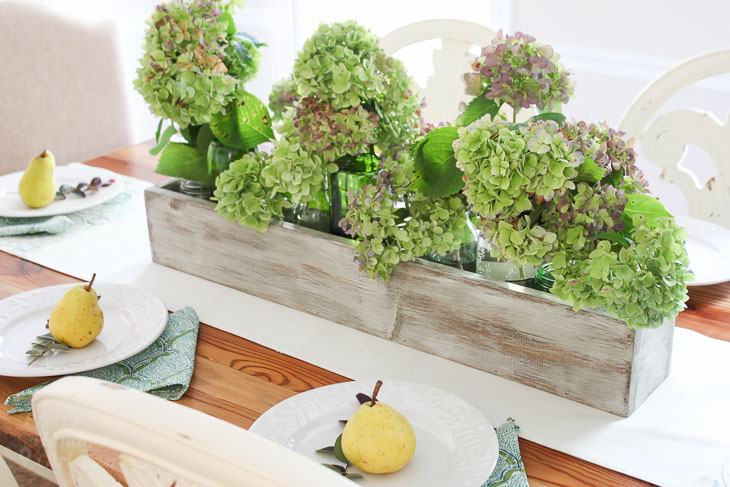
You may have seen the DIY Trough Centerpiece I built last week. If you don’t have a piece of furniture you want to try this technique on, go ahead and build this quick little (or should I say long) DIY Trough Centerpiece to experiment on.

Then you’ll want to gather some materials and coffee (this is optional, but I find I enjoy DIYing with a cup of java.)
Materials:
(I’ve included affiliate links for your convenience. I earn a small percentage from a purchase using these links. There is no additional cost to you. You can read more about affiliate links here.)
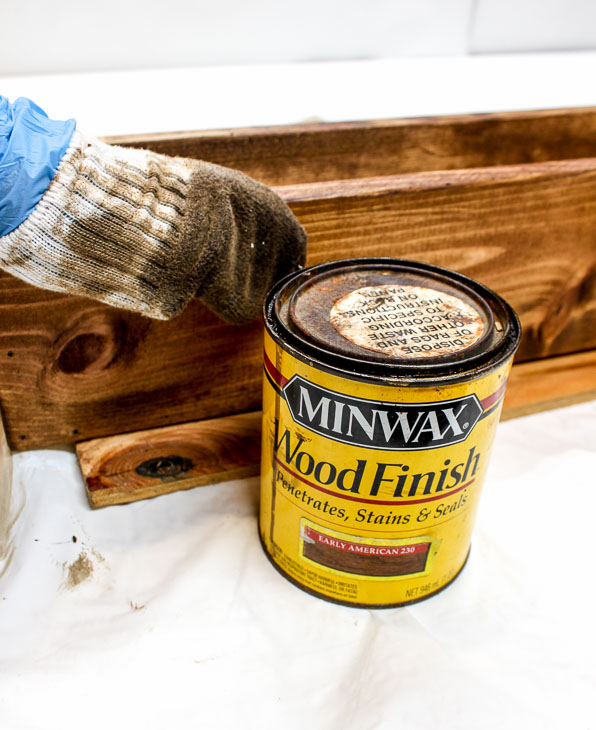
- Minwax Early American Stain
- Rubber glove
- Old rags or lone socks
- 2-3 Chip brushes
- Wax brush
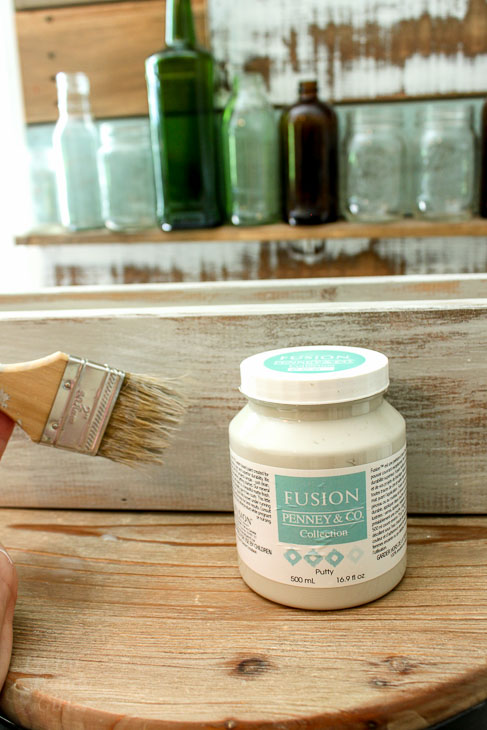
- Chalk-like Paint
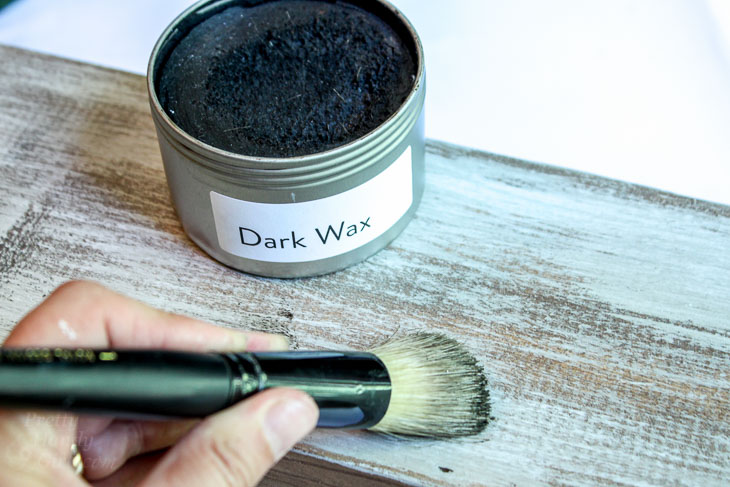
- Dark wax
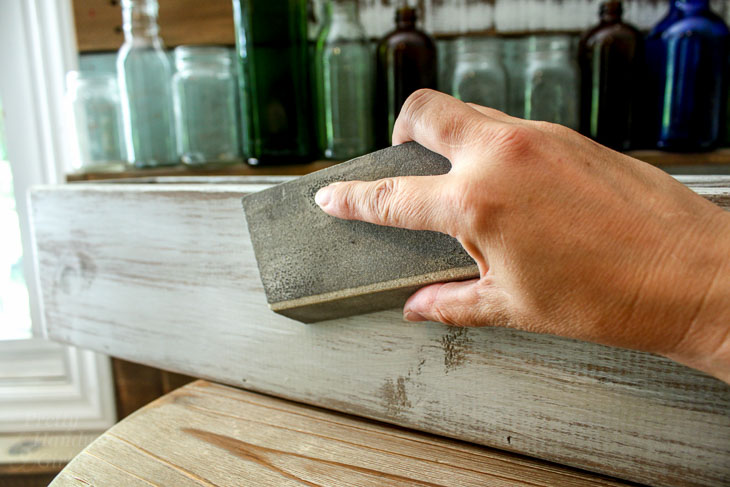
- Sanding sponge
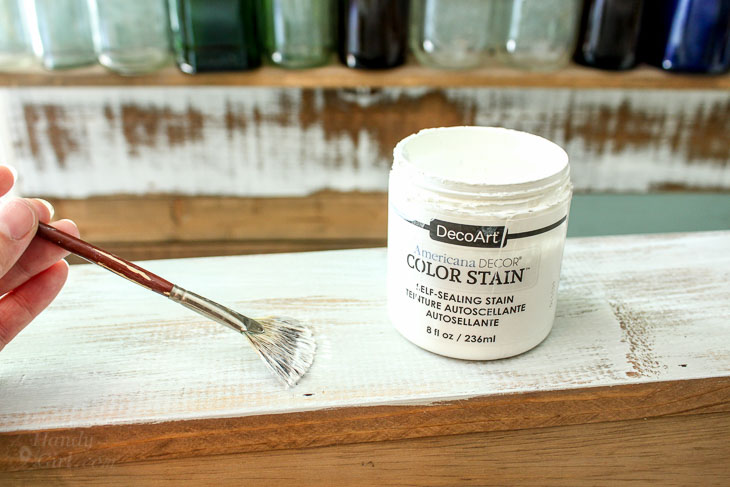
- White Stain (or white acrylic paint slightly watered down)
- Antiquing Glaze
Instructions:
Want to cut to the chase and watch the video tutorial? Well, be my guest:
If you like to see the step-by-step tutorial, here’s the break down:
Step 1: Sand & Stain
Lightly sand your piece to remove any rough spots.
If you’re working with a pre-finished piece of furniture, clean well to remove any dirt or oils that would resist the stain. Then sand everything lightly to give the surface a little “tooth” for the paint to grip to. Skip the next step unless you have sanded down to bare wood.
Put on your rubber glove and grab a rag or slip an old sock over your hand. Dip the rag into the stain and wipe it on the wood. Wipe off any excess stain. If you want a darker look, apply a second or third coat of stain. Allow the stain to dry (overnight is best.)
Step 2: Painting
A quick note about chalk-like paints: I have tried a lot of different chalk paints and still don’t have an absolute favorite. Personally I like to buy them based on a pre-mixed color I like. That being said, I do have some that I don’t like as much. Although the Annie Sloan Chalk Paints were first on the scene, I struggled with them having unmixed chunks in them and they tended to dry out too quickly for my taste. That being said, most chalk paints will dry out quicker than latex paint. So make not to leave the lid off too long (it’s better to pour a small amount onto a tray or paper plate.) And store chalk paint in a temperature controlled environment.
Dip your chip brush into the chalk paint and dab off most of the paint onto rag. Your paint brush should have very little paint on it.
Lightly drag the chip brush over your piece following the direction of the wood grain. This technique is called dry brushing (in case you wondered.) Allow some of the wood stain to show through. This will cut down on the need to sand down to the wood later.
Step 3: Adding Dimension
Allow the paint to dry (which shouldn’t take very long.) Dip another chip brush into the white color stain. Wipe off most of the paint and dry brush some “hi-lights” onto your piece. You don’t need as much coverage as the painting step. This is just adding some extra dimension to the piece.
After the white stain has dried, dip another brush into the antiquing glaze and wipe most of the glaze off the brush. Once again, dry brush some areas on your piece to give some more dimension.

If you make a mistake or put too much glaze on, you can wipe it off within the first few seconds. Alternatively, you can always sand off any paint, stain or glaze you apply.
Once you’ve achieved your desired amount of paint, stain and glaze, get ready to seal in the beauty!
Step 4: Wax Finish Coat
Apply some dark wax onto a wax brush (or stencil brush.) Rub the wax on in a circular pattern.
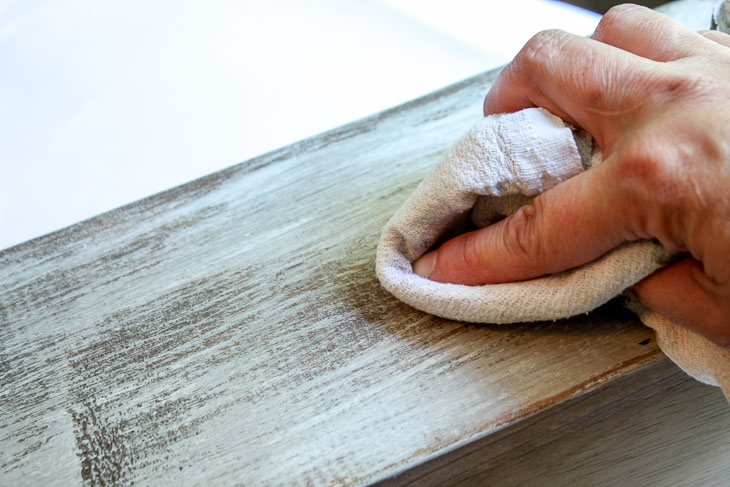
Then buff it off with a clean dry rag. The wax gives your piece a soft luster and protects it from water. If you are working with a piece of furniture, you may want to apply another coat of wax. And you will need to re-apply in a few years.
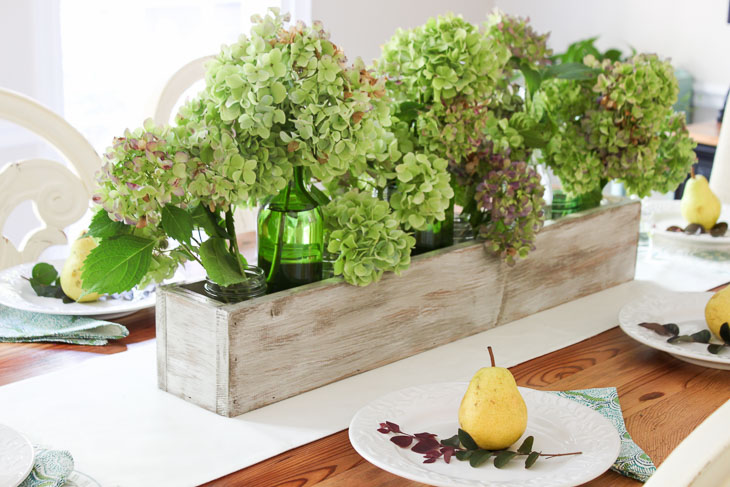
Now stand back and admire that Perfect Rustic Paint Technique!
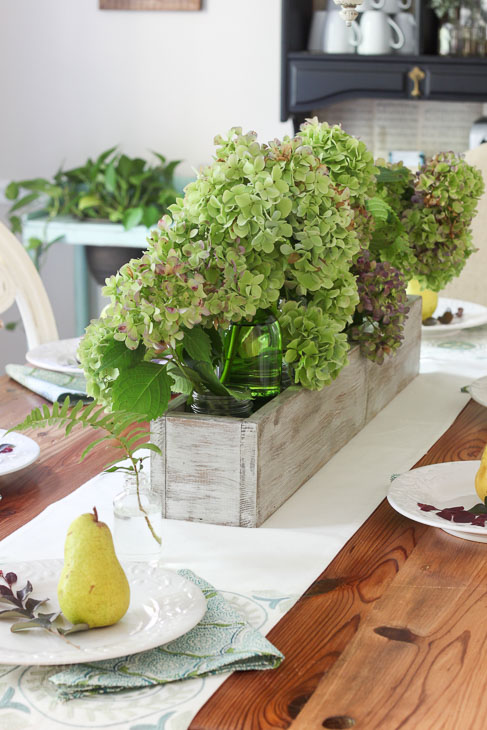
She’s purdy, don’t you think?
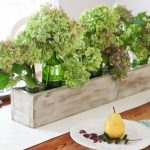
Pin this picture to share the rustic love!
![]()
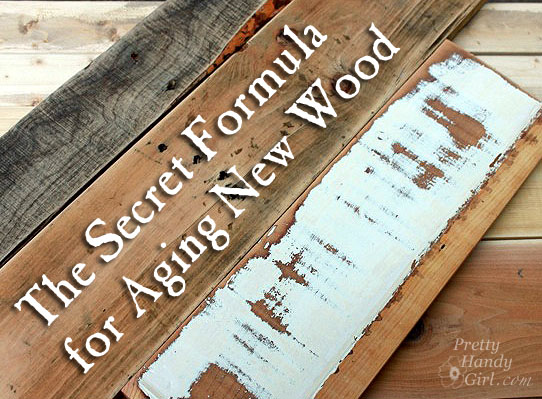
Liked this tutorial? I think you’re going to love my Secret Formula for Aging New Wood:

My cabinet that I want to make look rustic is a cherry wood, would I use the same technique?
sure
So beautiful! I just love this.
Thanks!
She sure is purdy!!! 🙂
Thank you Diane!