Painting Like a Pro – Part 2. Paint and Sheen

Let’s talk about Paint, Baby…
Before we start, let’s talk paint. One factor for a perfect paint job is the quality of the paint you choose. Do yourself a favor, don’t settle for the cheap store brand paint. You may save yourself a few bucks, but you will be looking at streaks and imperfections from the cheap paint for years to come. Or worse, the paint won’t hold up to wiping or moisture (not good!)

Painting Like a Pro
Benjamin Moore Aura Paint – Love this stuff! Serious love affair here. Not only is it low VOCs and low odor, but the coverage is amazing and you don’t see any of the roller marks. It is thick like a chocolate milk shake and spreads slightly after it is rolled on. This is the only paint I’ve been able to get away with only using one coat. But, it was because I was painting a lighter shade of sage over a pine green color. Other rooms where I was going from a much darker color to a light color, I had to use two coats, but I definitely didn’t use as much paint as I would have if I used another brand. Be prepared for the sticker shock, this paint isn’t cheap at $56 a gallon, but you will use less and you will be saving the environment!

Valspar – Hi Def Paint – Before we were spoiled by the Benjamin Moore Aura paint, Pretty Handsome Guy and I used to paint with Valspar paints for all our walls. In fact, we still use the Flat Ultra White for our ceilings. We were always happy with the results, but the idea of using a Low VOC paint really appealed to me. Last week, as I eyed the “oops” paint at my local Lowe’s (a normal habit of mine), I was lucky enough to spot a color that was very close to a color I was craving for our bathroom. I grabbed it up for $5 ($10 at register with a $5 rebate. Normally $32). The paint was a gallon of the new Valspar Hi-DEF paint. I have to say, I was impressed by the coverage. It almost covered all of the old color in one coat (I was covering dark purple with a light aqua.) This paint would be a good option if you didn’t want to shell out the $56 for the Aura paint.

Benjamin Moore Impervo paint – This is my new favorite trim paint! This stuff goes on smooth and spreads like an oil paint. It also has a durable finish that resists chipping and really stands up to our kids’ shenanigans. Before I found the Impervo, I thought I was doomed to use an Alkyd (oil paint with a dryer added) paint for our trim. If you’ve ever had the misfortune of using oil based paint, you know that it has a strong odor and the brushes have to be cleaned with turpentine. Not at all good for you or the environment. You can imagine my excitement (and skepticism) at finding a water based trim paint that is supposed to hold up like oil. Our living room trim paint has lasted 1.5 years and it still looks great! Again, this amazingly durable paint isn’t cheap, it costs $48 a gallon, but at least you don’t have to paint your trim every year if you have little devils boys in your home.
Please note: There are other good paints available (Sherwin Williams is also a favorite of many other DIY bloggers.) This is just a list of the paints that I love to use.
Let it Shine, Let it Shine (or maybe a little less shine) – Flat, Eggshell, Satin, Semi-Gloss, or Gloss. How do you know which one to choose?
Gloss – The only time I use gloss or high gloss is for trim and cabinetry. (Or the things that get grubby fingers ALL over them.) The gloss surface cleans up much better than non-gloss, and it doesn’t hold onto oils or grease like the other finishes.
Semi-Gloss – This sheen is great for painting a bathroom, kitchen or walls that will see a lot of moisture, water and basic abuse. Similar to the gloss, it will be easier to wipe clean and water splashes won’t show as much on this surface.
Satin – I know I just said you should paint kitchens and bathrooms with semi-gloss, but I rarely do. Why? Well, because my walls are far from perfect. We have two rooms that had wallpaper painted over (not my decision.) After spackling and sanding the seams (doing my best to smooth them), I used a satin paint. Satin has most of the durability of a semi-gloss, but less sheen. If you use paint with a sheen you will see highlights wherever there is a seam, bump or edge.Therefore highlighting your imperfect walls.
Eggshell – Low sheen, but not flat. Eggshell is best for rooms with imperfect surfaces or bedrooms. Eggshell has an almost matte or flat appearance and is very smooth and hides bumps and dips fairly well. It’s not as easy to clean, but will stand up to an occasional wiping better than flat paint.
Flat – I never use flat, except….when painting ceilings. Then we grab our favorite ceiling paint: Valspar Flat Ultra White for maximum light reflection. (Read more about bright white ceilings HERE.) So, unless you are painting ceilings, don’t use flat, it is too chalky and hard to clean.
Just call me Ms. Mix-a-lot. How to Save $ by Mixing Your Own Paint:
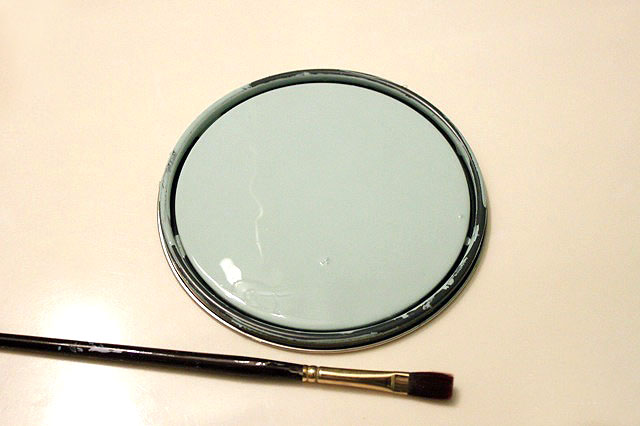
Some of the paints I mentioned can cost quite a pretty penny. So, I thought you might like to know the way I save money on paint. I frequently scour the “Oops” or “Mistint” paints. If I see a color that is close to what I want, I grab it. For my downstairs bathroom I spotted this sea green color and knew it was close to the color I wanted, but just a shade darker. All I needed to do was purchase an empty paint can and use some leftover white paint to mix a prefect color.
You can mix any two sheens as long as they are next to each other in the list above. In other words mixing gloss and semi-gloss is fine; semi-gloss and satin; satin and eggshell; or in my case eggshell and flat paint. You definitely don’t want to mix a semi-gloss with a flat or eggshell. You might get some streaks and it is hard to mix.

To mix paint, I like to use this paint mixer attachment that fits on my drill. It is a dream come true for a custom paint mixer like myself.

Without going into too much color theory, here are two mixing formulas I like to use.
Keep in mind your paint color has to be fairly close to the final color you want before attempting these mixes.
Too vibrant, intense or bright – Let’s say you find a color that you like, but it is too intense and you want to dull or tone it down. You can add either black or brown paint (I use acrylic craft paint) to tone down the color. Pour some of your paint into an empty bucket or paint can, then add a big squeeze of black (or brown.) Mix it, put a dab on a piece of paper and dry it with a hair dryer (because I’m too impatient to wait.) Still too vibrant? Add more black (or brown) until it is the color you want. I used this method for my dormer hallway shutters. You’ll have to play with the mixing until you get the desired results.
Too dark, need a shade lighter – Add white paint to a bucket, then slowly add small amounts of your paint color and mix it. Put a dab on a piece of paper and dry it to check the color. Still too light? Add more color or if it is too dark, add more white.
I hope this post helps you find the perfect paint for your next paint job.
Other Steps in this Series:
Step 3. painting your room and finishing touches


Hi. I am an Aura fan just like you. Nothing touches my house walls except Aura. Question for you. I did a room in my house which has cove lighting with LEDs.the painter Ended up putting Affinity Iron mountain but from Sherman Williams flat. The cove lighting pretty much disappeared. I asked him to put a coat of BM Matte coat and apparently BM matte has a bit of sheen. The cove effect came back – slightly though. I am now wondering what your opinion is. Should I go for eggshell or should do a eggshell Matte mix. Note that my house is new from builder so ceiling has little to no imperfections.
Wow, that’s interesting. I don’t have much experience with the Affinity paint and have only used the Benjamin Moore flat bath & spa paint. May be paint a sample board and tape it up on the wall (using painter’s tape) for a day to see what you think.
Hello
I have a 5 gallon of High gloss and a 5 gallon of semi gloss, if i were to mix them what sheen would happen? I have 4 kids and the house is older so the moisture never escapes. I just dont want to ruin the paint and am just trying to dull the high gloss a bit
It would be a slightly duller gloss. But glossier than semi-gloss. I’d suggest making a test board to see if you like the results.
Use the flat paint of your preference if the room have high levels of moisture use sherwin williams duration extra white flat (moisture resistance) or worst case use promar200 low sheen. But the correct paint is ceiling paint
Brittany
I have a little different twist on “mixing paint”. I’ve mixed flat paint with matte paint of the exact same color to match the sheen of existing walls on a 12 year old house. It takes a bit of trial and error, mostly error, and some place to test the paint, like behind a door or in a pantry. The trick is to get it exactly right, then to write down what you did, so you can do it again. Even the same paint after several years might not have the same sheen when it is used to touch up places on an existing wall. It takes a little patience, but I’ve had good luck matching existing paint when nothing worked right out of the can and flat was too flat and matte was too shiny.
Thanks for the tips on mixing different finishes of paint. I didn’t know if this was possible, now I’m going to try it. I ordered way too much paint for a project and can’t return it. Going to try & lighten it for another room. By the way, can you buy clean empty paint cans? You made it sound like you get them at the paint store.
Hi there! I’m mixing paint colors, and I’ve i have question regarding an alternate way of mixing. I have a small budget and don’t want to buy a mixing attachment for my drill; can’t I just mix with a paint stick? Are there’s any negative results if I do so? Thanks so much!
P.S. Love your blog! SO glad I found it!
Sure, you can use a paint stick. It just takes longer and is harder to get perfectly mixed.
Thank you for this! I have been getting paints, mostly Benjamin Moore, from our recycling center reuse sheds. One day I picked up a satin without thinking. I have been getting eggshell. My husband said I couldn’t mix them. You showed him!
Fyi. Behr Marquee comes with a 1 coat cover guarantee. Our tenants painted the bathroom and kitchen a deep garnet red, living RM and hallway 70’s eyeshadow blue and 1 wall dark taupe. I bought a light grey (dolphin grey) and told the guy at HM depot it was covering dark red. He SD it’s guaranteed or ur $ back. I SD ok. And no lie…it covered everything 1 coat and it’s $43 a gallon. I’m obsessed. It’s super thick.
This is so good to hear. I just bought the Behr Marquee to cover chocolate brown trim with white and one room which has red paint a soft Robin’s egg blue. The young man was said the paint was guaranteed one coat coverage but that I should primer it first which didn’t make a lot of sense to me and was more expensive. I’m going to test it out before I go through the time and expense to primer everything first.
I haven’t tried the Behr Marquee, but I really like Benjamin Moore Aura, it is very thick, but you may still need two coats to cover a dark with white.
What ratio should you mix? I guess I never knew the difference between flat/eggshell/satin.
I have a color I LOVE, but it is flat – bought to hide imperfections… Need to do the second coat, but am not liking the flat – not cleaning well at all.
I have about half a 5 gallon bucket left of the flat paint.
How much eggshell should/can I add so I have a better surface?
I don’t want to have tons left over, but if I have a little, I can always save it for the next room. I loved the color so much, I seriously considered painting three rooms I just finished in other colors…
Glad I googled and looked at this post – I was seriously going to add a gallon of satin, which I think is too shiny…
Thanks!
I know you said you use flat on ceilings but when it come to a bathroom, do you use semi-gloss or a paint with a lesser sheen?
I accidently mixed together some oil paint and some wb paint (for a custom color), but obv a mistake. Is there anything I can use this paint for? If not, how do I get rid of it? Thanks for your tips, have made a big difference in my painting!
Kg, Not really, that sounds like a mess waiting to happen. You will have to mix the paint with sawdust and/or kitty litter and leave the lid off to let the paint harden.
hi! i just found your blog and i have a question! do you have any experience painting over various sheens? i am planning on repainting a couple of my rooms that *i think* the previous owners painted in either satin or semigloss. is it ok to just paint over them, or do i need to take steps prior to the painting. i have been having such a hard time finding a good answer…
Caitlin, definitely read the first post in this series on Prep work. I highly recommend lightly sanding the walls first. Then as long as the wall paint isn’t oil (highly unlikely) your paint should stick fine! https://prettyhandygirl.com/2011/04/painting-a-room-like-a-pro-80-is-in-the-prep-work.html
I’m about to cry!!! I have painted many a wall and trim in my day. I am painting my dining room with Martha Stewart’s “Kalamata Olive” that was custom mixed in Behr’s paint+primer. I do not allow a lot of sunlight in the room. The walls are in very good shape. With natural sunlight or ceiling light at night with the drapes closed, I can still see (after 3 coats) that the paint isn’t uniform: roller streaks, however subtle they may be. My technique is really great; I don’t thin the paint out or glob it on. I take my time and use decent rollers and brushes. Is it the brand of paint? What am I doing wrong?? Please help me as I have the rest of my condo to paint. #feelingdiscouraged. Thank you. Leah.
also…it’s satin btw. thanks…
Leah, what color are you painting over? Is it a drastic dark to light (or opposite change?) I don’t have much experience with Martha Stewart paint, I do know that I had results like that in the past when I bought cheap paint. I can tell you that you shouldn’t have any roller marks with Benjamin Aura, but the paint is expensive.
I’d like to know if I can use a craft paint in a design over a semi-gloss paint?
I usually use flat paint for my imperfect walls but my kitchen need something stronger should I do the latex mixed with eggshell or eggshell and satin?
Jason, if you are willing to pay a little bit more for paint, Benjamin Moore makes a great Bath & Spa paint that is flat but resists water and is easy to clean up. It is called Natura. I used it in my kids’ bathroom and so far really like it.
Otherwise, I would use a latex satin finish in the kitchen. Just try to patch as much as you can on the walls before painting.
I absolutely LOVE your blog. It is very empowering as I am trying to do more DIY and am sometimes a bit scared! I do need your help on a project from last summer. I painted my bathroom in a turquoisey (more light blue with a bit of turquoise) blue. We have one whole window (a skylight) in our bathroom. It gets moist in the bathroom… I mean it’s a BATHROOM 🙂 In any case, the paint started dripping (like after it had dried, because of moisture I’m thinking??) down the walls. It’s horrid. If you touch it at any given time, you can kind of wipe it off (not completely but you’ll have a little blue on your finger). It was semi gloss. What did I do wrong? How can I fix the horror? Please please help if you can!
Christina,
You didn’t do anything wrong. The paint manufacturers did! Unfortunately you were the recipient of poor quality paint. If you repaint this room, I highly recommend priming over the current paint. Then, invest in a higher quality paint like Benjamin Moore (Aura is my favorite because of the low VOCs) or Sherwin Williams. You can use a satin finish if you like, or semi-gloss (but it will show imperfections more.)
I hope that helps. Good luck with your bathroom and sorry that happened to you.
Brittany
Thank you Thank you Thank you!!!I went back and looked at the paint can: Glidden Low VOC Satin tropical lagoon 😉 Love the color-not the paint. Thanks for getting back to me so quickly. I’ve been afraid to repaint all this time thinking I might mess it up worse. I’ll just reprime and get that color paint matched in Benjamin Moore paint.
Hmmm, I would have thought Glidden was a good brand. When you go to your Benjamin Moore dealer, ask the paint guy what the best paint for a moist bathroom would be. I’m guessing most would work well, but better to double check with them.
OK will do. I thought Glidden was a better brand too. On the can it says to wait 30 minutes in between coats. Maybe I should have waited longer? Maybe I didn’t wait long enough after I primed it? It’s not paint drips per se’.. it’s like the paint is kind of runny / running down the wall. In any case, I will still ask the Benjamin Moore person as well. Thank you again for your help! 🙂
Found you via One Pretty thing! Great tips on painting. I have a basement full of oops paint- you can’t beat the price and I have rarely messed up though I pray real hard as I am playing with all those cans of paint.
Getting ready to paint another room this weekend. Am trying to figure if I want to go blue, or tan- well see what comes out of the mix!
Benjamin Moore Aura Paint is my favourite as its with no voc just in love with it.
You are truly an asset for the DIY industry. Thanks for all you do to help others have the confidence to tackle our projects.
If you’re feeling adventurous about tweaking an Oops paint, you might check out your local Habitat Re-store. The last couple of places we’ve lived got a lot of Oops paint donated and we’re selling it for great prices.
Great idea Nann! I haven’t bought any paint there, but always see tons of cans.
These tips could not have come at a better time. We’re in the process of painting several rooms. I purchased a can of blue paint that I don’t like and I don’t want to throw it away. I’ll have to try mixing it with something else too. And I won’t blame you if it comes out horrendously. 🙂
Looking forward to tomorrows post. Thanks!
Thanks for the tips. I always wondered about mixing of paints. I always kept it flat with flat, etc.
Also, thanks for the tips on toning down paint.
Excellent tips, especially about the not mixing too far away sheens! I’m about to do some mixing for the first time, I’ll have to let you know how it turns out.
Oh, I hope your mix turns out (or you might be blaming me for the results!)