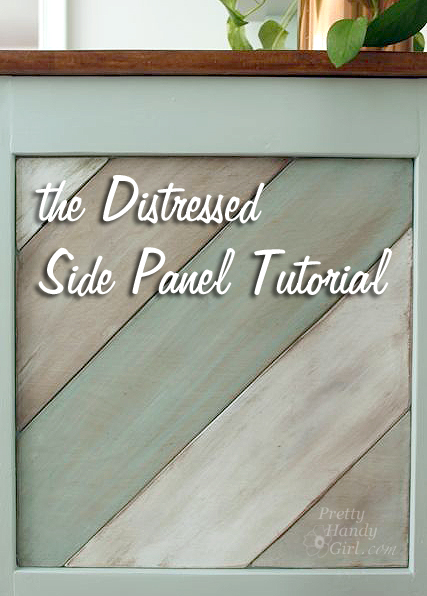
The Painted Distressed Wood Panel Tutorial
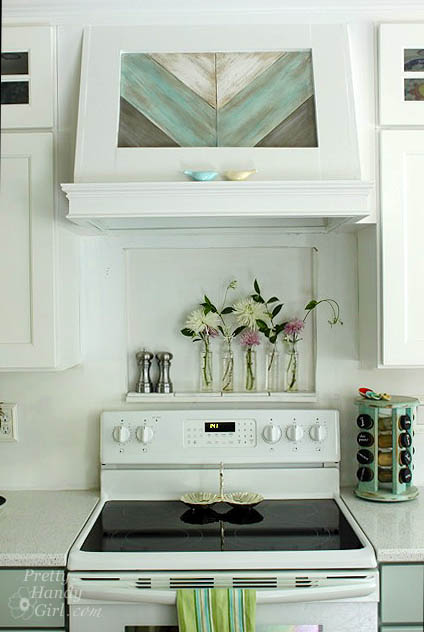
I can tell you are excited about this tutorial! I’ve had more comments and compliments on the side panel on my kitchen desk and on the range hood. Today we are going to talk about the painted Distressed Wood Panel Tutorial.
They are definitely the details in our kitchen that make it personal. I got the idea after seeing Sarah Richardson’s kitchen, where she actually used reclaimed lumber on the side of her cabinets.
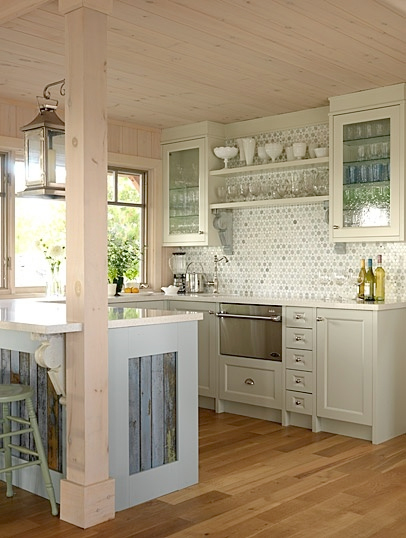
But, I knew finding the right distressed wood would be tricky. Plus, I always worry about the presence of lead paint. Instead, I decided to make it and fake it. As promised, I’m sharing the tutorial with you.
Distressed Wood Panel Tutorial Materials:
- 1″x4″ boards
- Kreg Jig
- Tape Measure
- Finish Nails
- Hammer
- Nail set
- Gorilla Glue
- Wood putty
- Putty Knife
- Pencil
- 45 degree triangle
- Thin Plywood
- Jigsaw
- Palm sander
- Chalk paint (or acrylic paint) gray, white, and light blue
- Valspar Asphaltum Glaze
- My Secret Rustic Glaze Formula
- Rag
- Paint brush
- Gorilla glue
- Coins to use as spacers
Instructions:
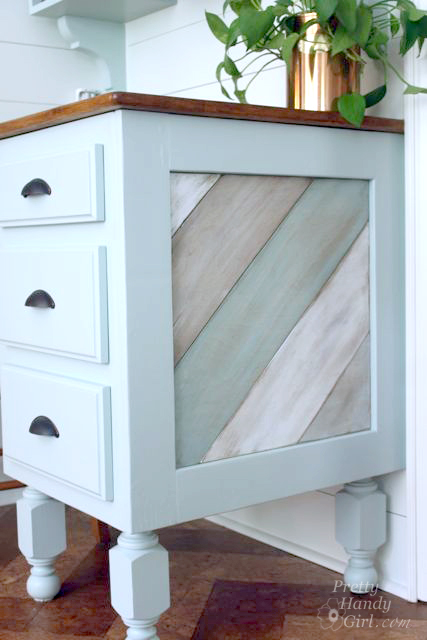
Create a frame for the side of your desk (or cabinet) using 1×4″ boards and a Kreg Jig. You can follow this tutorial for making open frames with a Kreg Jig.
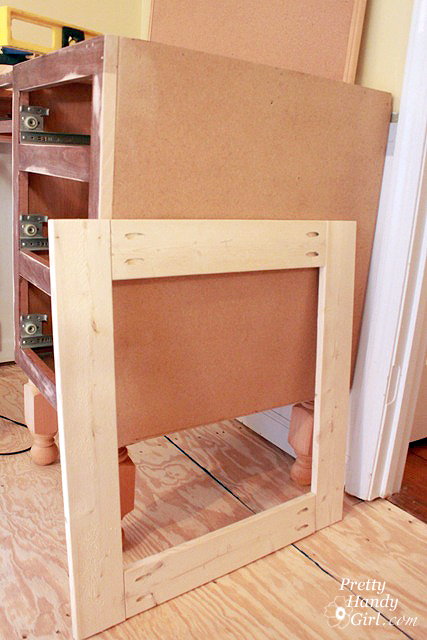
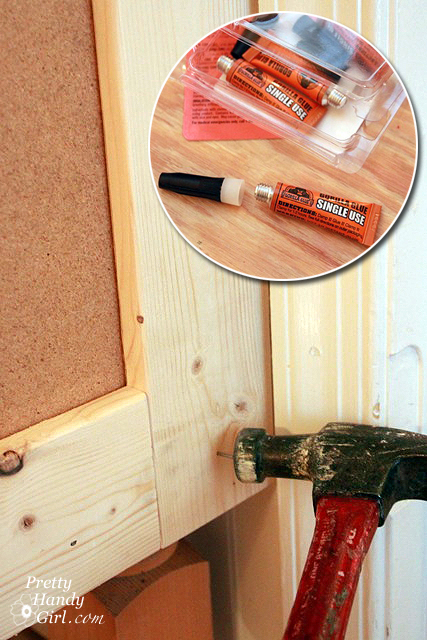
Attach the frame to the side of the desk using Gorilla Glue and finish nails.
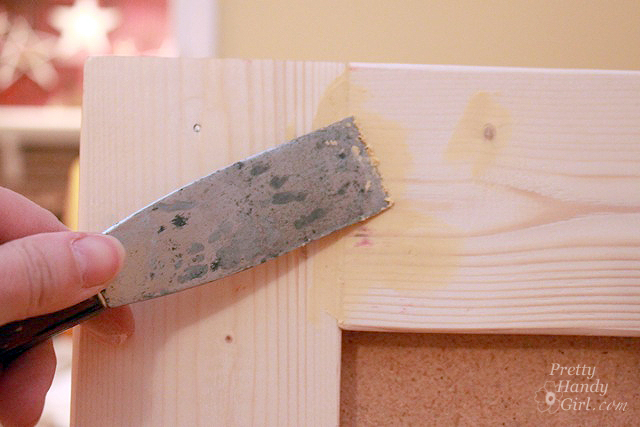
Countersink the nails with the nail set. Fill nail holes and seams with wood putty. Let putty dry and sand smooth. Prime and paint the frame to match the rest of the desk.
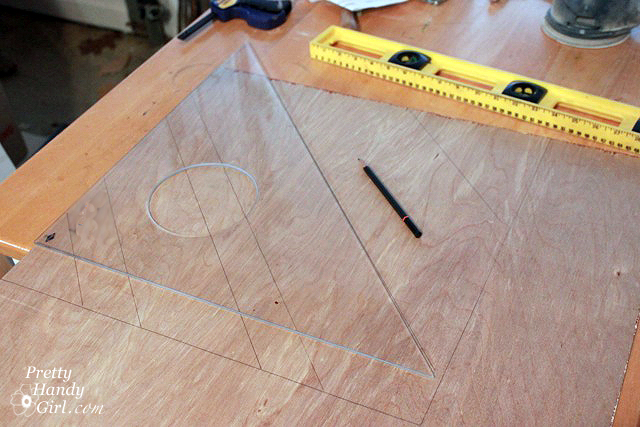
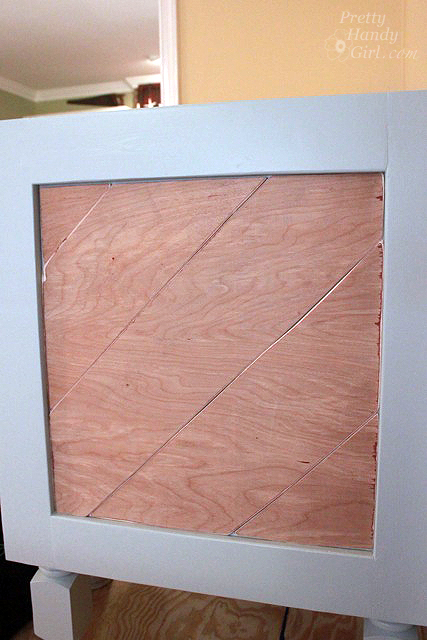
Measure the inside of the frame. Transfer the measurements onto your thin plywood. Draw diagonal lines using the 45 degree triangle onto the plywood. (You may need to play with your panel sizes until you get even spacing and even corners.)
Cut the plywood pieces with a jigsaw and sand the edges smooth.
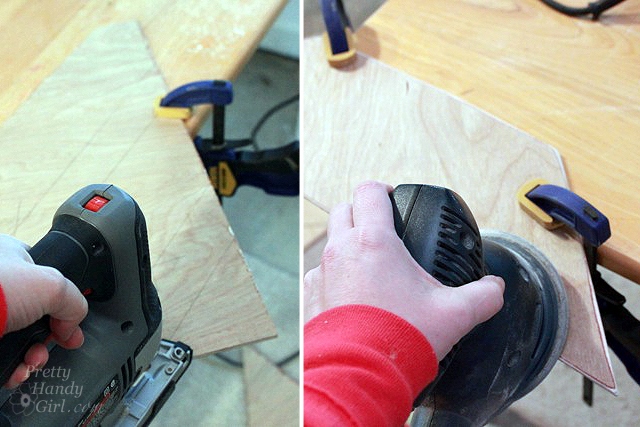
Test fit the pieces into the side of the frame. Make any cuts or sand down edges now. (I actually sanded the edges until I had a gap in between the panels.)
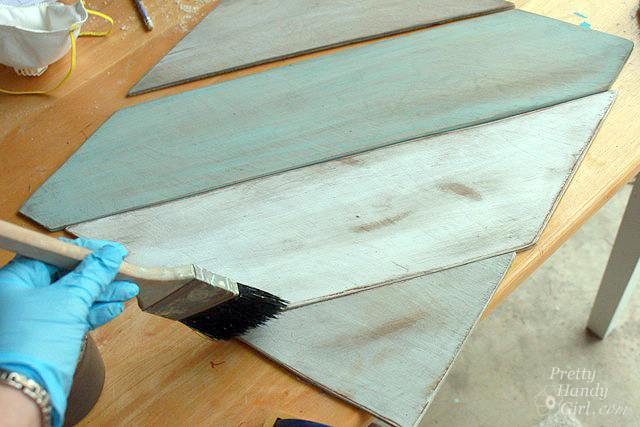
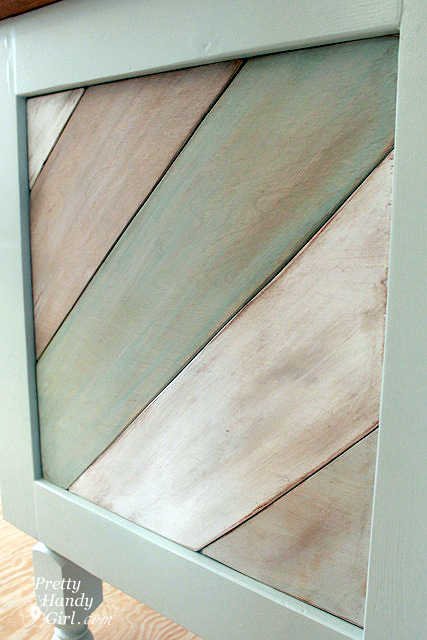
Lay boards onto a drop cloth and paint them different colors. I used a very watered down paint to allow the wood grain to show through. Add a white wash on top by using watered down white paint or dry brushing.
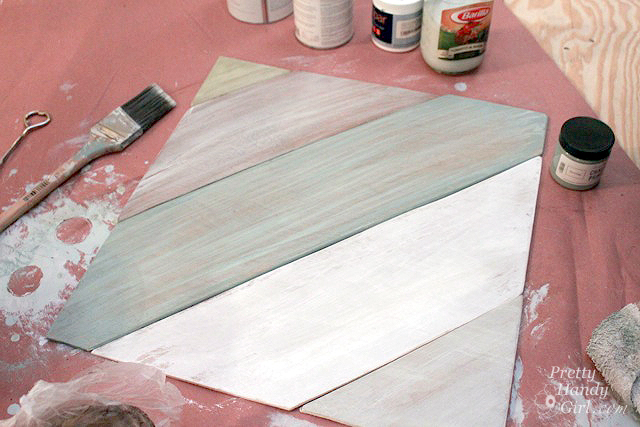
Use the Valspar Asphaltum and/or my Secret Rustic Glaze Formula to lightly dry brush the edges and select places to give the boards some “dirty age.” Wipe off excess with a rag. You can also put a small amount of glaze on your paint brush and knock it on another paint brush to freckle the boards. (Read this great tutorial if you want more aging and distressing ideas.)
Once you are happy with the distressed boards, get ready to glue them into the frame. Add Gorilla Glue to the back of the boards. Set them into the frame, use coins as spacers to hold the panels in place.
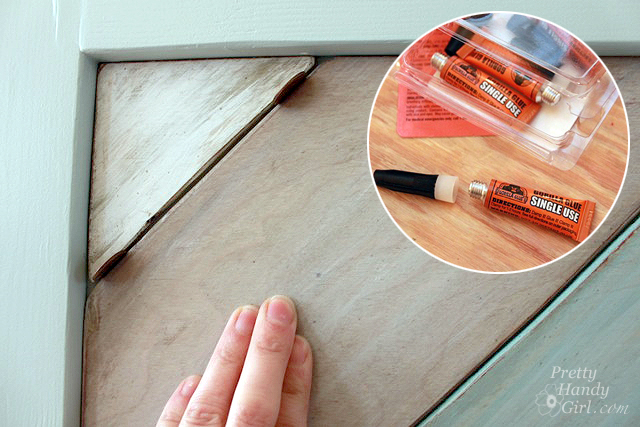
Once the glue has dried, remove the coins. And…admire!
And that my good friends is the way to create distressed boards for the side of a desk, range hood, or wherever you want to add visual interest. Please feel free to pin and share the tutorial with others.
I’ll be back later this week with the tutorial for building a custom range hood!

P.s. Because I know you’ll ask: The desk color is Copen Blue by Sherwin Williams. And the floor is golden oak and natural nugget cork flooring by Globus Cork.
Fabulous, fabulous, fabulous
Thanks for a great tutorial! You have inspired several new projects for this spring!
You did an amazing job with painting the wood panels… Simply gorgeous!
Can you please tell me the paint colors you used for the distressed wood panels?
thanks so much
Kiffany, I used a bit of what I had on hand so I’m not exactly sure. But, probably Annie Sloan Chalk Paint: Duck Egg, Pure White and French Linen
This is super cute. Love the colors that you chose. Thanks for the tips! Saw your feature on Tutes and Tips 🙂
Definitely pinning this! I’ve been drooling over the side of your kitchen desk for awhile!
I love it. Hoping to use something like this on the new island.
Thanks!
Jake’s a Girl
Gorgeous, gorgeous, gorgeous, gorgeous…. oh yes did I tell you how GORGEOUS I think this all is? Love it all!
I never would have guessed it was Luann. and you are certainly the guru when it comes to distressing wood. I know right where to come if f I ever try one of these treatments. that and your willingness to share is amazing. as I have said – you rock Brittany. Thanks for putting it out. ~jb
Wow….I love this project. I have always thought that end cabinet panels needed a little bling. Thanks for tut…you have inspire many to go be creative on their end cabinets.
Those side panels caught my eye awhile ago. Those are absolutely fabulous ideas. I never would have thought of that. A woman after my own heart with the distressing, glazing & antiquing. Pretty darn cool stuff you did there! Love the finishes as well as the colors too.
you have outdone yourself this time.. really ready for the range hood too
I remember seeing a picture of that stove hood a couple months back and it inspired me to do something similar to my stove hood we just built this past week. It was built from leftover pieces of wood from various house projects. Thanks for posting it!!! Here is the finished project: http://perpetualrenovator.wordpress.com/2013/08/20/kitchen-work/
First of all, I have to say that I LOVE your site. I too, have a shop, and work wood. Although I can MAKE just about anything, sadly I lack the ability to come up with original ideas. 🙁 I’m remodeling my kitchen, and this idea is just perfect. I may “tinker” with it a bit, but it’s just the type of look I want. Thank you so much for posting. You have no idea how happy you have just made me! 🙂 Keep up your wonderful work!!
You made that seem super easy! Thanks for the tutorial, I can’t wait to give it a try!
OMG This kitchen of Sarah’s was one if the very first things I ever pinned on pinterest! along with her red doored mudroom at her farm house. Great way to do it without the pain!
I love it! I loved it when Sarah did it too!
Debbie
You sure are a pretty handy girl! This is so attractive, I want it done in my kitchen today. I love how it looks.
Sweet! What a simple way to add that extra-awesome detail. I will now have to look around the house for someplace I can implement this.
Office, I’m looking at you…
such an easy thing to do and it turns out great. Thanks for sharing.
Your painted wood panels caught my eye right away when I first saw your kitchen. It all looks great!
Love this idea. Thanks for the tips!