• Home
  • About
  • My Home
  • Project Gallery
    • Decorating
    • Painting & Antiquing Techniques
    • 31 Days of Handy Home Fixes
    • Arts & Crafts
    • Build It
    • Electrical
    • Plumbing
    • Gift Ideas
    • Sewing
    • Tool Tutorials
    • Home & Auto Maintenance
    • Landscaping & Gardening
    • Photography
    • Recipes
    • PHG TV
  • My Toolbox
  • Contributors
  • DIY Blogs

Pretty Handy Girl

A DIY Blog Empowering You to Complete Your Own Project. Build it, Fix it and Do it yourself. Home project tutorials.

  • Contact
  • Advertise
  • Home
  • About
  • My Home
  • Project Gallery
    • Decorating
    • Painting & Antiquing Techniques
    • 31 Days of Handy Home Fixes
    • Arts & Crafts
    • Build It
    • Electrical
    • Plumbing
    • Gift Ideas
    • Sewing
    • Tool Tutorials
    • Home & Auto Maintenance
    • Landscaping & Gardening
    • Photography
    • Recipes
    • PHG TV
  • My Toolbox
  • Contributors
  • DIY Blogs
Home » accessories » All You Need Is…Valentine String Art & Engraving

All You Need Is…Valentine String Art & Engraving

February 3, 2014 Brittany Bailey 5 Comments

3.5Kshares
  • Facebook
  • Twitter
  • Pinterest

All You Need is...Valentine String Art | Pretty Handy Girl

All you need is some scrap wood, and maybe a little string. And a few nails. And how about a gum wrapper? If you had all those you could be like MacGyver and build some kind of cool device that would catch fire. But, since I had everything except the gum wrapper, I decided to make a Valentine art project. Follow along and I’ll show you how easy it is to make your own heart string art and engraving art for Valentine’s Day. If you need any of the materials, you can pick up most of them at your local Lowe’s Home Improvement store (probably the same place MacGyver shops because they have gum at the registers.)

(I’ve included affiliate links for your convenience. I earn a small percentage from a purchase using these links. There is no additional cost to you. You can read more about affiliate links here.)

Materials:

  • Plywood or scrap wood
  • Valspar red paint sample
  • Paint brush
  • White paint pen
  • Scissors
  • Brass brad nails
  • Hammer
  • Twisted white mason string
  • Glue
  • Wooden popsicle stick or paint stirrer
  • Dremel
  • Dremel engraving bit
  • Chalk
  • Pencil
  • Quote print out
  • Wet rag
  • Cup Hooks (or screw eyes)
  • Picture hanging wire and hooks
  • Piece of Gum

Instructions:

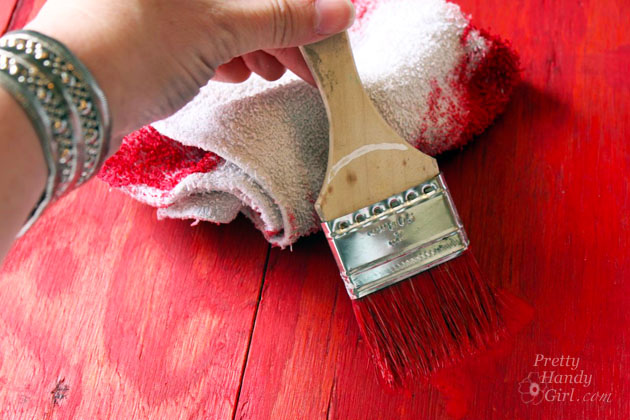
Start by painting your wood red.

All You Need is...Valentine String Art | Pretty Handy Girl

After the paint has dried, draw a heart with chalk.

All You Need is...Valentine String Art | Pretty Handy Girl

Hammer brad nails equally spaced around your chalk outline.

All You Need is...Valentine String Art | Pretty Handy Girl

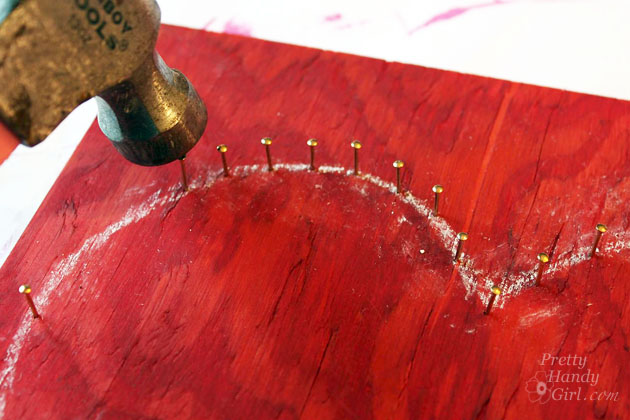
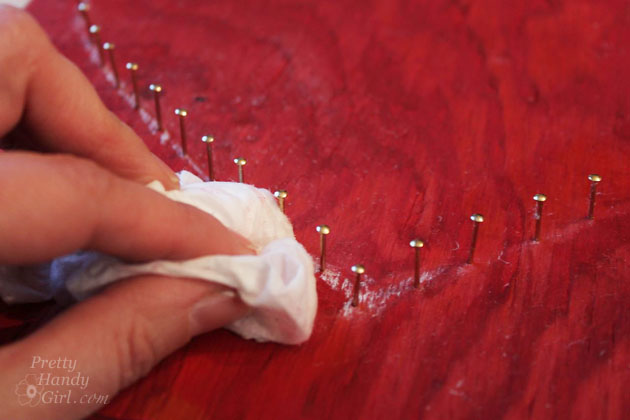
After all the nails have been hammered, wipe the chalk line off with the wet rag.

All You Need is...Valentine String Art | Pretty Handy Girl

Time to start stringing. Tie the string to the nail at the point at the top of your heart. Tie a double knot. Pull the string taut and follow the sequence below.

All You Need is...Valentine String Art | Pretty Handy Girl

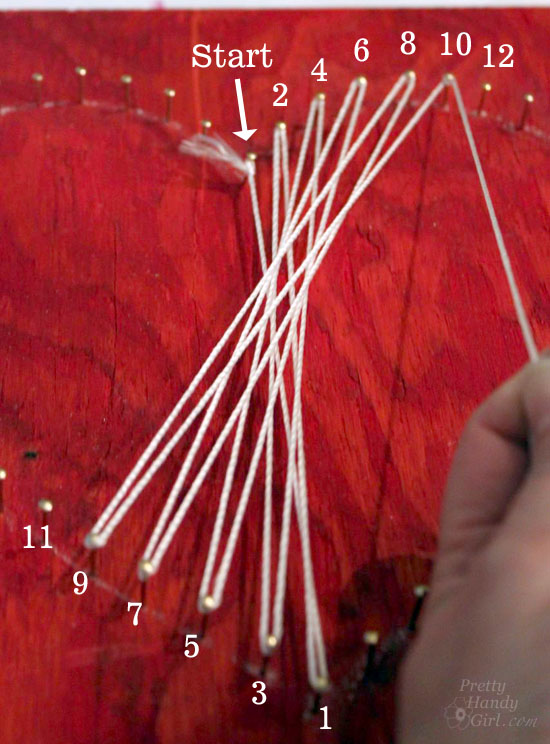
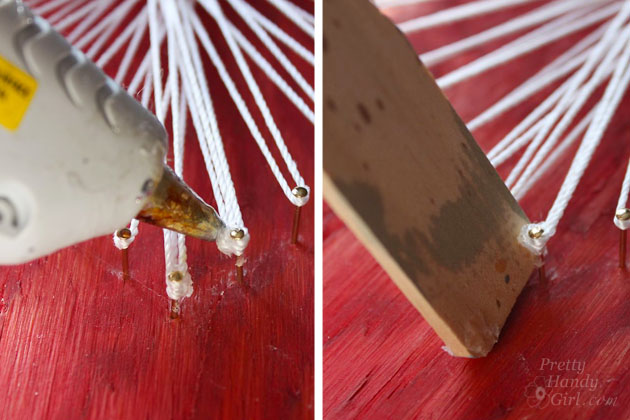
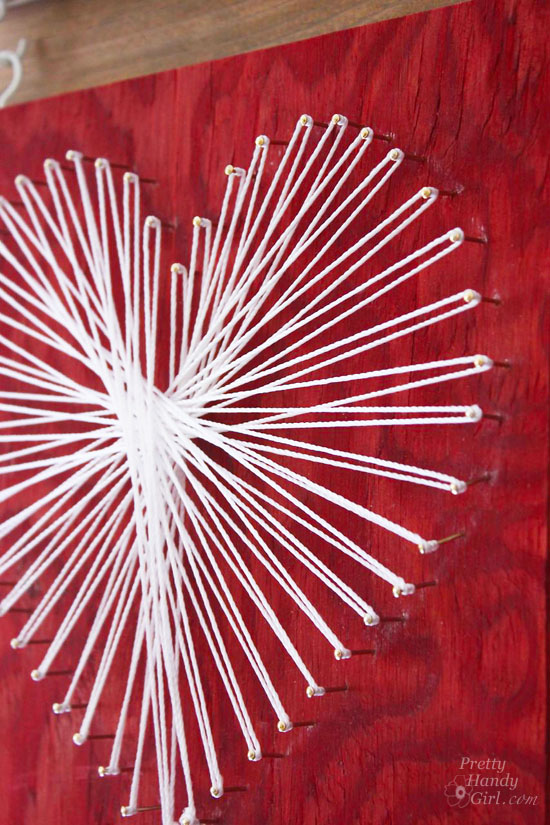
Follow the pattern until you complete the perimeter of your heart. Tie a double knot. Secure the first and last points with a dab of glue. Use a wooden stick to press the glue into the knot (because the wood can’t be burned, but your finger can!)

All You Need is...Valentine String Art | Pretty Handy Girl

Beautiful!

All You Need is...Valentine String Art | Pretty Handy Girl

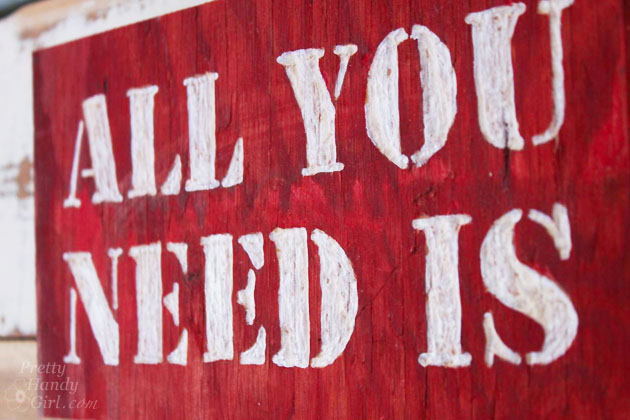
To create your engraved quote, print out your words on paper.

All You Need is...Valentine String Art | Pretty Handy Girl

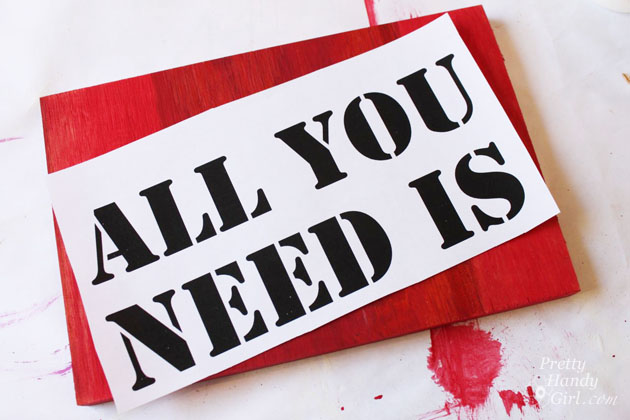
Flip the paper over and rub pencil behind the letters.

All You Need is...Valentine String Art | Pretty Handy Girl

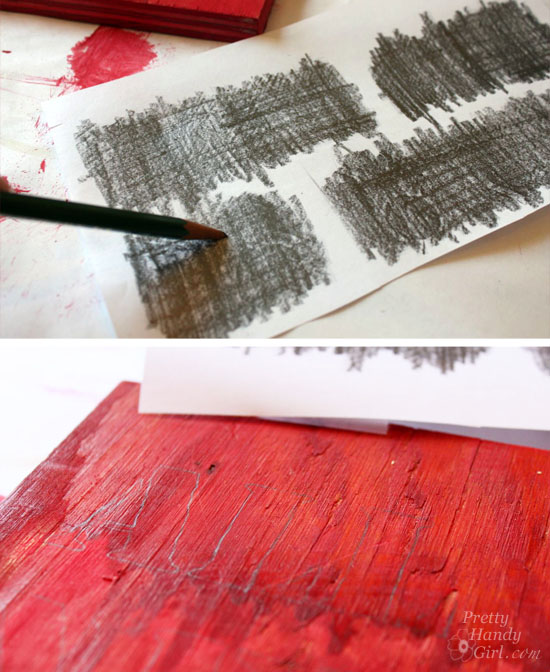
Tape the paper onto your wood and trace each letter using firm pressure. When you lift up, you should see the letter outlines have been transferred onto the wood.

Use the Dremel and engraving bit to scrape inside the letter outlines.

All You Need is...Valentine String Art | Pretty Handy Girl

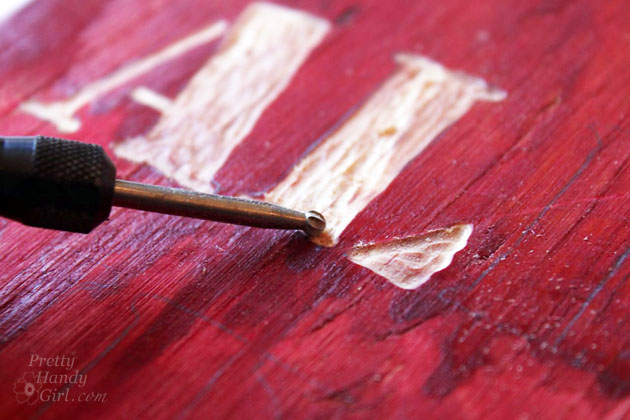
For more contrast, color in the letters with the paint pen.

All You Need is...Valentine String Art | Pretty Handy Girl

Done.

All You Need is...Valentine String Art | Pretty Handy Girl

To connect your two boards, screw cup hooks into the bottom of your word plaque and the top of your string art heart. (Pre-drilling will make this an easy task.)

All You Need is...Valentine String Art | Pretty Handy Girl

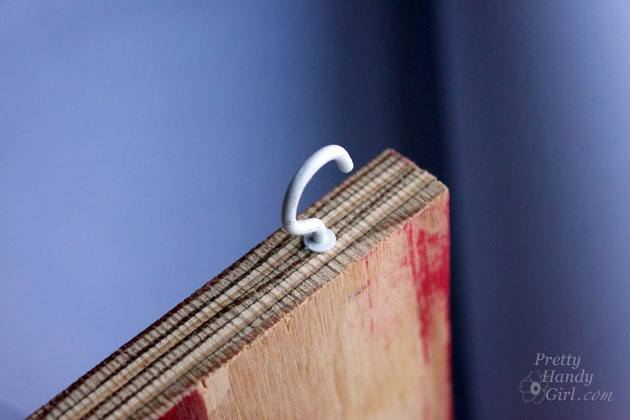
Add a picture hanging hook or wire on the back and hang your Valentine art proudly!

All You Need is...Valentine String Art | Pretty Handy Girl

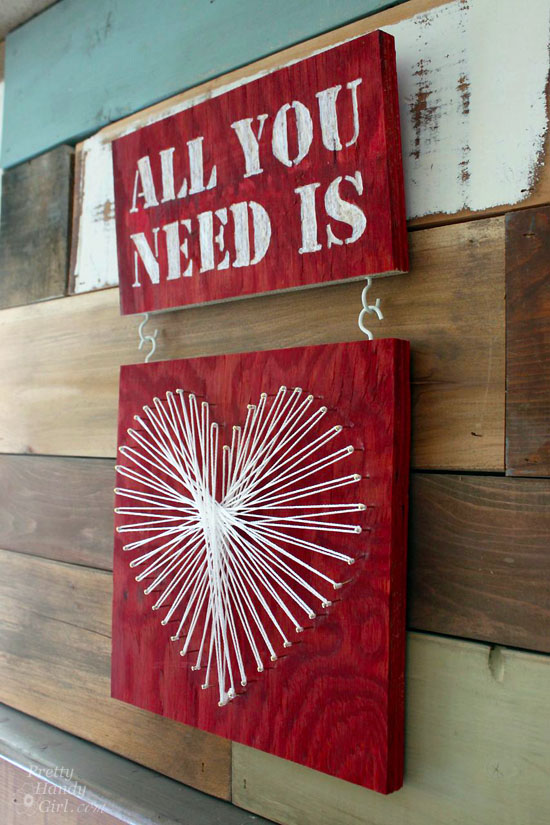
This would make a great wedding gift if you added the wedding date in the engraving or the couple’s initials.

All You Need is...Valentine String Art | Pretty Handy Girl

Even MacGyver would love this…don’t you think? Who needs a stick of gum!

Like this Valentine’s Day art idea? You can find more home decor ideas from the Lowe’s Creative Idea bloggers !

Winter14BloggerBadgeBanner-392x240

You can also sign up to receive their free Creative Ideas Magazine, which is loaded with inspiration! AND, check out the digital magazine app so you can have inspiration on the go! Don’t forget to follow Lowe’s on Pinterest or on Instagram!

PHGFancySign

Disclosure: As a #LowesCreator, I was provided with a Lowe’s gift card to purchase supplies for this post. I was not told what to write. All ideas and words are my own. I may or may not have gotten inspiration from watching old re-runs of MacGyver.

3.5Kshares
  • Facebook
  • Twitter
  • Pinterest

You might also like:

accessories, art, arts and craft, Crafts, Decorating, gifts, Holiday decorating, Home Decor, Lowe's Creative Idea, Stashbusting, Trash to Treasure, Tutorial

Comments

  1. Tess @ Tips on Life & Love says

    February 3, 2014 at 10:02 am

    This is such a cute decoration for Valentine’s! Could you also maybe use ribbon instead of string?

    Reply
    • Brittany Bailey says

      February 13, 2014 at 12:27 am

      Tess, thanks. I bet you could if you had longer nails, but I’m not sure how it would look. I’d love to see photos if you try it.

      Reply
  2. Shirley@housepitalitydesigns says

    February 3, 2014 at 7:16 pm

    That is terrific Brittany!!!…So many Valentine’s projects out there and this has got to be one of my favorites!!!

    Reply
    • Brittany Bailey says

      February 13, 2014 at 12:25 am

      Thank you Shirley. Nothing like upcycling some scraps ;-).

      Reply

Leave a Reply Cancel reply

This site uses Akismet to reduce spam. Learn how your comment data is processed.

Hi, I'm Brittany aka Pretty Handy Girl. I like the smell of coffee and sawdust in the morning. I live to break stereotypes and empower you to take on your own DIY project.

  • Email
  • Facebook
  • Instagram
  • Pinterest
  • Twitter
  • YouTube

Saving Etta - Follow the Adventure to Flip a Historic House

  • Email
  • Facebook
  • Google+
  • Instagram
  • Pinterest
  • Twitter

Privacy Policy

Affiliate Link Disclosure:

Pretty Handy Girl is a participant in the Amazon Services LLC Associates Program, an affiliate advertising program designed to provide a means for sites to earn advertising fees by advertising and linking to Amazon.com.

Copyrighted Content Permission

All images and tutorials on this blog are copyrighted material. Please contact me if you would like to borrow any media (photos, video or audio files), tutorials, or ideas from this blog. 99% of the time I would be happy to allow you to use one photo with appropriate credit and link back to PrettyHandyGirl.com (preferably to the same post it was borrowed from.) I can be contacted via email: PrettyHandyGirl (at) gmail.com.

© 2019 · Pretty Handy Girl ·

We use cookies to ensure that we give you the best experience on our website. If you continue to use this site we will assume that you are happy with it.Ok