Make a Rustic Farm Crate Sign

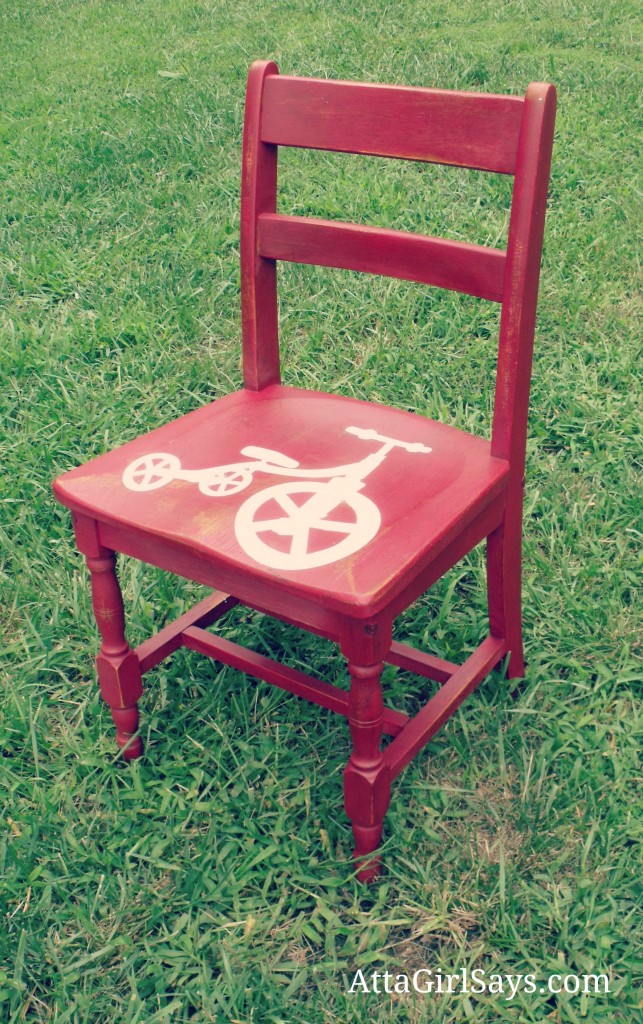
Last month, I was a little nervous to try a new power tool. I know…I know…shock and disbelief! But, y’all came to my rescue and helped share all your tutorials for using the Silhouette and other craft cutters. You really have to see all the wonderful projects that were linked up, like Atta Girl’s Tricycle Chair:
And Vintage Revival’s Wood Grain Lamp:

and I yelled “Stick a Fork in Me I’m Done Procrastinating!” when I laid eyes on All Things Thrifty’s Knife and Fork curtains:

After reading all your project tutorials, I was able to get a handle on my fear of the unknown and try out the Silhouette.
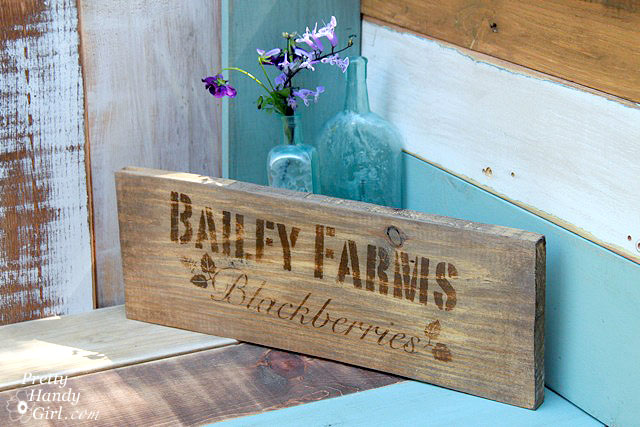
I couldn’t have been more surprised and happy with the results of this rustic farm crate sign, my inaugural project.
If you are new to using a Silhouette, here is how to create your own farm sign or any sign you desire.
Before using the Silhouette for the first time, you need to load the software that comes with the machine onto the computer. Then create a graphic using the software or import one of the graphics from the store or a vector image. There are some great tutorials for using the software on the Silhouette site.
When you are happy with your design, load vinyl into the Cameo and then send it to cut.
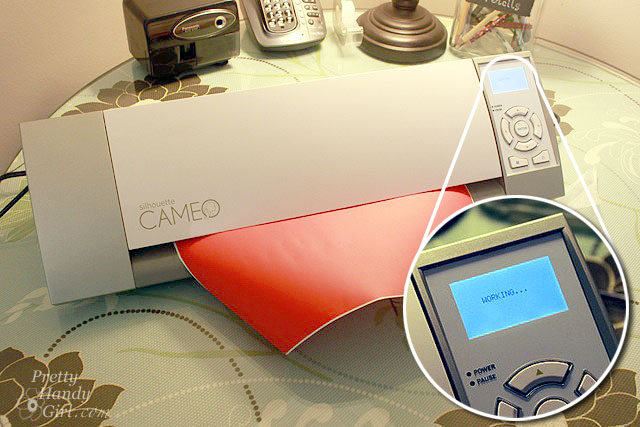
I was so relieved to see the message in the status window. Phew, it was working.
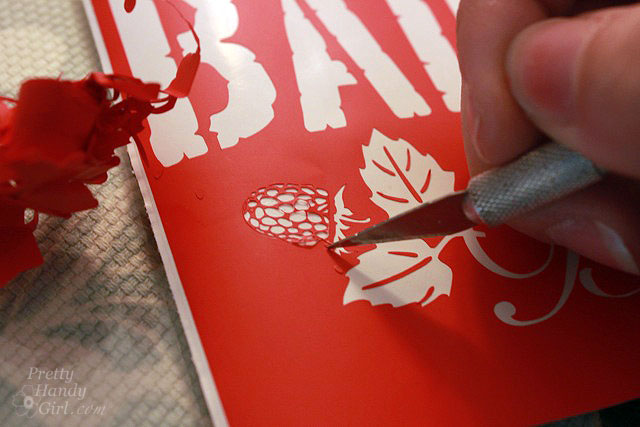
After the Cameo has finished cutting, weed out all the excess letters and design from the vinyl.
![]()
1. Cut a piece of transfer paper to the size of your vinyl.
2. Peel off the transfer paper and lay it on top of the vinyl.
3. Rub the transfer paper firmly onto the vinyl.
4. Lift up the transfer paper and the vinyl should come up with it.
![]()
Lay the vinyl and transfer paper onto the block of wood. Rub the transfer paper to firmly adhere the vinyl to the wood.
![]()
Carefully pull the transfer paper back to reveal the vinyl stencil you just created.
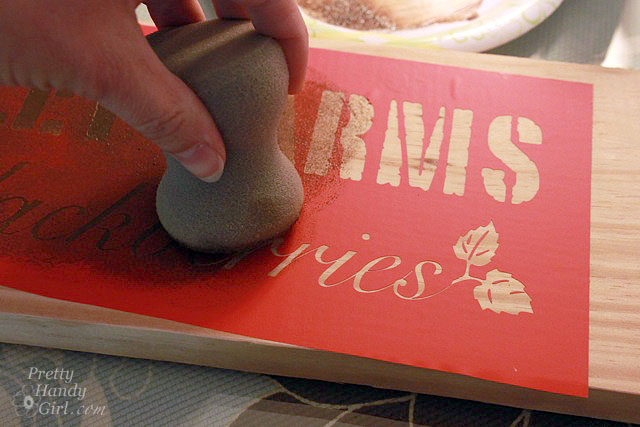
Sponge or pounce brown acrylic paint into the stenciled letters.

When the paint has dried, gently remove and discard the vinyl.
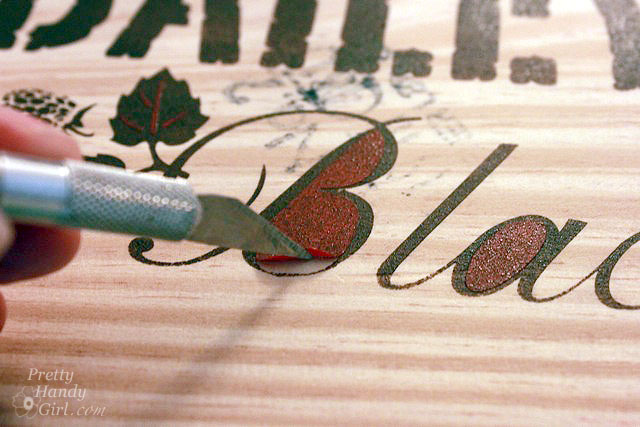
Remove any centers and excess pieces of vinyl with the xacto knife.

The sign looked great, but not “old and rustic” enough for my tastes.
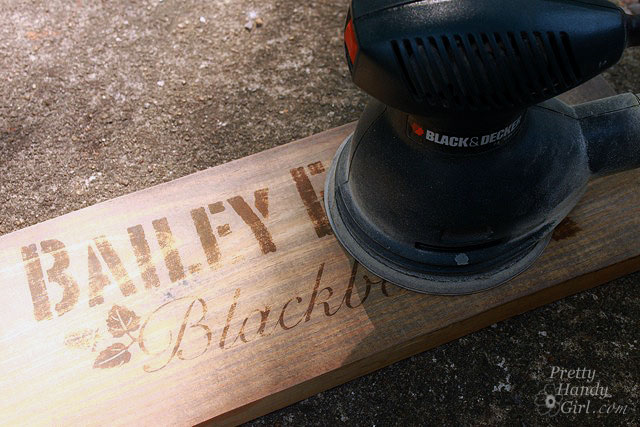
I started to age the sign by sanding the letters a little bit with an orbital sander.
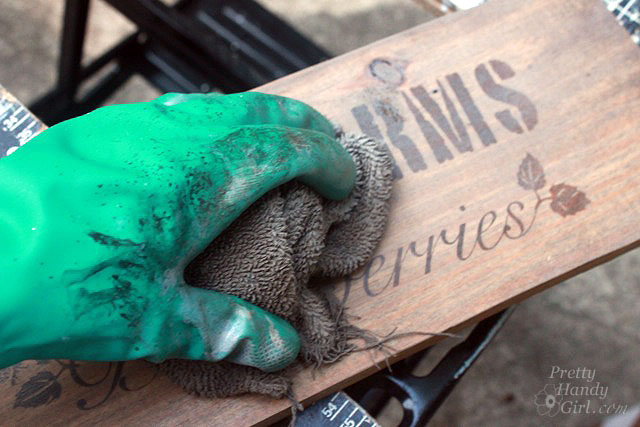
I wiped some Rustoleum sunbleached gray wood stain onto the board and ragged off the excess.
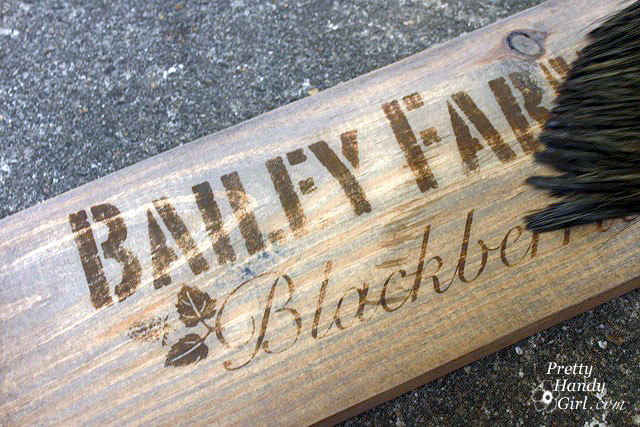
Then I wiped a glaze over the board to further age it. (Read my tutorial for making new wood look new.)

The sign is perfectly aged and looks like I salvaged it from a berry patch. When in actuality it was created using new wood and acrylic paint with a stencil from the Silhouette Cameo. Would you have known? Tell the truth now.

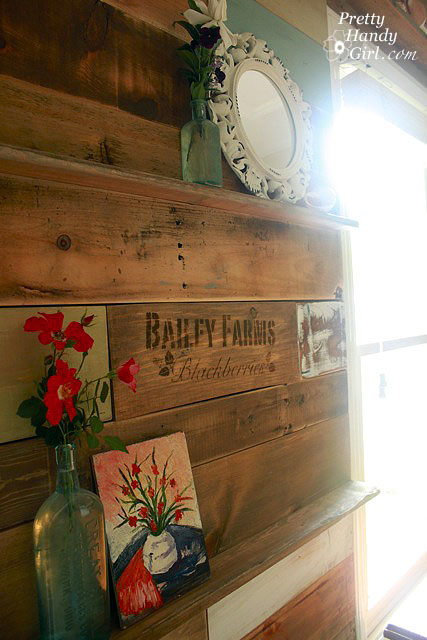
I love this sign so much, that I had to incorporate it into my scrap wood wall in the new arts & craft studio.
If you were to make your own sign, what would it say? Would you use your last name or a favorite brand? Do tell.

![]()


Un blog lleno de ideas bonitas,muchas gracias por buscarlas y compartirlas.
What font did you use for your wonderful sign? Thanks.
Thanks for including my chair, Brittany! And I love your sign. It definitely looks vintage, like something you salvaged off an old berry crate. You’re making me look at 2X4s in a whole new way!