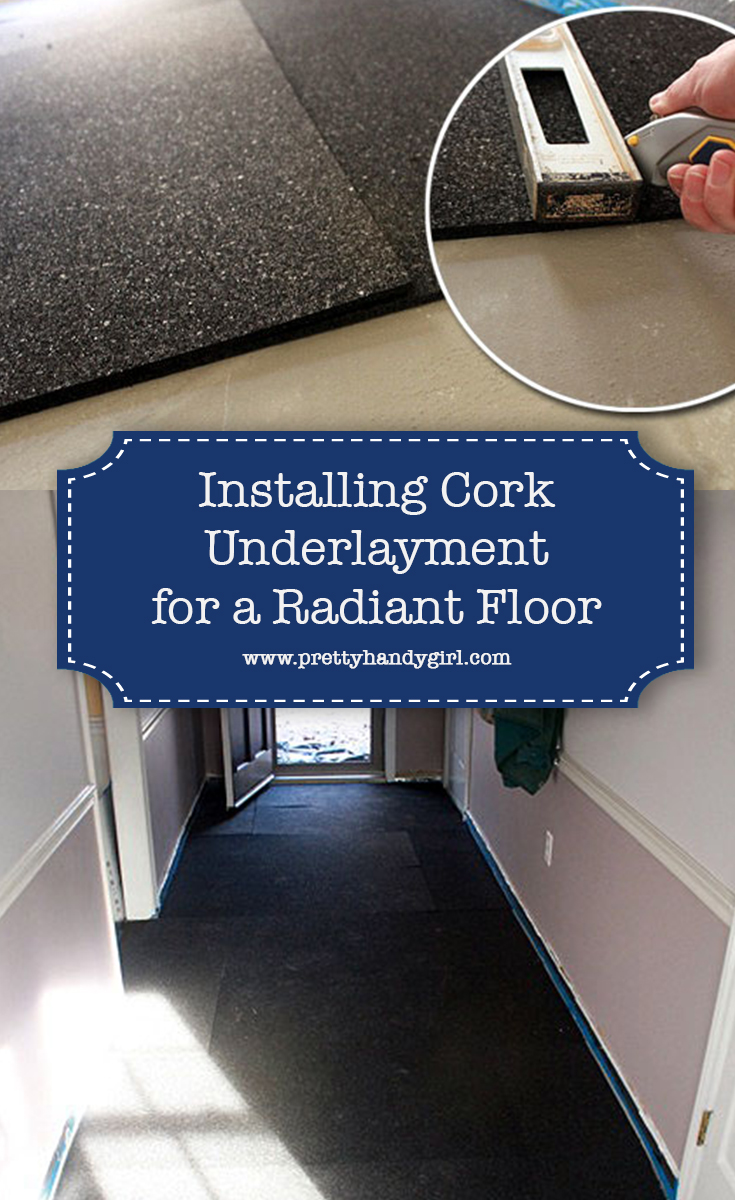
Installing Cork Underlayment for a Radiant Floor

After you read the title, I guess the cat’s out of the bag. It’s true, I installed radiant floor heating in our mudroom/laundry room and I couldn’t be more thrilled. One of the positives of having a plumbing leak and subsequent gutted room, is being able to make changes that you otherwise wouldn’t have considered. Tile floors with radiant heating underneath was one such change we never entertained until our flooring was ripped out.
Here’s the low down on those two rooms. Our long hallway mudroom that ends in the laundry room was an addition to our home back in the 80’s. It was built on a concrete pad and the owners must have decided not to tie those two rooms into the heating and air conditioning. Consequently, in the winter, these rooms are brrrrrrr…chilly willy! (It’s true, my blood has thinned over the years from living in the south. I think I’d turn into a useless popsicle if I had to spend more than an hour in Alaska like Ana White.) The linoleum flooring that was there didn’t do much to dampen the chill. And, I knew since we were installing tiles in these areas that it would only contribute to that polar ice effect (wimpy wimpy wimpy, I know).

I decided that I wanted to try to add radiant heat in the floors. After a few nights of research, I settled on a company that makes custom configured TempZone radiant heating mats for your home.

Warmly Yours manufactures floor heating, ice melting, towel warming, and mirror defogging products. They also stand behind their products and offer the BEST WARRANTY on radiant floor products that I’ve ever seen. If your radiant floor fails due to a defect in the material, they will not only pay to replace the radiant mats, BUT they also reimburse you for the cost to rip up and replace your floor. That’s impressive!
The promise of warm tootsies on a cold day made my insides all fuzzy. Plus, I was hoping that it would help heat those two rooms as well. (Their heat loss calculator didn’t promise fully heated room, but I’ve already noticed a BIG difference in the comfort of those rooms.)
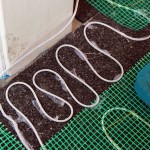
After talking to a support tech at Warmly Yours, I learned that it is highly recommended that I install cork or CeraZorb synthetic cork mats between the radiant mats and the concrete subfloor. Without the mats, the sensor that is embedded in between the wires would read the temperature of the tiles AND the concrete, which would not provide an accurate temperature. With a colder temperature reading, the radiant wires would spend a lot of energy trying to heat the concrete subfloor. The cork mats insulate the radiant heating wires and tiles from the cold subfloor and direct the heat up to warm the tiles.
What follows is my tutorial for installing the cork mats, but this tutorial is also very similar to laying tile. The only difference is that you wouldn’t use a rolling pin to flatten the mats and you’d used a tile saw instead of a utility knife ;-).
Materials:
(I’ve included affiliate links for your convenience. I earn a small percentage from a purchase using these links. There is no additional cost to you. You can read more about affiliate links here.)

- Cork mats
- Drill with 1/2 chuck
- Pistol grip handle for drill
- Mixing Paddle
- Mapei Ultracontact
- 5 Gallon Bucket
- Quart measuring cup
- Dust broom
- Sponge
- Bucket of water
- Chalk
- Metal ruler
- Utility knife
- 1/8″ notched trowel
- Rolling Pin
- Spackle knife
- Knee pads
- Rubber gloves
Installation:
The cork mats are a flexible material, but you will need to cut them to fit perfectly in your space or you’ll have dips or bumps.
To cut around trim, lay the tile up next to the door casing and trace the profile of the molding with the utility knife. Push the tile up against the wall and trim any excess as needed.

To cut a cork mat to fit in any leftover space, lay the first mat up against the wall, layer a second mat on top of the first and butt the second mat up against the opposite wall (or other mats).

Lay the metal ruler on top of the edge of the second mat and score the utility knife through the first mat.

Remove the excess material from underneath the second mat and you should have a perfect fit.

Be sure to stagger your seams so you don’t have one long seam running the length of your room. Continue until your entire room is covered with the cork mats. (At this point, I could feel the effects of the insulating properties of the cork. The room felt less chilly already.)
Using the chalk, number and/or letter each tile to keep track of where they are supposed to go. Snap a picture with your camera or cell phone for reference. (Whatever did we do before the invention of smart phones???!!!)

Mix up the thinset according to the package directions. (The process will be very similar to how we mixed the self leveler.) The thinset should have a very thick consistency that will hold it’s shape when glopped on the floor. I made a video to show the thinset application process.
Here’s the cliff notes from the video. (Do they even still have cliff notes? Are they still paperback or are they all in digital form now? I know, I’m showing my age.)
Lift up one or two cork pieces at a time. Sweep up any dirt from the floor. Use a damp sponge to clean up any additional residue.

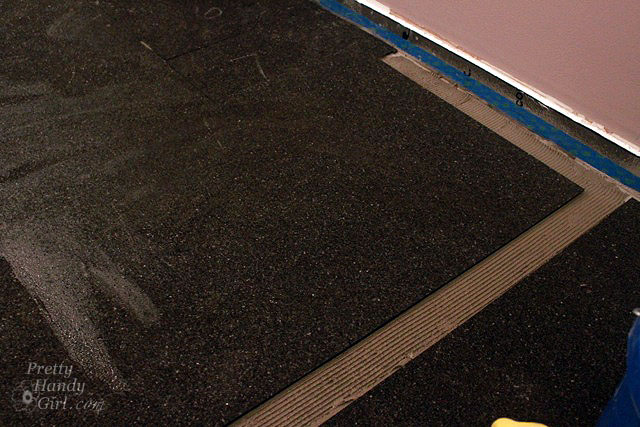
Work in small areas, do not exceed an 8 sq. ft. area or your thinset might dry prematurely. Use your trowel or spackle blade to glop and spread thinset onto the floor in the area where the cork mat was. Be sure to spread thinset up to and slightly over the borders of the tile area.

Use the flat side of the trowel to spread out the thinset and to cover all bare spots. Flip the trowel over to the notched side and scrape the trowel along the length of the tile area. Repeat in the unnotched thinset until all the mortar has a nice uniform corduroy pattern.

Slip the cork mat over the thinset. Wiggle the mat into place to distribute the thinset onto the underside of the cork.
Enlist the help of children (cheap labor) to do modified rolling pin push ups to insure a firm cork to thinset bond. Depending on the weight of your child (my kids are filled with helium), you may need to add a little extra weight and roll out the mats yourself ;-).

Wipe off any thinset that gets on the mat edges. Move on to the cork mat. Repeat until finished. Let the thinset dry overnight before walking on them.
Coming up next, how to install a radiant heat cut and roll mat system.

Disclosure: The CeraZorb cork underlayment and Warmly Yours radiant floor mats were provided to me at no charge. However, I was not paid to endorse Warmly Yours. I was not told what to write. I contacted Warmly Yours because I was interested in their product and I read about their excellent warranty and customer service.
Pin for later!

mapei ultracontact is difficult to find locally unless i order online.could you recommend a suiteble substitute for a adhesive for the cerazorb over a cement slab /foundation please?
Juan, you’ll need to check with Globus Cork to see what they recommend.
unfortunately globus cork only sells natural cork and does not mention anything in reference to cerazorb
Ii will have to continue my search.
Well I’m an idiot! I meant to tell you to contact Warmly Yours and see what the recommend: https://www.warmlyyours.com/en-US/support
Brittany
Just came across this – have you found any cracking in the grout? My hubbie seems to feel the cork underlayment might make the floor too “pliant”.
Your project looks great!
It’s been almost three years and we don’t have any cracking except one spot where the tile layer let the mortar dry too much. That one tile has always wiggled a little when we step on it. But, the grout hasn’t deteriorated at all.
Why did you decide to ‘glue’ the cork down with thinset instead of the manufacturer’s recommended adhesive glue? I’m planning a (non-radiant-heat) ceramic tile floor install and wanted to use cork as the underlayment… I already have modified mortar on-hand, so I wanted to use that instead of glue. But nobody else online uses mortar *under* the cork, so I’m nervous!
Oops, I misread “adhesive” as meaning glue, but it’s actually just a special thinset. Nevermind my question 🙂
Brittany, you are a woman after my own heart since I’ve done so much home remodeling. I must say, I haven’t tackled this but since I live in Arizona now, (recently remodeled this house) I most likely wouldn’t need to have this flooring. My tile is very very cold now with winter settled in but only for a few short months. You never cease to amaze me with your hard back-breaking jobs. That’s hard on your back so I do hope you were able to get a nice massage when this job is over. If not, someone should treat you to one! Great job & well done!!!
Colleen, Thanks for your comment. Actually I finally got my massage this past weekend. It was much needed and you aren’t kidding, crawling around on the floor was brutal.
I am seriously jealous 🙂 You should see what I wear around this house in the winter to keep from becoming a popsicle! We used to have a wood burning stove in the basement when I was growing up, which heated up the floors above it. I loved the toasty kitchen floor back then.
We had a wood burning stove in our childhood home. It was on the ground floor, but the second floor had a balcony overlooking it. Upstairs was always toasty when we had a fire going ;-).
You so deserve nice warm floors.
I can hardly wait to see your kitchen come together. It is amazing to me what you can accomplish.
Thank you Barbara. And I appreciate your comment. Hang on for the ride, it’s going to be a while before we are finished 😉
You totally rock!! I’m always amazed at what you do. I can’t wait to see the next post.
Radiant floor heat is the BEST! We love ours; can’t wait to see what you think about it!
This is awesome Brittany!!
I had no idea this company existed because I’ve never tackled a project of this nature.
Their warranty is crazy good and honestly makes me want to do radiant heat.
Can’t wait to see your next post. I agree with Mary Ellen, YOU ROCK 🙂
Thanks Jeff. I know, crazy good warranty!!! Love that and their customer service is amazing.
You are such an inspiration to all! Golly just trying to get my husband to do anything anymore is like pulling teeth. But you are amazing. So impressed with your ability and desire to do everything. Keep it up. Love your blog.
Thank you so much Mary Ellen. You are too sweet and there are days I don’t want to power forward ;-).