Installing an Anti-Tip Bracket for Your Oven
I hate to break up the holiday glamour-fest, but it is time to put on my tool belt and share with you an important safety device. As some of you may remember, we had an oven fire this past September. We ended up replacing our oven and when the new one was delivered it came with an anti-tip device. All new free-standing and slide-in ovens should come with one. Be aware that most stores that deliver your stove WILL NOT install the anti-tip device when they deliver (shame on them!)
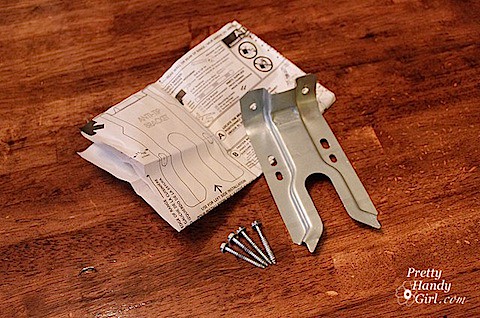
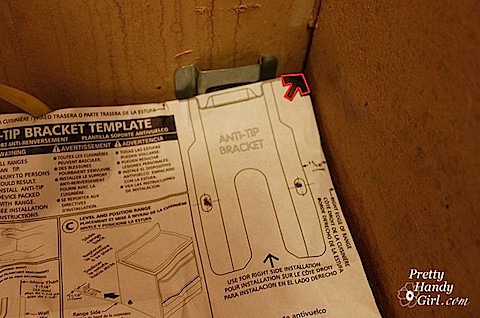
If you don’t know what an anti-tip device is, let me show you:

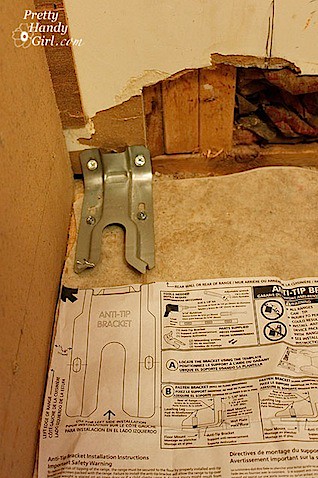
That’s it! Just a bracket and a few screws. But, that little device can prevent this:
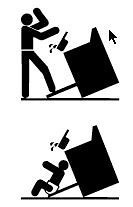
The whole oven can and will tip very easily with very little weight on the open oven door. Stop reading RIGHT NOW and go open your oven door. Then press down to see if you can tip your oven!
If you can tip it, you can call the manufacturer of your oven and they should send you a device for free or just a shipping charge. To find an anti-tip device for your stove, contact the manufacturer.
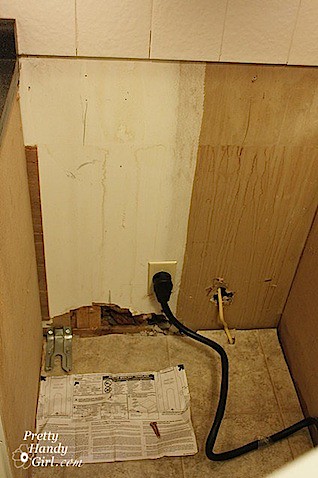
Installation is super simple. The hardest part is pulling the stove out and cleaning all the goodies that have fallen beneath the stove for years. Apparently our stove doubles as a matchbox car garage!
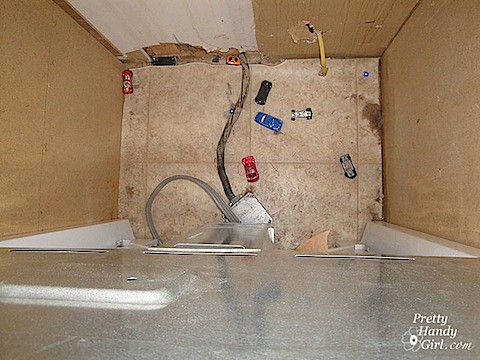
Safety Alert: If you notice in the picture above, there is a metal box lying loose on the floor with black and grey wires entering it. This is the junction box where our wiring for the stove is hardwired into the house. The fact that this junction box is lying loose on the floor is dangerous! Should we (or the firemen) had pulled hard enough when removing the stove, the connections could have come loose and there would be 240 volts of live (or should I say life-ending) power exposed! Therefore we hired an electrician to wire an outlet into the wall before we installed our new stove.
One more safety tip, if your oven catches on fire (specifically the heating element is burning) you will need to stop the oven from receiving any power. Be sure to turn off the circuit at your circuit breaker! This probably would have saved me from having to call the fire department, I thought just turning the oven off would stop the element from continuing to ignite and burn, BUT NO IT DID NOT!
Anti-Tip Bracket for Your Oven Installation:
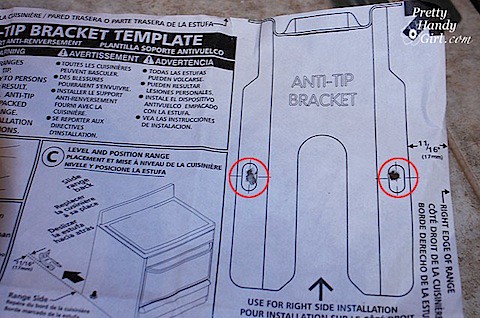
If your oven is hardwired, before installing the bracket be sure to shut off the power to the appliance. Even if you have an outlet, be extra safe and turn off the power to that outlet. Once you have removed all foreign objects from under the stove and cleaned the floor. Layout your template lining up the corner of the sheet to the corner of your cabinet and the wall.
Drill through the crosshairs marking the location of the screws (remember to use a drill bit slightly smaller than your screws.)
If you are having trouble lining up your stove with the bracket, you may need to remove the storage drawer and look underneath your oven. You also might need to adjust the feet on your oven up or down to give enough clearance for the whole foot to slide into the bracket. (You do this by screwing or unscrewing the feet.) Be sure to adjust the foot on the opposite side to level your oven.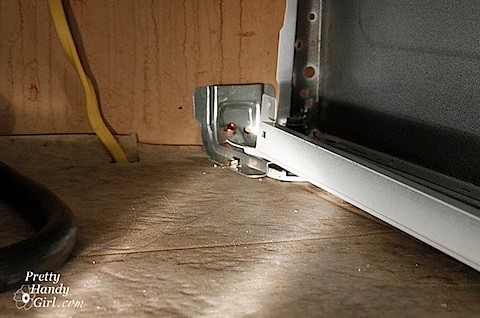
And you are done, this installation is relatively easy as long as you don’t encounter things like electrical code violations (aka improperly hard-wired appliances.) Feel free to email me with any questions and I will try to assist you. Again, I have one extra anti-tip device for a GE stove if you would like it.
Now it is time to bake some cookies! YUM!


Why do most installers refuse to install the anti-tip bracket? Shouldn’t the maufacturers be concerned about potential liability since the owner’s manual is clear that it must be installed in order to avoid serious injury or death?
It’s actually required by building codes in our area. If it’s not installed you risk failing the final inspection if you are doing a kitchen renovation.
I’ve been trying to install my anti tip device for over an hour now. The floor is concrete so my screws aren’t going in with a power drill. Tried the wall, seems to be something very hard there, too. What can I do? Unfortunately the buyers of my house require we get this done for closing.
Christy, you need to buy a masonry drill bit. Drill the hole slightly smaller than your screws. Then drive your screws into the floor. You could add a little epoxy to the hole for added security, but the screws will never come out then.
Hi, Cool site. Came here as I try to find out what the difference is between a Whirlpool and GE bracket because these are the two Home Depot sells. Obvious appears to be how far the stove “foot” slides into the bracket, width of the slot, and maybe height for the “foot”. I’ve got a few rental places with different ranges that need these – inspector just started checking this year… is good idea – never thought of it before (a mom and 3-year old girl had lived in one). Anyway, I’d like to get a few of the same kind if they work – cost isn’t high, some $7, some $15- then shipping charge. The Whirlpool looks to have the deepest slot, so it should work for both. Someone gave a stove model number and was recommended to get a WB2K12 which is this odd piece (install instructions at bottom of left column – I don’t understand how it works, but there’s another piece – one screws to stove, the other to the wall and somehow it works.
In your photos, brackets are shown on both sides – one each side with the templates, two from above on the left, then final view underneath shows the right. So wondering if there was a problem if on the left and you had to move to the right.
No, we actually had two anti-tip brackets (one for each side) the photos were taken a little out of order. Sorry for the confusion.