
Inserting Spring into My Wreath
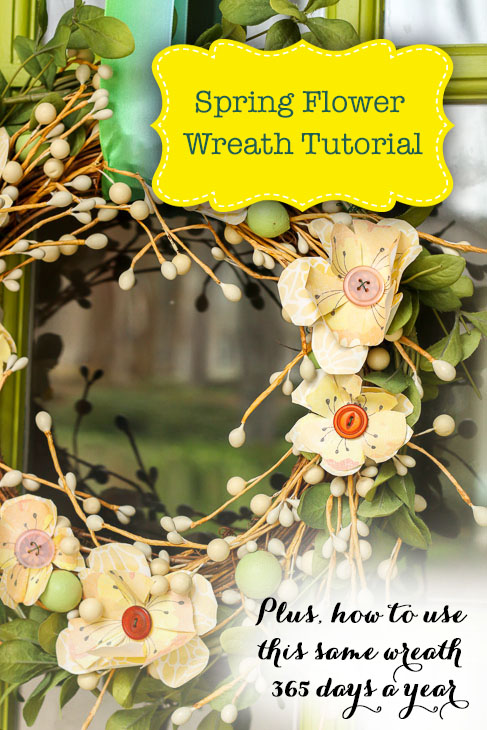
Inserting Spring into My Wreath
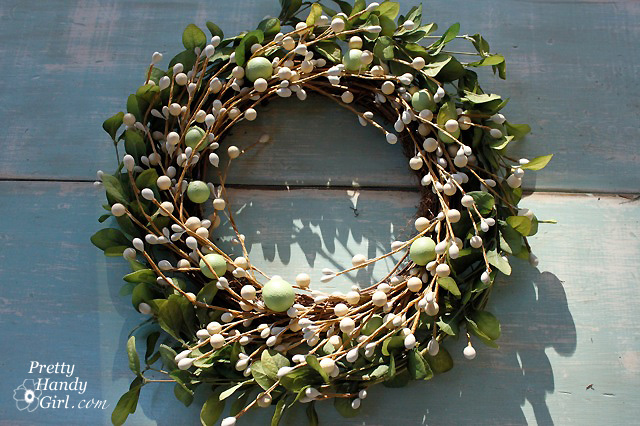
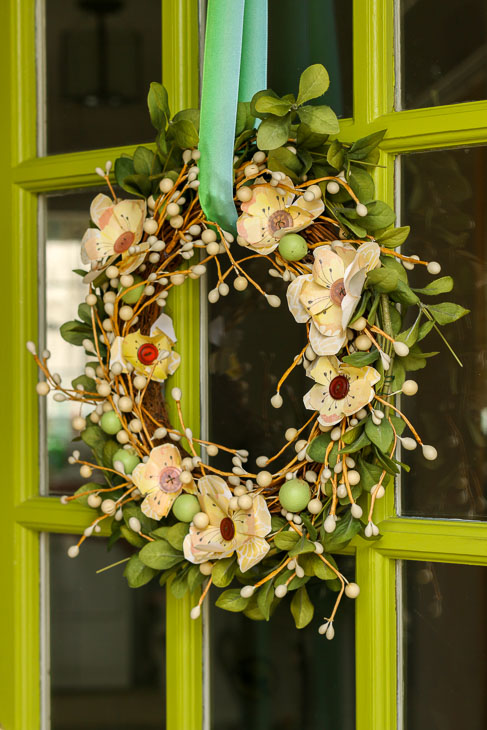
A few years ago I purchased a simple white berry wreath from Target (I don’t think it’s still available at Target, but this is a similar style wreath.) To save money, I challenged myself to use this one wreath through every season for one year. Did I do it? You bet your little penny pinching fingers, I did! So, today I want to show you how I transformed this simple wreath for Spring.

Inserting spring into the white berry wreath was as simple as pairing a green leaf wreath and some DIY scrapbook flowers.
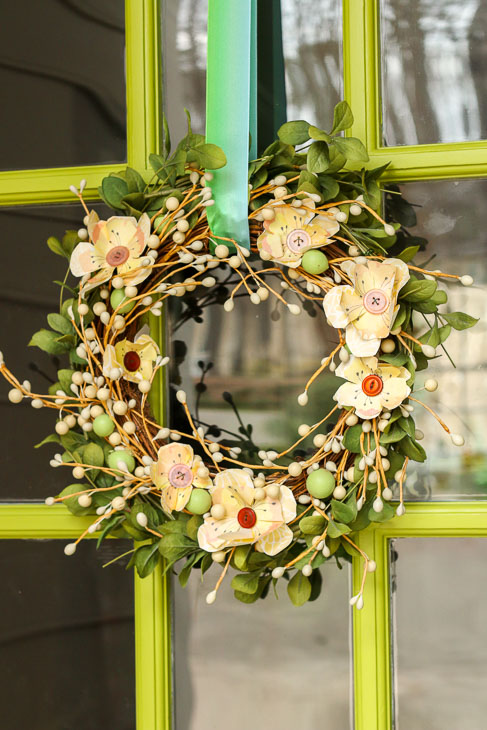
The best part about it is, this simple wreath can handle new colors and elements throughout the year. Can we calculate how much you’ll save on door wreaths for one year? Subtracting the minimal cost of crafting supplies, you’ll save at least $100 on wreaths (attractive wreaths usually start around $39.99.) If you want to see how I transformed the wreath for the other seasons of the year, be sure to scroll all the way to the end of this tutorial!
Inserting Spring Paper Flowers into your Wreath:
Materials:
(I’ve included affiliate links for your convenience. I earn a small percentage from a purchase using these links. There is no additional cost to you. You can read more about affiliate links here.)
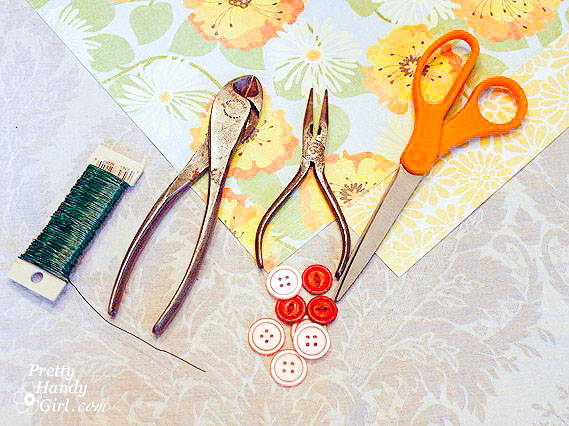
- White berry wreath
- Green leaf wreath
- Two coordinating scrapbook paper sheets
- Buttons for flower centers
- Scissors
- Wire cutters
- Floral Wire
Instructions:
Start by pairing your white berry wreath with a green leaf wreath to give it more bulk (or just add green sprigs to your berry wreath.)
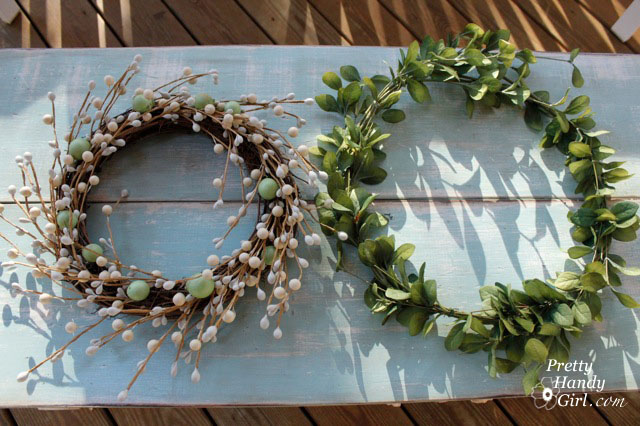
To combine the two, simply wrap some of the berry branches around the leaf wreath.
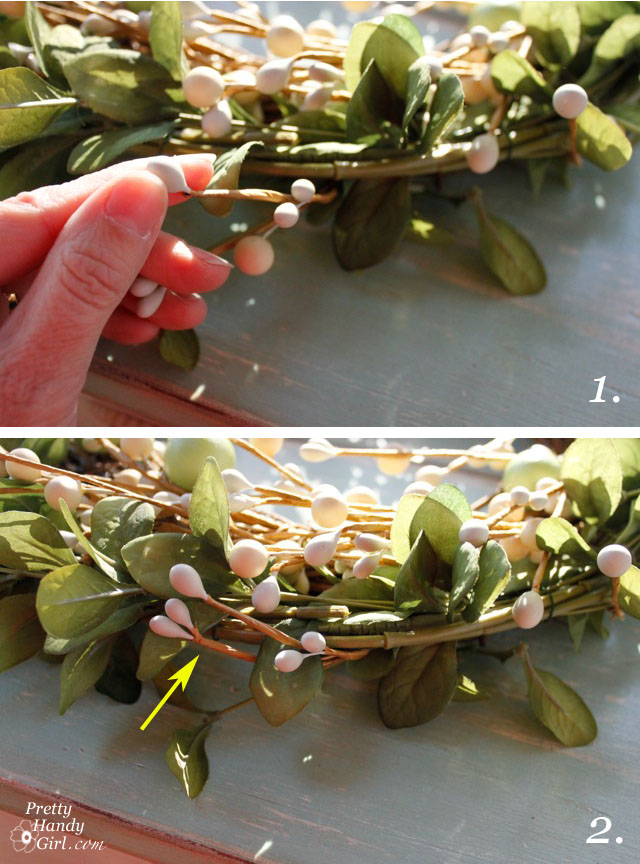
That’s it! This way you can separate them at a later date if you decide to use the wreaths independently.
Making Scrapbook Button Flowers:
Begin by cutting flower shapes out of your scrapbook paper.
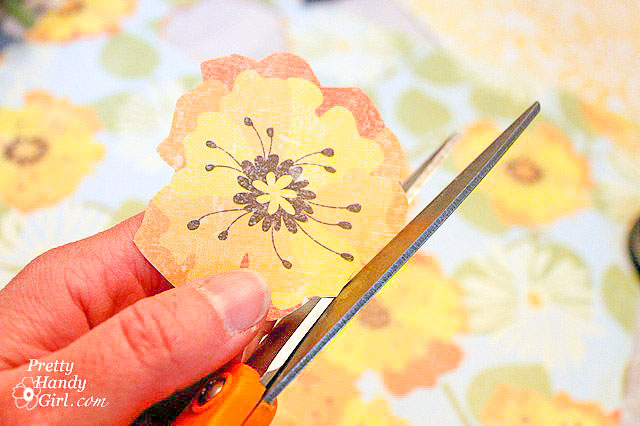
Lay your flower on top of a coordinating sheet of scrapbook paper and cut a second flower shape larger than the first.
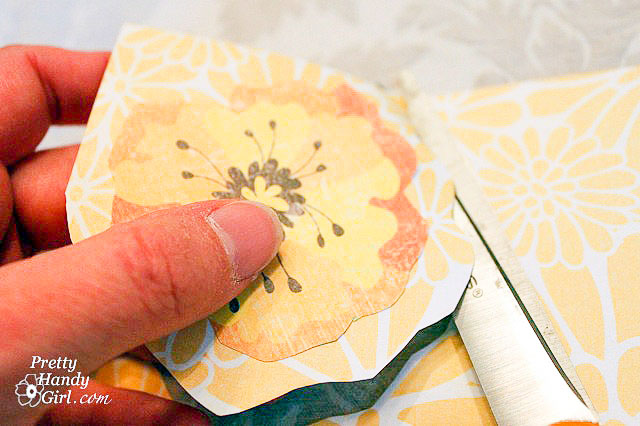
Lay both flowers on top of one another and cut slits in toward the center of your flowers. Be sure not to cut too close to the center.
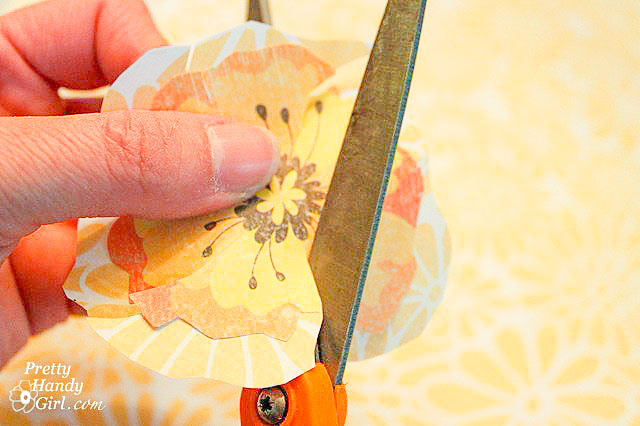
Fold the edges of your flowers up to give them dimension.
Cut a length of floral wire long enough to wrap around your wreath.
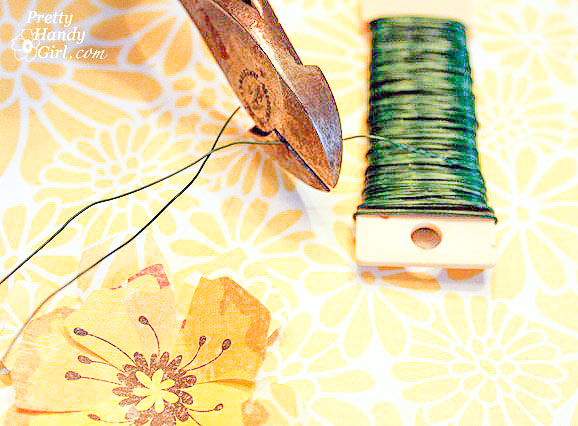
Thread the wire through your button. If you have a four hole button, you may want to thread it in an “X” shape as shown below:

Then poke the wires through the centers of the flowers (it is easiest if you have one on top of the other so you can poke through both flowers at once.)

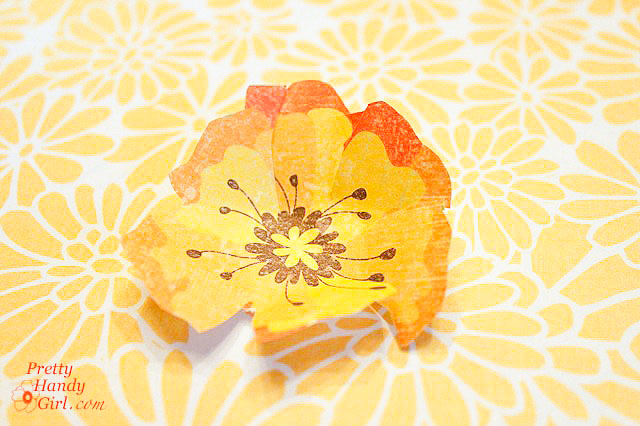
You should end up with a scrapbook paper and button flower that looks like this:
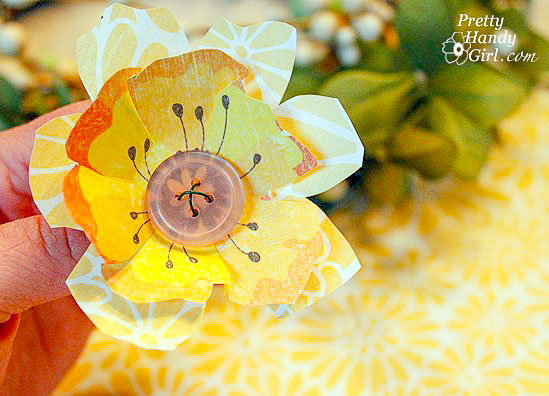
Make as many as you like and then arrange the flowers on your wreath.
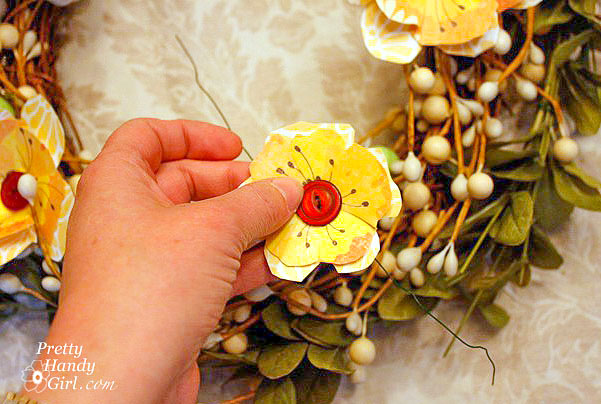
Wrap the wires around the back and twist to secure.
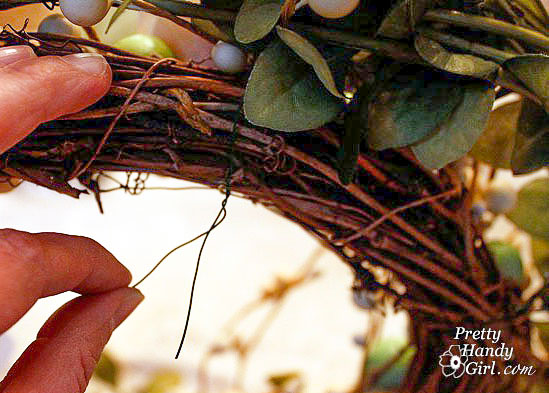
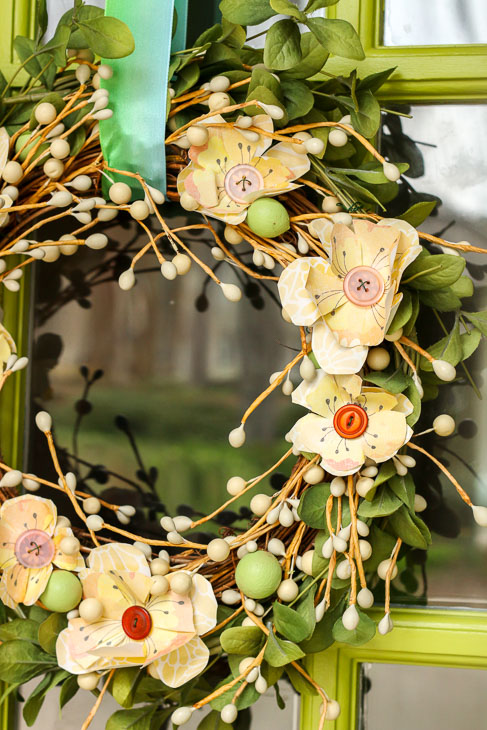
Repeat until you have covered your wreath in beautiful spring flowers.
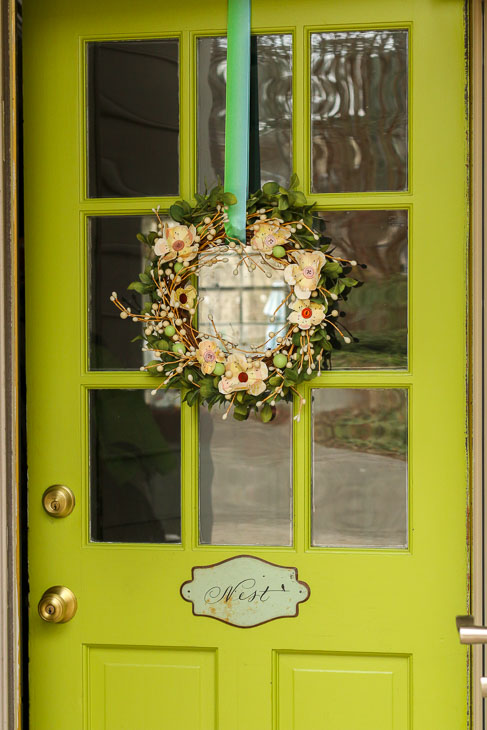
Add a coordinating ribbon to your wreath. You can tie a bow on your wreath. . .
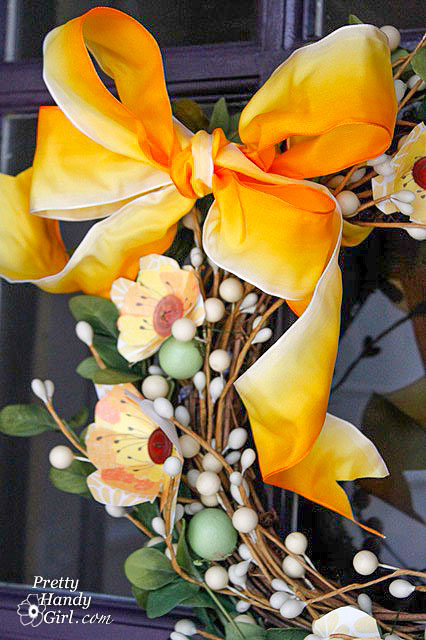
. . . or use a flat ribbon to hang your wreath. It’s your choice.
Enjoy your new spring wreath!

Although my paper flowers have faded a little, I’ve been able to use this wreath for several years (as evidenced by the change in color of my door.)
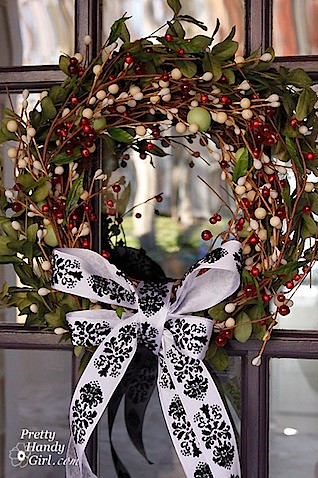
Here’s how I transformed the same wreath for Christmas through Valentine’s Day:
For Thanksgiving, I added some feathers to the wreath, (For a fuller wreath, you can add more feathers):

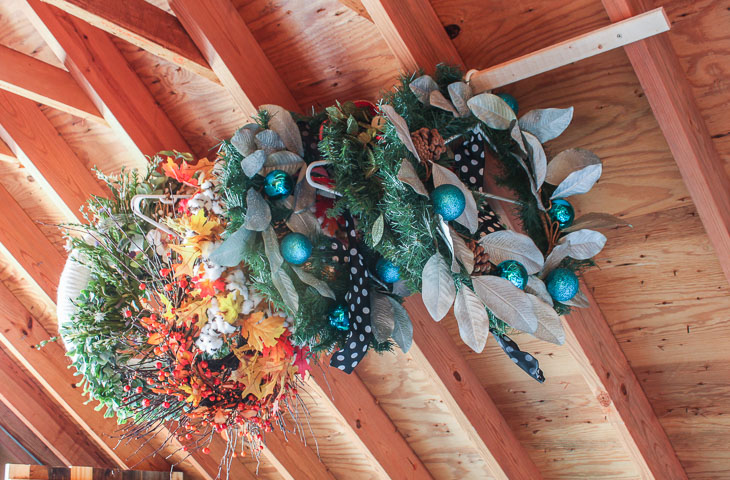
For fall, I paired free magnolia leaves with the white berry wreath:


Hope you enjoyed this tutorial. If you liked this post, you’ll love my round up of 24 creative fall wreaths (because frankly, some of these look pretty enough to hang year round.)

You might also appreciate these 9 Holiday Storage Hacks:


What a great idea! I love how you re-purpose a simple berry wreath and combine it with the other plain greenery wreath! Just those two combined takes on a whole new look and adding different decor and accessories to it each season or holiday to switch things up is wonderfully cost-effective! I do that with my DIY burlap bubble wreath by just keeping the base wreath in burlap and then switching out accessories whenever the seasons change or the mood strikes!
I would have never thought to add a paper accessory to my wreaths.
I love the paper flowers! I have a grapevine wreath that I do the same thing with! It’s so easy to change it up.
Lovely … and very frugal. Thanks for the inspiration, Brittany!
Wonderfull idea are you going to make one for Etta house?I enjoy the story about the house but will be makeing a change on my front door Thanks to you.
Loved the spring wreath with paper flowers with button centers. It is perfect for my sewing friends. My granddaughter and I (she is 5) just completed a dried rose wreath made with her mommy’s Valentine’s bouquet and mine. Between the dried flowers we inserted baby’s breath and eucalyptus on a grape vine wreath. It turned out sensational!
I am so going to do this, One wreath for all year great idea and saves storage space. thanks
I absolutely love it. What a very, very pretty wreath. So fantastic that you are changing it for each season. Brilliant actually! : )
I have the same wreath and I am SO impressed at how much you’ve changed it up! The peacock feathers make me SWOON!
Such a fun, sunny, eye-catching wreath! Splendid job and sweet of you to include a tutorial.
What a completely adorable wreath ~ I love it!
Have a Happy Labor Day!
This is such a gorgeous wreath and I love how you revamp it for each season!
That is BRILLIANT! i’M SO LOVIN’ IT!
fabulous wreath, the colours are beautifully fresh, thanks for sharing this fun creative project
I have been looking for a new spring wreath for a while without success. Nothing seems right for one reason or another. I came across your blog and realized I can just spruce up something I have and give it new life! Thanks so much!
What a darling wreath… all year long. Very creative and I just might have to try this to!
What a fun stop.!
You made my Saturday Seven this week! Love these flowers, Brittany! http://www.positivelysplendid.com/2011/03/saturday-seven-no-3.html
This is a FANTASTIC project. Great idea! I would be delighted if you would link this to my VIP party today! http://designergarden.blogspot.com/2011/03/vip-party-6.html
Cheers!
Sommer
Those paper flowers are so cute! You are rocking that wreath!
this is so beautiful! you have done an amazing job with this wreath! your collection of all your creations should be on HGTV or something. seriously. ALL of them are beautiful.
thanks so much for your support on the party & just a few seconds ago on twitter. i appreciate you more then you know!
thanks for linking up to the Spring Fling!
take care!
xo
kelie
I really like this one. I think it is my favorite.
What a cute idea. I love all the scrap book paper but I don’t scrap book 🙂
These wreath suggestions/ideas are fantastic! Thanks for showing how diverse a simple wreath can be. I’m new to your blog and a big, big fan!
Great transformation. I love that its so springy and looks more real than the silk flowers you can buy. I love it!!
Wonderful how you remake this throughout the year. Love the button flowers.
Beautifully done! I’ve got a similar wreath to start with–now I know what to do with it! 😉
I LOVE wreaths and yours turned out beautiful!!
I thought I’d seen just about every wreath combination out there but your wreath is very pretty and unusual. The yellow and orange really make the wreath pop. I’m enjoying the change!
If you hadnt said so each time you transformed this wreath Id never know. They all look so different from the other (but in a GREAT way)
I love your paper flowers! So cute. I’ve done a ton of wreaths (ex-florist) but never with paper flowers. Love the pop of Spring. Bring it on . . . I’m ready!
I love all your wreath’s “outfits” and this one is awesome as well! It gives me an idea for my poor “naked” wreath, I better get crackin’! Thanks for all of your inspiration!
This is the best one yet!
That is such a darling spring wreath! Great job!
Brilliant idea in “redecorating” the wreath … especially since you’re doing such a beautiful job of updating and redesigning!
It hardly even looks like the same wreath season to season!
What an awesome challenge! 🙂 Your wreaths are beautiful!
Love love LOVE this, Brittany! Absolutely lovely! Consider it Stumbled. 🙂
So cute! I love that you can change it out according to the seasons/holidays. Such a great idea. I put it on my TT&J FB page and stumbled it 🙂
xoxo
Jen
Super darn cute. I just pulled down my grapvine wreath to give it some spring! I love these little flowers.
I always pick up those wreaths and then put it back down because they just look too blah…not anymore …I love all the things you have done with it…
You are so talented! I love your creativity in taking one wreath and transforming it for each holiday. I want to make flowers with a button center! Good job!
That is soo cute.
I am loving all the spring colors that are happening here right now.
I have got to get out this weekend and take some down at the lake.
So cute!
That is such a fantastic idea and I really like how you use the same wreath for all the different seasons!
That is really cool. I’m inspired. I wonder if I could do something like this?
This looks beautiful…I love the bright colors of red and yellow for Spring! I just wish we had some sort of sign for Spring…we just got another 12″ of snow last night 🙁
~Jenna, SAS Interiors
http://www.sasinteriors.net
A-dor-able! Those little flowers scream spring. I’m loving your magnolia tree picture too…beautiful. I don’t get to see thing like that living in the high dessert. We just got about 4 more inches of snow this morning too. 🙁