
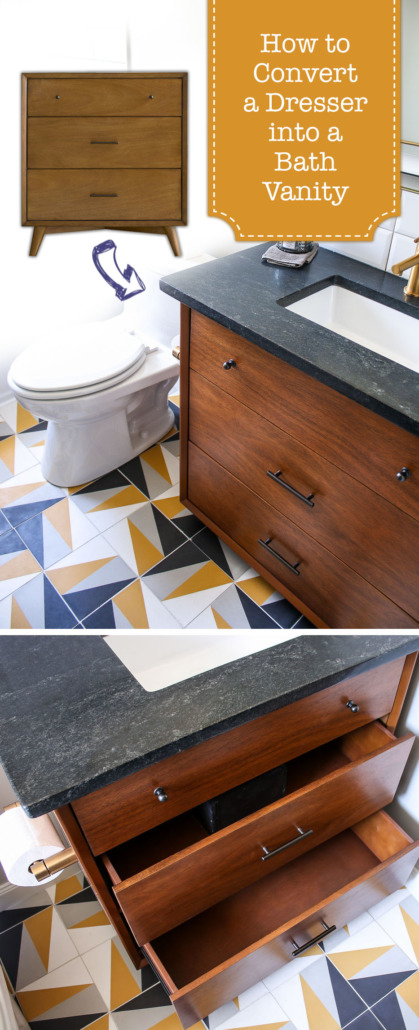
Turning a Mid-Century Modern Dresser into a Bathroom Vanity
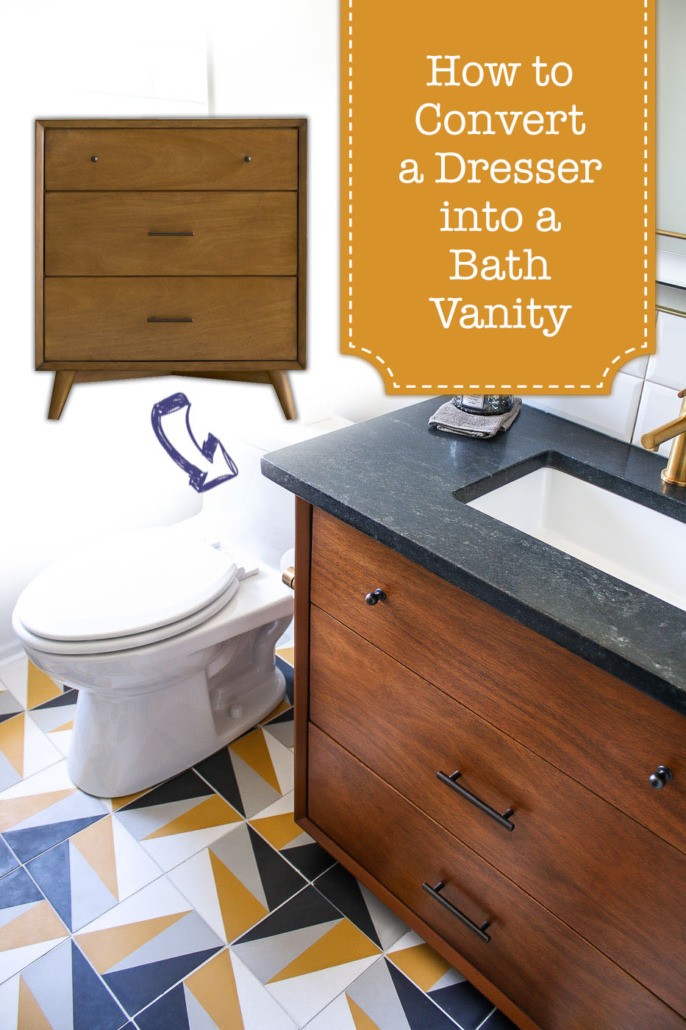
Do you love the mid-century modern style, but find the selection for bathroom vanities severely lacking? Today I’ll show you how to turn a modern dresser into a vanity including how to alter those drawers to work around the plumbing.
Turning a Mid-Century Modern Dresser into a Bathroom Vanity
Hello out there, is anyone still listening? I’ve been a bit delayed on getting the Millie’s Remodel updates and tutorials live on the site. (I shared why I’ve been offline here.) Today I have the much asked for tutorial and I’m excited to share how to turn a mid-century modern dresser into a bathroom vanity.
(I’ve included affiliate links for your convenience. I earn a small percentage from a purchase using these links. There is no additional cost to you. You can read more about affiliate links here.)
While working on the Millie’s Remodel project, I looked everywhere for a vanity for the main bathroom. Unfortunately, I didn’t like any of the options available. They were either too expensive or they looked cheaply made. So, I ordered a dresser very similar to this one:
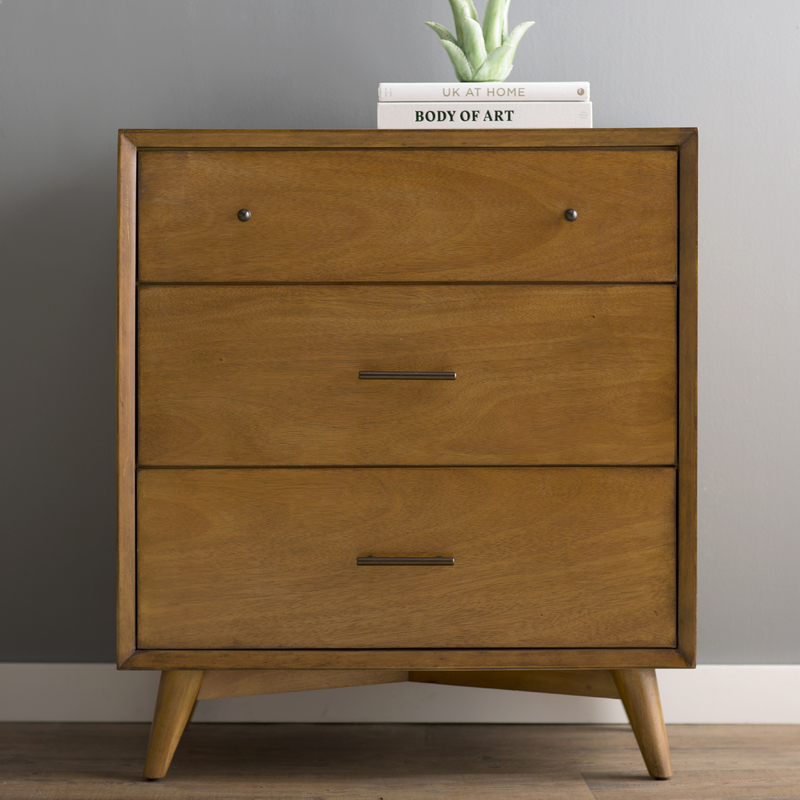
(The actual dresser I ordered is no longer in stock, but this one is a good look-a-like.) When it arrived, I was incredibly happy with the mid-century modern style look I was craving, but I knew I needed to make some modifications for it to accept a sink and the plumbing underneath. Luckily, I’d been “looking under the hood” of a lot of bathroom vanities and taking notes on how to modify the drawers to fit around the plumbing.

Average Height for a Bathroom Vanity:
Back in the day, bathroom vanities were 30 – 32 inches tall. Today, as our average height is growing, most people prefer 34 – 36 inches for a bathroom vanity height. If you’ve ever seen vanities that are shorter than 30 inches, it’s usually because the floor was laid and/or built up around the vanity instead of the vanity being set on top of the tile. In fact, Millie’s bathroom vanity was a mere 28 inches tall. It was ridiculously short.
When shopping for your vanity dresser, keep the final height in mind looking at the dresser height. Don’t forget to account for the countertop thickness if you will be adding a new top. Typically countertops are 1.25 inches thick.
Modifications to Turn a Dresser Into Bath Vanity:
- Remove the legs (if the vanity will be taller than 36 inches once the countertop is added)
- Secure the top drawer face (or use hardware to create a tilt out cubby)
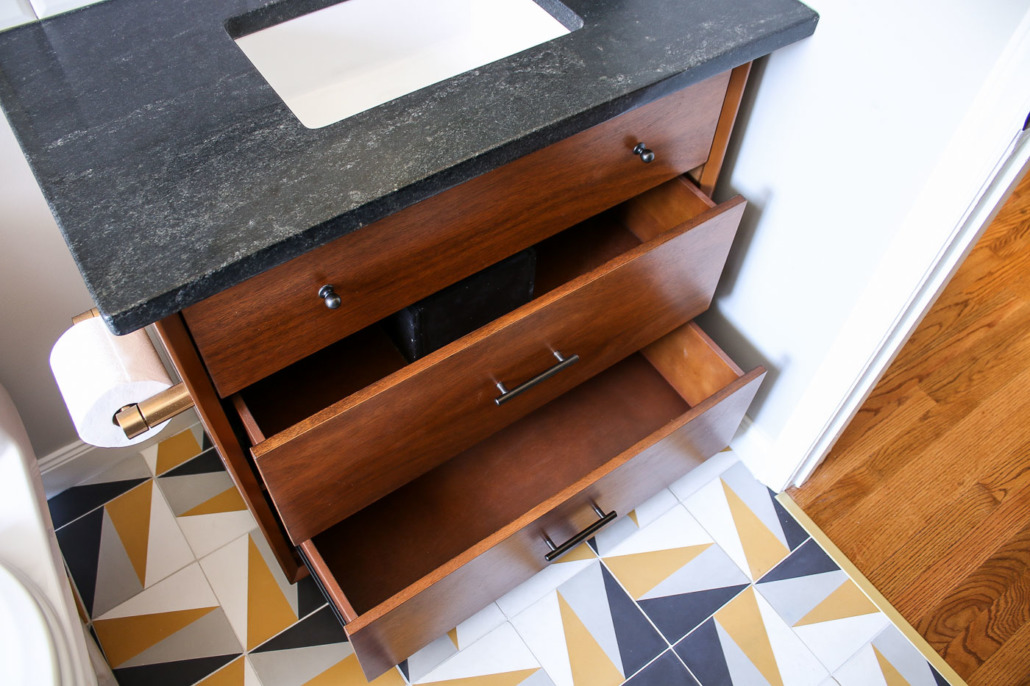
- Modify the second (and possibly third drawer) for the plumbing
- Choose a countertop
- Install a faucet
- Add a sink
Countertop Options for Dresser Turned into Sink Vanity:
The sky is the limit when it comes to countertop options for your dresser. Granite, quartzite, or other stone materials provide an attractive and long lasting surface for your vanity. Keep in mind Marble, soap stone, concrete, and other soft stone materials may etch and require more upkeep. Cultured marble, granite, or quartz would provide a more durability surface. Laminate countertops are a very affordable option for your new sink vanity. Any countertop you use in the kitchen can be used in your bathroom. I’ve seen many people keep the original dresser top and cut a hole for a sink or set a bowl sink on top. A word of caution, if you’re using the original wood dresser top, protect the wood with several layers of a marine varnish or other strong topcoat. Also, try to wipe up any water droplets from the surface immediately. (Using the existing top of the dresser means a lot more maintenance to protect from scratches and water damage.) You could rationalize a more expensive countertop by comparing the time and energy used to maintain each top.
How to Turn a Dresser into a Bathroom Vanity:
It’s time to take that dresser and turn it into a beautiful and functional bathroom sink vanity. Let’s gather a few supplies first.
Materials:
(I’ve included affiliate links for your convenience. I earn a small percentage from a purchase using these links. There is no additional cost to you. You can read more about affiliate links here.)
- Scrap 1/2″ plywood
- Furniture Legs
- Clamps
- Brad nail gun
- Dremel UltraSaw or Jigsaw
- Wood Glue
- Tape Measure
- Drill
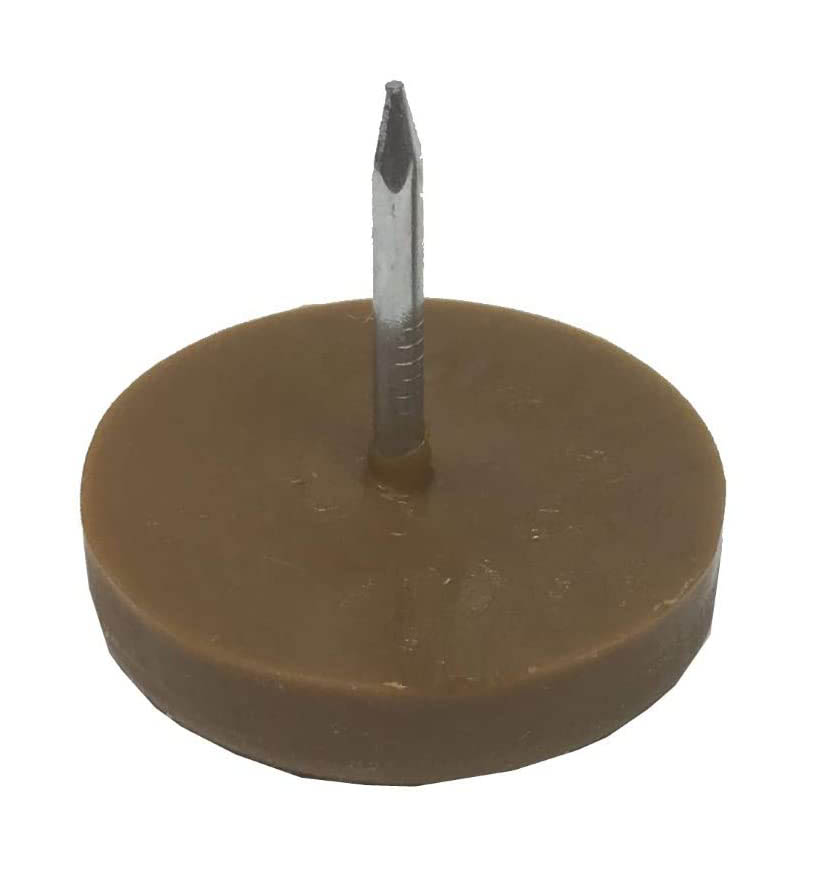
- Nail-in floor protectors
- General Finishes Matte Top Coat
- Foam Brush
- Baby Wipes
Optional: Table Saw
Video: How to Convert a Modern Dresser into a Sink Vanity
I made a video tutorial to show you exactly how I converted a mid-century modern dresser into a modern bathroom sink vanity. (Of course, I also tried to insert some humor into the video, so I hope you get a few laughs.)
Instructions:
- Determine the final height of your vanity. Subtract for your countertop. Determine if you need to remove or alter the legs to achieve the desired height.
- Remove the top drawer. Next, remove the drawer slides for the top drawer because these can be saved for another project. Save the drawer face. (You may need to remove the drawer knobs to disconnect the drawer face from the box.)
- Secure the drawer face to the face frame of the cabinet with screws. If your cabinet doesn’t have a face frame, add some blocking inside the opening for securing the drawer face to.
- Measure the location of your plumbing pipes (height off the ground, depth from the wall, side to side measurements from the side walls, and finally how wide are the pipes). Don’t forget to account for the drain, p-trap, and shut-off handles if your plumbing is new and simply stubbed out of the wall or floor.
- Remove the second drawer. Transfer the measurements for the plumbing onto the bottom of the drawer.
- Cut a hole in the drawer for the drain and plumbing pipes.
- Measure the cutout and create new sides, using plywood, to close the cutout back up.
- Secure the new sides with glue and finish nails. You may need clamps to hold the sides as you attach them.
- Paint the new sides and/or finish with a protective topcoat to protect the drawer from water.
- Cut out the top of the dresser to make room for the sink and faucet (unless you are opting to use the dresser top as is.)
- Re-insert the second drawer. Install the vanity in the bathroom.
- Install the countertop, sink, and faucet.
Waterproofing Your Vanity:
Depending on the finish of your dresser, you may want to paint or seal it to protect the new vanity from water damage. To protect the legs of the vanity, you may want to add nail-in floor protectors to the bottom of the feet. This will lift the dresser off the ground should any water spill or puddle under the vanity.
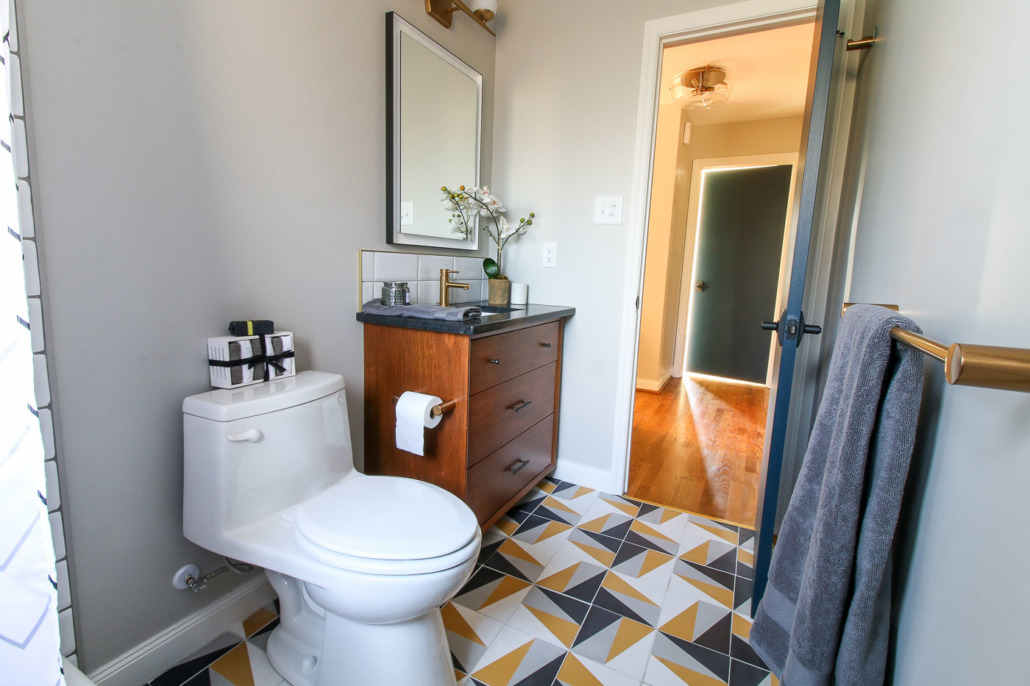
Final Result:
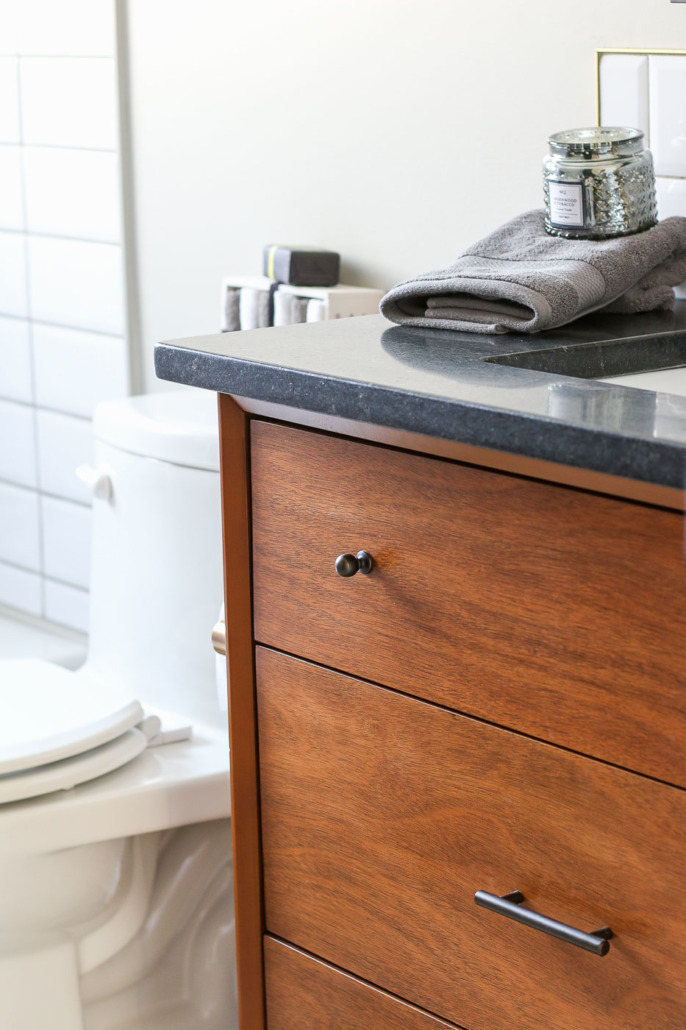
I found a remnant of granite at my local countertop fabricator. It’s honed Negresco granite and I love the dark black color on the wood vanity. It has a similar look to soapstone, but much more durable.
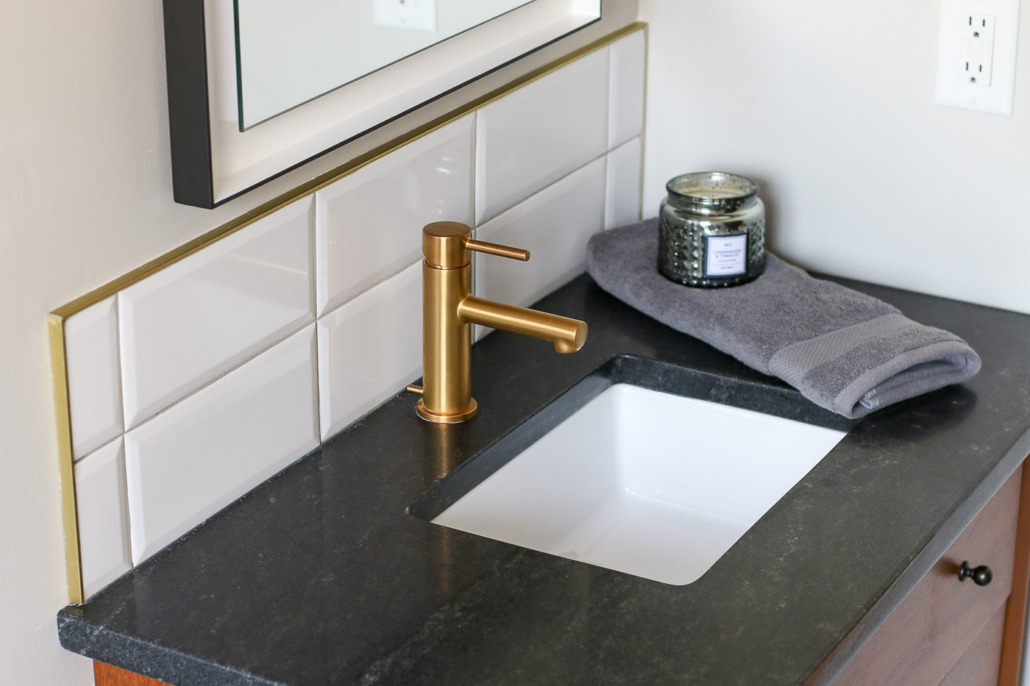
The faucet I used is the Moen Align faucet in brushed gold. I created a backsplash using a few leftover tiles from tiling the tub surround. For a beautiful finished edge, I used a Schluter satin brass jolly profile to frame the tiles.
The drawers hold a decent amount of toiletries and fit around the plumbing without any issues.
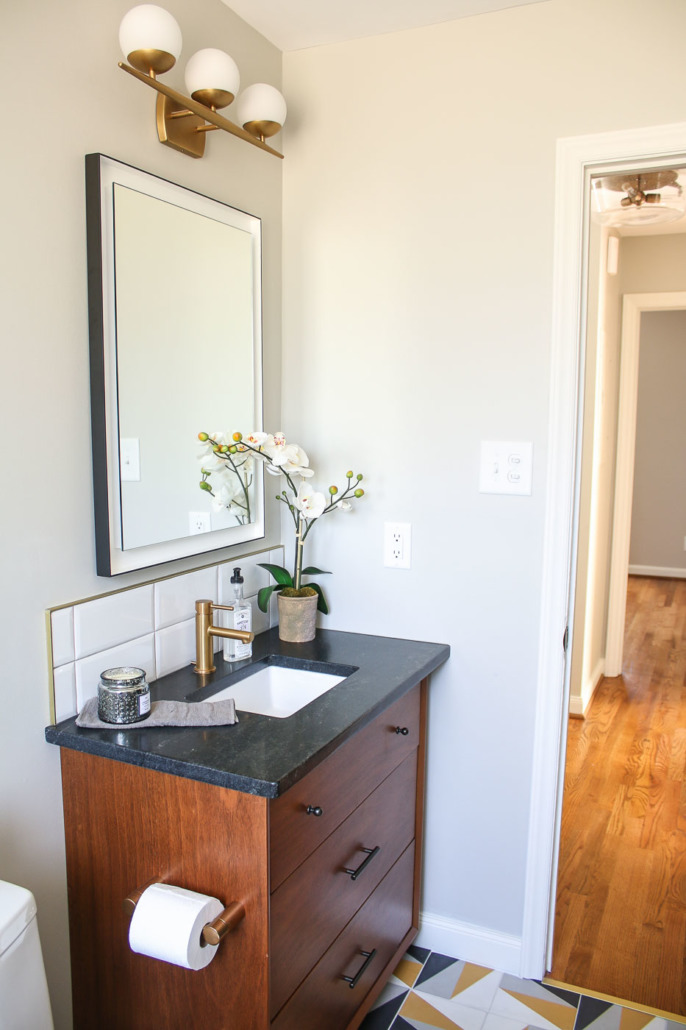
The lighting was provided by Kichler, one of the Millie’s Remodel sponsors. The minimalist Ryame lighted mirror is perfect for applying makeup or just giving the perfect amount of soft lighting. And the Jasper 3 light wall fixture has all the mid-century modern style this house needs. Fun fact, you can hang this light facing up or down. Your choice!
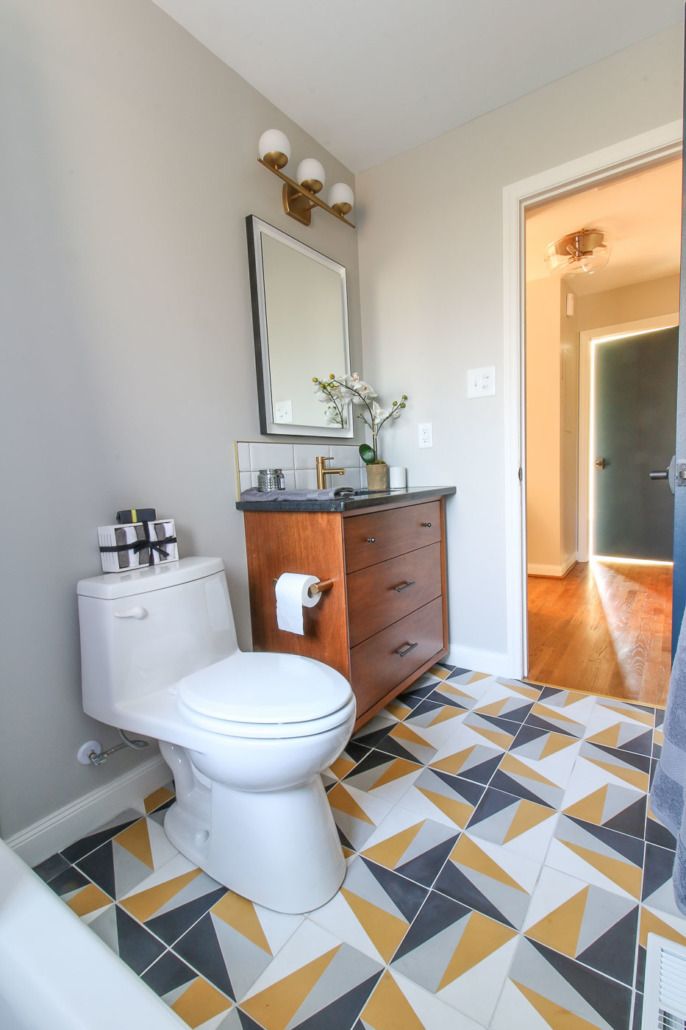
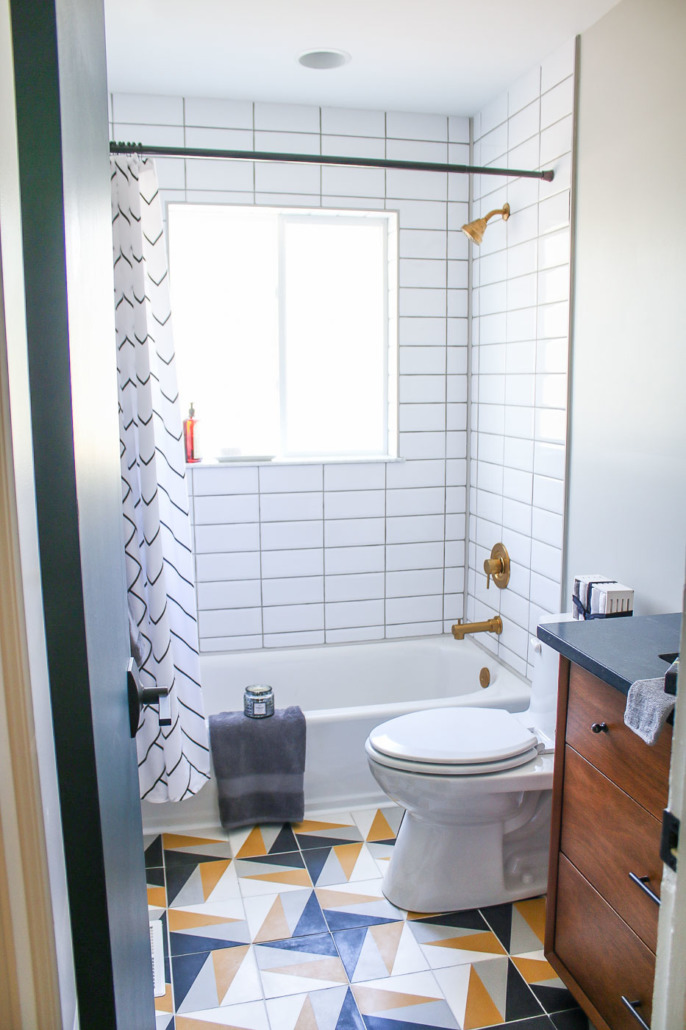
Can you believe this is the same bathroom? I love how it turned out.
Before:
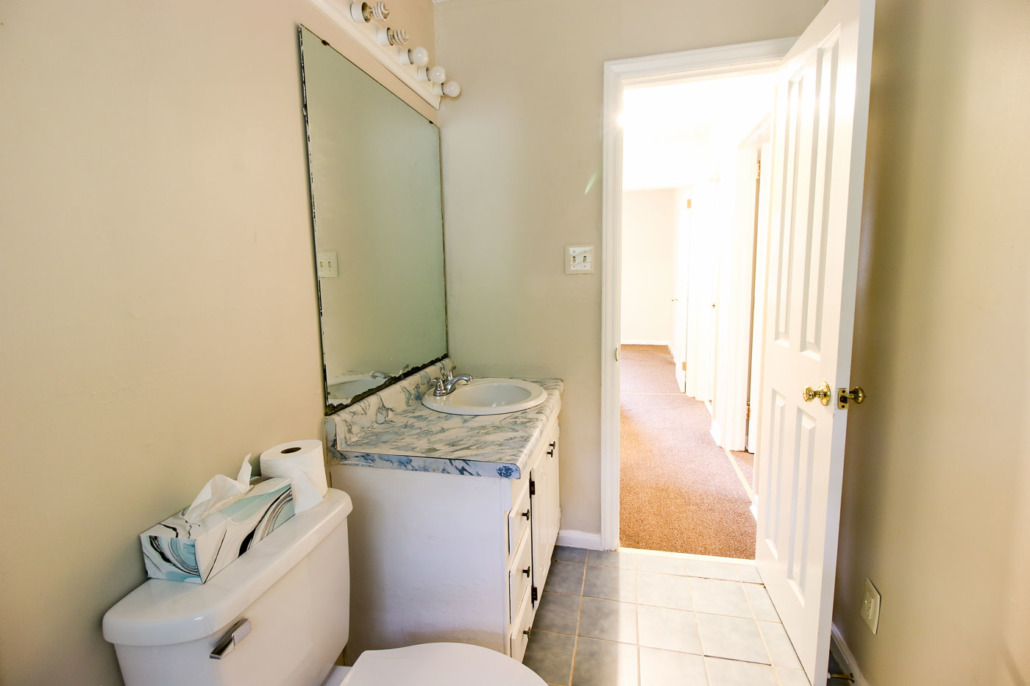
After:
Before:
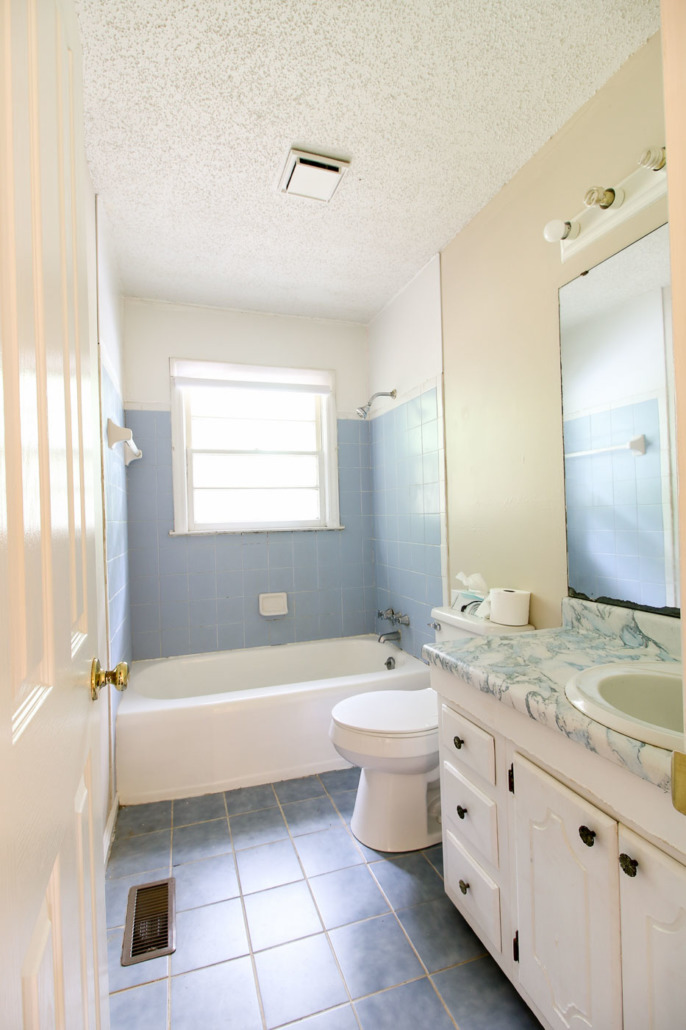
After:
Stay tuned for the next Millie’s Remodel update. I’ll be giving you the full tour of the house and it will be filled with loads of before and after pictures!
Do you enjoy the videos I’ve been sharing? Are you subscribed to my YouTube channel? This is one simple way you can thank me for sharing this content with you for free. Click here to subscribe to my channel.

Psst, if you really want to follow my daily adventures, you can follow me on Instagram. I share most of the projects I’m working on in real-time there.

Take care and see you soon.

Pin this post to share with a friend!


Hi, beautiful bathroom and great project! I didn’t see a link or reference to the great floor tiles you used – love them! Can you share who makes them or a link?
Thanks, Veronica
Veronica, sure thing. This is the post with more information about the tile floors: https://prettyhandygirl.com/millies-remodel-tiling-the-bathroom-floors-cement-tiles/
Hi, Brittany. LOVE the dresser that you turned into a vanity for your bathroom. I am remodeling my powder bathroom and I need a small sink. Can you tell me what brand/size you used in this project?
I am also using Negresco granite–glad to see it in action in your bathroom.
I bought a small rectangular sink by Kohler.
I REALLY want to do this with an older dresser but dressers are so much narrower than most regular vanities. My husband is reluctant to make the effort. Your sink and faucet doesn’t look cramped. Did you use a smaller sink? The bathroom is beautiful!
Yes, the sink is not very deep (front to back)