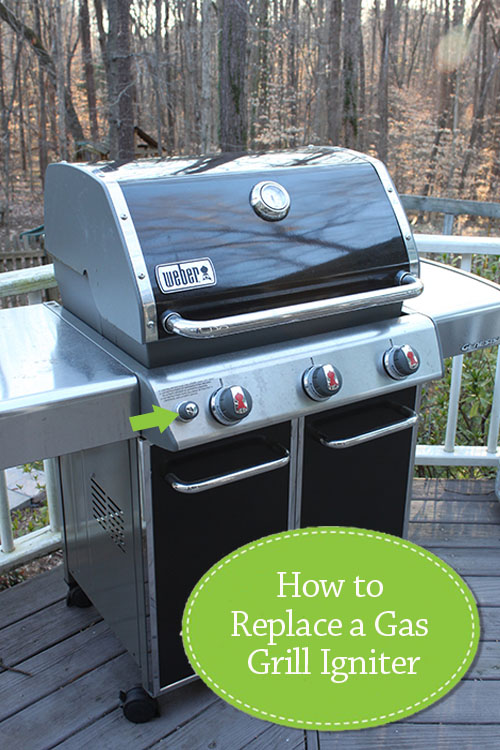
How to Replace a Grill Igniter
 How to Replace a Gas Grill Igniter
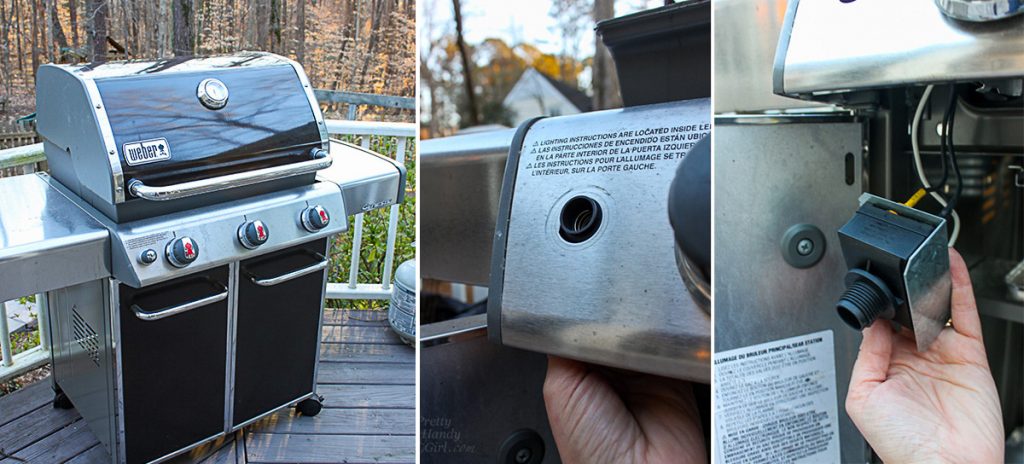
Nothing beats using a gas grill to make a quick, delicious dinner! However, when the electric igniter no longer works, you may be tempted to throw up your hands and buy a new grill (or cook inside forever more.) WHOA! Before you go to extremes, I’ll show you how easy it is to Replace a Grill Igniter.
Recently I’ve been ordering parts from SearsPartsDirect.com to fix all our broken appliances. When Sears Parts Direct approached me about writing this sponsored post, I naturally replied “Yes, of course I’d love to share my source for appliance parts!” And, I want you all to know my secret for saving money on appliance fixes. With this legal explanation out of the way, let me show you how easy it is to replace that grill igniter that is no longer working.
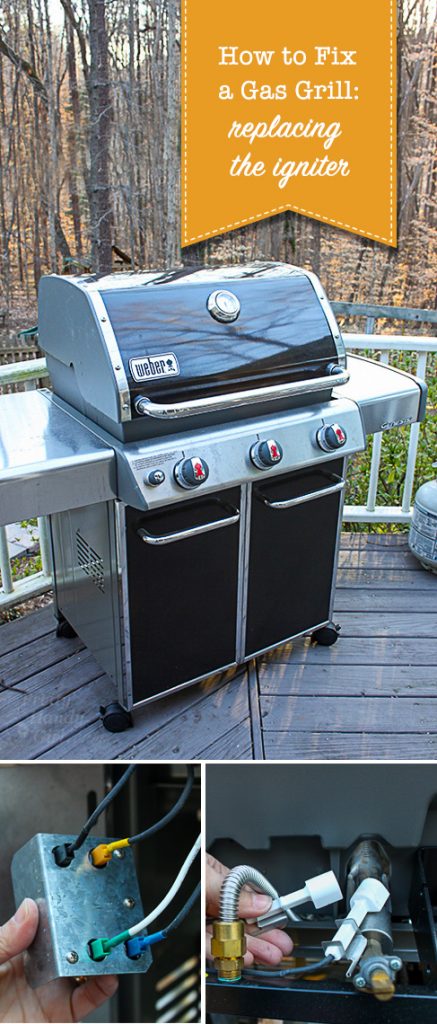
(Note: The grill I’ll be repairing is the Weber Genesis 310 model. But, Sears Parts Direct sells parts for all major grill manufacturers and the instructions are similar for replacing the igniter on other models. Be sure to check your owner’s manual for accurate replacement instructions.)
Materials:

(I’ve included affiliate links for your convenience. I earn a small percentage from a purchase using these links. There is no additional cost to you. You can read more about affiliate links here.)
- Phillips head screwdriver
- Flat head screwdriver
- 5/16″ nut driver
- AA Battery
- Rubber gloves
- Newspapers or plastic (to rest greasy racks onto)
- Igniter replacement wires and/or Ignition Module (Parts for Weber Genesis Grill from Sears Parts Direct)
Optional:
How to Replace a Grill Igniter Instructions:
Make sure the gas is turned off, your grill is turned off, and it is cool before proceeding.
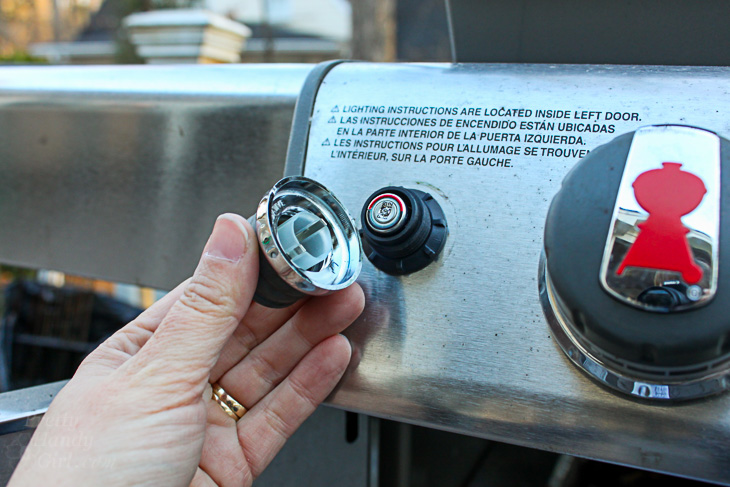
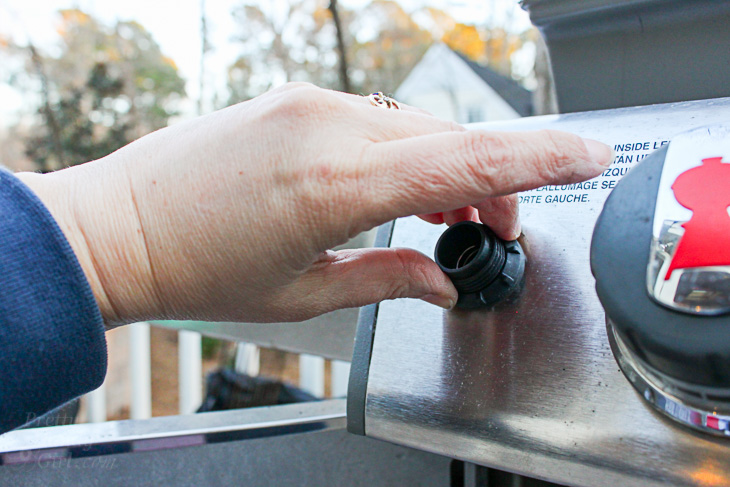
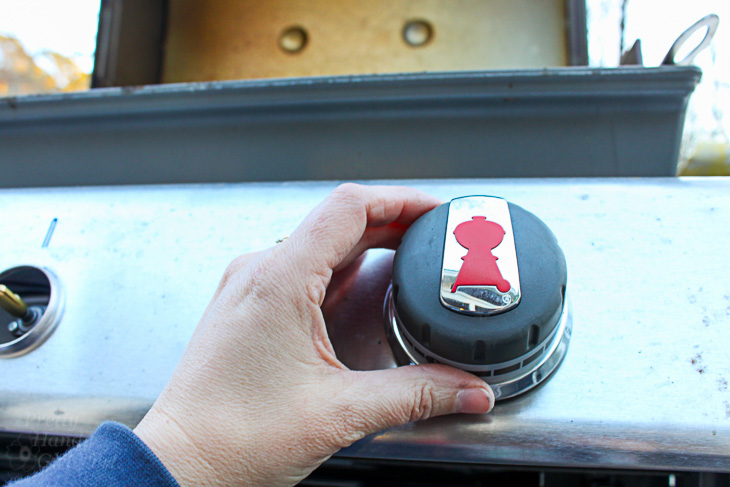
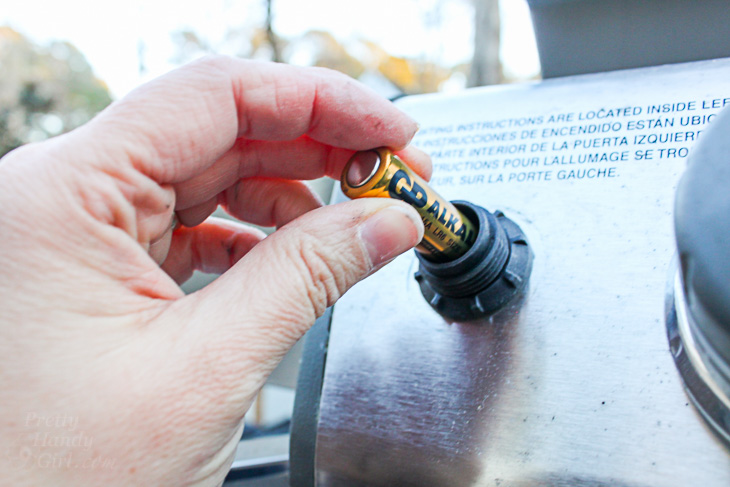
Before you go to the effort of replacing the igniter module and wires, check the battery inside the igniter button. Remove the igniter button by turning the cover counter-clockwise.
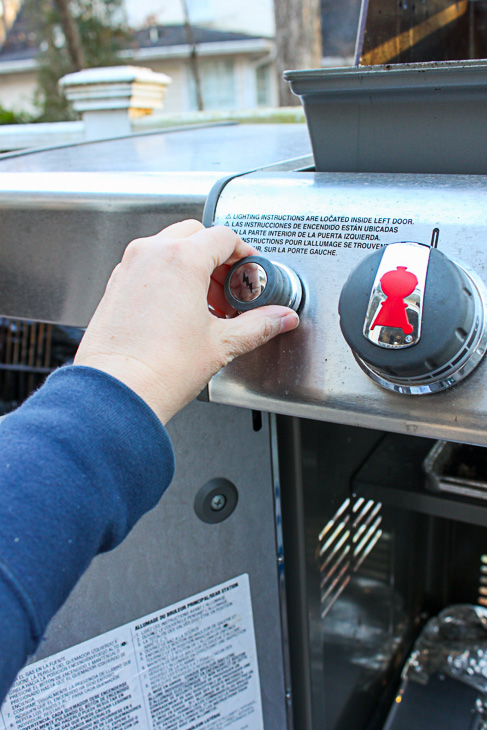
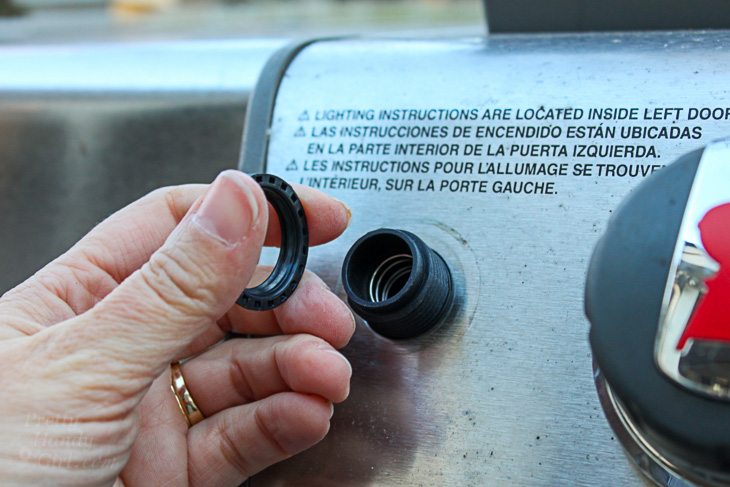
Lift off the igniter button cover to expose the battery.
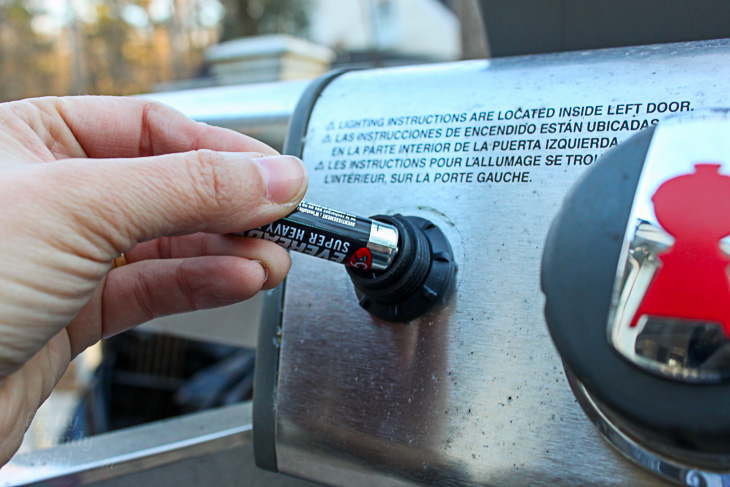
Pull out the AA battery. Replace with a brand new AA battery and replace the cover. Check to see if your grill will light. If yes, great! If no, keep reading.
Put on your rubber gloves and remove the cooking grates and place them on newspaper or plastic to protect the surface from grease.
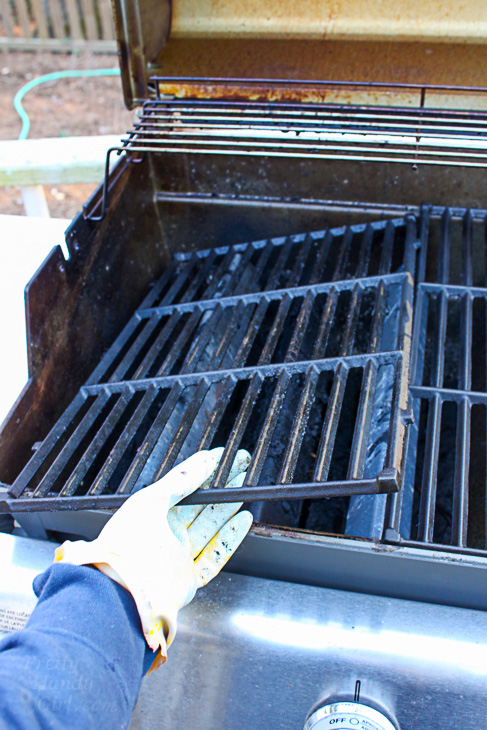
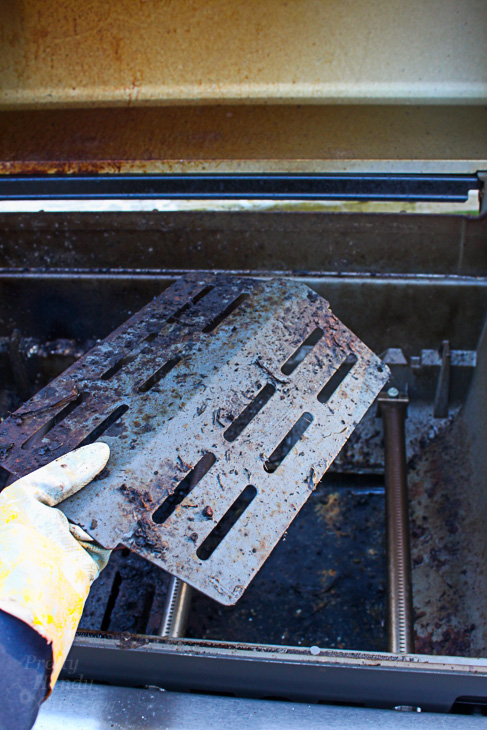
Remove the heat deflectors.
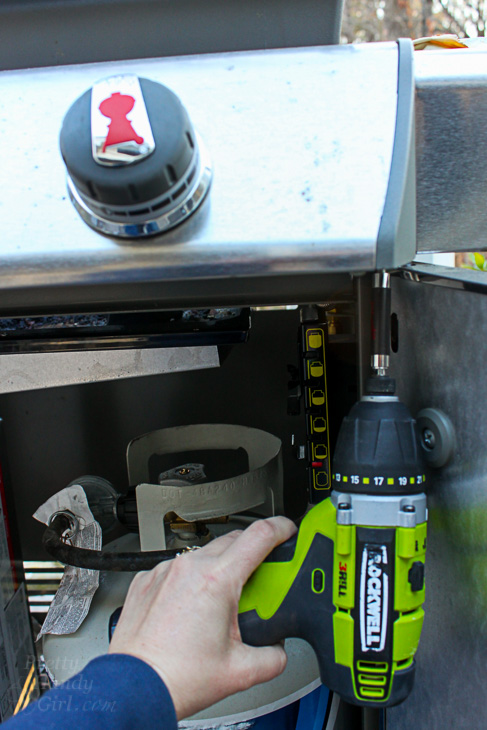
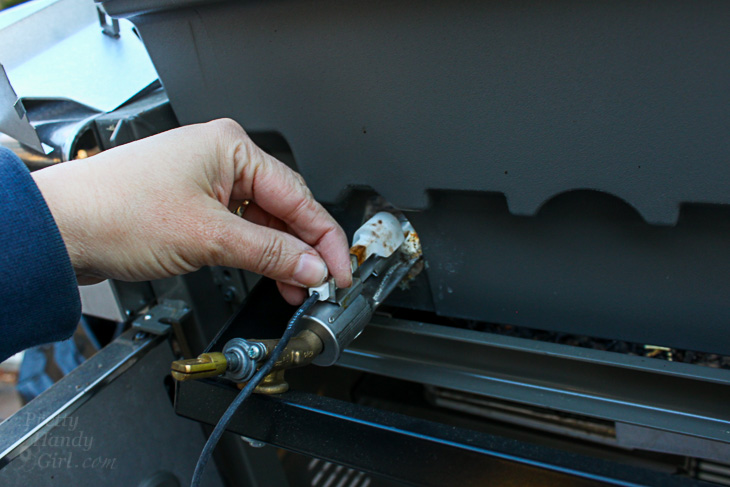
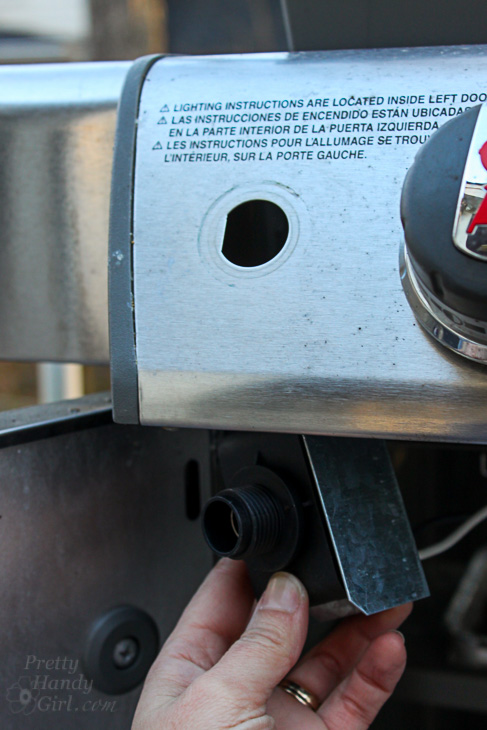
Remove the igniter retention nut by turning it counter-clockwise.
Set the retention nut aside where you won’t lose it.
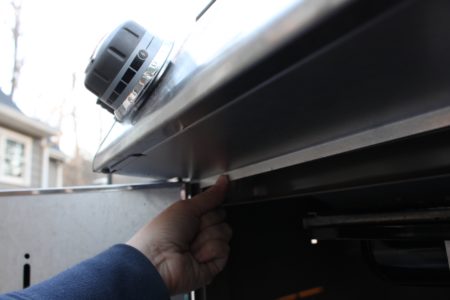
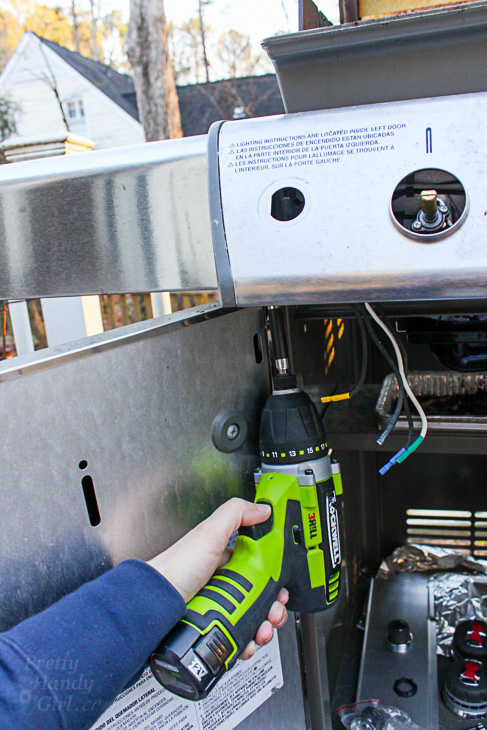
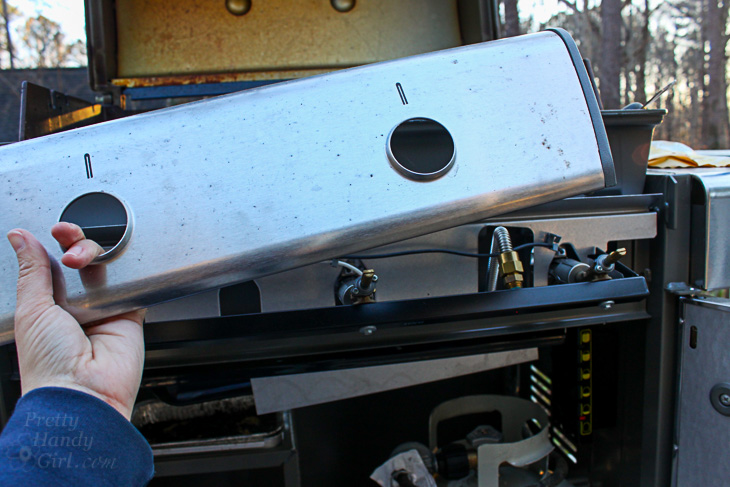
Remove the screws for the wind deflector that are underneath the control panel. There are two screws that need to be removed, one on the far right and one on the far left.
Remove the wind deflector. You’ll need to tilt the back of it down and then slide it out toward the back to remove.
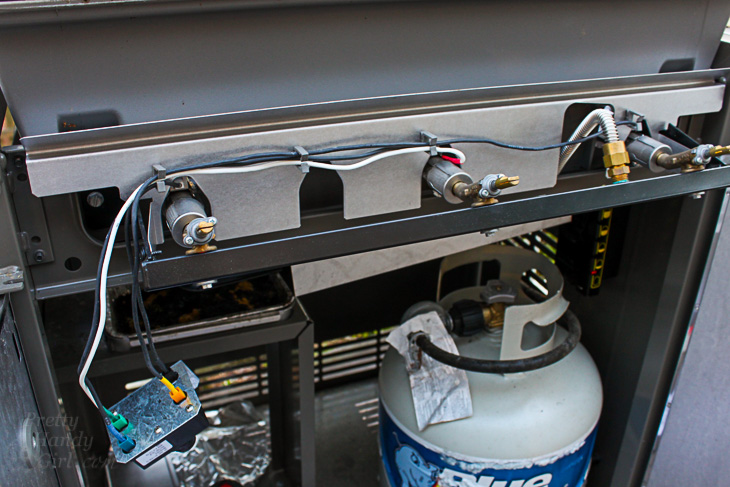
Remove the igniter module by reaching underneath the control panel and gently lowering module.
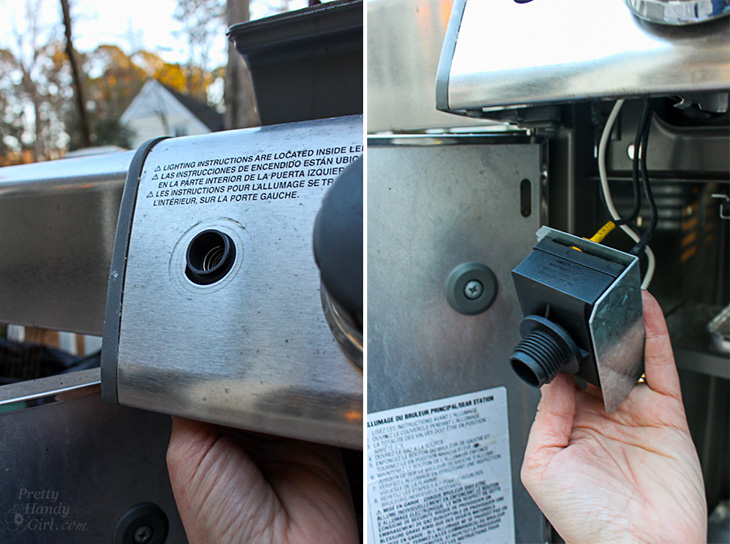
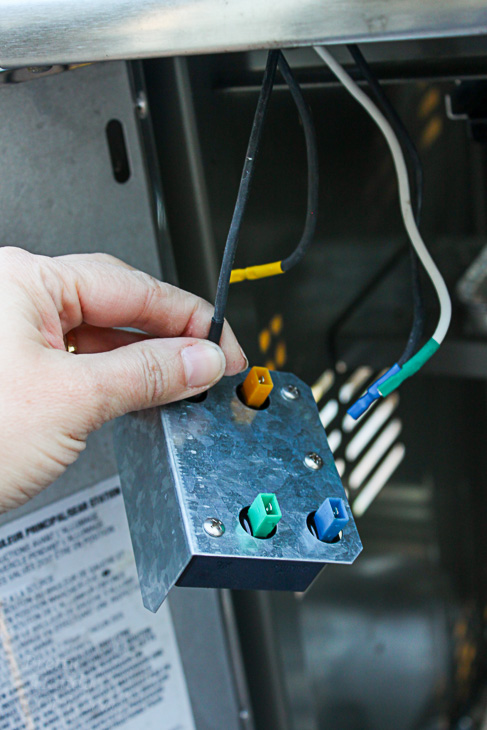
There are wires connected to the back of the igniter module. Make a note of where each wire goes so you will be able to connect the new module properly when the time comes. Let the module hang to the side while you remove the control panel.
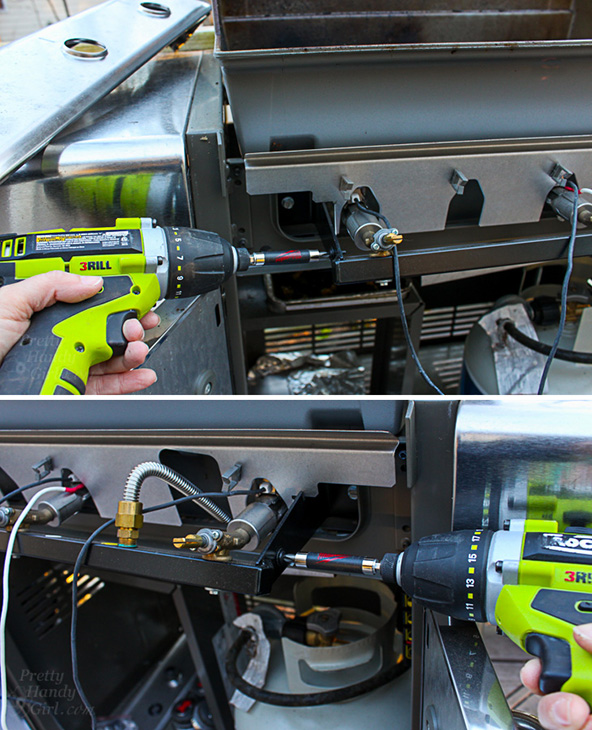
Remove the screws underneath the control panel that are holding it on. These are inside a bracket just above the door hinge.
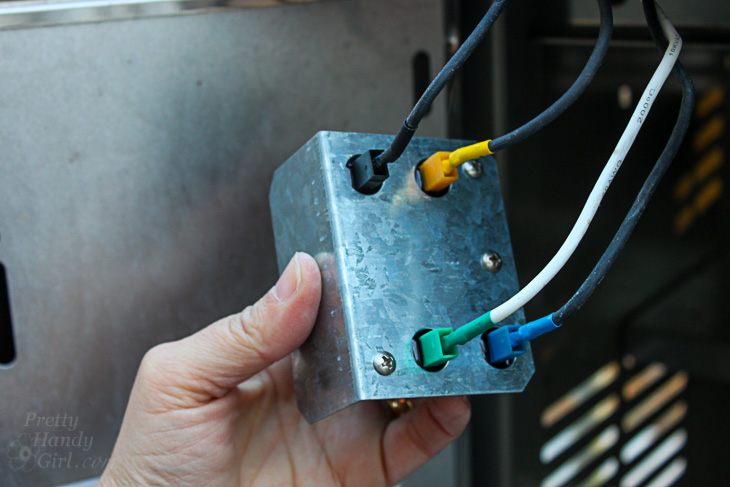
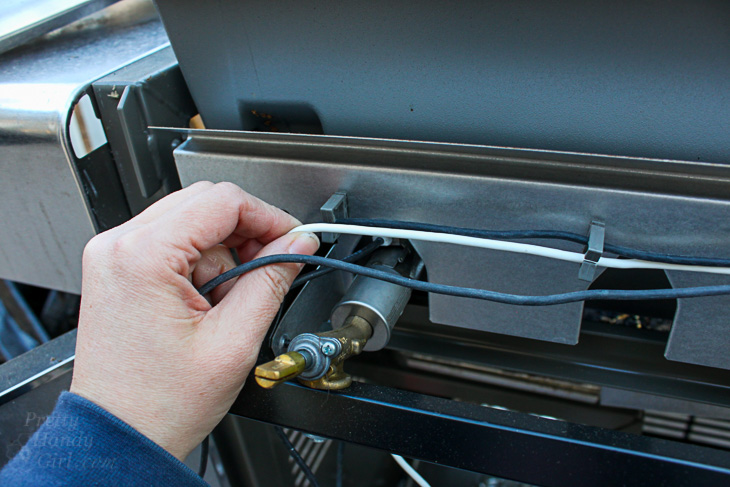
Unplug the wires from the back of the igniter module.
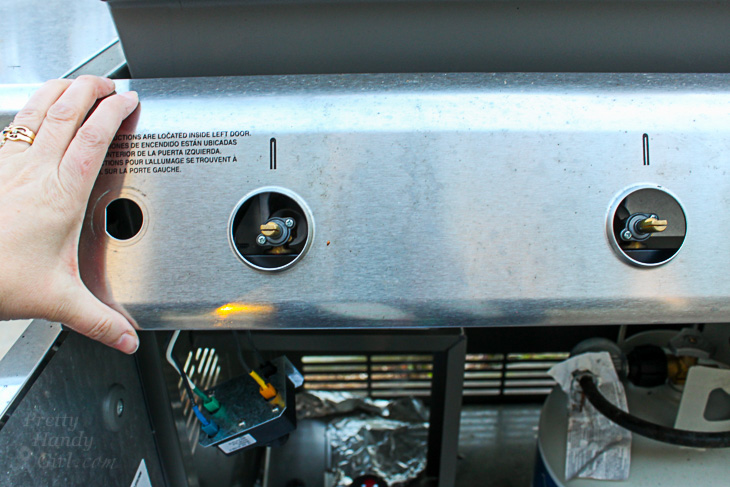
Remove the control knobs on the front of the control panel by firmly lifting them straight off.
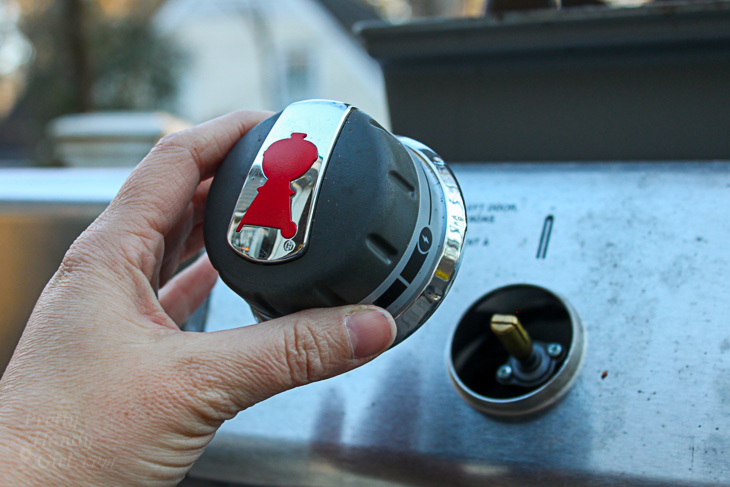
Remove all three control knobs from the control panel.
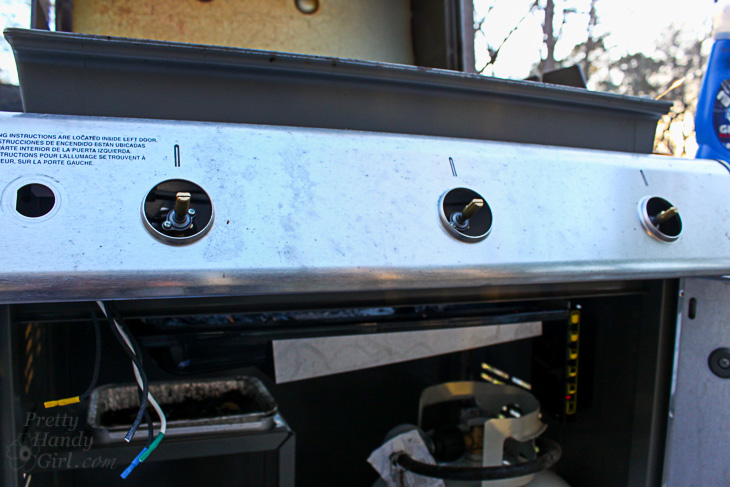
Lift the control panel off the grill and set aside.
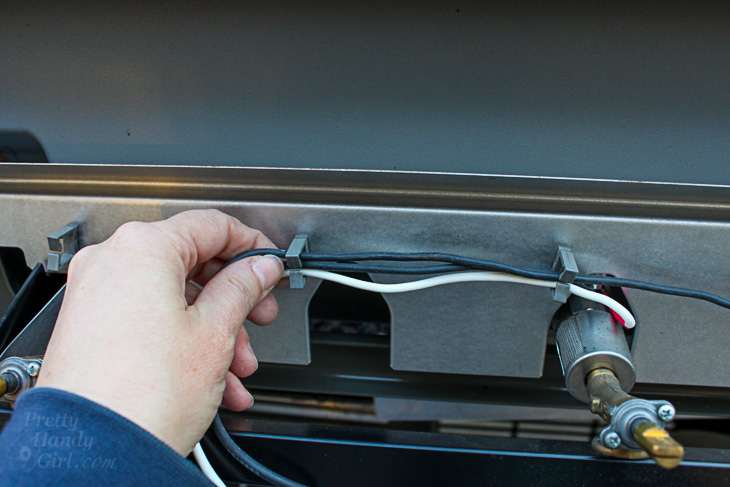
Remove the igniter wires from the wire clips.
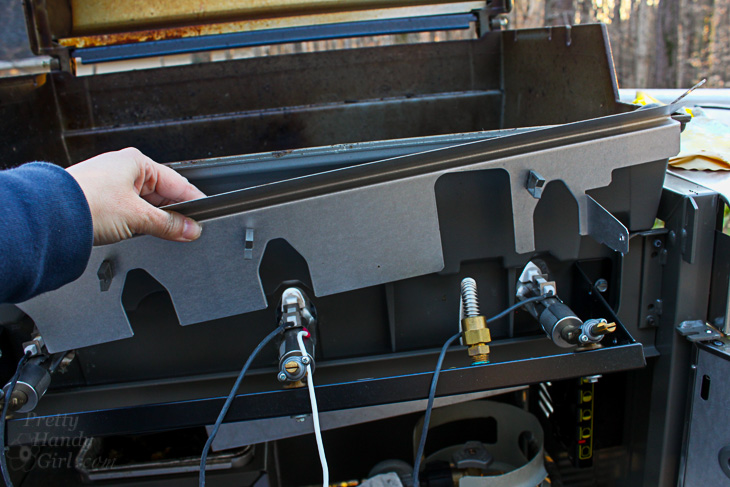
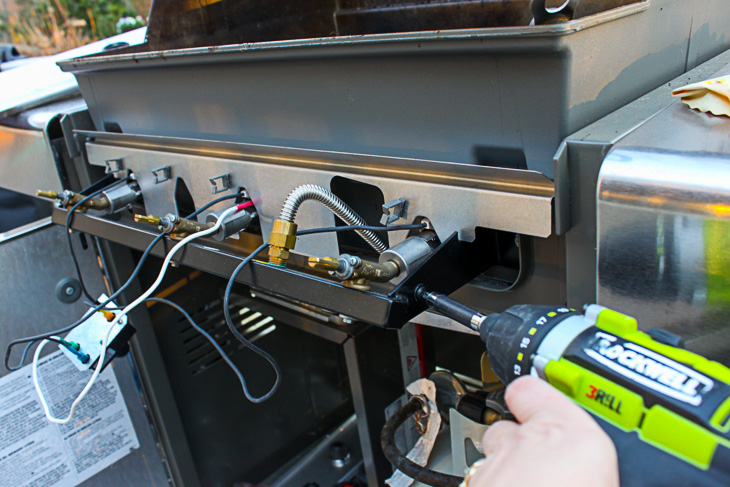
Remove the two screws on either side of the manifold that hold the heat shield in place.
Lift the heat shield up and set it aside.
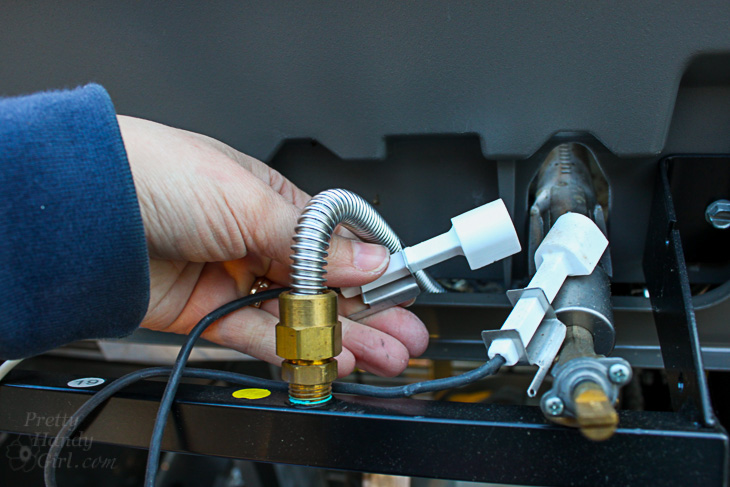
Remove the old ceramic igniter assemblies from each burner.
Replace with the new ceramic igniter assembly (pay attention to the length of the wires, installing the longest wire igniter on the right side.) Make sure you hear an audible click when inserting the assembly onto the burner tube.
Replace the heat shield and screws you removed.
Gently press the wires into the clips on the heat shield.
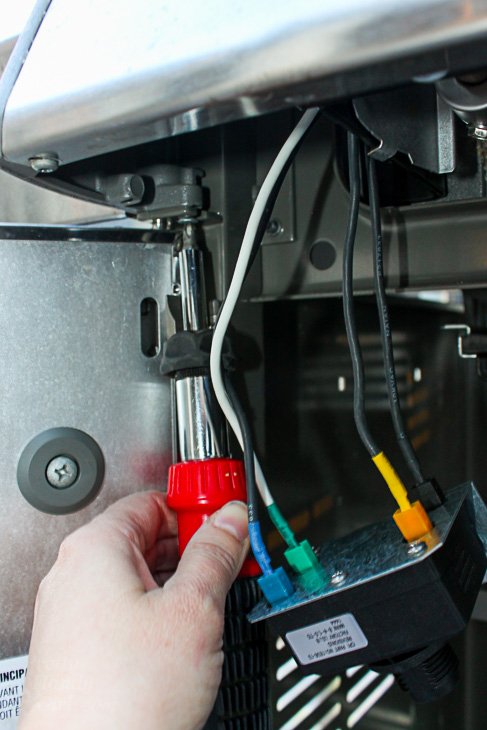
Plug the igniter wires into the igniter module.
Replace the control panel.
Replace the screws to secure the control panel.
Replace all three control knobs.
Lift the igniter module back in place.
Reattach the igniter button retention nut to hold the module in place.
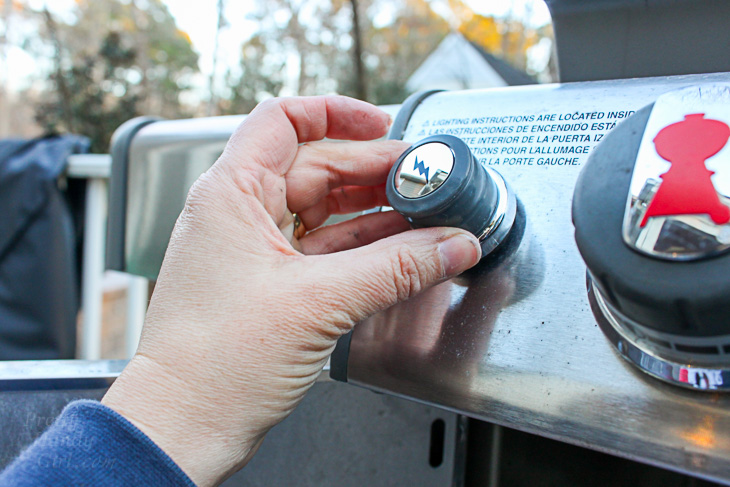
Insert a brand new AA battery.
Replace the igniter button cover.
Replace the wind deflector and the screws to hold it in place.
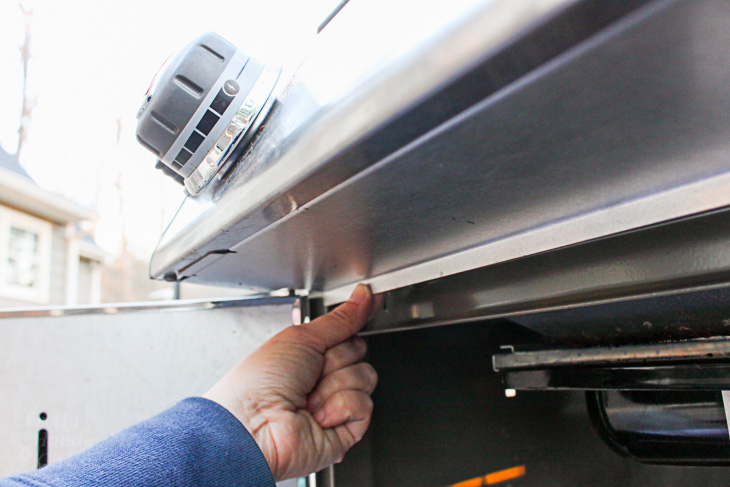
Replace the heat deflectors and the grates.
Fire up that grill to make sure it lights. Then make some amazing grilled corn pesto pizza. . .

. . . some grilled fruit kabobs,

. . . or a variety of other grilling favorite recipes!
Is there something else on your grill that needs repairing? Check out Sear’s Parts Direct to find help with your most common grill repair issues.
What appliance have you been putting off fixing? You really need to check out SearsPartsDirect.com to find that part to make it work again! Also, be sure to follow Sears Parts Direct on Facebook, Twitter, or YouTube to see a variety of repair articles and videos.
Share with a friend, pin this image:
![]()
Disclosure: This is a sponsored post for Sears Parts Direct. I was not told what to write. All opinions are my own. I was compensated for my time and efforts to create this tutorial. I am very particular about the brands I represent. Because I value your trust, you will always be notified when you are reading a sponsored post on PrettyHandyGirl.com.


Your step-by-step instructions were excellent. Even I completed the project with no missteps and it works perfectly. Thank you.
Just like the previous comment, I just fixed my Weber Genesis 330 using your instructions. Thank you so much for providing them. The text and screen shots made the task a snap.
Awesome! Thanks for letting me know.
I relied upon your photos and instructions to replace the 4 burner igniter kit in my Weber Genesis 330. Very well done and FAR SUPERIOR to the marginal instructions included in the kit. Took me about 30 minutes from start to finish. Many thanks.
Wow Britteny, you have so much talent. I don’t think there is anything that you cannot do. I wish I had at least a small piece of your talent. Thanks, as always, for sharing you brilliant ideas, skills, talents
Thanks Ivory. Happy to share!