
How to Paint Doors (The Professional Way)
Many of us have been staring at the same walls and doors in our homes for many years (or maybe many decades.) If you’ve wanted to give your home an update, painting a door is a quick and easy way to do just that. Today I’ll to show you how to paint doors (the professional way) so they look amazing for years (or decades) to come.
How to Paint Doors (The Professional Way)
So you want to paint like a pro? Well, sit back and let me give you some tips and a tutorial for painting a door. This tutorial pertains to any paneled door (interior or exterior).

Our doors are all the six panel type. If you have flat (non-panel) versions, you can skip this post and come back later. For the rest of us, get out your paper and pencils and take some notes (does anyone do this anymore?)
Materials:
(I’ve included affiliate links for your convenience. I earn a small percentage from a purchase using these links. There is no additional cost to you. You can read more about affiliate links here.)
optional: Painting Pyramids
How to Test for Latex or Oil Paint?
To determine if you need to prime your door you need to assess if your door was painted with latex or oil paint first. To test the paint, rub a small spot with rubbing alcohol (or ammonia) and if the paint comes off it is latex. If not, it’s oil paint.
How Do I Know if My Door Has Lead Paint:
You can easily test your door (or any paint) for the presence of lead by using a lead test swab. I go into more detail about lead paint in this tutorial.
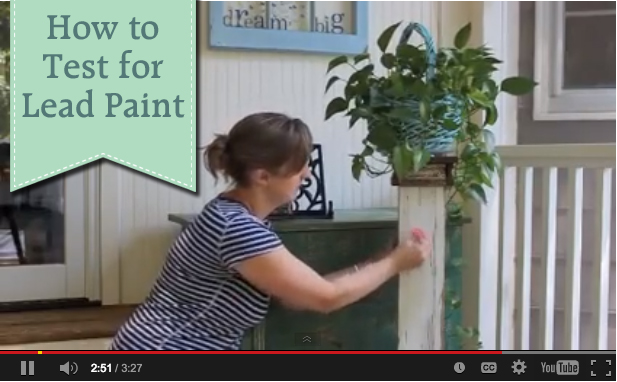
But, the short of it is, if you have lead paint, you must be very careful when sanding it. Cover the area with disposable plastic. Use a wet sanding block (never use a power sander). Wear a respirator and be sure to clean everything with disposable wet wipes.)
When Do You Have to Prime?
As we determined above, if your door was painted with oil-based paint (and you want to use latex paint) you will need to prime. But, here are a few more reasons you need to prime your door first:
- Bare wood or stained wood doors.
- Dark painted doors you wish to paint lighter (or vice versa), you want to use a tinted-primer to cut down on coats.
- If the door was painted with oil and you want to use latex paint. If you are painting over latex with latex (or oil over oil) and the previous paint job is in good shape you can skip the primer. (This was the case with my door, so I didn’t prime it.)
- The paint is chipping. First, scrape or sand any flakes and then prime. (Important: Check for Lead Paint First.)
- Lead paint (whether in good shape or not), you will need to prime.
Should I Remove or Paint a Hung Door?
The easiest way to paint a door is to remove the door, then remove the knobs and latch. Then you can lay it horizontally on sawhorses. Painting a door on sawhorses eliminates potential drips and is easier on your back. But, removing the door can also be a pain, especially if it’s a large solid wood door. I’ve painted plenty of doors without removing them, and they look great. It comes down to personal preference.
Preparation:
Whether you are removing the door or painting it in place, be sure to cover the area underneath with a drop cloth, newspapers, or flattened cardboard boxes (my favorite for hung doors because it gives some cushion when you are kneeling on the floor.
Lightly sand the entire door. No need to bust out the power sander, you can use a sanding block or sheet of sand paper. Be sure to sand down any bumps or blemishes. The main goal is to give your door a little “tooth” for the new paint or primer to adhere to. Wipe off the door with a damp rag to remove any sawdust.
Instructions for How to Paint Doors the Professional Way.
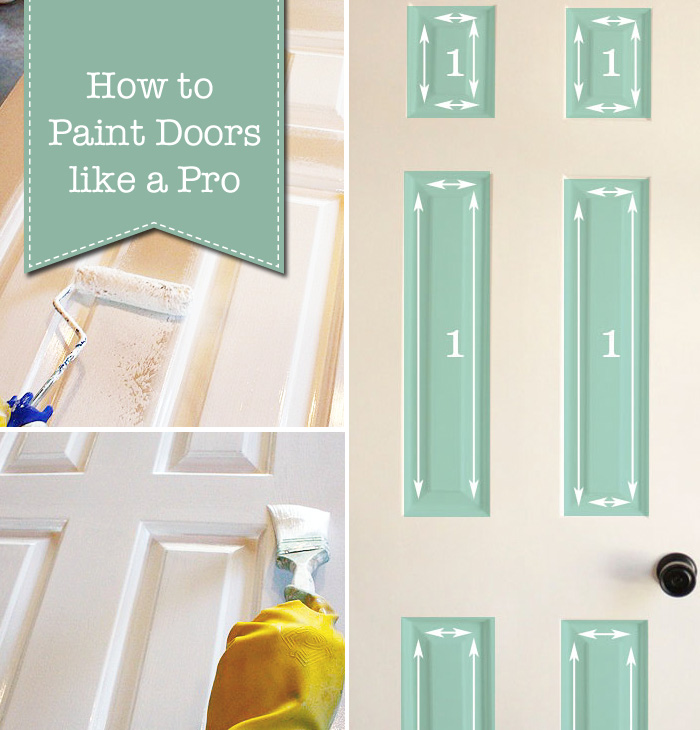
Step 1: Paint the interior panels first as shown in the graphic below.

Using a small roller to paint doors can greatly speed the process. Begin by rolling paint on the flat panels. Work quickly by rolling on the paint, then use a brush to smooth out the paint and fill in the detailed areas around the flat panel.
This is one of the most important tips for getting a professional look:
Follow the grain direction when brushing on the paint
If you follow the grain and the direction of the arrows in the graphic above, you will maintain the look of the door construction. Original wood doors are made with several pieces and the wood grain changes direction. Even if you have cheap hollow core doors, you can fake the look of a quality door by following the grain pattern.

In other words: NEVER run your brush strokes perpendicular to the wood grain. This does NOT look professional.

Step 2: Next, roll the inside center vertical piece. Start by rolling the paint on in an up and down direction.

Then drag your brush up and down vertically with the wood grain (see arrows in the above diagram.)

Step 3: Next paint the horizontal cross pieces in the middle of the door.

Keep your brush strokes horizontal (with the grain) and cross over the tall vertical center.

Step 4: Paint the door border. Pay attention to the direction of the wood grain for this last step. The grain on the two sides should go vertically from top to bottom.

There are header and footer panels sandwiched between the left and right sides. These “sandwiched” pieces should be painted by dragging your brush horizontally (see diagram above.)

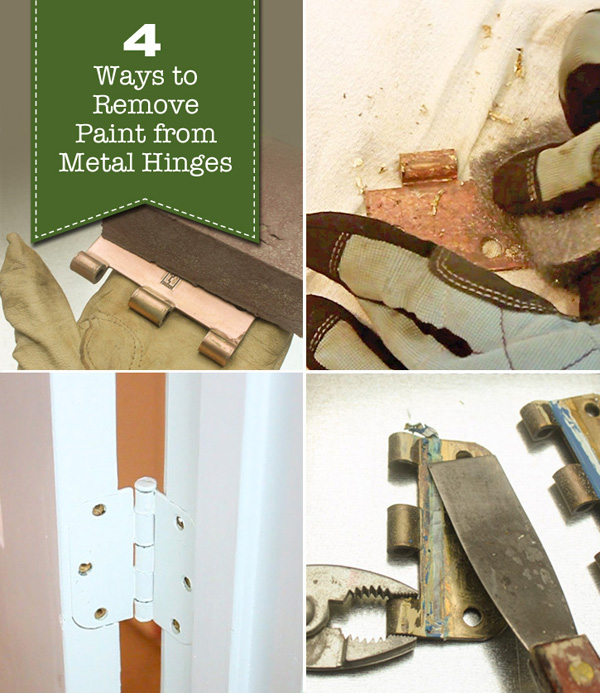
Step 5: The last step is to paint the edges of the door. (Do Not paint the hinges…that’s not very professional either!) If your hinges or doorknobs were painted previously you can follow this tutorial with four ways to remove paint from metal hinges.
Roll paint onto the edges then smooth them with the paintbrush. Be on the lookout for drips or puddles of paint. Go back and check the face of your door for drips now before the paint cures.
Let your door dry (30 minutes – 1 hour), then follow up with a second coat of paint. When you are done let the doors dry for 2+ hours before flipping to paint the other side. I have found that it helps to put pieces of cardboard or rags under the door so the paint doesn’t stick to the sawhorses. But you can also buy Painting Pyraminds which elevate the door and hold it on tiny points.
Ready to perfect more of your painting skills? Check out the Paint Week series with 5 Lessons to Perfect Your Painting Skills:

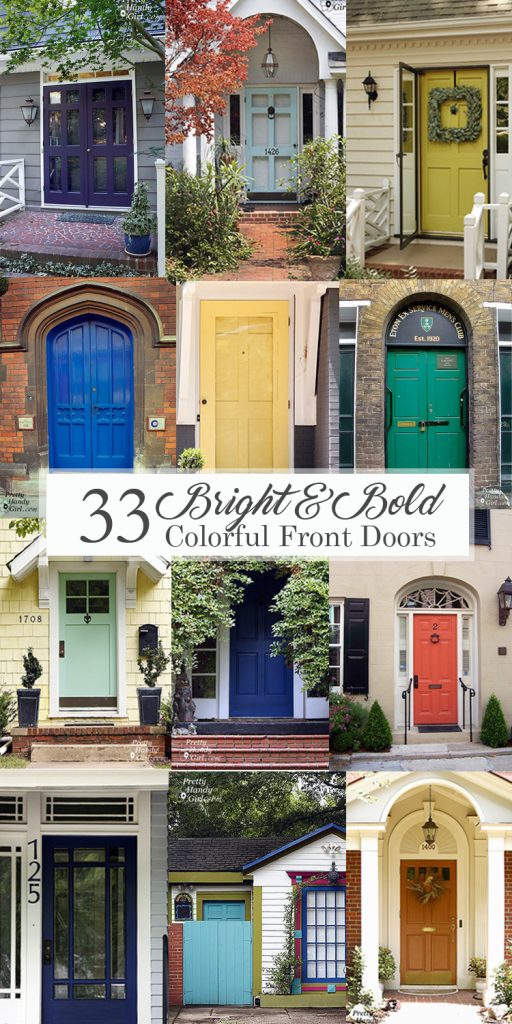
And if you really want to paint your front door but can’t decide on a color, you’ll love this collection of Bold Colored Front Doors!

Well that is a pretty good tutorial on how to paint a door.but my Mom and I just purchased paint from Sherwan Williams that is Self-leveling paint. It works real slick you just paint it on with nice large paint brushes and it flattens out any brush strokes. My Aunt paints for a living and that’s what she uses for all the doors she paints……not rollers!! You just have to move fast when you paint because it acts quickly.
I have the flat, non-panel doors and I have yet to find a tutorial on the best way to paint them. They are the faux wood doors with the ugly brass hardware. (I did find your tutorial on painting them and can’t wait to do that.)
Can you recommend a good tutorial?
Hi Brittany – just a note to say I highlighted your post today. I’m trying to get inspired to paint my own doors 😉
Dang, I just wish you lived closer to me!
Thanks Colleen. And you are so right. No need to remove the heavy front door off it’s hinges ;-). Get busy painting now!
I love it all! Your smaller salvaged window looks like a mirror? I’m dying to do that to a set of old gothic windows that make up a panel. Can you tell me how?
thanks soooooooo much,
Sheila
I will send pictures of my friends house. It’s looking good -inside painting done (doors too!) and wood floors are almost done. At least last I heard they were on schedule.
I wish they had time to fix their butt ugly fire place. 🙂 Think 70s with wood, brick, stone, and orange tile. I know – you should do an “ugliest room” post where your readers can win something. 🙂
Great job and thanks.
Nice job on the door & the tutorial on how you did it. Also enjoyed your demo of how to remove/replace an escutcheon.
CAS
Okay, you just solved the argument between Hubs & me. He always wants to use a roller and I say Brush! Now I see how you can use both!
Brittany . . . gloves? Really?!? Oh, my! I’m so bad that when I went to grab a sandwich yesterday, some guy said “hi” then as I walked past said, “Professional painter, huh?” I asked, “How can you tell?” He just laughed. I had on my ‘work’ clothes (which now describes about 80% of my closet) complete with paint splatters.
It’s my moving business card 🙂
WOW you read my MIND! I need to paint our front doors. THANK you for this post. Showing to the hubs.
Yes, it definitely applies to front doors as well. The only difference would be if you choose not to remove it from its hinges. Front doors are usually much heavier than interior doors.
Drips will happen easier on a hanging door, so be sure not to use too much paint.
Hi! Does this apply to Front doors as well or just inside doors. I really want to repaint the front door, but wonder what would need to be done differently.
Thanks!
I’m so glad this tutorial will be helpful for you all. Heather, I’m just glad I got it up in time for your next work day. Send me picture y’all!
I haven’t even read this yet but I am so excited! I checked in just to see if you had this up yet. Jumping around excited. It’s kind of silly what makes my day. 😉 Friday is our next work day at my friend’s house.
I could have used this tutorial about a week ago. We replaced two of the solid, flat doors with the 6-panel doors. Now I know what to do as we slowly but surely replace all the doors in the house.
DUH! I never though to take the door off!
This post has perfect timing I was thinking last night as I taped up my baseboards and trim “how the heck am I gonna paint the doors”
what a great tutorial!!!! i’ve always left the door on the hinges, it makes it so difficult. your instructions are great!!!
I have a tip to add…take 4 nails…after laying the doors down hammer a nail about three inches in on the ends of the door (its actually the very top and the very bottom of the doors) get them in there good and when you put them on the saw horses…lean the NAILS on the saw horses. After you paint one side of the door you can use the nails to flip the door over and paint that side before the first side is even dry! Works great…got it from my handiman mag!
Great tip Carmen! I read that too, but haven’t tried it. I will next time. Thanks for sharing.
I have put the nails in the door and used them like you said – works perfect! I had a remodeling company for years and this is how all the professional painters do it!
Better yet, two nails inserted that way on end, and one nail in the middle on the other end. This way when you’re done with the first side, you can spin the door on the one nail and there’s a smooth flip.
Love this tip! I found myself trying to picture how I would flip from one end by myself with 2 nails in the other end. Then I read this. Genius.
My father-in-law just finished painting our doors on our new house. He used a spray gun but the process he used would be the same with a roller probably. He and my husband put hooks in the tops of the doors and nails in the bottoms. Then they strung rope between a tall ladder and a tree (because we only had one ladder tall enough) so they were upright and then old boards/cardboard underneath to get them off the grass. Then he just went back and forth painting one side and walked around them to paint the backs without having to wait for them to dry and flip over. 🙂