How to Make Pinch Pots from Clay
Looking for a simple craft to make and help you decompress? Make these cute clay pinch pots and use them around your house.
How to Make Pinch Pots from Clay
I hope you are ready to get your hands a little messy! Today’s tutorial is all about making some easy pinch pots out of inexpensive clay. Right now, it feels like the days are long, and life is still so uncertain. I find that immersing myself in an enjoyable activity really helps to pass the time. Working with the hands can be good for the soul!
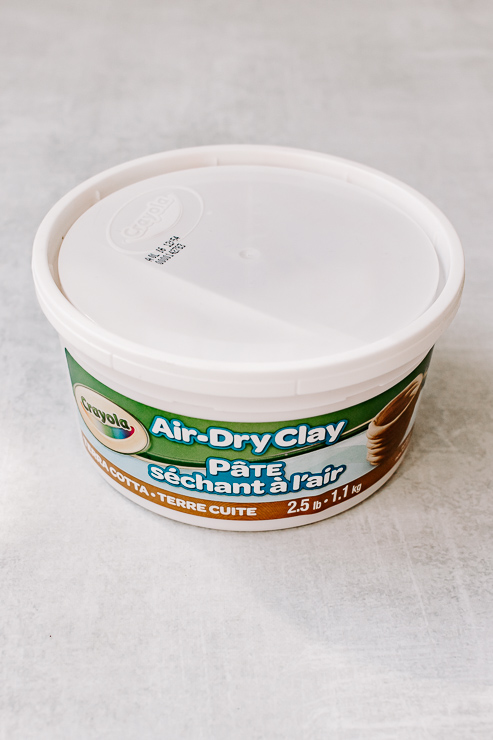
The good news is, you don’t really need anything special other than air dry clay and your hands. Plus, you don’t have to leave your house to create this project. The terracotta clay I purchased is from Amazon and was shipped right to my door.
This is a great craft for the kiddos too, so be sure to involve them with learning how to make pinch pots if they are looking for something to do.
Let’s dive right in!
Materials:
(I’ve included affiliate links for your convenience. I earn a small percentage from a purchase using these links. There is no additional cost to you. You can read more about affiliate links here.)
- Crayola Air Dry Clay (I used terra cotta, but you can also use white)
- Parchment Paper (so you don’t dirty up your surfaces)
Instructions:
This project is easy, inexpensive, and very therapeutic! Let your mind focus on shaping the clay and put your worries aside for a little bit.
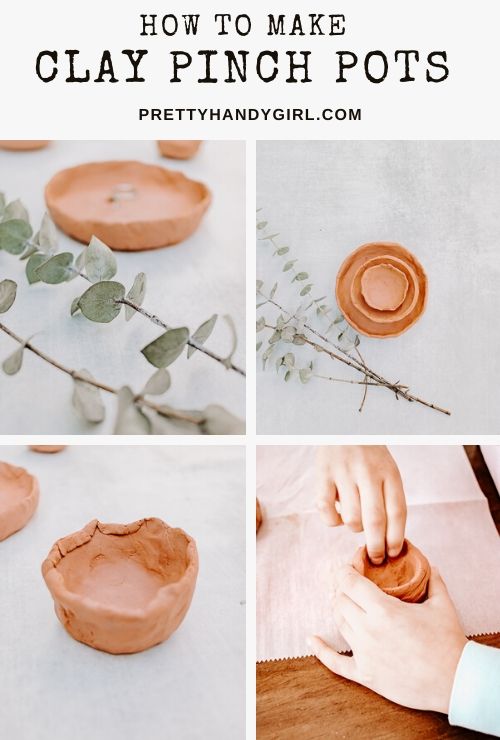
Step 1: Shape your clay into round balls
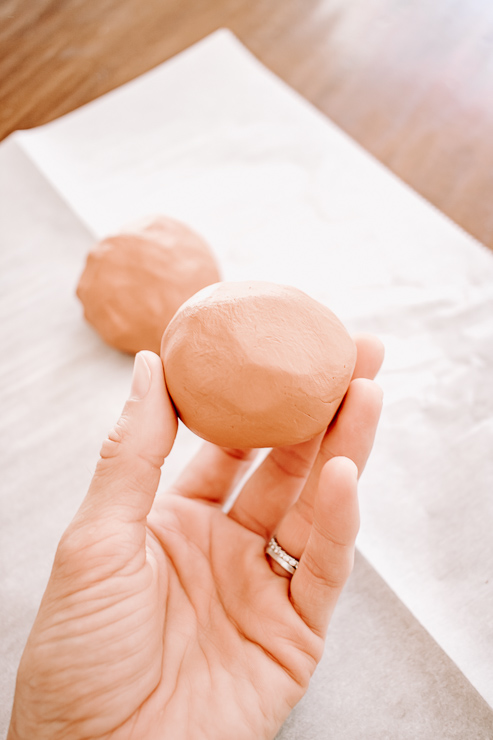
Layout a piece of parchment paper. Grab a hunk of clay and shape/roll it into a nice ball. My clay balls are about the size of the palm of my hand. You can go bigger or smaller, it’s up to you!
Step 2: Form your Pots
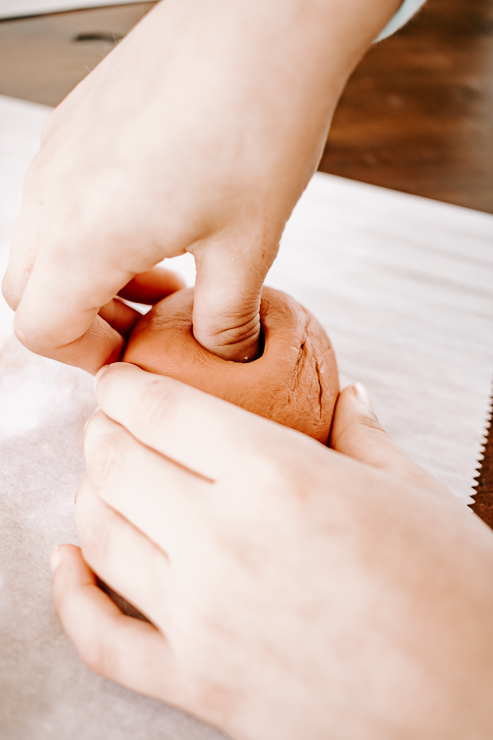
Now that you have your clay ball formed, take your thumb or finger and stick it into the center of the ball. Use your fingers to “pinch” the clay outward, slowly creating a bigger hole in the center. Keep going around and around until you are satisfied with the shape and size of your pinch pot.

Clay is forgiving, you add more if you pinched it too thin. Add a little water to your clay to avoid cracking. The thicker the sides (or bottom), the longer it will take to dry. Keep that in mind when shaping your pinch pot.
Step 3: Dry your Pinch Pots for Several Days
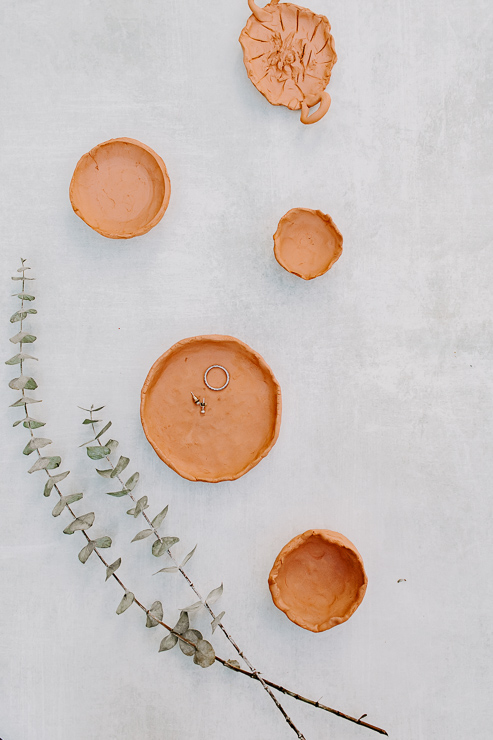
We left our clay pinch pots to dry on the parchment paper for several days. When they are fully dry, the pots will turn a lighter color and be hard to the touch. Once dry, you can paint them with acrylic paint or just leave them plain. Being the simplistic girl that I am, I just left mine plain. But kids might enjoy a painting project.
That’s it! As I said, this is a simple, inexpensive project. Luckily, you should have plenty of clay leftover for next time.

You might be wondering what in the heck to do with pinch pots?
Aside from the fact that it’s just a fun craft, there are tons of ways to use your new pots! A quick google search will bring up some ideas for you. But I’ll give you a few here to get you started.
- Plant faux succulents
- Use as a ring tray on your nightstand
- A decor dish to decorate with
Since you can’t get the clay wet, planting a real plant in them is not going to work. But that’s ok because those faux succulents have to go somewhere and they look great in these little pinch pots.
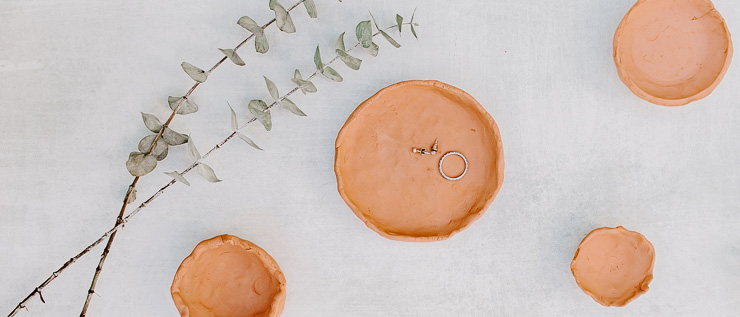
You could also use them as a small catch-all dish on your nightstand or console table. In fact, that’s how I’m using my pinch pots! I have one sitting on my nightstand because I somehow always forget to take off my earrings at night – so this has become the perfect little spot to put them before I go to sleep.
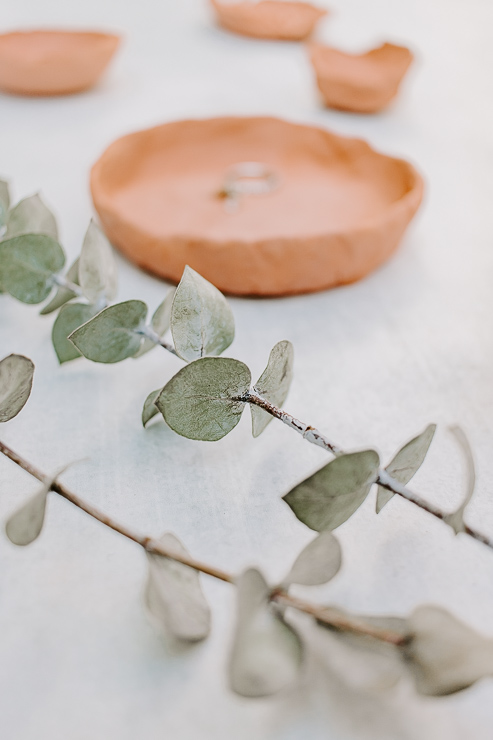
Finally, you can just use them as decor pieces to decorate shelves and bookcases or tables. They look very earthy, so depending on your decor style, they add a nice collected feel to your rooms. Plus – you made them! Take a little pride in your handiwork.
If you like this clay project, be sure to check out my tutorial for a heart-shaped jewelry dish.
Stay safe, stay healthy!

~ See More of Karen’s Tutorials ~

 Hello! I’m Karen, the creator of the Home Decor and DIY Blog: Decor Hint. I’m a Native of the East Coast, but I currently live in beautiful Seattle with my hubby, our two wonderful children, and our spunky wheaten terrier.
You can usually find me with some sort of craft in one hand and a coffee in the other. And I’m always rearranging furniture or moving lamps from room to room. I have a passion (read: obsession) for decorating, DIY, and gardening. In short, I love making my house into a home.
Like many, I’m inspired by what I see in home decor magazines, but I’m not so inspired by the price tags. Consequently, I love finding and creating beautiful budget-friendly home decor items. In a head to head competition, I bet you’d never know the difference between the designer items and my DIY creations! Many of my DIY projects focus on sewing, crafting, upcycling and organizing. Some of my favorite projects have been making pretty wreaths, sewing my own tassel hand towels, and crafting these trendy wood bead garlands. I can’t wait to inspire you and spark your creativity through my DIY projects.
You can always connect with me on Pinterest, Twitter or Instagram.

That’s a great idea for crafting at home. :)) And thank you for providing ideas of usage. Faux succulents in clay pots sounds lovely to decorate my kiddo’s room 🙂