
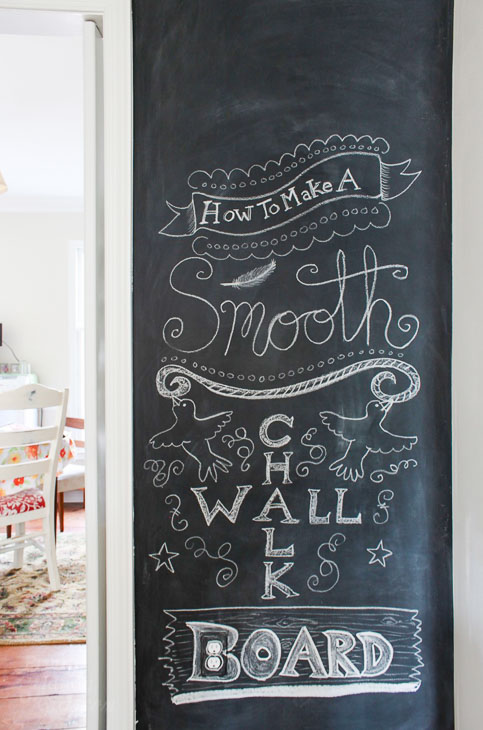
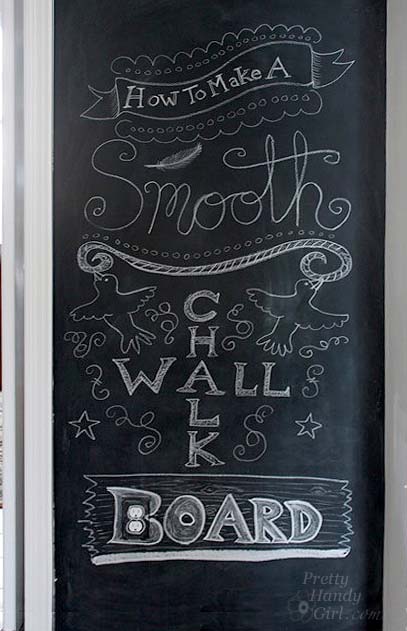
How to Make a SMOOTH Chalkboard Wall {For Imperfect Walls}
Have you ever wished you had a chalkboard wall in your home? But, those bumpy textured walls or damaged drywall are not smooth enough? Well, today I’m about to rock your world by showing you How to Make a SMOOTH Chalkboard Wall For Imperfect Walls!
 How to Make a SMOOTH Chalkboard Wall {For Imperfect Walls}
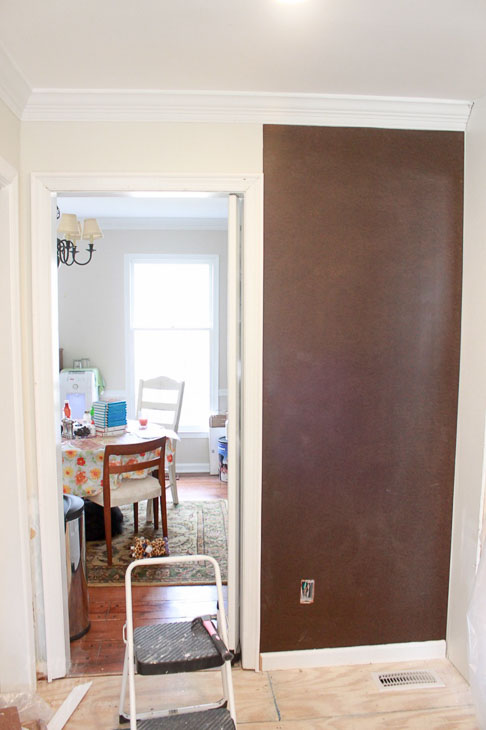
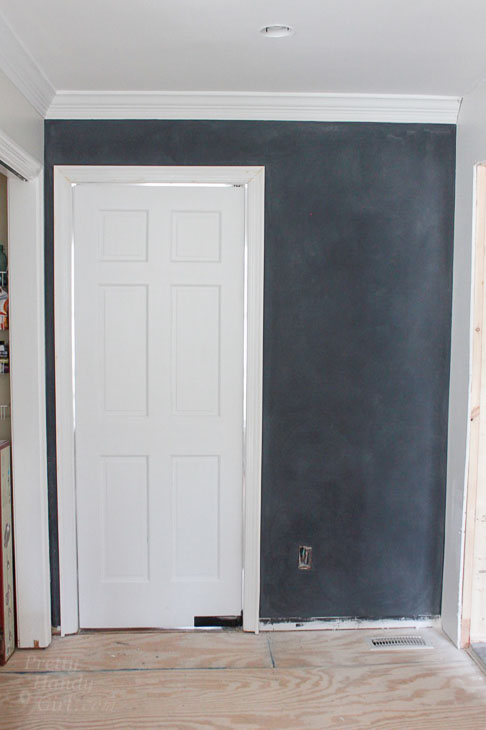
I feel your pain! We have a little wall between the kitchen and the dining room that was the perfect spot for a chalkboard wall. But the drywall was ripped from the removal of the beadboard. Sure, I could have ripped out the drywall and added new, but honestly I was beyond drywall in our kitchen renovation process and I didn’t want to back track.
I’m cringing at the photo below because the pantry looked like that long after we finished the kitchen. Luckily, I finished the pantry last year. You would not recognize it as the same space!
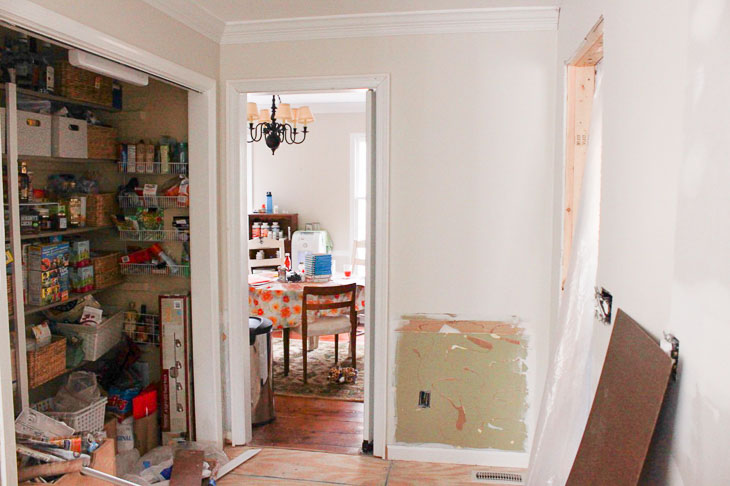
But enough about the kitchen renovation. I came up with a new solution for making the wall smooth enough for a chalkboard! You could also use this technique if you wanted to remove the chalkboard in the future if you live in a rental and aren’t allowed to paint walls.
Ready? Alright, let’s get this chalkboard party started now!
SMOOTH Chalkboard Wall Materials:
(I’ve included affiliate links for your convenience. I earn a small percentage from a purchase using these links. There is no additional cost to you. You can read more about affiliate links here.)
- Rustoleum chalkboard paint
- Masonite sheet (sold in 4’x8′ sheets at your local home improvement store. Have them cut to size or cut it yourself.)
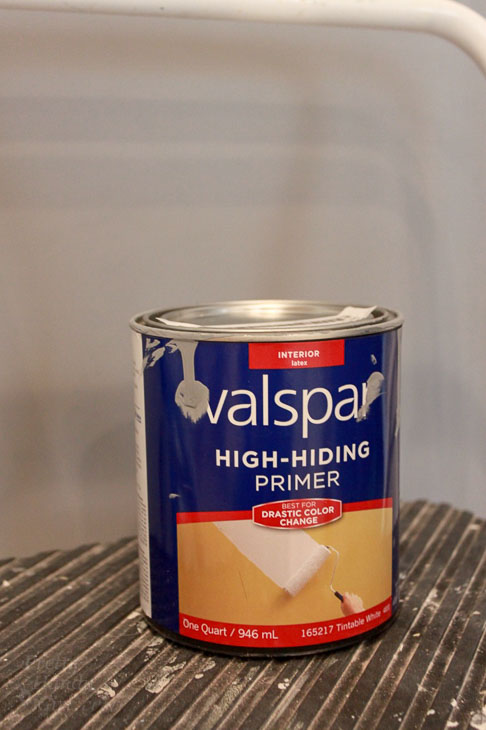
- Primer tinted gray (Ask the paint department to tint your primer gray.)
- Foam roller
- Sanding sponge
- Wood putty
- Putty knife
- Finish nailer (or simply a hammer and finish nails)
- Construction adhesive
- Caulk gun
- Chalk
- Rag
Optional (if you have an outlet or switch to work around):
SMOOTH Chalkboard Wall Instructions:
Cut Your Pieces:
Cut your masonite to size. (Or bring your measurements and ask the store to cut it to size for you.)
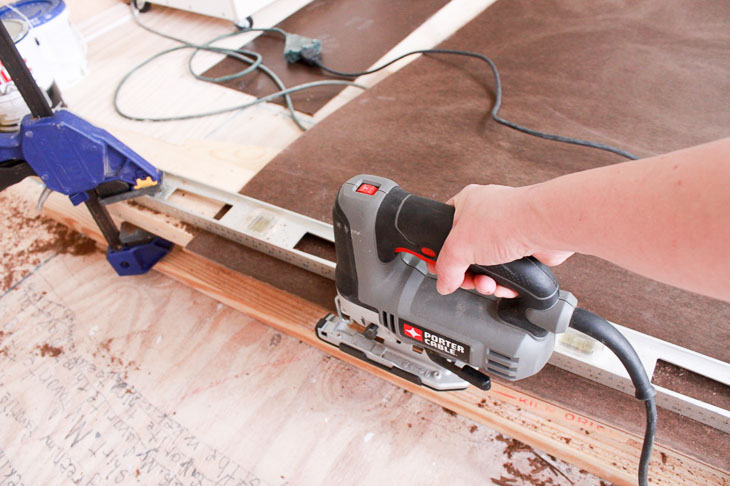
Use a jigsaw, circular saw, table saw, or other power saw to cut each panel. Dry fit the panels on the wall and make any adjustments as necessary.
Plan your sections:
Use one large sheet to cover as much wall as possible. The fewer the seams the better. Plan to hang a small piece for over any doors. (Note: The skinny little section on the left side of the door was left blank, no one has noticed after it was painted black.)

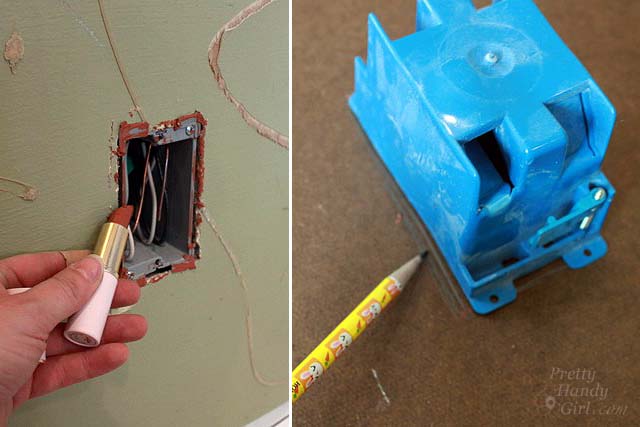
If you have an outlet or light switch, you need to cut a hole in the masonite to accommodate them. To cut the hole, smear lipstick around the edges of the box (or you can smear it on an outlet as shown in this post.) Hold the masonite panel in place and push against the outlet box. When removed you should see the lipstick impressions. (I used an extra outlet box to trace around for lines that were easier to see.)
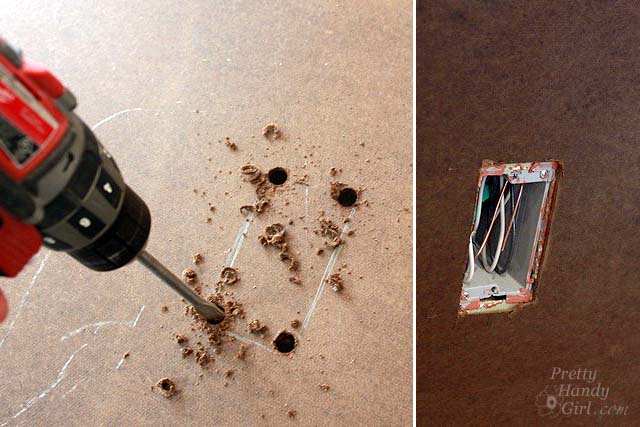
Drill holes in the corner of the outlined shape. Use a jigsaw to cut from hole to hole. Test fit your panel.
Install Panels:
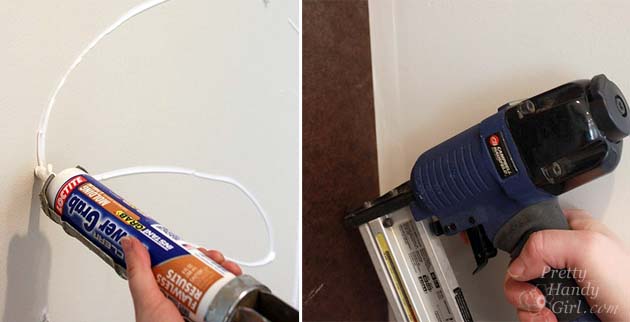
Time to hang the masonite panels. For a permanent hold, use construction glue and then secure with finish nails. If you want to be able to remove the panels later, skip the adhesive and use only finish nails.
Fill nail holes and seams with wood putty. Lightly sand smooth after the putty has dried.

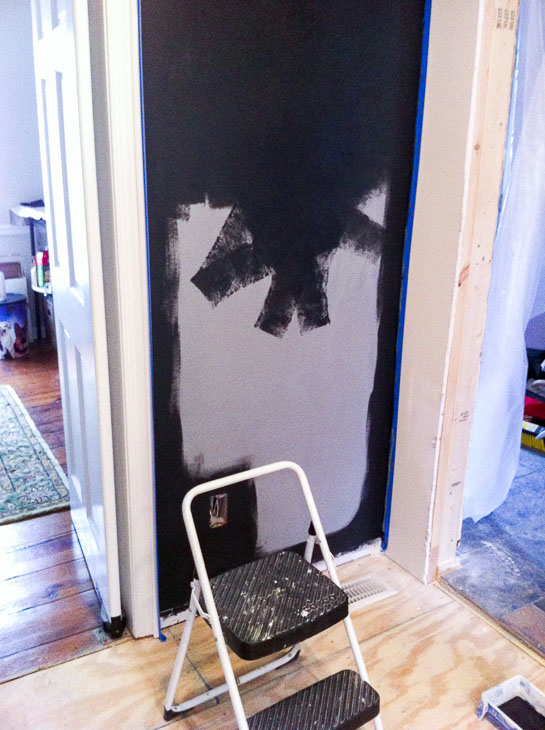
Prime and Paint:
Using a foam roller, prime the chalkboard with tinted primer (ask your paint department to add as much black as they can to a small can of primer. This will reduce the number of coats of chalkboard paint needed.) My Lowe’s store was able to produce a 50% gray color.
After the primer dries, lightly sand, and wipe clean. It’s important to sand between coats because this will give you the smoothest results and it gives a little tooth for the next layer to adhere to. You’ll need at least two coats of chalkboard paint.
Seasoning the Chalkboard:
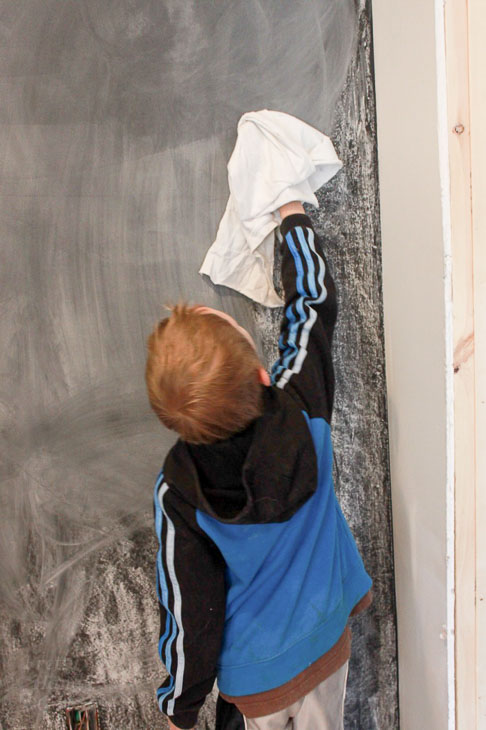
After the paint has dried thoroughly, enlist the help of your son or daughter to help season the chalkboard (rub chalk on its side over the entire surface.)
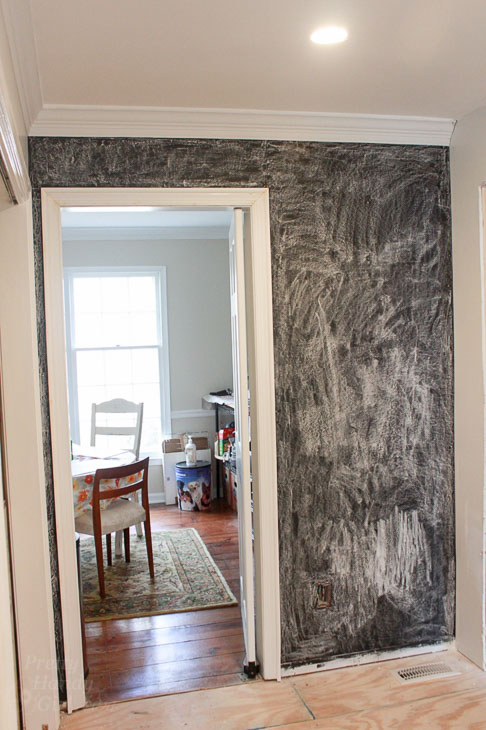
Then wipe off the chalk using a completely dry rag.
There is beauty in the gray movement on a chalkboard wall, wouldn’t you agree?
Don’t forget to add your outlet covers. You can paint them with chalkboard paint to match the wall. (Important: Do not paint the actual outlet, this violates electrical codes.)
Christen your chalkboard with drawings or your to do list.
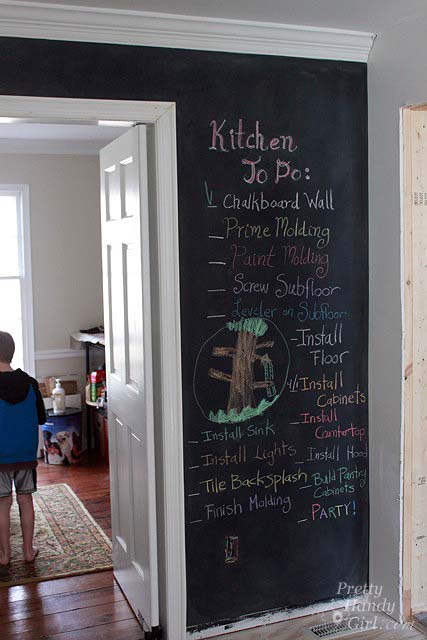
Within two hours I had to erase the list because I was feeling a little stressed by all the things I needed to complete in our kitchen renovation.
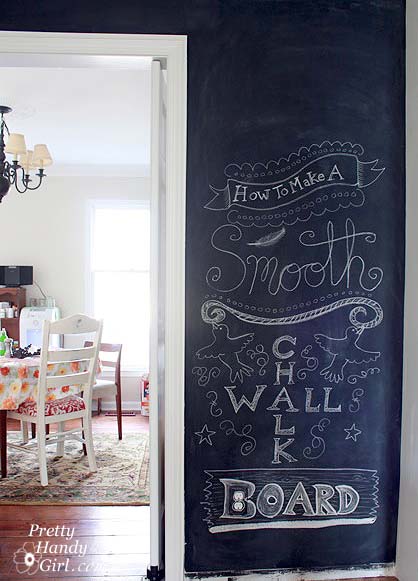
This fun quote was a lot less stressful!
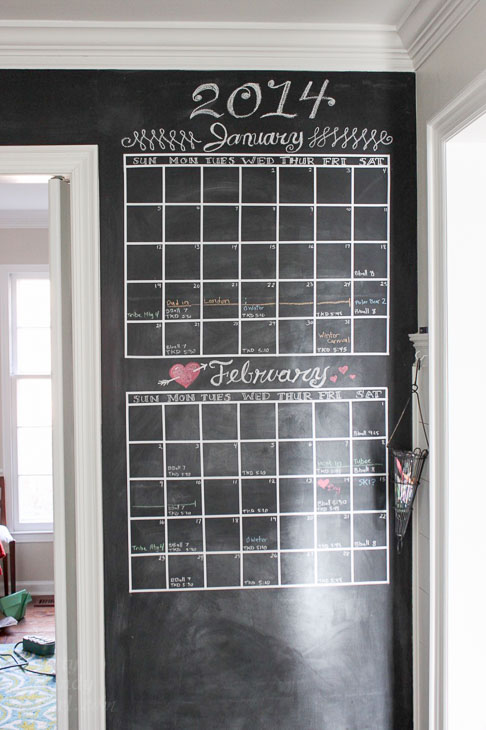
We added a chalkboard calendar a few years ago and this has been the best way for our family to stay organized (also the kids love seeing what’s coming up each week.)
What would you use a chalkboard wall for? I’d love to hear your ideas.


Btw REALLY appreciate this article. It’s assuring to see so many renovators & creators out there! =)
This is pretty intensive. heh (for me). But obviously a job worth doing is worth doing well. I have those sliding closet doors right next to my desk/work station. I think they’re some artificial flimsy wood paneling? But the surface is pretty smooth.
I naively just painted directly onto it, applying 2 coats of chalkboard paint with a foam roller, thinking the 2nd coat would “smooth over” the 1st, but of course now it’s more coarse than the surface of the closet door itself.
Wondering if you have any “quick fix” recommendations to sand or smooth over it somehow? Appreciate any advice I could get. Thanks!
Why wood putty and.l not wood filler??
The term is interchangeable in my opinion. Either or will work.
I’m in the midst of converting a pocket door into our “family hideaway chalkboard command center” (that’s a mouthful). What did you use for the calendar outline? I was thinking of using a sharpie paint pen… suggestions?
I bought vinyl stripes from LeentheGraphicsQueen.com
Dont prime with sidewalk chalk
Why?
Hello! This is great and thank you for share! I made one in my home but I am wondering if it would resist the use of liquid chalk markers, have you tried using them?
In my experience, chalk markers are more likely to leave ghosting. I prefer to use regular chalk on our chalkboard wall.
Would the masonite work well if I were doing a whiteboard wall?
I don’t see why not. I’d use un-tinted white primer for your case.
Love this!!! And so needed! I am about to try this on an old fireplace that has been boarded up. Wish me luck!
Sounds like a great use! Good luck.
I just finished my second coat of chalkboard paint on my wall and it seems to be drying shiny in some areas. 🙁 The first coat dried dull/chalkboard like…do you think that maybe it’s just not fully dry yet? And if it is…will “priming” the wall with chalk fix it? Thank you!
Chanel, it shouldn’t be shiny. Try lightly sanding the surface, then stir your chalkboard paint and paint another coat. Then you can season the chalkboard by rubbing chalk on it’s side over the chalkboard and wipe it off with a dry rag before using it.
Is it okay to cut the sheet, paint it and than nail it on the wall? I am trying to avoid to paint the panel/wall inside the kitchen and prefer to do it in the garage.
How much did all of this cost together? I would love to do this to a room in my house!
It will all depend on the size of your wall and the cost of your local materials. I’d guess under $60.
I just bought 2 panels of Masonite for this project. I was so excited to go drive 40mins for the cloest Lowes from my house. Well, I did not tie it well enough on the top of my SUV. So once I left Lowes. They just flew right off and got torn about 8 inches…… I was so stupid! Anyway, I have no idea how to fix it or I should cut off the torn part and use some scarp piece to fill up the length of the wall. I don’t want to glue the sheet on the drywall. I know I will take it down in the future. What kind of finish nails did you use? Some people said Masonite is easy to get bucking and nail popping. Do you have those problem yet?
Oh no Ronnie, that sounds like a nightmare. Can you cut them down into squares or rectangles and create some type of gallery with them instead of trying to piece them together on the wall? I just used 1.5″ finish nails in my nailgun. No problems with anything popping, but remember I used construction adhesive.
Hi there –
I am in the midst of painting my chalkboard, with a foam roller, and it is leaving a small bit of texture….I have yet to sand it before the 2nd coat, but just had to ask if that was normal? It isn’t a huge texture, just the kind you get I think from using a foam roller….
Any thoughts would be appreciated 😉
Sieglinde (love your name by the way), You should be okay, just sand after the first coat dries. Paint the second coat and you might want to lightly sand after that coat. I’m also wondering if you have enough paint on the roller? Or too much?
Love your blog as well as all the great, lots of directions, explanations, resources and photos you use with each tutorial. Thanks for not assuming everyone knows everything. You are great.
QUESTION: We just bought a 30 yr old home that has the dreaded….popcorn ceilings. The ceiling height is only 8′ and we are trying to decide the best way to eliminate the popcorn. Either scrape by wetting or dry sanding or covering it with beadboard or ripping it all out and putting up new. When I saw your wall I was curious if you thought it would hold up for ceilings….installed upside down. What do you think and what wpuld hou do? There’s over 2500sq ft of it in the house.
Staci, you’re in luck! I have a tutorial just for you: https://prettyhandygirl.com/2012/03/scraping-your-own-popcorn-ceilings-its-a-messy-job-but-someones-gotta-do-it.html
I highly recommend having a section tested though. You don’t want to mess with asbestos (another link for you) https://prettyhandygirl.com/2012/10/asbestos-removal-everything-you-wanted-to-know-and-more.html
What a great solution. I have textured walls ALL over my home but really wanted a chalkboard wall somewhere for the kids. Now I know what I can do, thanks for this :).
I don’t know if you’ve seen the chalkboard paint recipe to make your own chalkboard paint with unsanded tile grout but I tried it on some furniture (for the kids) and it worked great. 1 cup paint to 2 tablespoons unsanded grout and you can use any paint color too. Your wall looks great, I can’t wait to make one, once I find a place.
Meg, thanks. Yes, I found the same chalkboard paint recipe. It is economical, but not as smooth as the pre-manufactured kind. (Then again, maybe I need to use a blender to make it more smooth ;-D)
I was wondering is you used a special blade in the jig-saw? My husband was worried that the edge would be ragged
Thanks
Maggie
Maggie, no. But, the blade I have in my jigsaw now came with the Porter Cable and has medium fine teeth.
why don’t you paint the outlet? I have painted all my outlet covers and the outlets themselves. . .oops, tell me the reason you do not do that.
and I love the new background to the blog. . the turquoise distressed wood. . I loved the pallet wall background too. . .both more fitting than the floral
peace to your home, body, mind, and heart-
Su
Su, I’ve seen the warnings not to paint them on the box, but never knew the true reason. I just read this post which makes sense to me why you wouldn’t paint them: http://emh-runningdesign.blogspot.com/2010/10/painting-101-do-not-paint-electrical.html
I love it especially the dog! You made it so clear and simple!
________
Rose
You are just too Good! That was a smart problem solver. I just can’t picture where that wall is, though. How are you doing on the time frame here? I’m betting for May. Ann
Ann, it is the wall between our dining room and kitchen. Our kitchen is an L shape, this is the base of the L.
What a great project. I want to do this on one wall of our bonus room. The kids would love it!
Jessie, you should! And yes, they would love it ;-).
I do and I did. I love it. And I totally wrote CAT when my girly was hanging by it. hehe. Mine is rough but I’m going to sand it down (making a mess) and then re paint it. When I get to it.
Yours looks great!! It’s a wonderful feature and the perfect spot 🙂
Thanks Shannon. Send me a pic of yours sometime! 😉
I have a smooth wall but you have given me the inspiration to take the plunge and paint my small wall in the kitchen with chalkboard paint!!!
Chrissy, oh you should! You’ll have so much fun with it. And check out Rhonna Farrer’s website for chalk writing techniques. http://rhonnadesigns.blogspot.com/2012/12/chalkboard-art-cheer-rhonna-style.html
Very good ideas, Love the lipstick trick 😉 That was quite a to-do list I would have erased it to. I just love chalkboard walls.
Mimi, I’m not sure what I was thinking when I listed it all out. LOL. Oh well. Thanks for taking the time to comment.
I recently bought some chalk MARKERS that I saw someone mention online. They work on any non-porous surface and look GREAT. You have to wipe them off with something wet, but I think they would minimize the chalk dust problem, just to mention. Plus they just don’t smear quite so easily. Kind of like dry-erase markers, but more opaque for dark surfaces.
Kristen, we have some chalk markers and they are less likely to smear, but they also leave ghosting easier. I’ll probably stick with plain chalk for now. Have you had the same issues?
I haven’t used them on large areas, but I suppose ghosting is why you are supposed to wipe them off with a wet towel, and not just dry?
Now I need to add lipstick to my toolbox!! Great tip Brittany on how to align the electrical box.
It looks like the boys are really enjoying your project 🙂
Jeff, I think hot pink would look good with your complexion! LOL.
Hmmm, you’re on to something. I’ll give it a try.
Interesting fix for the rough wall problem. Maybe chalkboard vinyl would have worked on this rough wall, too? I can’t help but wonder, though, every time I see a big chalkboard wall in a house–what about the chalk dust? Isn’t it going to collect on the floor? I see you have an air vent just below it. Will that blow the dust around the room? I’m not actually planning to make one of these but I can’t help but wonder how people cope with the dust. When my son was little I put a small chalkboard my MIL found at a yardsale out on the porch for him to scribble on. There I wasn’t worried about the dust. I was thinking chalkboards must be a girl thing, he didn’t use it much, but gosh your son did a nice picture. Actually, I’m a little tired of chalk drawings on sidewalks in the neighborhood. It gets on your shoes, so you have to tiptoe through the artwork. Could everyone please put one of these in their houses so the kids stop drawing on the sidewalks? (Just kidding)
We have a large chalkboard wall in my son’s room. Yes, we do get dust almost everywhere, but it’s not like it’s permanent. We even have a rug in his room, and there aren’t any chalk marks on the rug. So, yes, there’s dust, but it is completely manageable (I am not a neat freak, though, so my standards are probably different from most). 🙂
Cath, you know, I must be totally immune to messes by now. With two boys, it’s just inevitable. I don’t mind a little chalk dust as long as I’m fostering creativity and fun in their lives. Lyndsay, How cool that you have a chalkboard actually in your son’s room! I bet he loves it.
They make chalkless chalkboard markers that are fantastic! You use them like any other marker but they are justliquid chalk, so just a damp cloth removes whatever you write. They are excellent for precision drawings, with NO chalk dust & great color options!!! Still prime your chalkboard with chalk dust, though, just to get the best results. 🙂
Impressive problem-solving skills… LOVE THIS!
Also, I happen to love your new background design on the blog too. 🙂
Thanks for the sweet comment Beth. Yes, I needed a little bloggy update ;-).
awesome! i am trying to find a wall to do this on because my house is horrifying devoid of magnetic spaces (stainless steel fridge). how well do magnets stick to your chalkboard wall?
p.s. i like your lipstick cut-locating trick.
It isn’t magnetic. You’d either have to use magnetic paint under the chalkboard paint. Or use sheet metal instead of masonite (check the sheetmetal for metallic properties ahead of time.)
Love this idea! Way to be innovative and get around a problem with an even better solution!