How to Make a Mini Macrame Wall Hanging
How to Make a Mini Macrame Wall Hanging
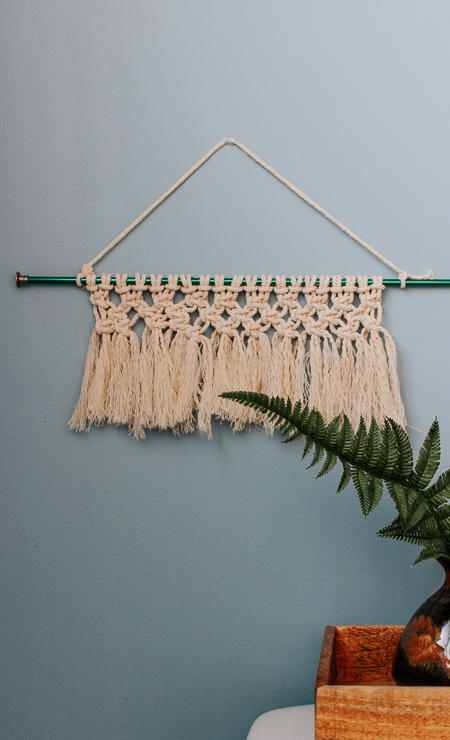
If there’s one hobby that has become quite the obsession for me – it’s macrame! It’s really fun to create and the projects are inexpensive to complete. Right now macrame wall hangings are all the rage, and add an eclectic look to your decor. Today I’m showing you how to make a mini macrame wall hanging. So chic!
If you’ve been wanting to start macrame—but are intimidated—you’re in luck! This project is small, simple, and can be completed in about 30 minutes!
This mini macrame wall hanging is a subtle nod to bohemian decor and it will look great pretty much anywhere in your home! Hang in your bathroom on in your office. Or, include it with a grouping of gallery wall prints for a more collected feel.
Here’s how to make it …
Materials:
(I’ve included affiliate links for your convenience. I earn a small percentage from a purchase using these links. There is no additional cost to you. You can read more about affiliate links here.)
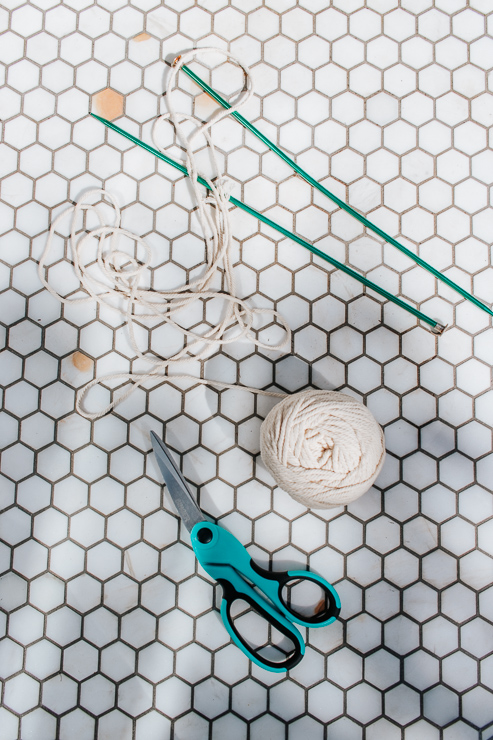
- Macrame Cording
- Dowel, stick, hanger or anything that will hold your wall hanging. (I used an old knitting needle from my late grandmother. A great nod to a family memory!)
- Scissors
- Wire Brush
Instructions:
Step One – Cut your Cords
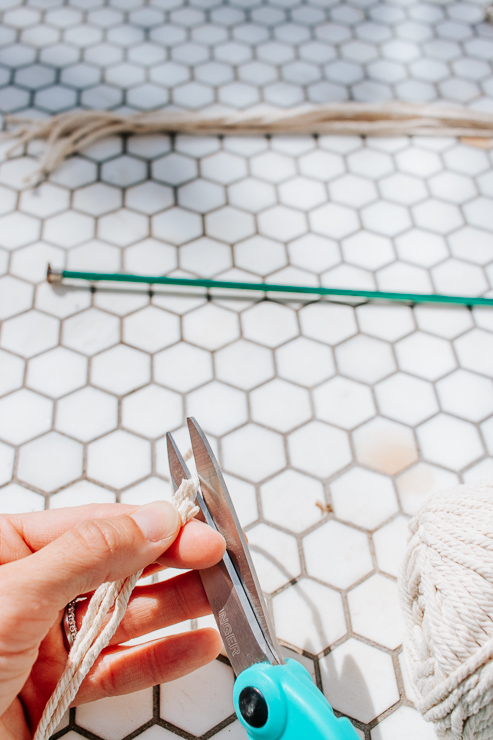
Start by cutting your macrame cording. You will need 20-20 inch cords for this project. (20″ will make a mini wall hanging. After you get the hang of this, you can make your macrame art skinnier or longer. Whatever your heart desires.)
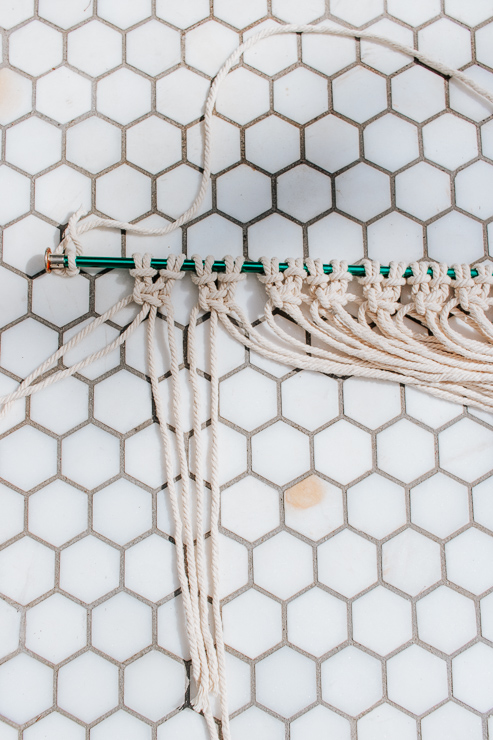
Step Two – Attach with Lark’s Head Knots
Once you have your cords cut, you want to attach the cords by creating 20 lark’s head knots. Here’s a quick video to show you how to make a lark’s head knot:
Take your cord and fold it in half. Take the loop part and fish it under your rod. Loop the ends of the cords through the cord – and pull tight! Now repeat this 19 more times with the rest of your cords.
Step Three – Make a Row of Square knots
Now that your cords are all attached, we are going to make Square Knots and Alternating Square Knots. Here’s how to make a square knot:
To make a square knot – take the first four adjacent cords and do the following:
- We are going to take the outer left cord and cross it over the two middle cords. Now take the outer right cord and place it on top of the left cord and UNDER the two middle cords.
- Loop it through the hole on the left side.
- Now pull to tighten the knot.
- Now take the outer RIGHT cord and cross it over the two middle cords.
- Take the outer left cord and place it on top of the left cord and UNDER the two middle cords.
- Loop it through the hole on the right side.
- Now pull your cords tight.
You have completed the full square knot.
You want to keep working the next four adjacent cords to make a row all the way across of square knots.
Step Four – Make a Row of Alternating Square Knots.
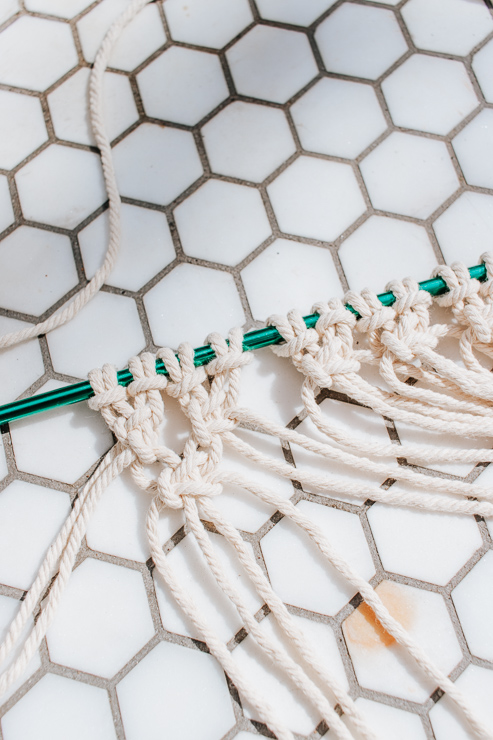
Our next row is going to be alternating square knots.
To make these knots – follow the same steps as above, however skip the first two adjacent cords – start with the third cord and work the adjacent 3 cords. Continue all the way across the row!
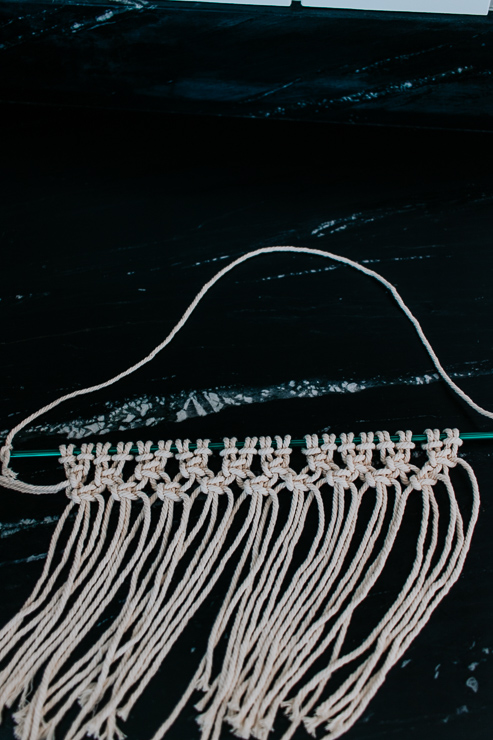
Step Five – Make a Row of Square Knots Again
To complete our mini macrame wall hanging, our last row will be a row of square knots – so follow Step 3 again.
You should have something that looks like the photo below.

Step 6 – Cut and Fray the Ends of your Wall Hanging
Take your scissors and cut straight across to create an even line of fringe. Take each cord and unravel it with your fingers.
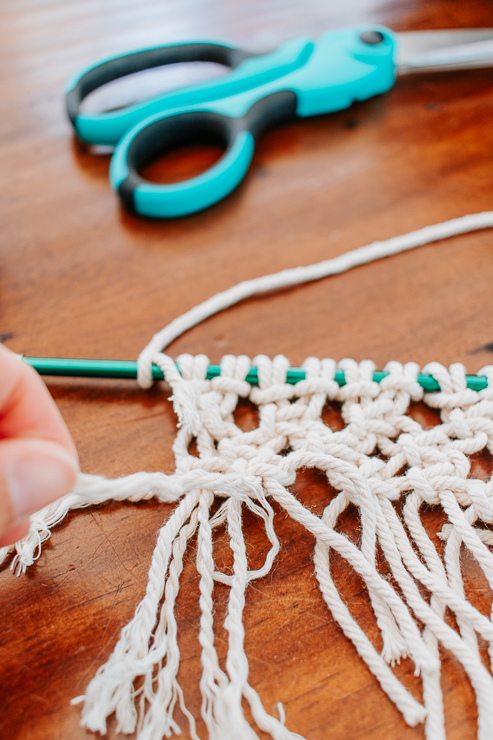
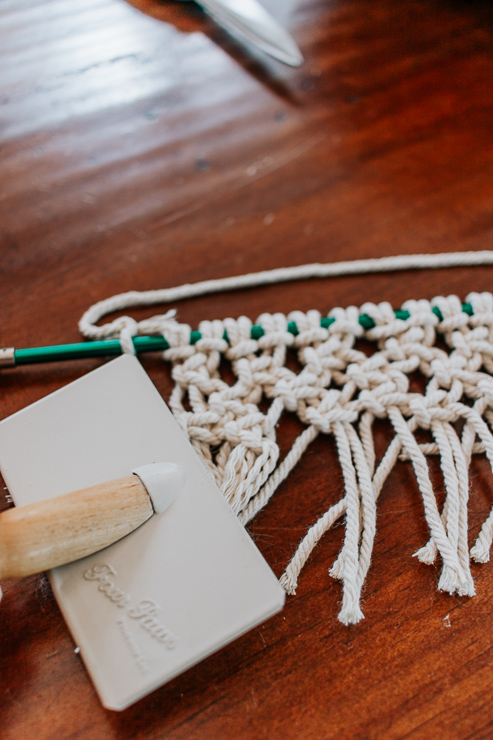
Now, take a wire brush and carefully brush through the unraveled cords to fray them.
All done!
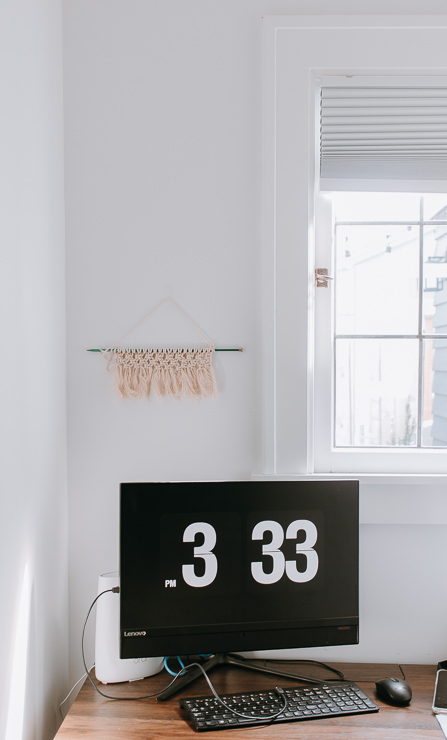
Now all you have to do is hang it up and enjoy your beautiful work. Can you imagine how pretty these would be if you made a trio of mini macrame wall hangings for a cohesive collage. I really love that idea.
I hung my mini macrame over the computer for some style and texture in this little corner.
If you want some additional help and projects – go to my blog and check out my Step by Step Basic Macrame Knots Guide. And check out the cool macrame planter hanger here on Pretty Handy Girl for another cool project!

Once you learn how to make the most basic knots – you can create all kinds of cool projects for your home. Such as Macrame Pillows, Mason Jar Covers, Jar Candle Hangers, Macrame Feathers – I could go on and on!
Feel free to leave me any questions or comments below – I hope this inspired you try Macrame if you haven’t yet.
I’ll see you right here next month with another awesome project for you.

~ See More of Karen’s Tutorials ~

 Hello! I’m Karen, the creator of the Home Decor and DIY Blog: Decor Hint . I’m a Native of the East Coast, but I currently live in beautiful Seattle with my hubby, our two wonderful children and our spunky wheaten terrier.
You can usually find me with some sort of craft in one hand and a coffee in the other. And I’m always rearranging furniture or moving lamps from room to room. I have a passion (read: obsession) for decorating, DIY, and gardening. In short, I love making my house into a home.
Like many, I’m inspired by what I see in home decor magazines, but I’m not so inspired by the price tags. Consequently, I love finding and creating beautiful budget-friendly home decor items. In a head to head competition, I bet you’d never know the difference between the designer items and my DIY creations! Many of my DIY projects focus on sewing, crafting, upcycling and organizing. Some of my favorite projects have been making pretty wreaths , sewing my own tassel hand towels, and crafting these trendy wood bead garlands . I can’t wait to inspire you and spark your creativity through my DIY projects.
You can always connect with me on Pinterest , Twitter or Instagram.


Hey Karen
This is such a beautiful wall hanging and so simple to make. I would definitely try making this one. Thanks for sharing.