How to Install Pegboard Walls
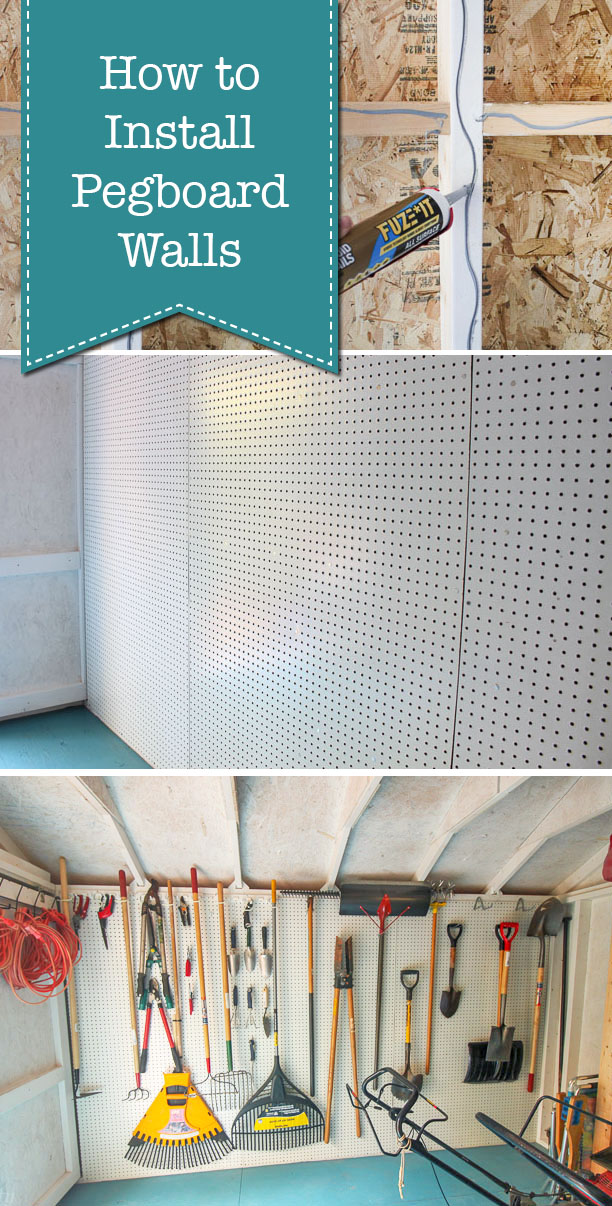 How to Install Pegboard Walls
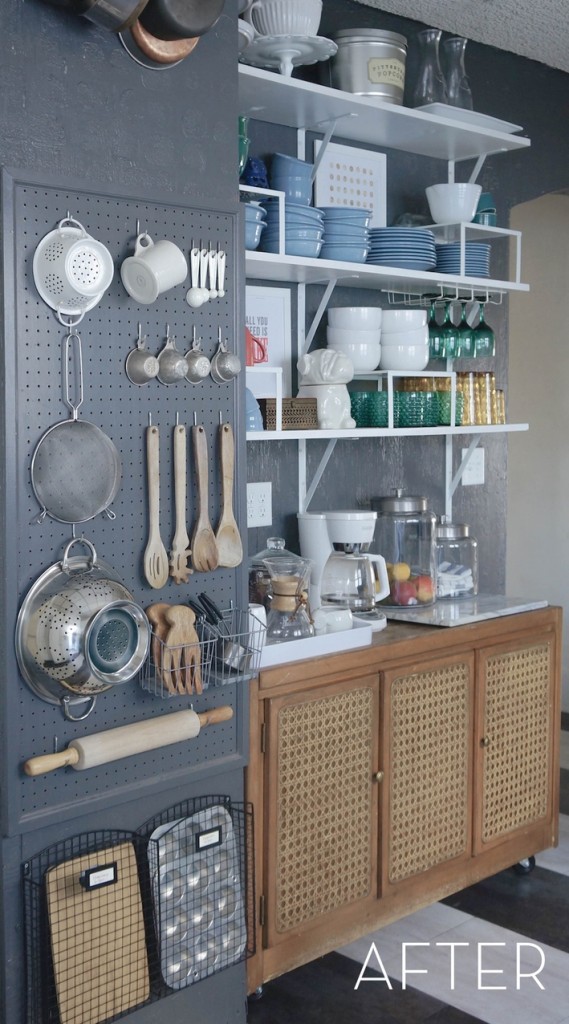
Pegboard walls are the bomb, aren’t they? They provide a ton of storage organization without taking up valuable floor space. Pegboard can be used in a variety of spaces successfully. A garage or shed aren’t the only places that can use this fantastic vertical storage. I’ve seen some amazing craft and sewing spots that utilize pegboards. Heck, even a kitchen can use some pegboard storage like this example from Curbly:
Today, I’ll show you how to install pegboard walls anywhere you want! I’ll be showing you the process on an open stud wall. If you have a finished wall, simply screw strips of wood into the studs before installing your pegboard. Easy peasy! Ready to get started?
Materials:
(I’ve included affiliate links for your convenience. I earn a small percentage from a purchase using these links. There is no additional cost to you. You can read more about affiliate links here.)
- Circular saw
- Tape Measure
- Hammer
- Roofing nails
- Construction Adhesive
- Caulk Gun
- Pegboard Hooks & Hangers
- Garden Tool Hooks
- Scrap wood about 1/2 – 3/4″ thick
Optional:
- Scrap 2 x 4’s for blocking
- 3″ Wood Screws for additional blocking
- Drill
Instructions:
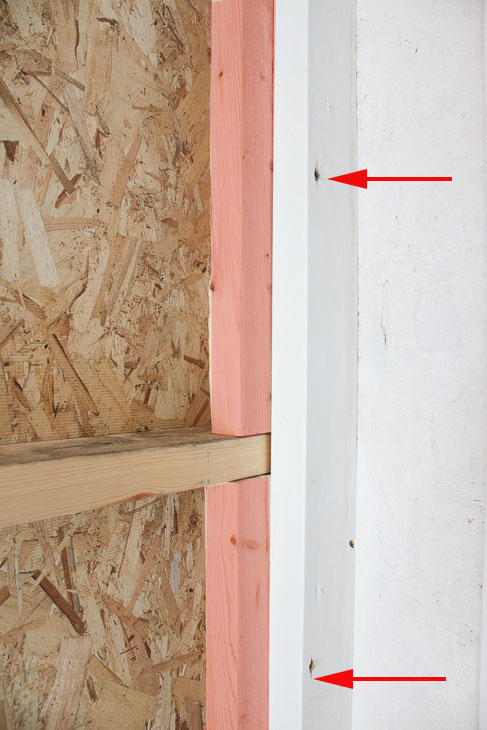
Installing pegboard is ideally done on exposed studs walls. If you don’t have exposed studs, you can secure 1″ x 2″ boards (or other wood strips) to the studs in your wall. This will create the hollow space behind the pegboard for the hooks set into.
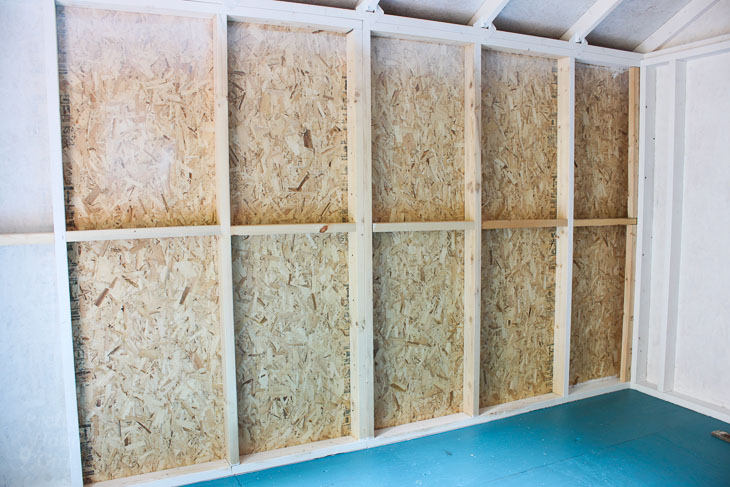
Add blocking to the corner if needed for something to nail into. To secure the blocking, drive screws through studs into the blocks as shown below.
Measure and cut your pegboard panels insuring that each side will line up on a stud.
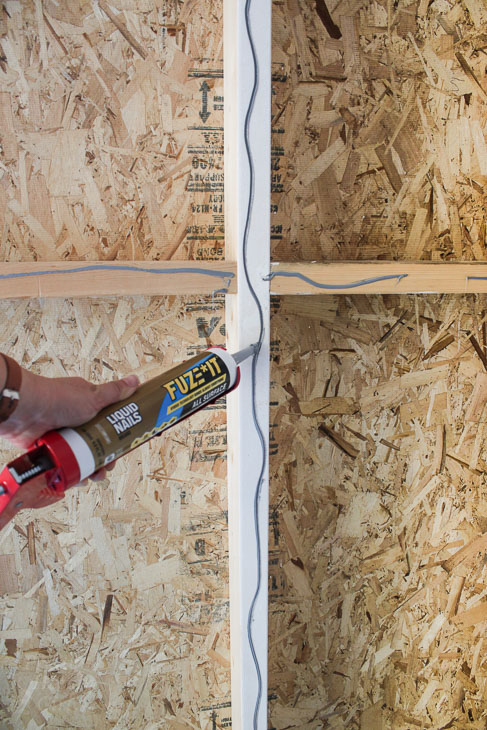
Start in one corner. Run a bead of construction adhesive along all the studs that will hold your first pegboard panel.
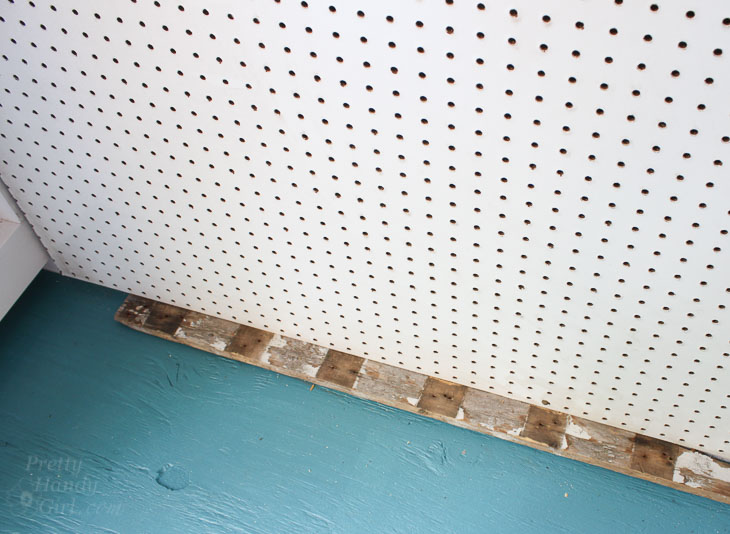
Set scrap wood below the pegboard to raise it off ground (this will prevent liquid spills from soaking into the pegboard. It will also allow for some expansion.)
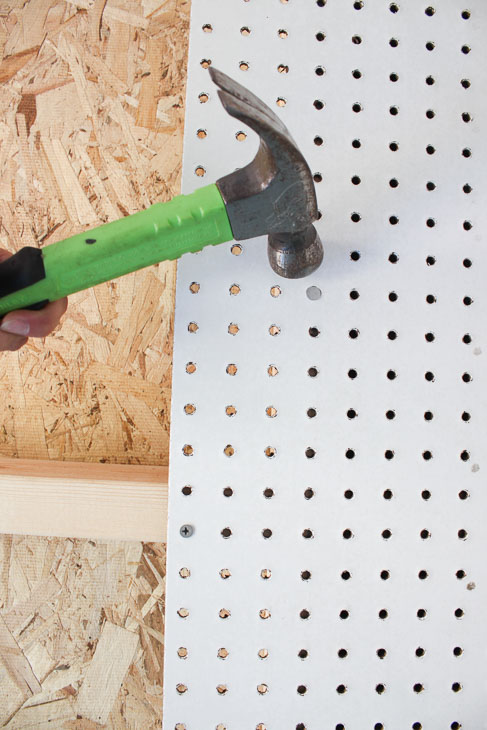
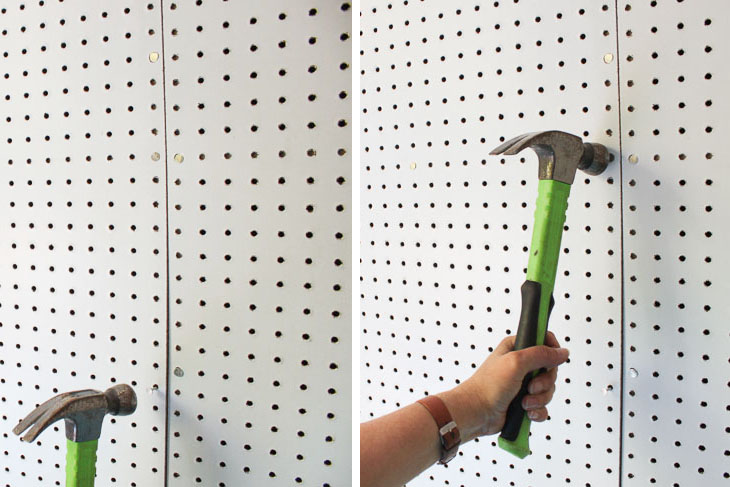
Nail one side of the pegboard to the end stud. Place nails every 9 – 12 inches.
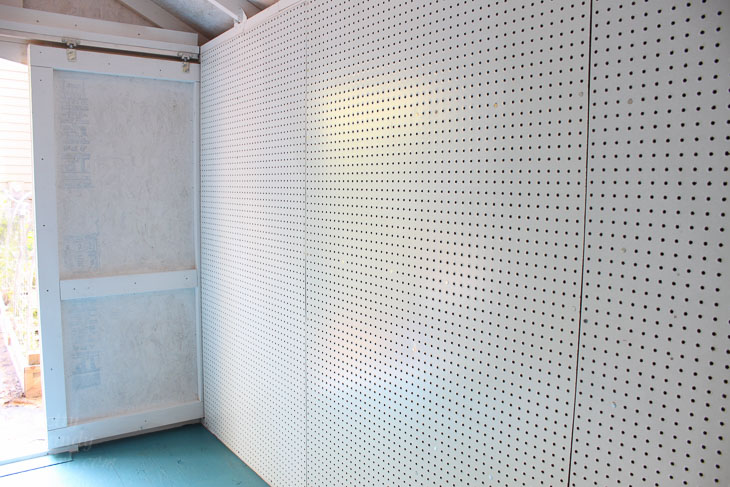
Continue adding pegboard panels following the same process (construction adhesive, then hammer nails to secure.)
Continue until all your pegboard panels are hung.
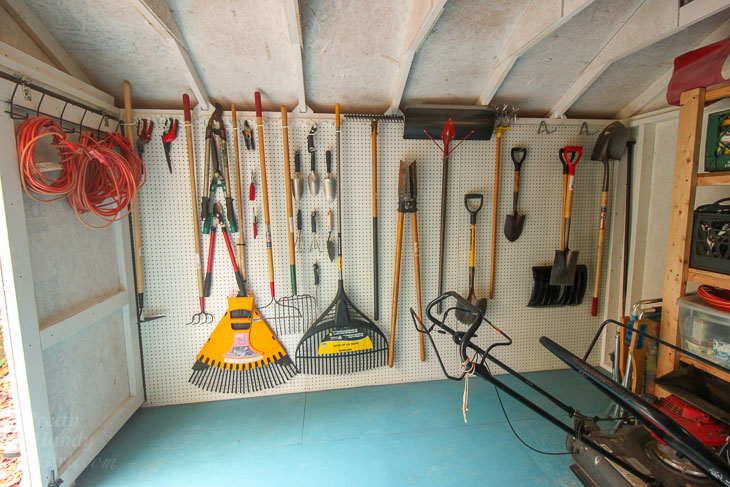
Add pegboard hooks and hangers. (To help me get my shed more organized, National Hardware sent me a wide selection of pegboard hooks and hangers. I can honestly say, they have all the bases covered with their assortment of storage products.) Hang all your items on the wall, for instant vertical storage.
Having all the lawn and garden tools on the wall frees up the floor for two mowers. Don’t ask me why we have two mowers. That’s Pretty Handsome Guy’s department.
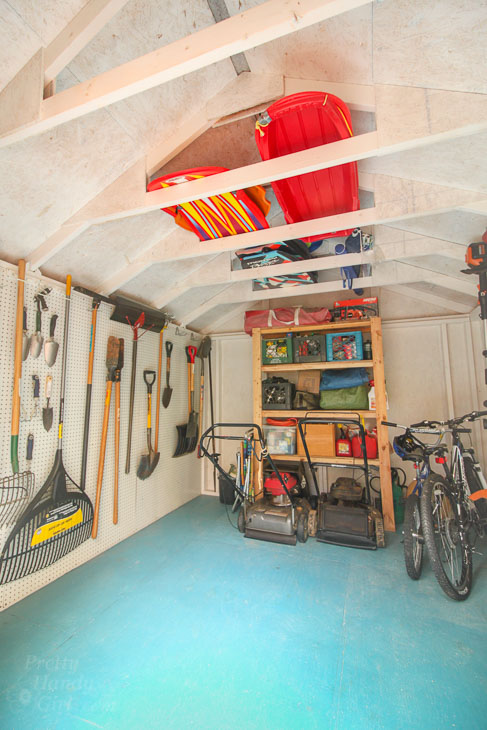
But, I guess I can’t judge, I do have duplicate tools. Doesn’t everyone need two drills and two power sanders?
Anyway, now that you know How to Install Pegboard Walls, are you ready to add some pegboard walls to your home?
![]()
How did you hang up the rakes right side up?
Pearl, I used a garden tool organizer with hooks like this one: https://amzn.to/3IvA3aJ
One thought is to skip the adhesive and use screws. This way it is simple to make any changes down the road like adding an electric outlet or shelving. Great post BTW
Another fantastic post!
Thank you!!!
This is great, thank you! Wondering if you have recommendations for ways to make a removable pegboard wall in a rental situation. I’ve made my second (larger) bedroom in a basement apartment into my project room where I keep everything from drills and saws to an embroidery machine. Messy projects are done outside, of course, but tools and supplies are all being stored in this one place. I’m trying to figure out if making a rolling pegboard wall might be possible. Then I could have storage on both sides of the “wall”, and it’s movable, AND I’ll be able to take them with me when I eventually change locations.
I guess you could build a frame on wheels just makes sure the feet are wide enough to support the weight and resist tipping.
Where is the link for the Peg board? LOL 😉