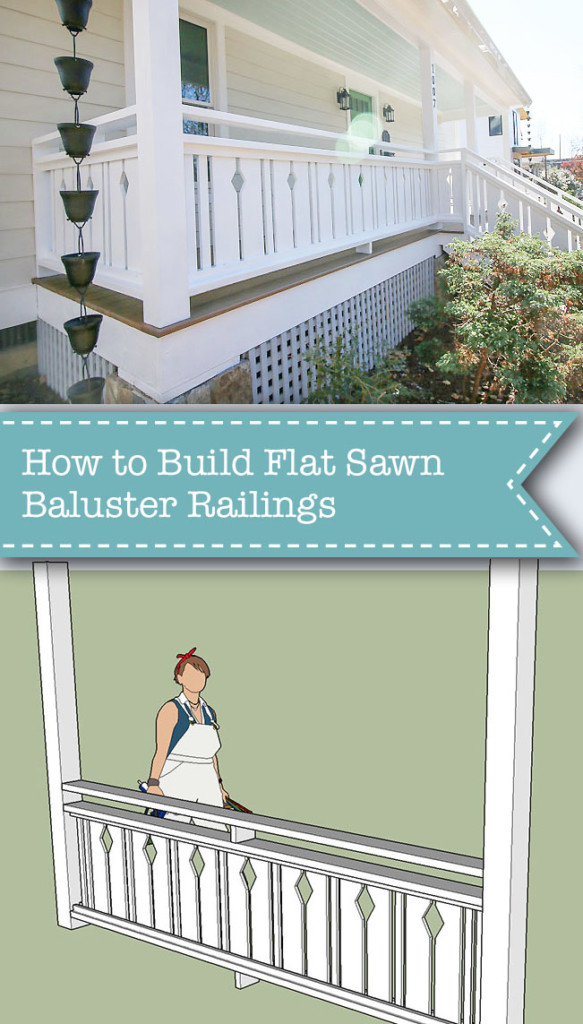
How to Build Flat Sawn Baluster Railings
Get ready for the tutorial I’ve been anxious to share with you. Ever since completing the Saving Etta front porch project, I find myself taking breaks to glance out the window at these gorgeous flat sawn baluster railings. Now I get to teach you how to make these decorative railings for your home!
 How to Build Flat Sawn Baluster Railings
Anyone who has strolled around a historic neighborhood has probably seen beautiful porches with decorative cut out railings. The patterned slats are referred to as flat sawn balusters. And they are simple enough to create if you have a pattern or can design your own. There are many different shapes and patterns of flat sawn balusters, all you have to do is use Google or Pinterest to find a style for inspiration.
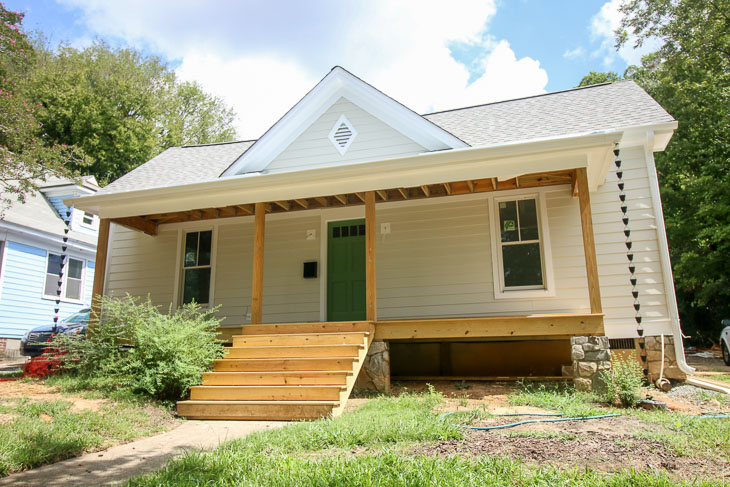
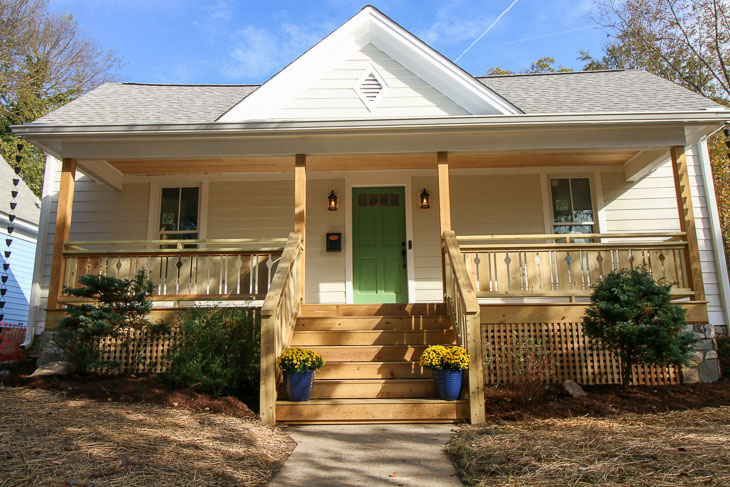
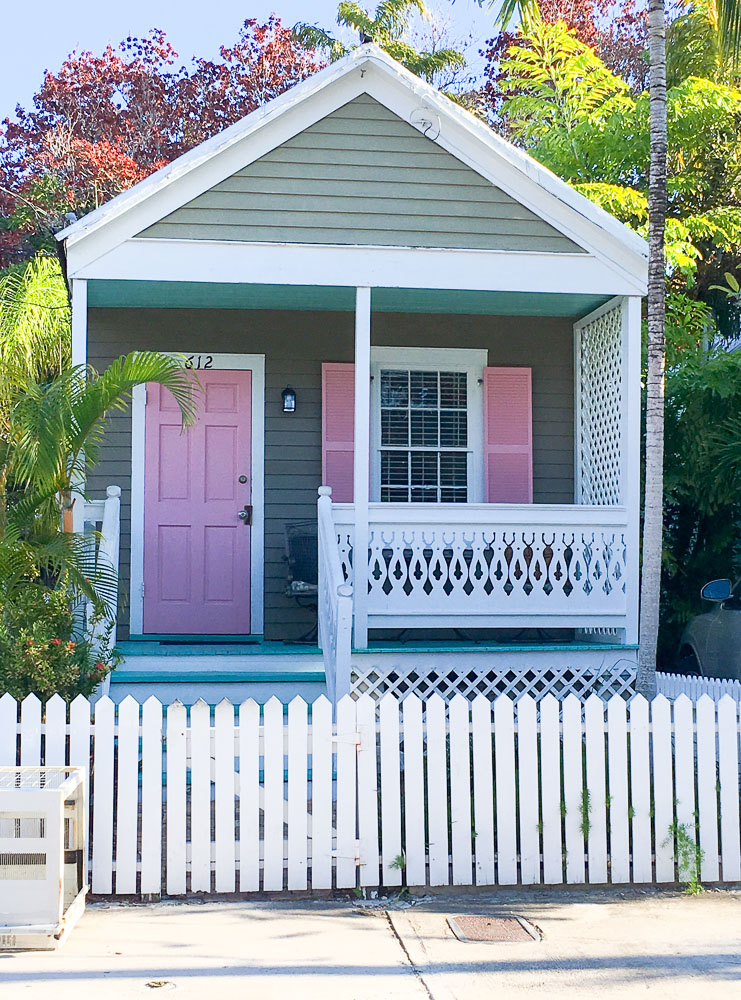 This is one of those beautiful architectural features I knew I wanted to use for the front porch at the Saving Etta house. Downtown Raleigh is filled with historic houses that have beautiful old flat sawn balusters. From the moment I laid eyes on the Saving Etta house, I knew the old metal railing would have to go.
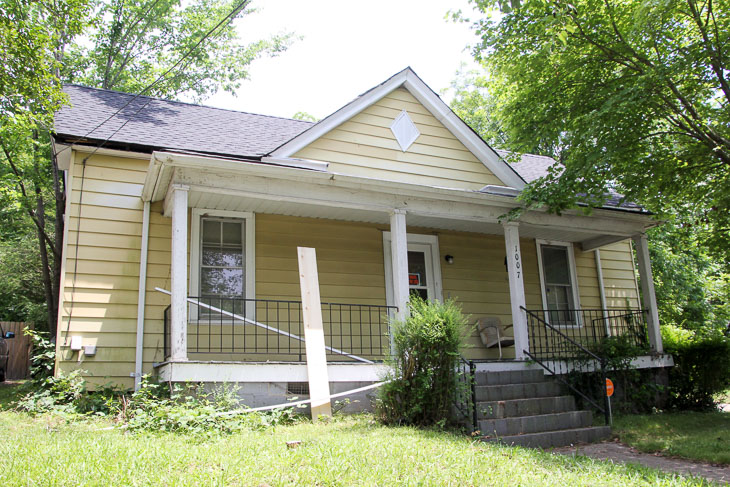
Not only were they a safety hazard (some were barely attached), but they also looked dinky. If you remember, during the framing process, we decided the original porch couldn’t be salvaged. It was removed and subsequently we rebuilt a new one in the exact same shape, size, footprint, and ceiling height of the original. This left us with an “open concept” front porch for several months until it was time to add the railings and porch ceiling.
As I designed the new railings, I knew a composite, metal, or vinyl railing wouldn’t look right on a house built in 1900. Therefore, I chose to use real wood for the railings and balusters. To insure the railings would last for decades, I chose pressure treated Southern Yellow Pine lumber.
(This is a sponsored post for Wood It’s Real.)
You may recall that Wood It’s Real is a proud sponsor of the Saving Etta project.

Building Code Requirements for Railings:
Before I teach you how to create flat sawn baluster railings, we need to talk about current building codes and historic houses (and where the two don’t meet.) Building codes in the US state that if your porch floor is 30 inches or more off the ground, you must have a railing at least 36 inches high. This can be an issue if you want your historic house to look historically accurate. (You may find this article about proportions and railing heights interesting.) If Etta had her original railings, they probably would have been 24″ high and could have been grandfathered in. Because we were starting new, I had to adhere to current building codes. In addition, spacing between balusters must be less than 4 inches apart to meet current building codes.
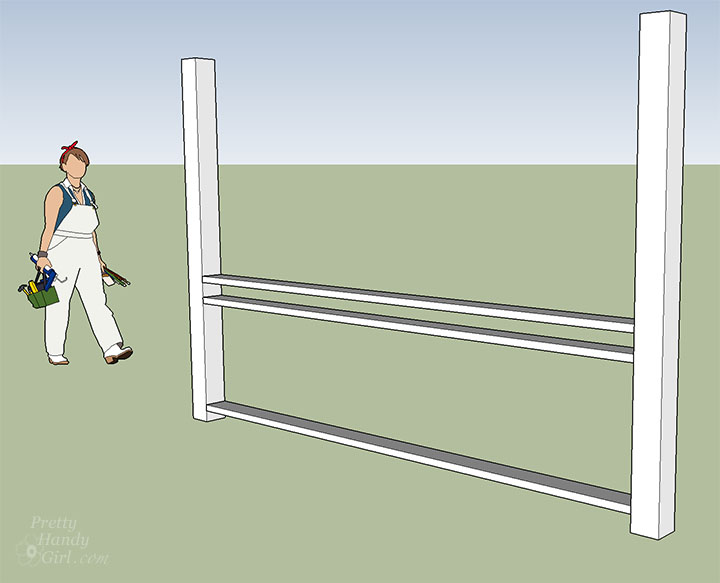
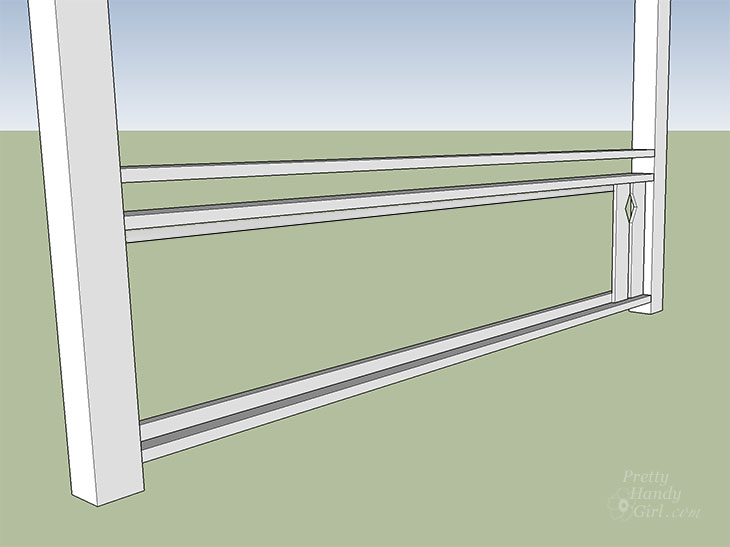
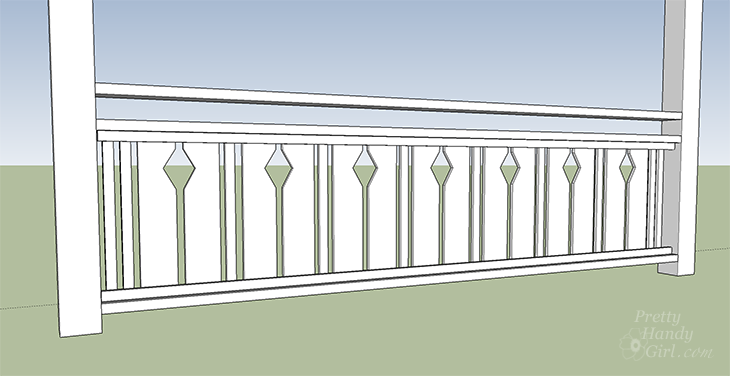
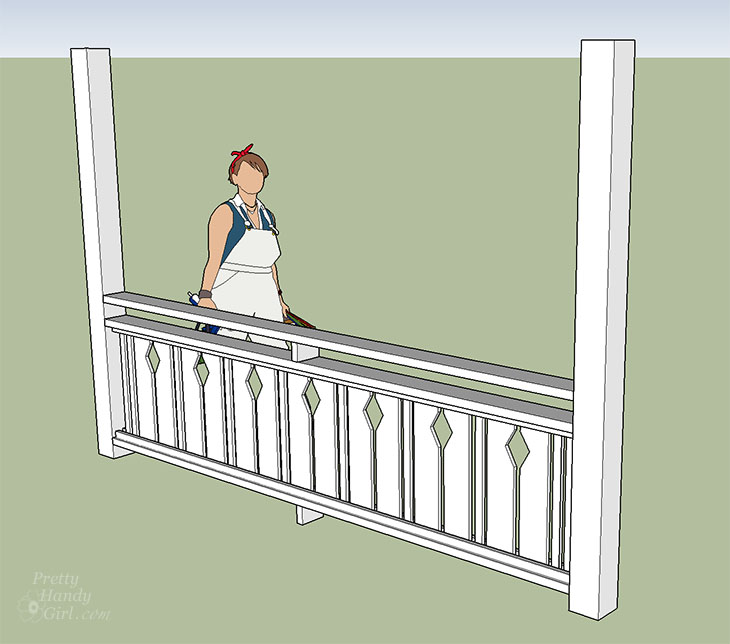
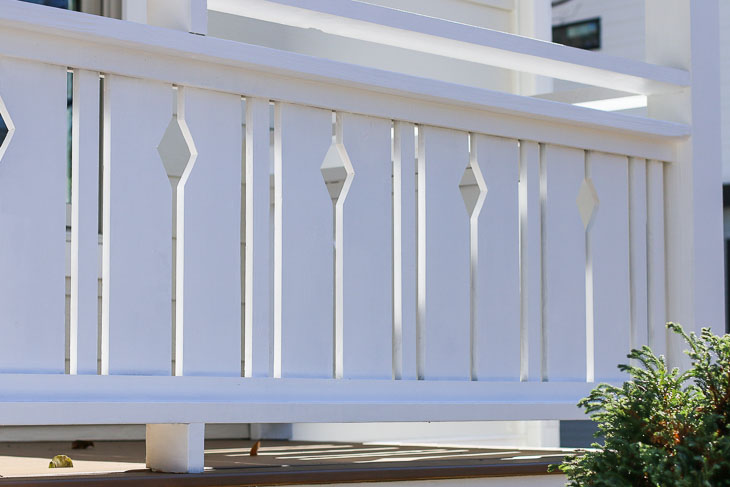
Before building the new railings, I drew up a design in SketchUp to share with the building inspector. I created a simple diamond cut out that pays homage to Etta’s diamond shape attic vents. This design was a simpler pattern to cut compared to many of the authentic victorian flat sawn balusters. Lucky for us, this design would save time, (and it would have less elements to deviate from the current building codes.)
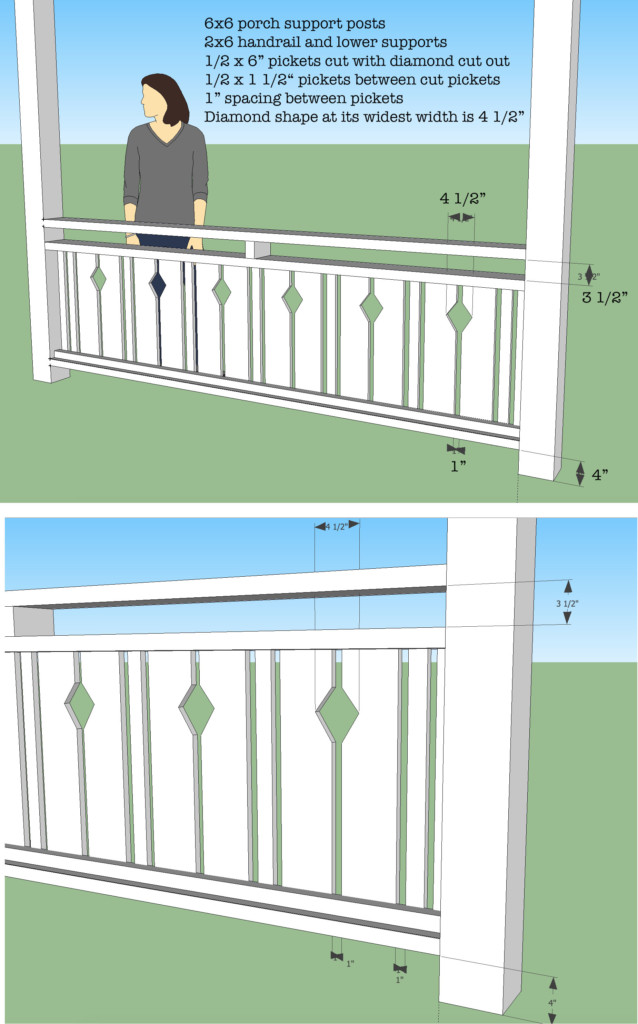
I was still concerned about the diamond width since it would be wider than 4 inches. To make sure my railings would meet final inspection, I emailed the above drawing to our local building inspector for his opinion. Luckily, he approved my drawings, stating that the diamonds were high enough a child would have difficulty getting their head stuck, and the majority of the spacing was much less than 4 inches wide. (Remember, it’s important to check with your local building official before you build anything that might not meet code. Ultimately each inspector may have a different interpretation of the local building codes.)
Once I had the inspector’s approval it was time to start building. Ready to learn how to make your own flat sawn baluster railings? Great, let’s get building!
How to Build Flat Sawn Baluster Railings
(I’ve included affiliate links for your convenience. I earn a small percentage from a purchase using these links. There is no additional cost to you. You can read more about affiliate links here.)
Lumber per Railing Section:
- 3 – 2″ x 6″ x (width between your posts)
- 4 – 1″ x 2″ x (width between your posts)
- *1″ x 6″ x 24″ boards for your balusters (figure out how many balusters you need to create a symmetrical pattern between the posts)
- *1″ x 2″ x 24″ boards to place between the 1″ x 6″ balusters
* You’ll need to figure out your railing length and decide how much lumber you’ll need for your balusters.
Materials:
- Nail gun
- 1 ½” Trim nails
- 2 ½” Deck screws
- Caulk
- Caulk Gun
- Primer
- Paint
- Paint brush
- Circular Saw
- Speed Square
- Tape Measure
- Jigsaw
- Pencil
- Sander or sanding block
Instructions:
Gather your supplies, set up on a workbench or two saw horses.
Cutting Flat Sawn Balusters:
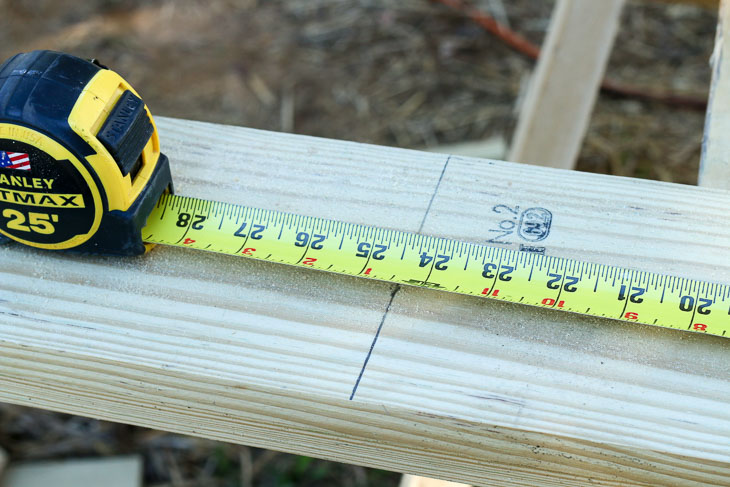
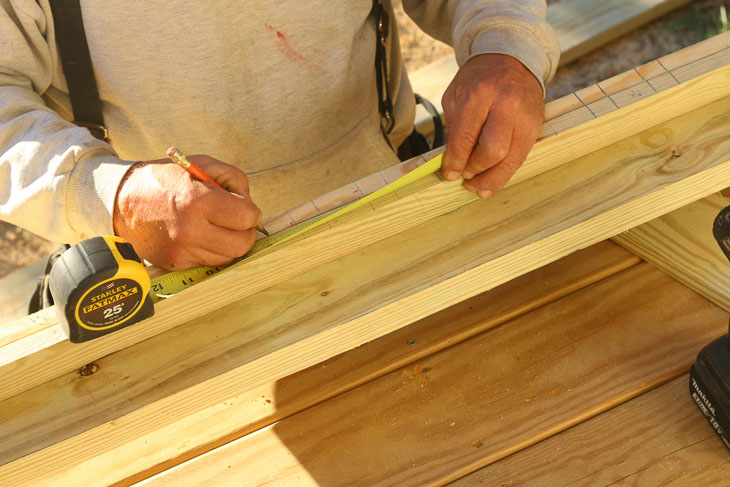
If you want to use the same proportions I designed in the drawing above, use 24″ tall balusters. To save time, layer two 1″ x 6″ pieces of pressure treated SYP (Southern Yellow Pine) on top of one another and cut all the balusters to length.
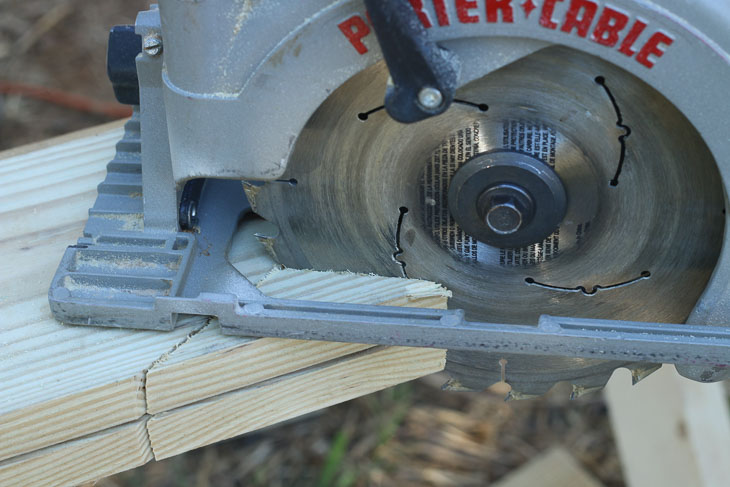
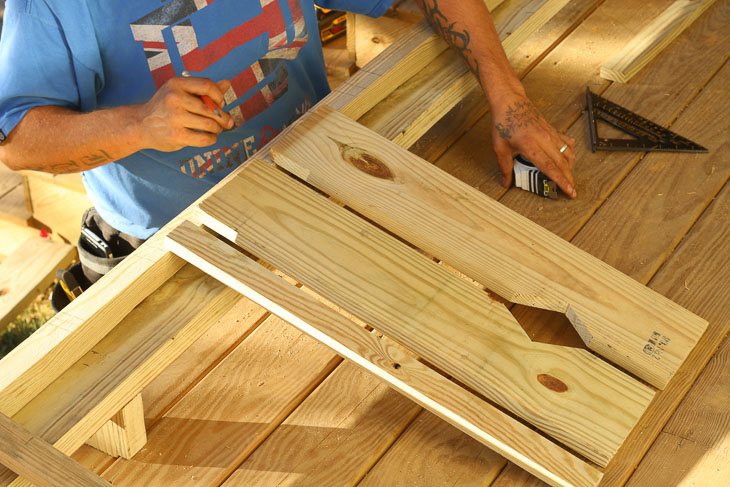
Make a quick diamond shaped template out of a piece of cardboard and laid it on top of two balusters side-by-side. Once you are happy with the size and shape (approximately 6″ tall), stack your two balusters and cut the triangle shape out of them. It’s quickest to stack the two balusters on top of one another and cut the shape with a circular saw. It’s okay if the saw doesn’t cut completely into the corner of the shape. We’ll take care of that next.
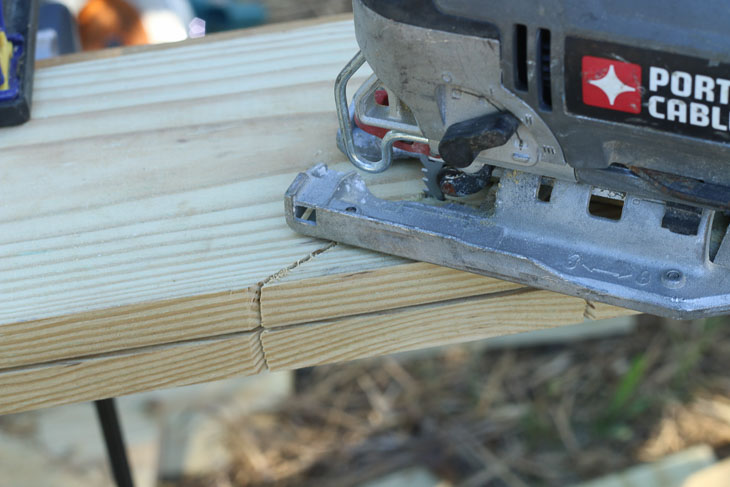
Use your jigsaw to finish cutting into the corner. You may be wondering why we didn’t use only the jigsaw to cut the shapes out. Pressure-treated Southern Yellow Pine is a much stronger wood than your typical pine lumber. The jigsaw takes longer to cut through the lumber. A circular saw makes quicker and straighter cuts into the wood. Of course feel free to use the tools you feel comfortable using.
Assembling the Railing:
Cut three 2″ x 6″ boards to the width between the porch columns. Level and secure the bottom rail 4″ above your deck floor using 2 ½” deck screws. Measure 24″ from the bottom rail. (Approximately 30″ from the floor.) Level and secure your next horizontal rail at this height using two deck screws on each end. Secure the top rail at 36″ above the porch floor.
Cut four 1″ x 2″ boards the same length as your rails. You’ll need them to hold your balusters in place.
Laying Out the Baluster Pattern:
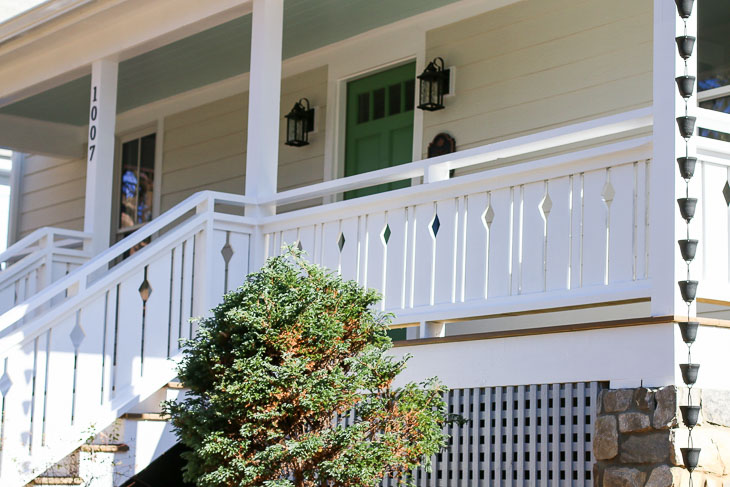
Before you begin securing the balusters, figure out your spacing. We chose to use 1×2 balusters in between the flat sawn balusters. This will give you more flexibility with your layout. (When you look at the finished railing, you’ll notice we finished the ends with two 1×2 balusters where we didn’t have enough room to fit a set of 1×6 flat balusters.) I’m not going to pretend laying out the spacing is easy. You may decide to use math to figure it out or start laying out your pattern using the cut balusters and pencil marks.
Once you determine your layout, lay two 1×2 boards (cut to the width of bottom and middle rails above) side-by-side and mark the location of the balusters and spaces onto them. This will help keep the balusters lined up on the top and bottom and prevent a mix up with your pattern.
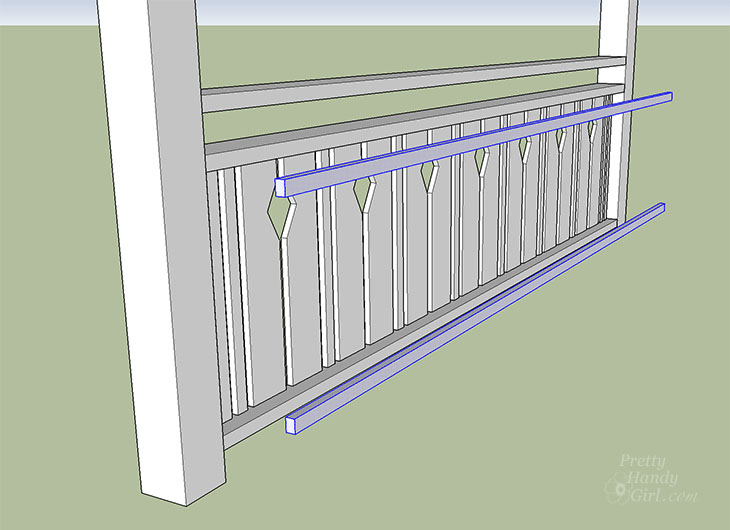
Measure the center of the bottom 2″ x 6″ rail. Measure 3/8″ out from the center mark. Using finish nails, secure one 1″ x 2″ board to the bottom rail on the outside of the 3/8″ mark. Repeat the process and add a second 1″ x 2″ board on the underside of the middle rail. These will help hold your flat balusters in place vertically.
Starting in the middle, set two 1×6 diamond cut out balusters in place. Secure with finish nails through the 1×2 supports. Work your way toward one side and then the other.
Secure the other 1×2 boards to the bottom and middle rails to “sandwich” the balusters.
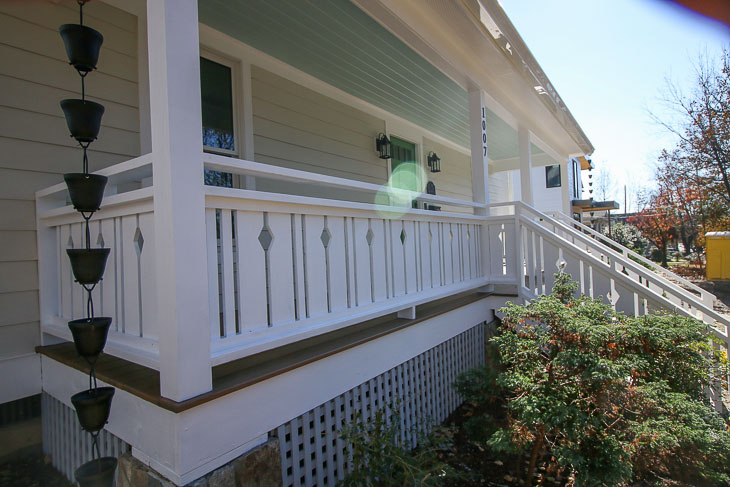
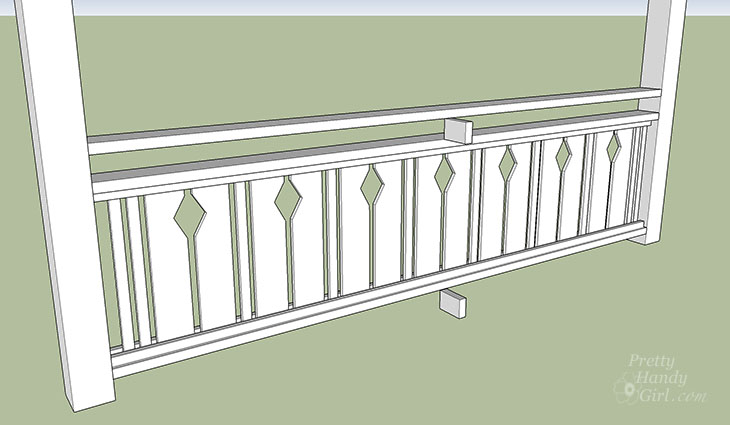
Here’s a look at our railings fully assembled.

Finally, measure the space between the bottom rail and the decking. Cut a support block out of the 2″ x 6″ leftover lumber. Measure the space between the top and middle rail. Cut a second block from the 2″ x 6″ lumber. (If your railing span is five feet or less, you might be able to skip the blocking. Spans longer than 10 feet might require additional blocking to keep the railings from bowing.) Attach the blocking with trim nails or screws.
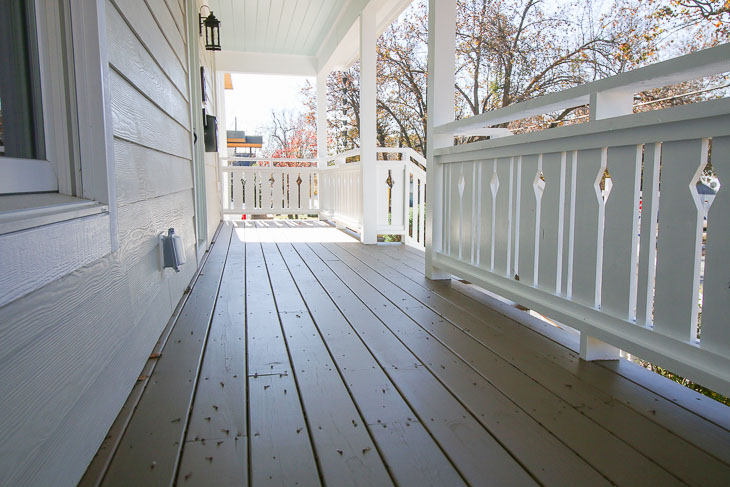
Here’s Etta’s new flat sawn baluster railings. They look good, but definitely need paint.
Finishing the Flat Sawn Baluster Railings:
Sand any rough edges on your railing. Caulk all screw and nail holes. Caulk all seams, but you don’t need to caulk where the flat sawn balusters rest against the four supports.
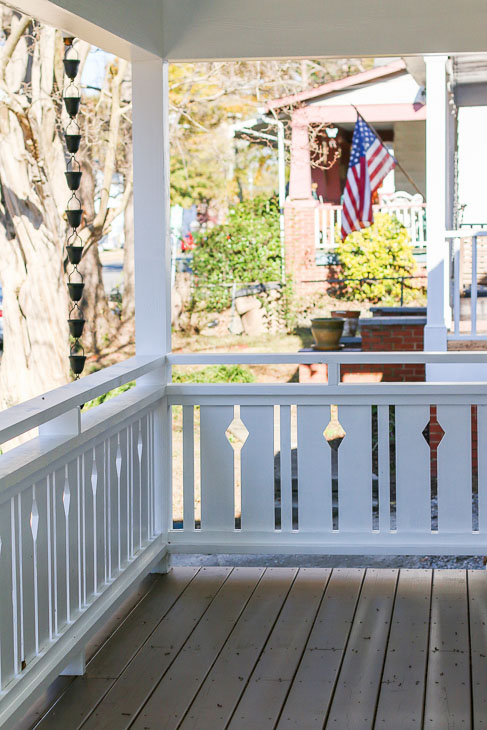
Allow the caulk to cure, then prime the railings and porch posts. Finish up by painting them the color of your choice (although personally I prefer a nice crisp Magnolia Home True White.)
The porch floor received two coats of semi-transparent Sherwin Williams Banyan Brown deck stain to protect it from the elements.
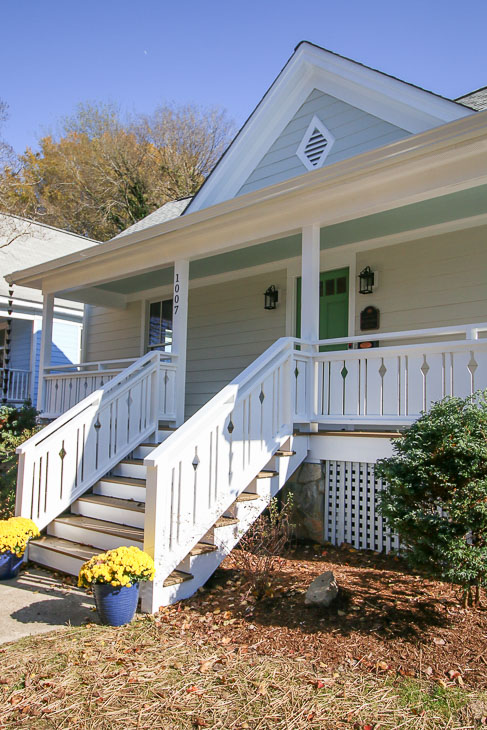
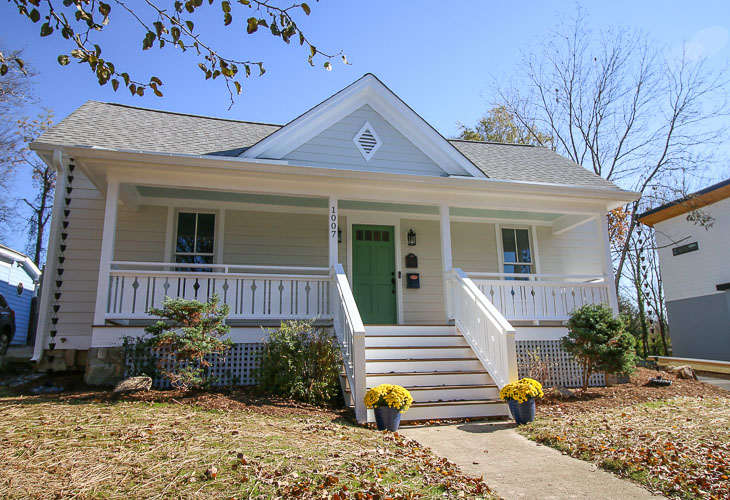
As if you couldn’t tell how excited I am about the final results, enjoy a few more shots of the finished project!
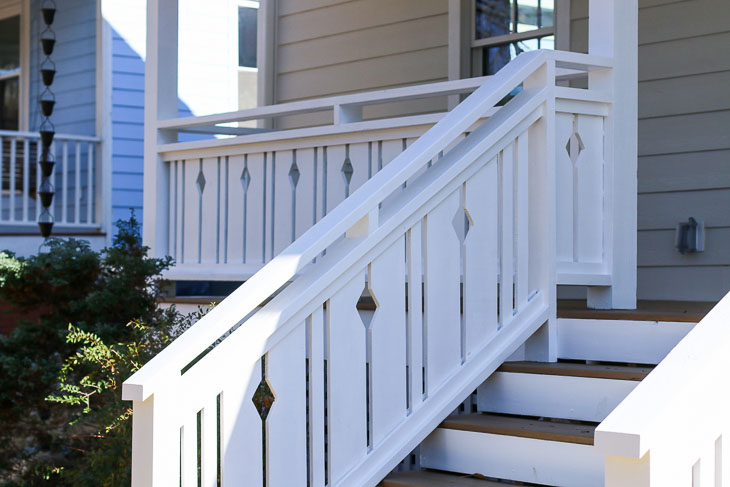
The angled railings, were created by cutting the appropriate angle for the balusters. Then we used a line to mark the location for the diamond cut outs. As you can see below, having 1×2 balusters in the mix allowed us to fill in space too narrow for a set of 1×6 balusters.
If were wondering about the colors I chose for Etta’s exterior, you can find them here. (The porch ceiling was recently painted Sherwin Williams Tidewater. It’s the perfect Southern porch ceiling color in my humble opinion.)
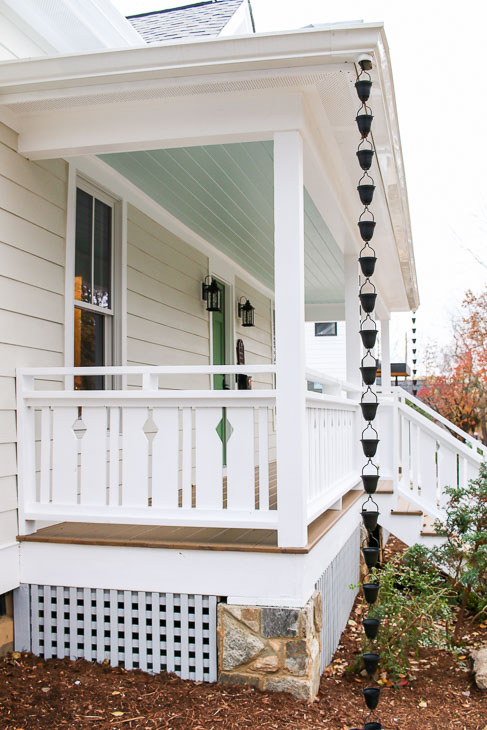
Because I get asked this question all the time, the rain chains are from Amazon. They work in place of standard gutters. The water flows down the cups and fills a small round bowl filled with Mexican beach pebbles. I have holes in the bottom of the bowl, but I also tipped it to spill excess water into the yard.
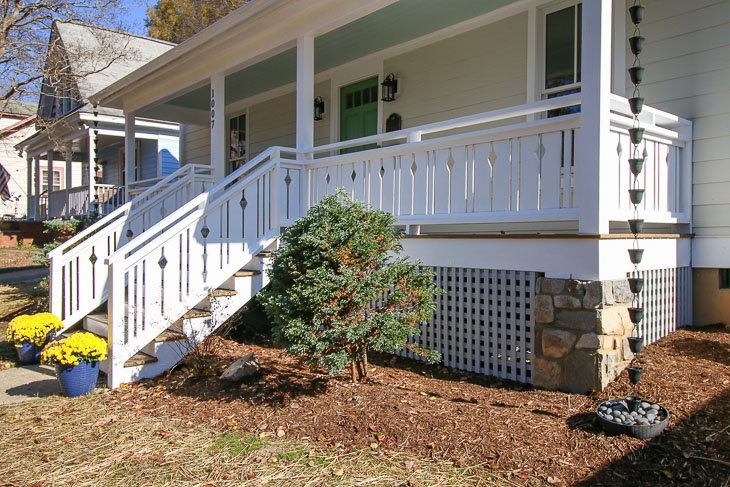
The Saving Etta house is looking amazing from the street. We’re closing in on the finish line!
Do you like the flat sawn balusters? Think you could use them on your own porch or deck?
If you liked this project, you might want to see some of the other deck, porch, and outdoor living projects on the Wood It’s Real website!
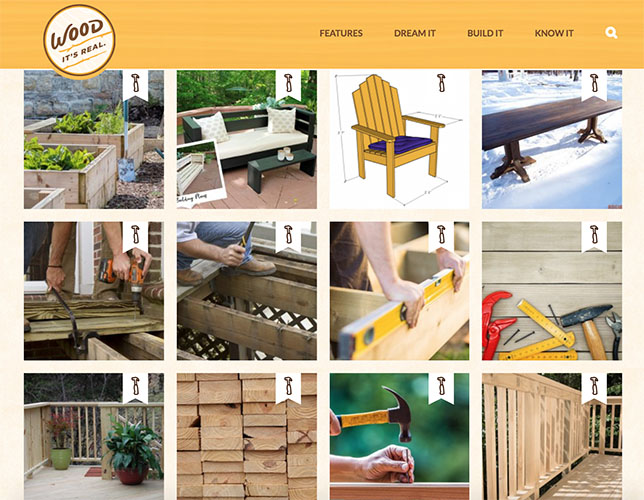

Disclosure: This post is a sponsored post for Wood It’s Real. It was written as part of their sponsorship of the Saving Etta project. I was not told what to write. All words and opinions are my own. I am very particular about the brands I work with, and only partner with companies that provide quality materials and/or services.


Hi. Very nice. Great instructions. I have a question about the board thickness. It seems as if your first illustration lists “1/2″ x 6″ pickets cut with diamond cut out” and then later in the post you seem to be using 1″ x 6″ instead of 1/2″ x 6″ Did you change your mind? The 1/2 inch thickness is harder to locate and more expensive. It seems the 1″ thickness worked for you. Any comments? Thank you for posting this.
Sorry, my image was wrong. I used 1×6’s and 1×2’s.
I desperately need the dimensions for the diamond cut-out including the distance from the top of the baluster to the top corner of the cut-out.
John David
[email protected]
Sorry John, I sold the house and am not sure what the dimensions are. I recommend laying out a paper template on your balusters to see what looks good to you.
Thanks for the detailed directions! I’m about to start my own project and have two questions. Does the pressurized wood need to weather for any time before you paint it? And if not, can you at least prime it before assembly? Painting after it’s up looks difficult to get all the sides.
You should always let pressure-treated lumber dry before painting. You can purchase kiln dried lumber to forgo the wait.
Thank you for the inspiration. Our smaller plain farm house needed at statement. I have a picture but didn’t know how to post.
Very beautiful!
I’m getting ready to redo my porch and would love to borrow your idea. I’m wondering if you think this design could hold up to New England weather, frost heaves, for example. Could water collect in the bottom spaces between the balusters creating a problem of frost heaves or rot? Also, could you see using pvc board? Would they be strong enough?
Thanks very much!
Flat sawn ballusters are nothing new. They’ve been used for years. If you’re worried about water collecting, I’d drill some holes in the bottom of the rail for drainage. PVC should be fine if it’s thick enough.
Wow. I am about ready to begin a similar project. You just saved me quite a bit of planning time. Thanks!
Nice job. I intend to incorporate your diamond pattern into my ballasters and maybe add a 4 circle overlapping “shamrock” into each board. Easy to do with a drill press.
Awesome idea!!! I’d love to see a picture if you do this.
Beautiful house, Great job. You have shamed some contractors, or so they claim to be.
Not sure I understand your comment Bill. Who’s been shamed?
Wanted to thank you for the great tutorial on this. I figured I could make my own, but the “how-to ” of putting everything together was going to be guess work. Thanks again! Beautiful porch.
You’re so welcome. I’d love to see your baluster railing if you make them!!
I wish I had railings like those. They are so elegant and beautiful. Too bad I live in an apartment 🙁 But I will definitely check out those rain chains on Amazon. Maybe I can even put them somewhere on the porch. Let’s see!
This looks amazing!
Hi Brittany, I am not caught up on your “Saving Etta” posts but I had to read this one out of order. You did a beautiful job on the railings, so precise… fabulous!
Thank you Julie!!!
Such a great improvement to your front porch! Nice tutorial, too! I enlarged our front porch this year but not sure it’s big enough for a railing. If I decide I need one, this tutorial will come in handy. Thanks for sharing!
These are truly the icing on the cake! They really shout “Historic”! Would love, but first I need a porch!