How to Build a Custom Vintage Ruler Picture Frame
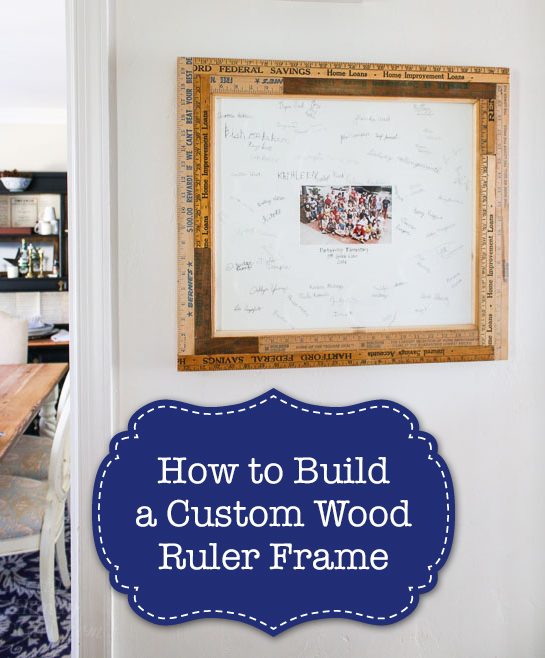 How to Build a Custom Vintage Ruler Picture Frame
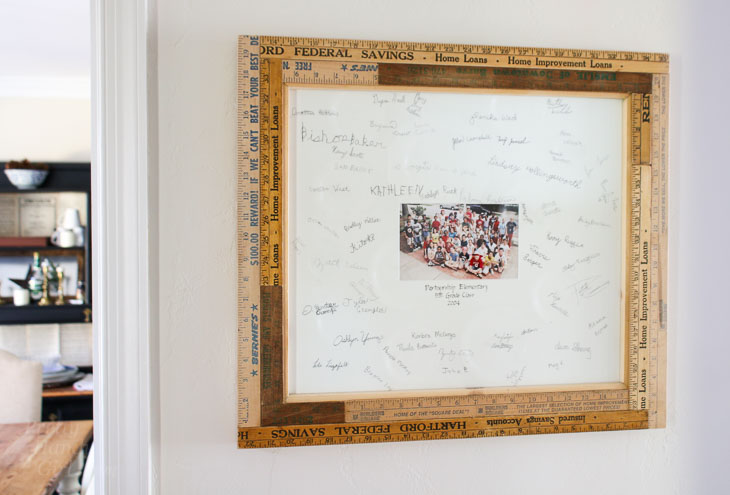
Every year when I go to meet my sons’ new teachers, I tell them if there is anything that needs fixing to let me know. It’s my small show of appreciation for all they do for my kids. Before Christmas, one of the teachers took me up on my offer. She asked me to fix a frame that had fallen off the wall and broke. I took one look at the cheap MDF frame and knew it was beyond repair. I didn’t tell her, because I wanted to surprise her with a Custom Built Vintage Ruler Picture Frame.
The great thing about this project is it uses cheap 1″ x 4″ lumber. And you can add your own moulding to dress up the frame if you like. Or just leave the frame plain, either way you’ll save major money by building your own custom frames!
Ready to learn how to build your own custom vintage ruler picture frame? Let’s get framing!
Materials:
(I’ve included affiliate links for your convenience. I earn a small percentage from a purchase using these links. There is no additional cost to you. You can read more about affiliate links here.)
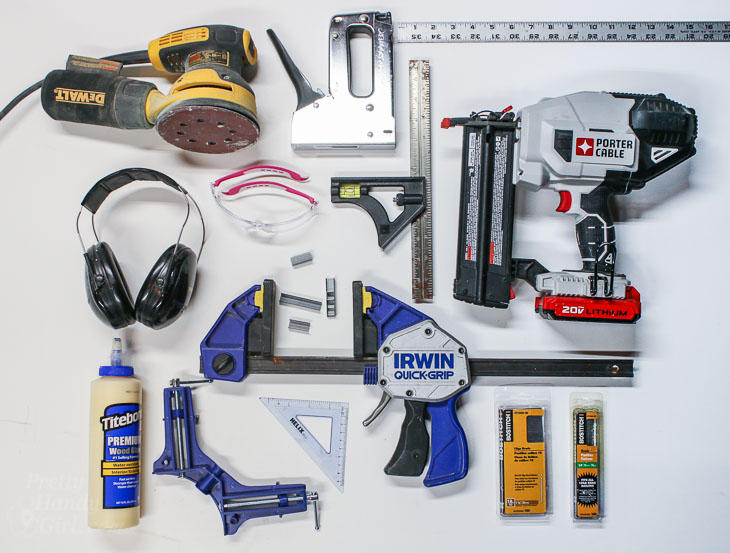
- Power sander
- Brad nailer
- 5/8″ nails
- 1 ½” nails
- Miter saw
- Staple gun
- 1/2″ staples
- 90 degree clamp
- 2 long clamps (learn how to use two short clamps as a long clamp here)
- Ruler
- Wood glue
- Ear protection
- Safety glasses
- 1″ x 4″ lumber
- Vintage rulers
- Framing points
- 5-in-1-tool (or flat edge to press framing points into wood)
Instructions:
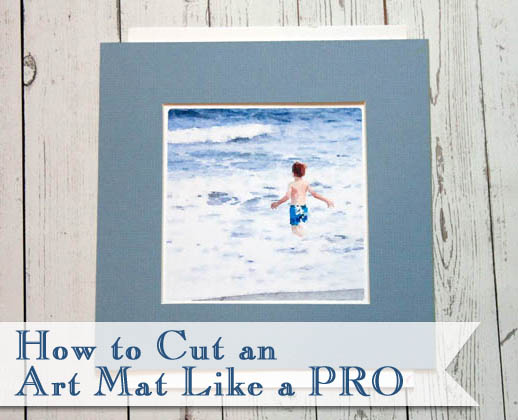
This tutorial assumes you have mounted art and glass, but if you don’t you can follow this tutorial for cutting your own art mats.
Cutting the Frame:
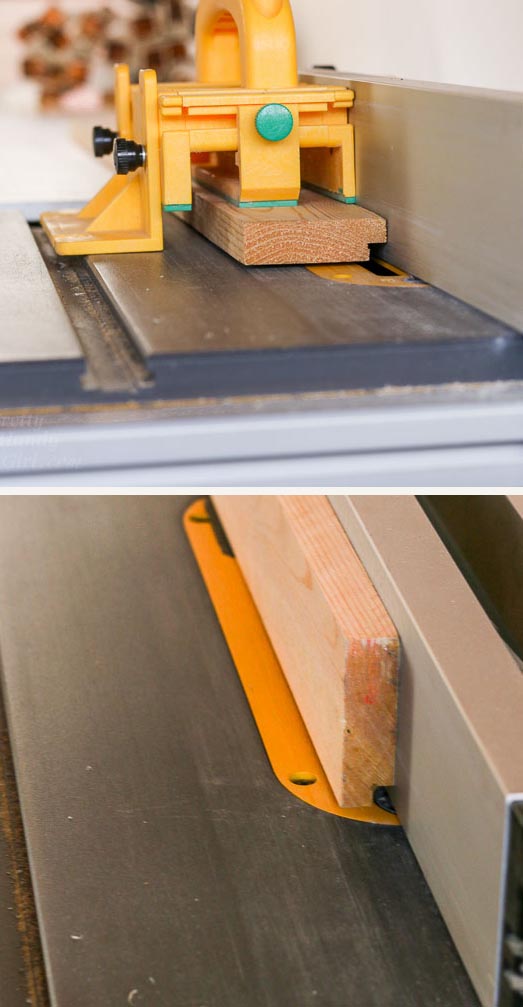
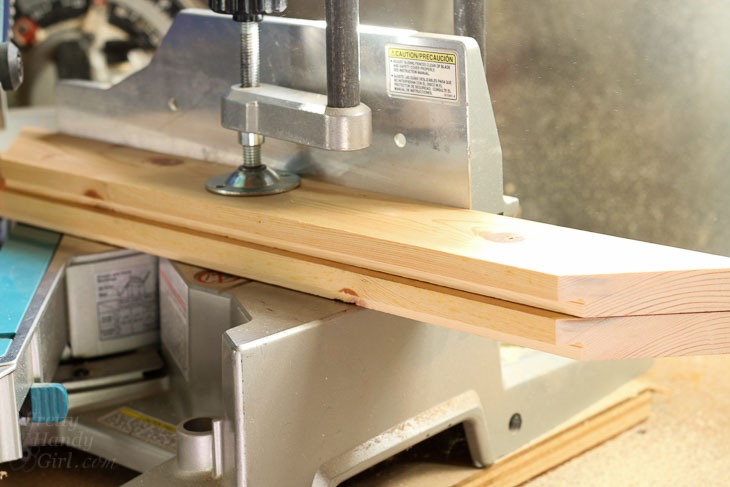
Use a table saw to rip your 1″ x 4″ lumber. Run your board through the saw along the 4″ side, then flip the wood up and run it through again. This will take 1/4″ off one corner to create a rabbet to place your art into.
Lay your ripped 1″ x 4″ boards against the fence of your miter saw. (I like to pre-cut four pieces a few inches larger than my artwork.) Cut one end of your boards at a 45° angle (angle the saw blade to position the rabbet on the short side.)
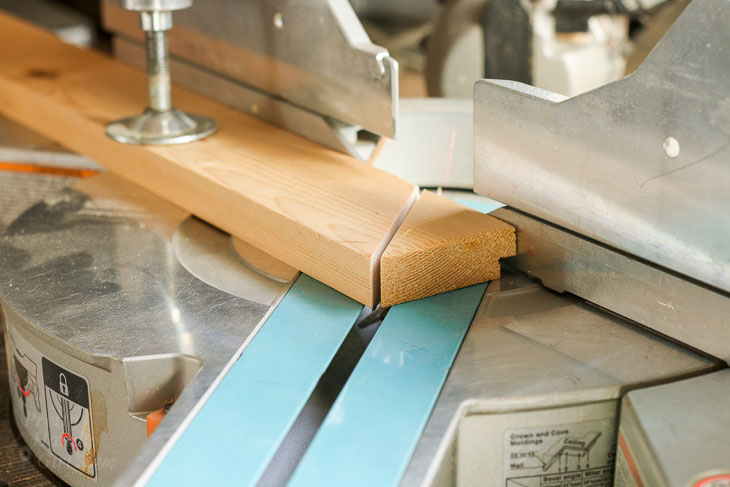
Set one board against your art. Before cutting the other side, measure the width of the art. Add an extra 1/8 inch. Mark the inside corner and cut to length (angling the miter saw blade in the opposite direction as your first cut.)
Take your first cut board and lay it on to of a second board. A quick way to cut them exactly the same length is to place the already cut board on top of the second board and line up the ends. Then line the blade up with the cut on your first board. Clamp the boards down and cut.
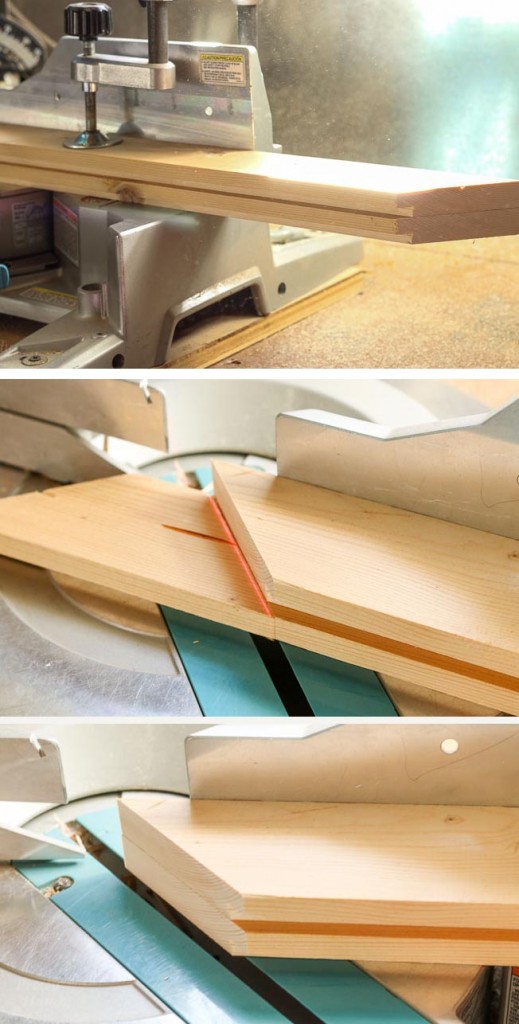
Dry fit the two identical sides. Lay one 1″ x 4″ board over the cut boards at a 9o° angle. Mark the inner corner where you need to cut.

Cut the side piece and dry fit to make sure the cut is perfect.
Repeat the process above to cut two identical parallel side pieces.
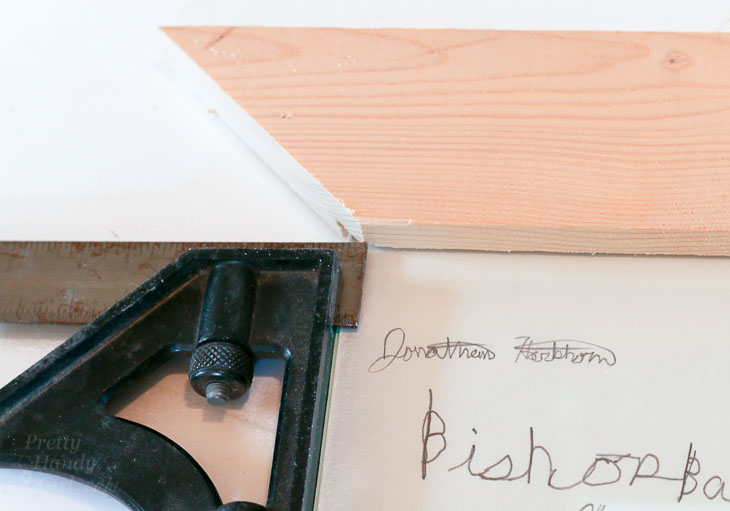
Dry fit the frame around your artwork to make sure everything is square and fits inside the rabbet.
Assembling the Frame:
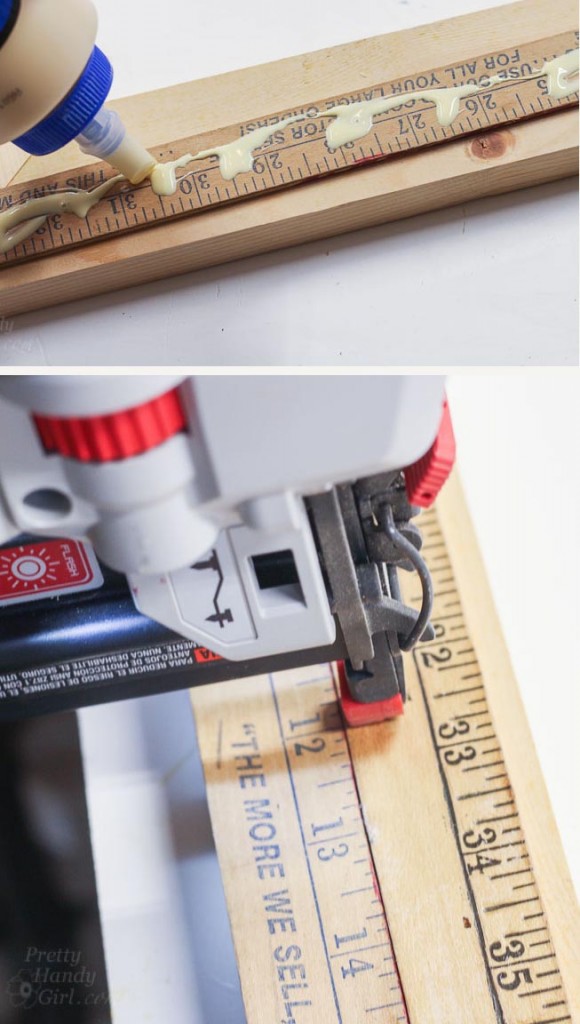
Apply a line of wood glue on the corners.
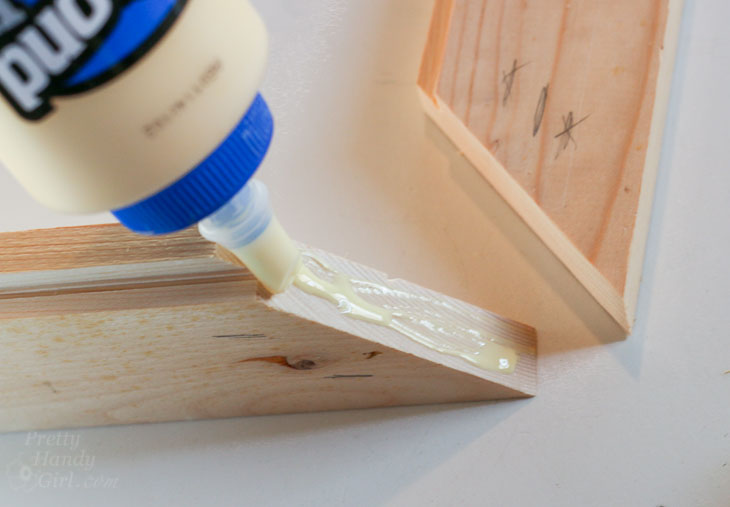
Clamp the corners with a 90° clamp then use your staple gun to fasten them together (on the back side of your frame). The wood glue is strong, but this will hold it in place while the glue dries.
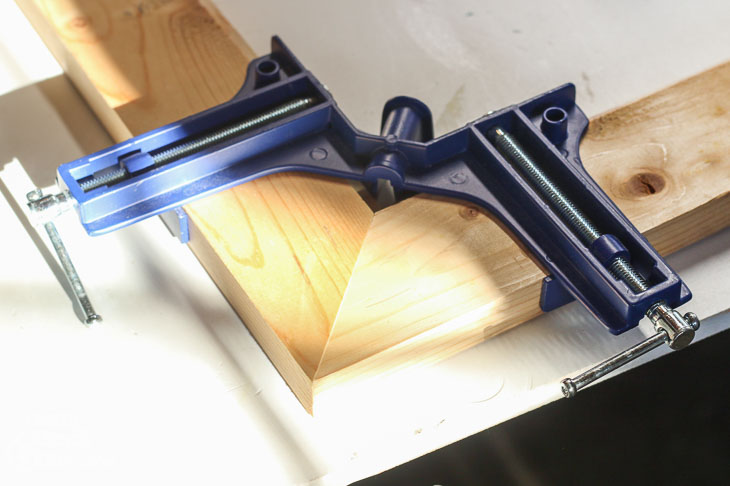


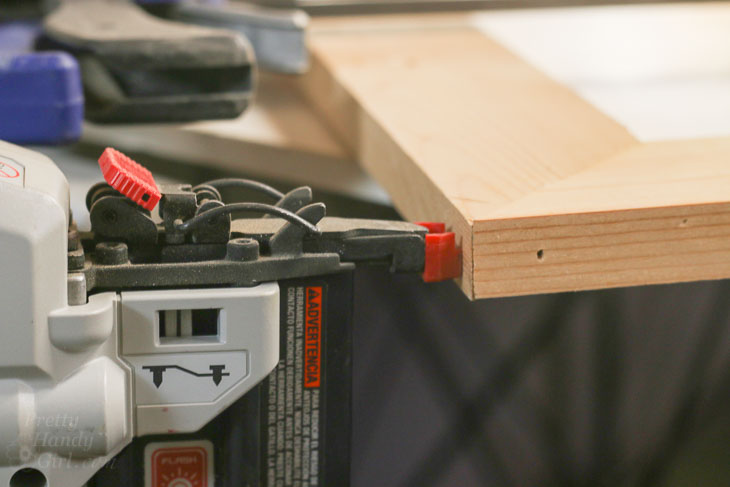
I like to add 1 ½” brad nails (one on each side of the corners) to further hold the frame together. (I don’t want the teacher’s frame to fall apart ever again!)
Clamp the frame and let the wood glue harden. If you don’t have clamps long enough, here is how to make one long clamp with two short clamps!

While the glue cures, cut off any chipped, broken, or rounded ends from your vintage rulers.

Lay the first two rulers against the outer edge of your frame.
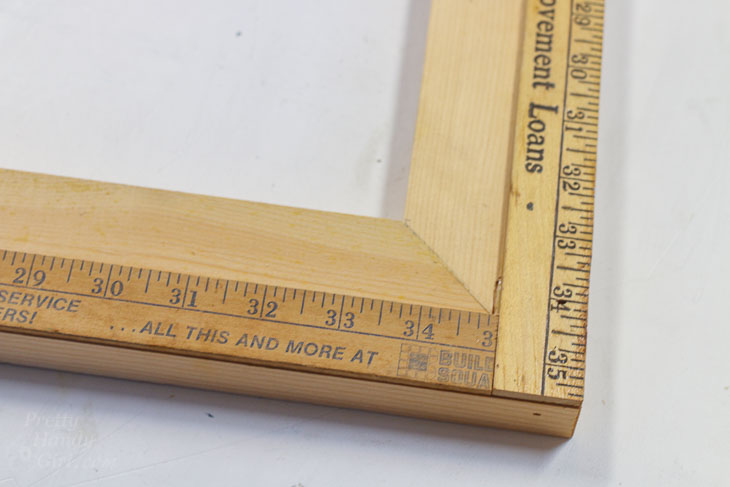
Mark the ruler where you need to trim and cut off the excess.
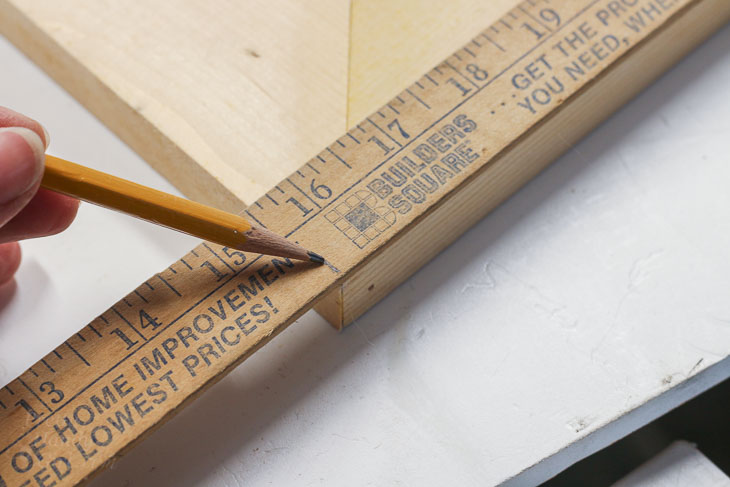
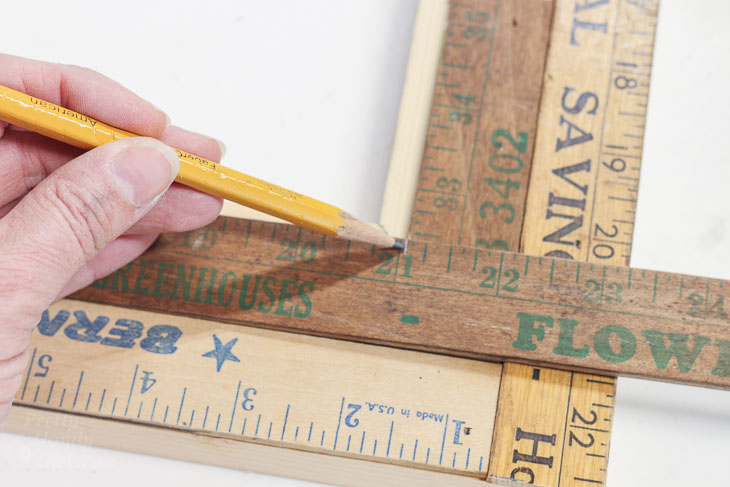
Continue until the outer edge of your frame is covered by rulers. Then start working on the inside of the first rulers. Measure, mark and cut the rulers to fit. Don’t worry if you are left with a small section of frame showing.
After all the rulers are measured and cut, use wood glue to adhere them to the frame. Follow up with a few brad nails to hold the rulers in place while the glue dries.
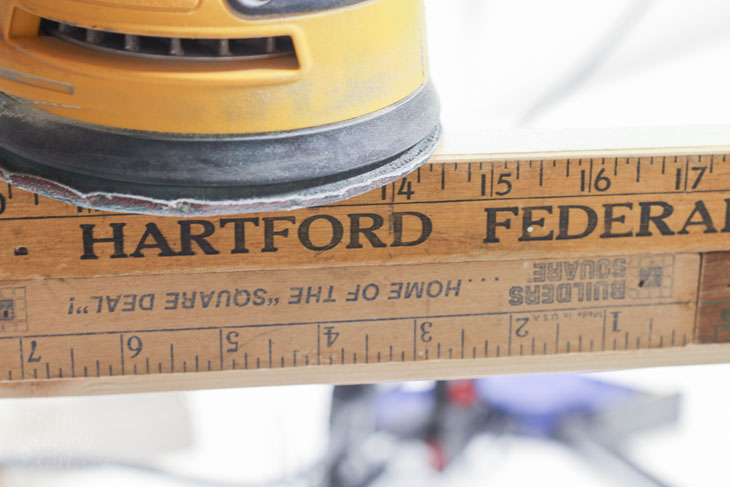
Sand the edges lightly with your sander to remove any splinters or rough edges.
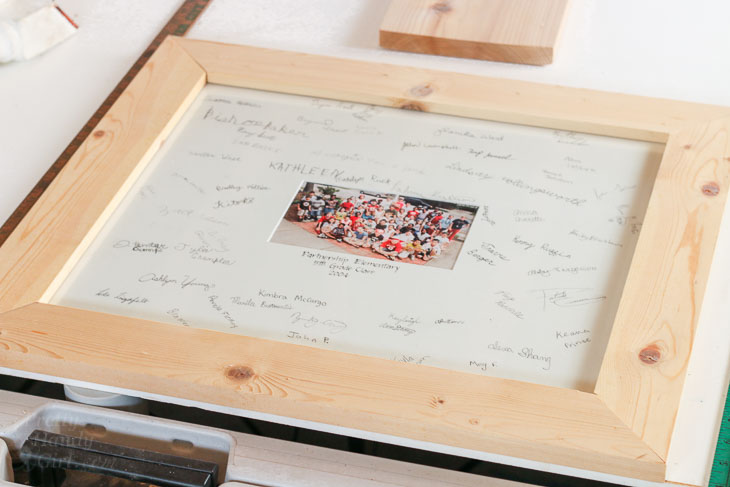
Securing Artwork and Adding Hanging Hardware:
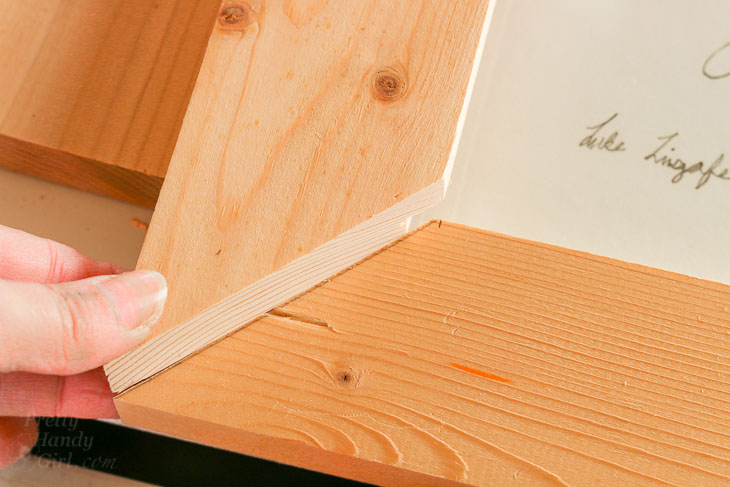
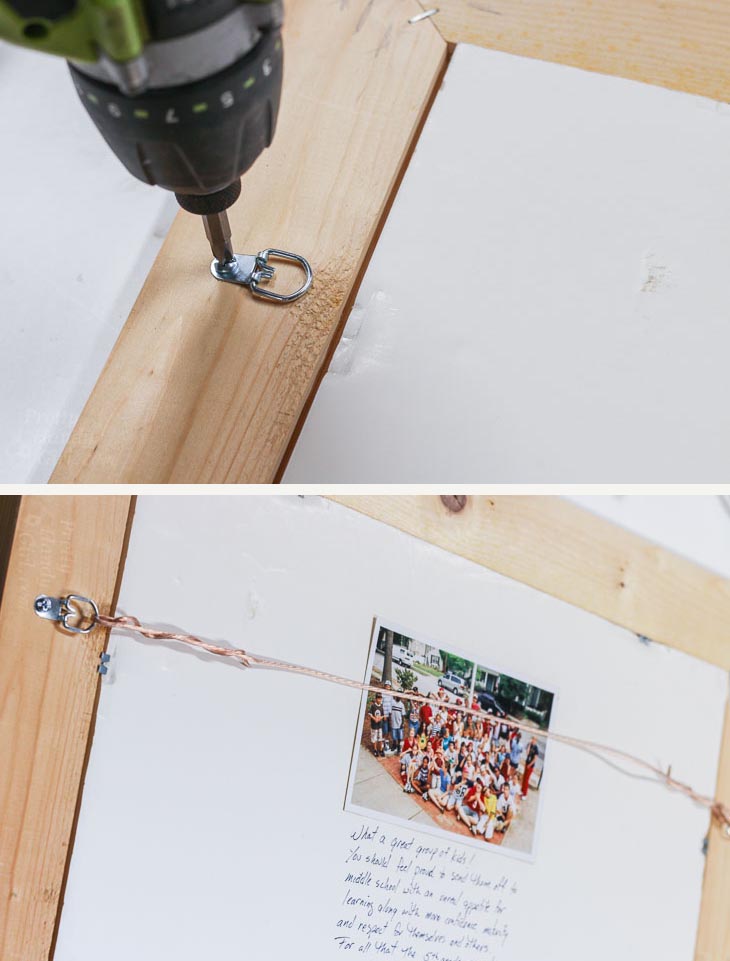
Fit your artwork into the frame. Place a framing point onto the back of the artwork with the point toward the frame. Use a 5-in-1-painter’s tool (or other flat tool) to push the point into the wooden frame. These will hold your artwork secure within the frame.
![]()
Add your hanging hardware. I prefer using D-rings and picture hanging wire, but you can use any hanging hardware you like.
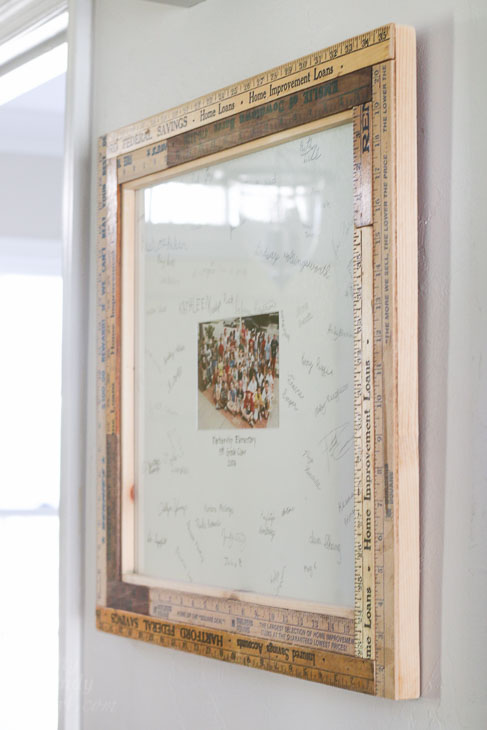
Congratulations! You are done and now have a beautiful (and unique) Custom Vintage Ruler Picture Frame!
This is an easy project to build and enables you to customize the frame to any size that you need. The vintage rulers add some character and charm to the frame.
I hope you liked this tutorial on How to Build a Custom Vintage Ruler Picture Frame. Check your local vintage shops, Craig’s List or Ebay for some rulers and make one of your own!
Pin or Share this project with your friends! Because friends don’t let friends spend lots of money on art frames!

If you liked this tutorial, you’ll love these frames:


You are genuinely amazing and give every single detail needed to make every project. Thank you.
That looks awesome! What was the teacher’s reaction?
She loved it! 😉
This is too cute!