
Millie’s Remodel: Super Strong Floating Shelves with LED Lighting
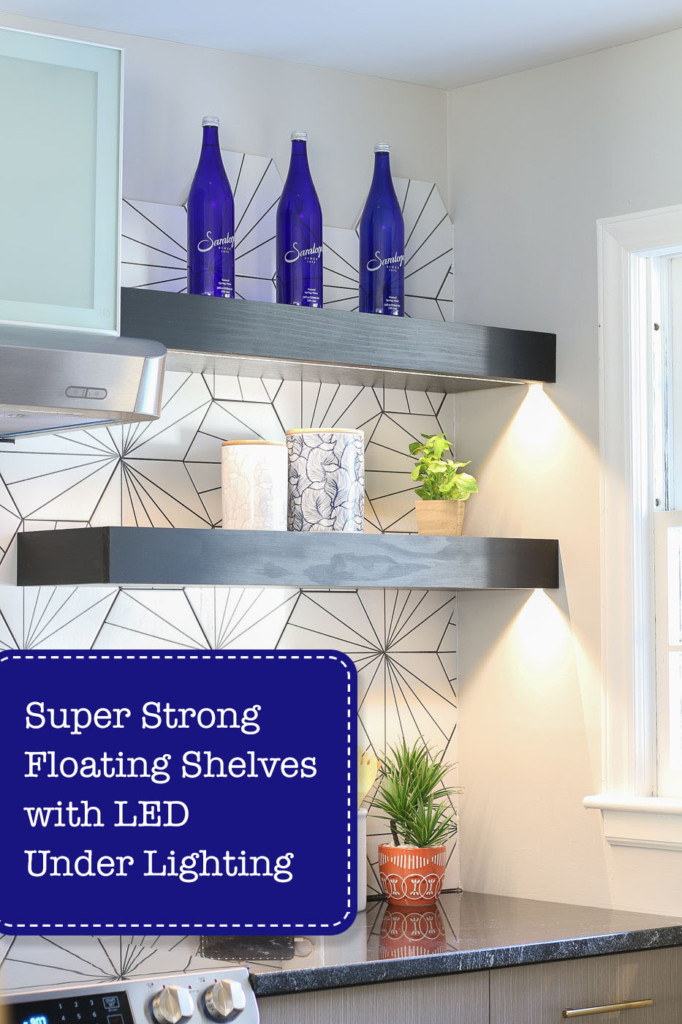
Millie’s Remodel is almost done. Today I want to teach you how to build and install the strongest floating shelves. Then make them even better with hidden LED under lighting. Let’s learn how to build these Super Strong Floating Shelves with LED Lighting!
Millie’s Remodel: Super Strong Floating Shelves with Under Lighting
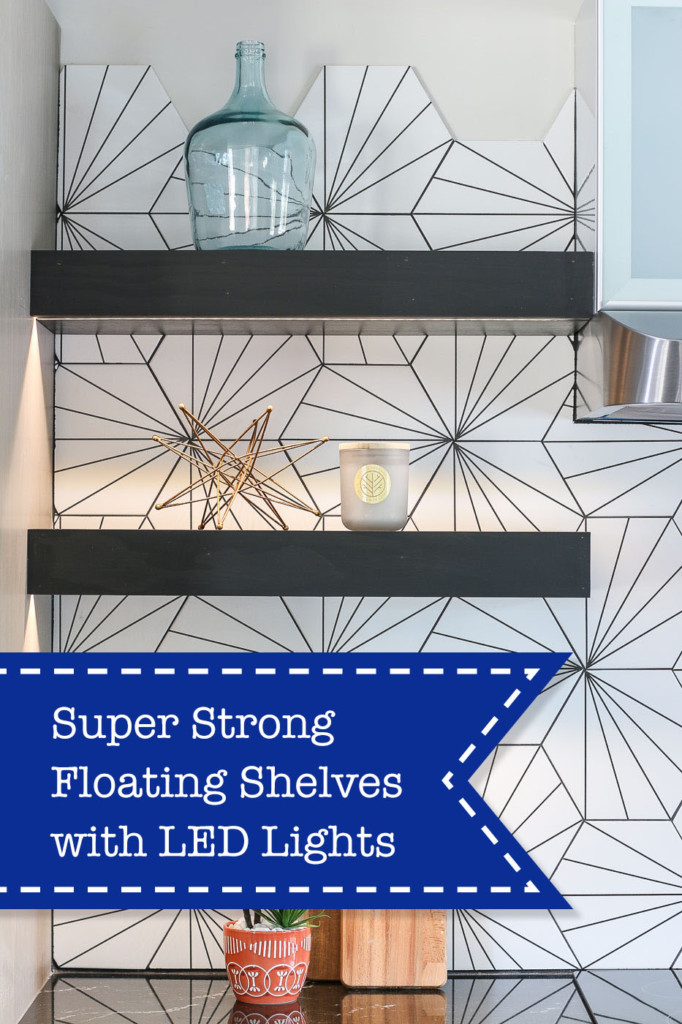
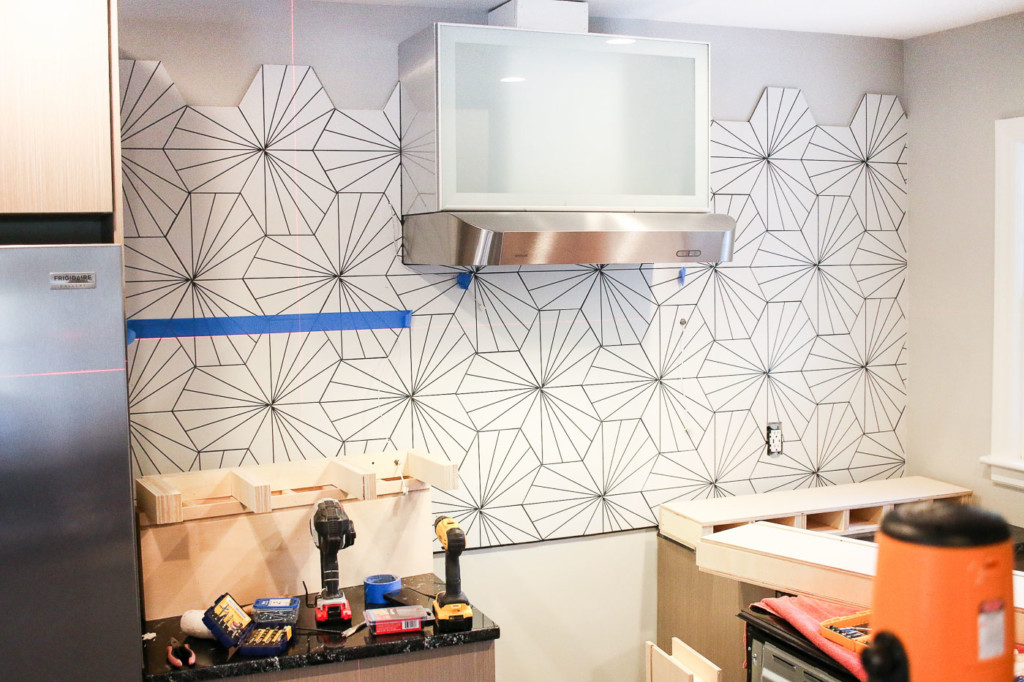
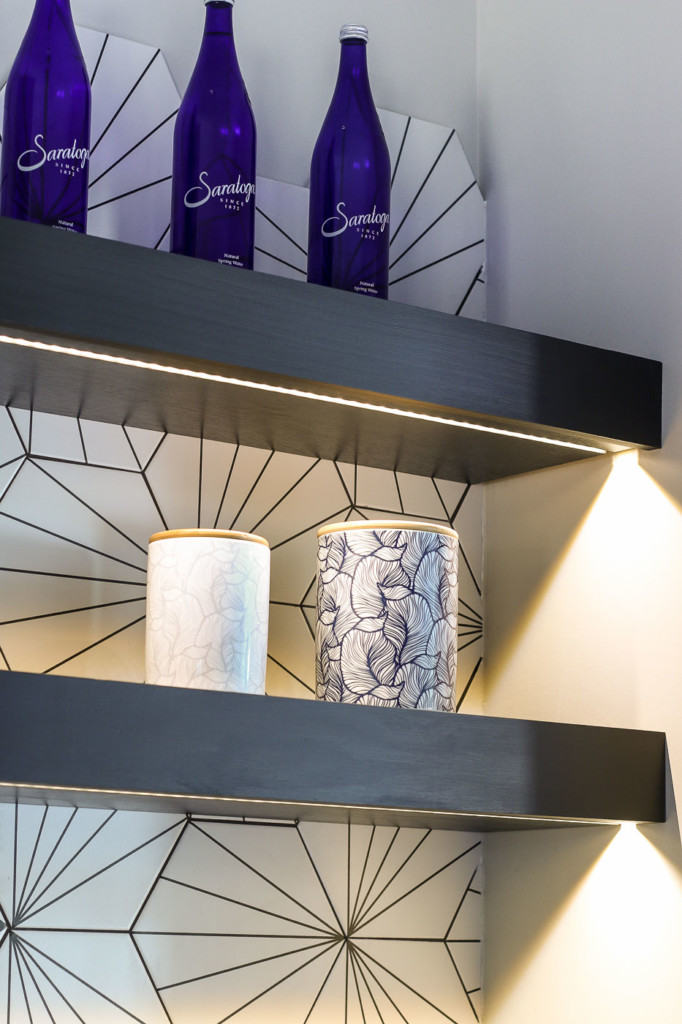
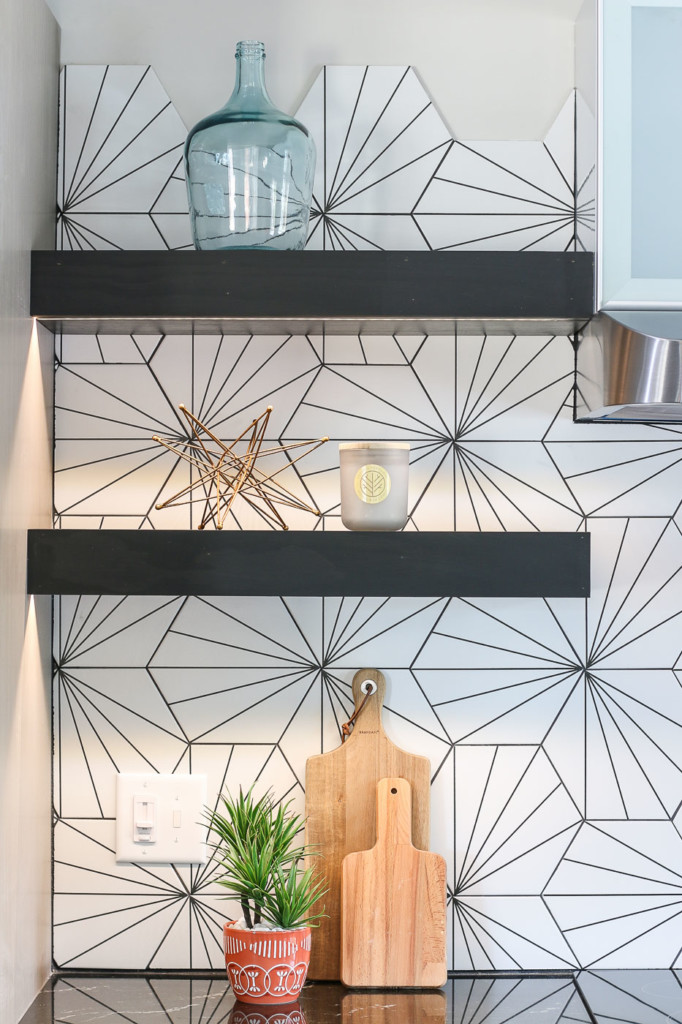
You know when you embark on a project and you’re not quite sure if your vision will work? This was one of those projects. In the end, I can honestly say, the results were much better than in my imagination! These floating shelves put off just the right amount of light in the Millie’s Remodel kitchen. The modern black floating shelves are a true show stopper against the modern hex tiles.
Today I’ll show you how to build floating shelves with LED Tape light underneath. But, before we begin, I have to give a huge shout out to Kichler for being a sponsor of the Millie’s Remodel project and for donating the LED tape lights and materials for this project.
![]()
Quality Will Save You Money! I love knowing all the Kichler lighting I used in the Millie’s Remodel house is top quality and will long after I leave this project. I learned my lesson in the past when I bought a few cheap light fixtures for the Saving Etta house and ended up with missing and defective parts. In the end, I paid more to purchase parts to make those cheap lights work. Plus, I had to pay my electrician for the extra time spent installing the lights. I’ve learned my lesson and only purchase quality lighting like Kichler lighting.
About the LED Tape Lights:
I’ve always wanted to use LED tape lights on a project. I like the idea of using an energy-efficient and low-profile lighting for under sleek modern shelving. LED tape lights aren’t hot to the touch, so they are safer than old halogen lights. Tape lights are so thin, they tuck up under a channel for a stealth lighting solution. Connecting them is as simple as trimming the tape lights on the cut lines, then sliding the strip under the metal clip, and closing the cover. It couldn’t be simpler.
I had my electrician run the wiring for these low voltage LED lights while he was replacing all the non-grounded electrical in the house. We followed the directions provided with the LED tape lights and found it straight-forward. If you aren’t working on a remodel where the walls are open, you can run the wiring from an alternate power source or outlet. Just be sure to follow the instructions and definitely check with your local building codes first and pull permits where necessary.
Learn more about all the creative places and applications for LED Tape lights here.
Kichler Products Installed:
- 2700K LED Tape Lights (this is my favorite color temperature. Not too warm and not cold.)
- Wiring to connect to the tape lights
- Wall controller switch/dimmer
I can’t wait to show you how to build these Super Strong Floating Shelves with Under Lighting. So let’s go ahead and jump right into this tutorial!
Materials:
(I’ve included affiliate links for your convenience. I earn a small percentage from a purchase using these links. There is no additional cost to you. You can read more about affiliate links here.)
- 3/4″ finish grade plywood
- Track Saw (or circular saw or table saw)
- Miter Saw
- Nailgun
- 2″ nails
- Trim Screws
- Drill
- Drill bits
- Router
- 3/8″ router bit
- Sandpaper
- Wood Glue
- Stain
- Finish Top Coat
- Tape Measure
- Pencil
- Safety Glasses
- BlueTooth Ear Protection
- Laser Level
- Structural Screws
Instructions:
My friend, Chris from a Glimpse Inside, created a fantastic tutorial for building floating shelves, so I recommend watching his video first to learn how to build the components of the shelves. I’ll go over the build briefly, but he gives more details on how to build them.

Video Tutorial:
After you watch Chris’s video, watch my video for the process from building the shelves to adding the LED lighting.
Preparation:
I highly recommend taking measurements for your space and then spend some time figuring out how to get the maximum use out of your sheet goods. My shelves were 36″ wide and 38″ wide. The longer your shelves, the more supports you will need. I recommend spacing supports no more than 6-8″ apart.
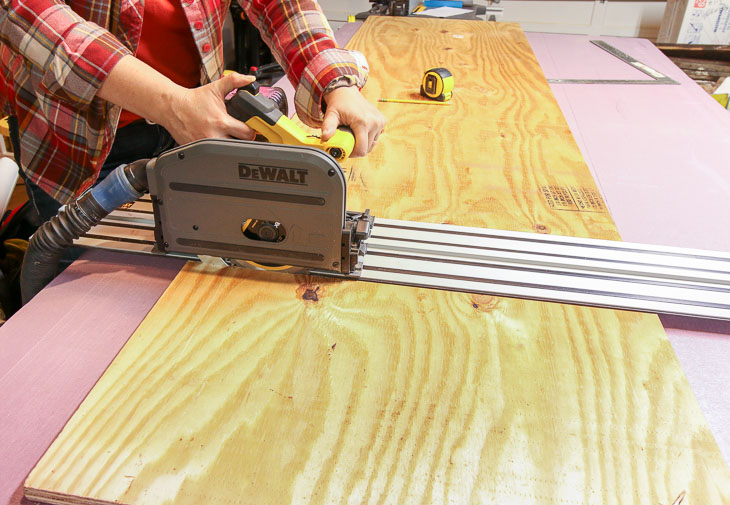
Tracksaw vs. Table Saw:
You may notice I’m using my DeWalt TrackSaw to cut the plywood. After getting this track saw from DeWalt a few years ago, I’ve found myself using it more than my table saw. It’s much easier to lift the track than a whole sheet of plywood. Plus, this track saw is battery-powered, so I don’t trip my breaker when running the shop vac at the same time. The track saw is safer to use because the blade is almost completely covered. My cuts are much more precise because the blade cuts perfectly along the edge of the track. This saw is super portable, and because it’s battery-powered I can take it with me and cut down my sheet goods in the parking lot if needed! Just be sure to purchase a piece of rigid foam insulation to use as a cutting surface.
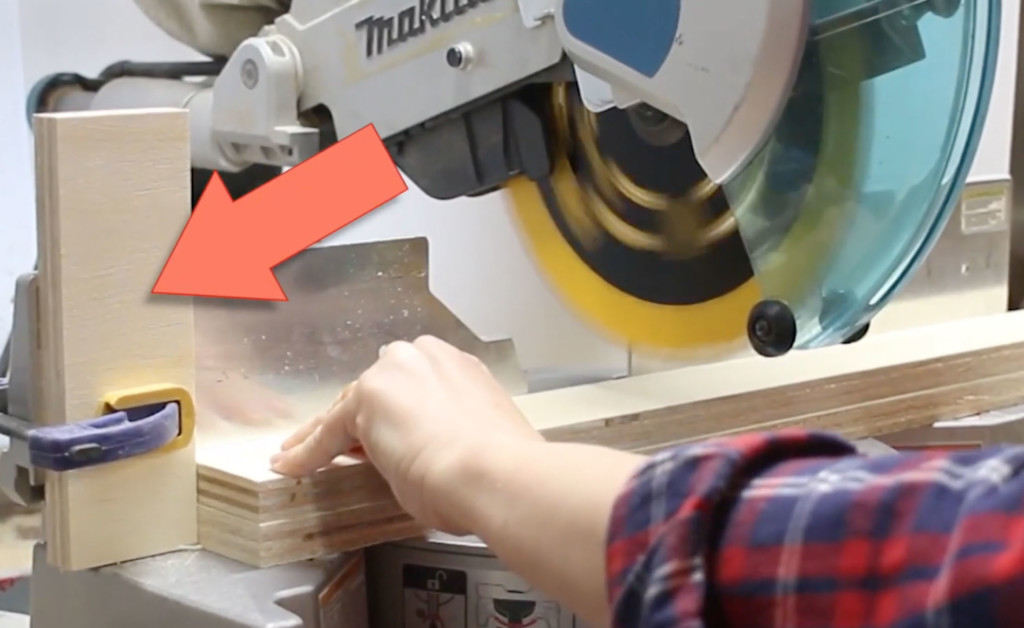
Getting Exact Repetitive Cuts:
You’ll notice in the video, you can clamp a stop block on your saw to ensure all the support arms will be the exact same length. When using a stop block, don’t clamp the opposite end of your workpiece because you can create a dangerous situation pinching the saw blade.
How to Get Even Spacing:
To figure out the dimension of your spacing between the support arms, gang the supports together and take the measurement of the area left.
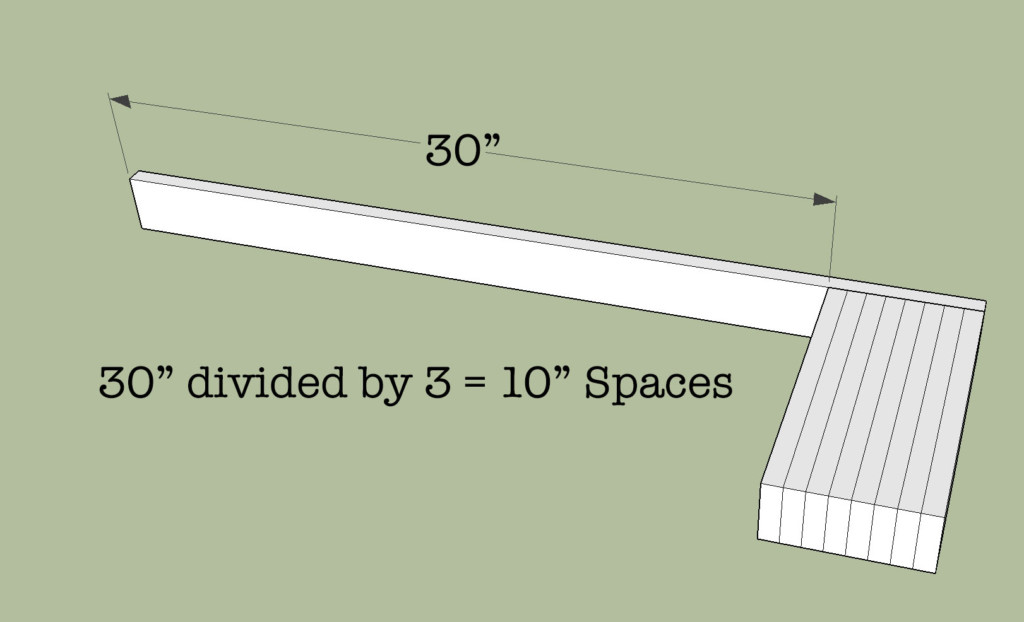
Then divide it by the number of spaces between the arms to figure out the length of the spacers.

Assembling the Wall-Mounted Support Arms:
Cut all your pieces to build the floating shelves. It’s important to dry fit all your pieces before assembly. Now that your wall-mounted support pieces have been cut it’s time to assemble it.
To assemble the supports, add wood glue to any surface that will touch another part. Then tack the pieces together with brad nails to hold them while the glue cures. For added strength, screw thin trim screws into the support arms where possible.
Tip to Sink Screws Easier:
When driving wood screws into several layers of wood (i.e. plywood) or into a hardwood, you can help the screw by lubricating it on a bar of soap.
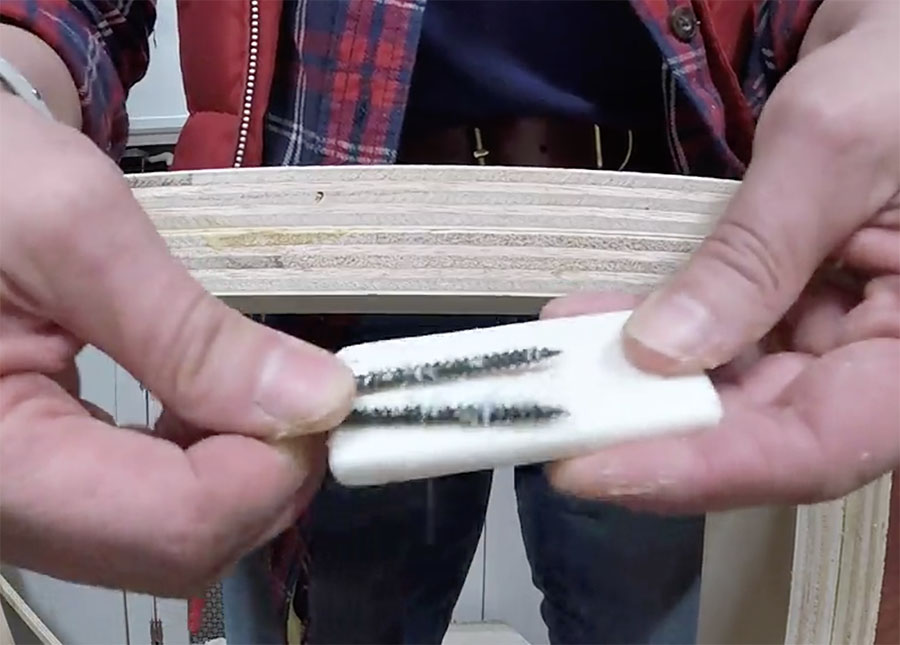
Just rub the screws on the soap and watch how easy they will drive into the wood now!
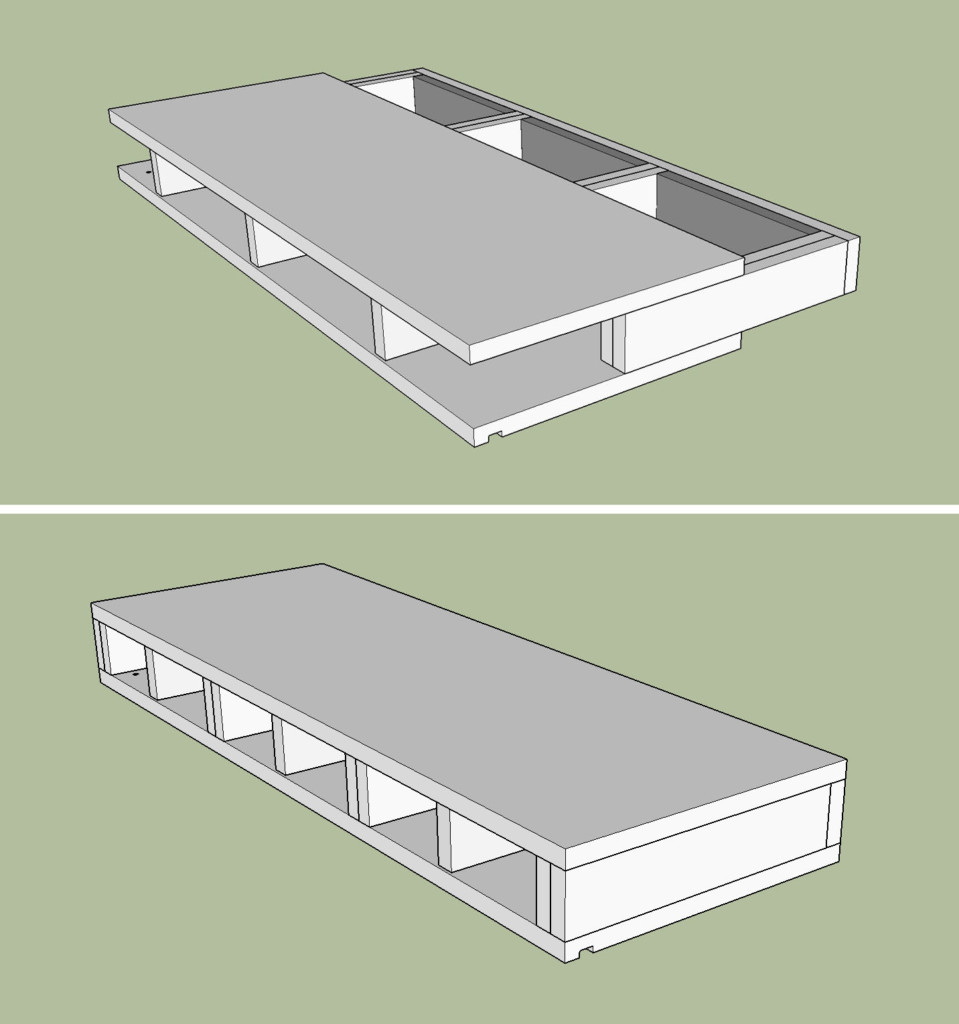
Building the Shelf Top and Bottom:
To cut the top and bottom of the shelves, simply trace around the support and cut the plywood to size.
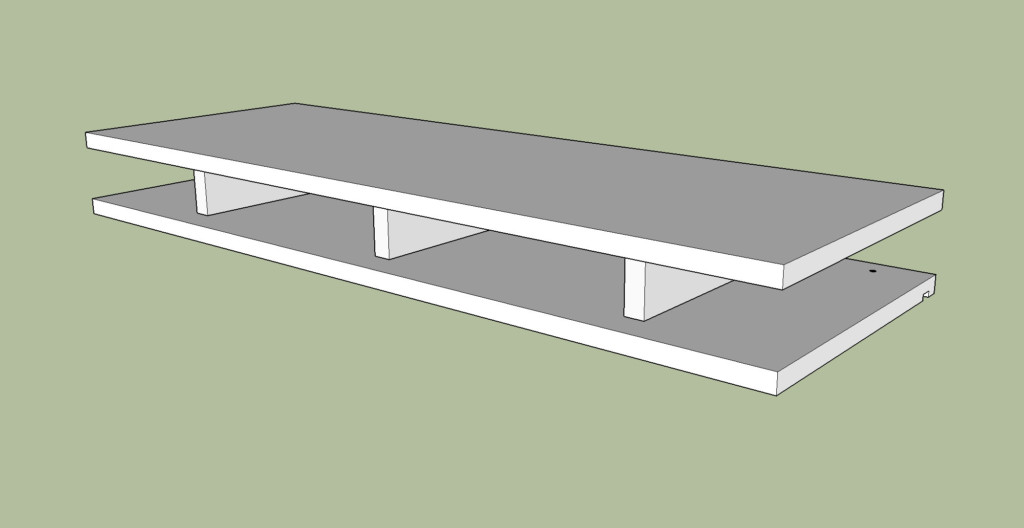
The shelves will be connected by pieces of plywood that get sandwiched between the top and bottom of the shelves. These pieces will slide in between the arms on the wall-mounted support arms.
The connector pieces are the length of the wall-mounted arms, minus one thickness of plywood. In the video, you can see how I added another scrap of plywood against my stop block to get the exact length.
Once the connector pieces are spaced evenly, attach them to the top and bottom of the shelf with wood glue and nails.
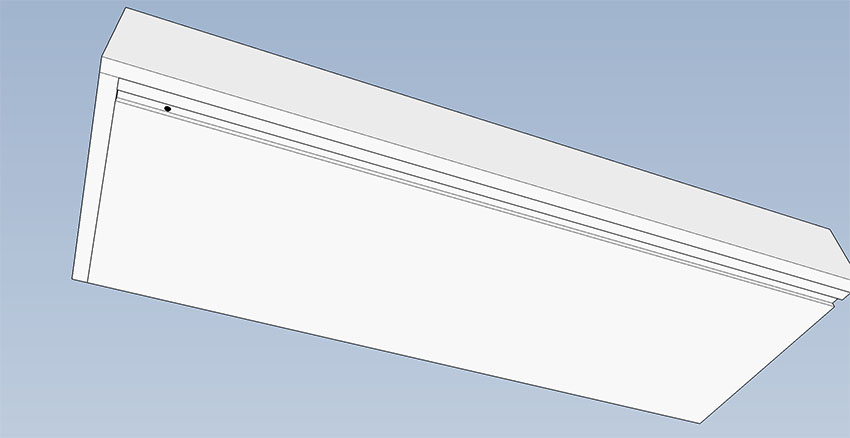
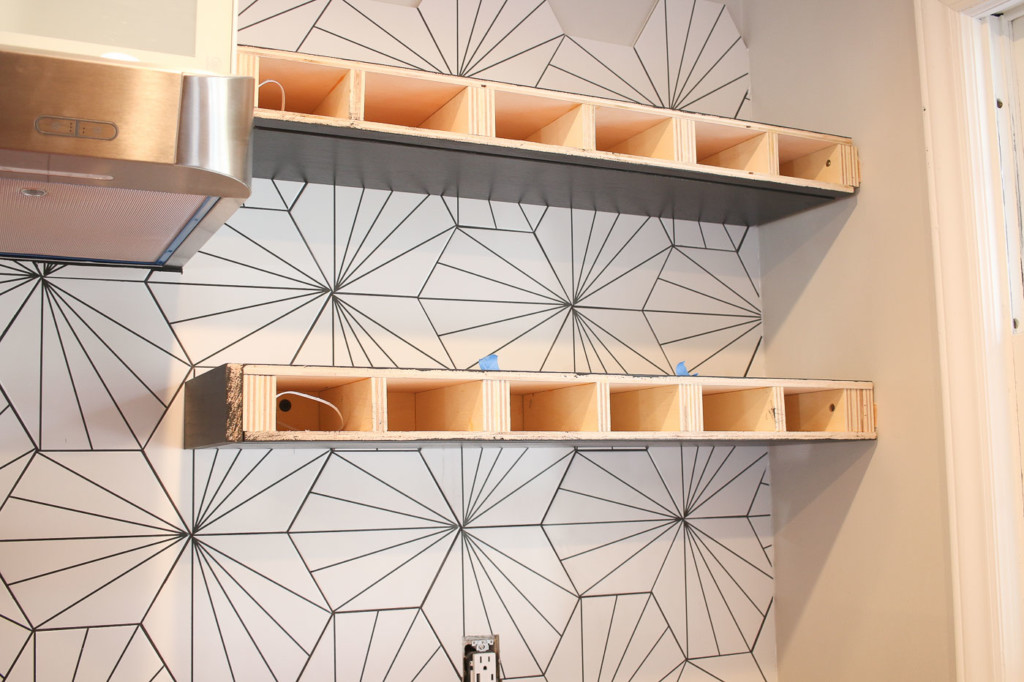
To create a channel for the LED Tape Lights, use a router and the 3/8″ straight bit to create a channel 1 inch in from the edge of the shelves at about ½” deep. Then sand the channel smooth.
The last step is to drill a hole into the bottom of the channel wide enough to feed the tape light through. Make sure you coordinate the location of this hole with the wiring location in your wall. This way all the connections will be hidden inside the floating shelf and won’t have to cross through a support arm.
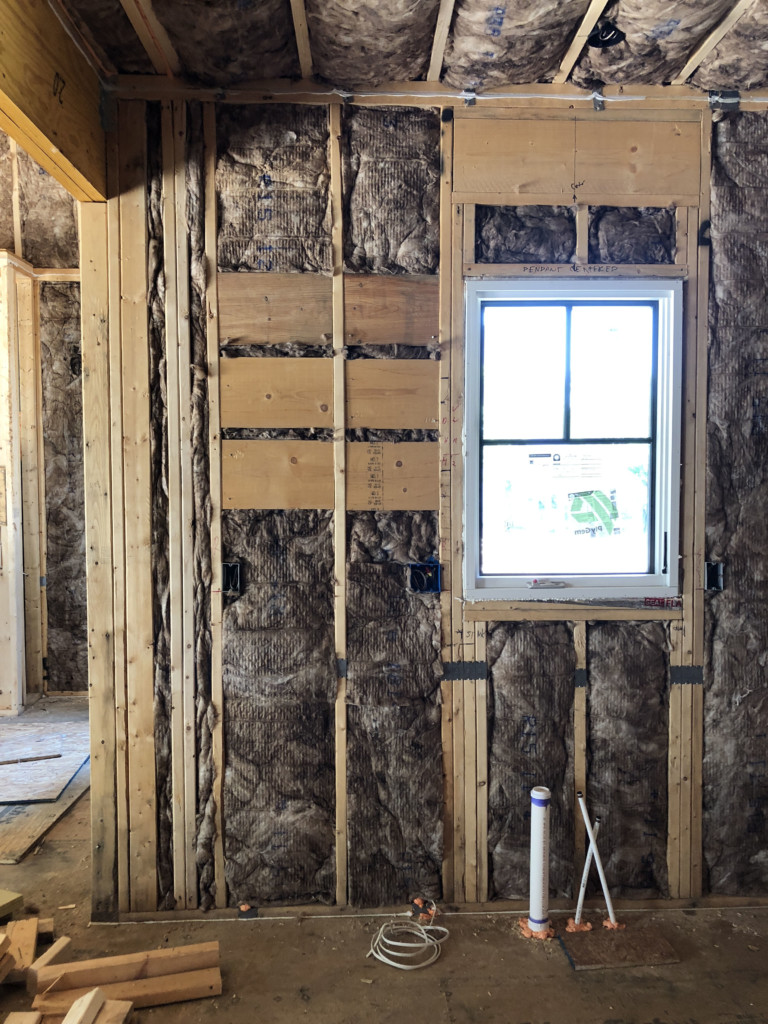
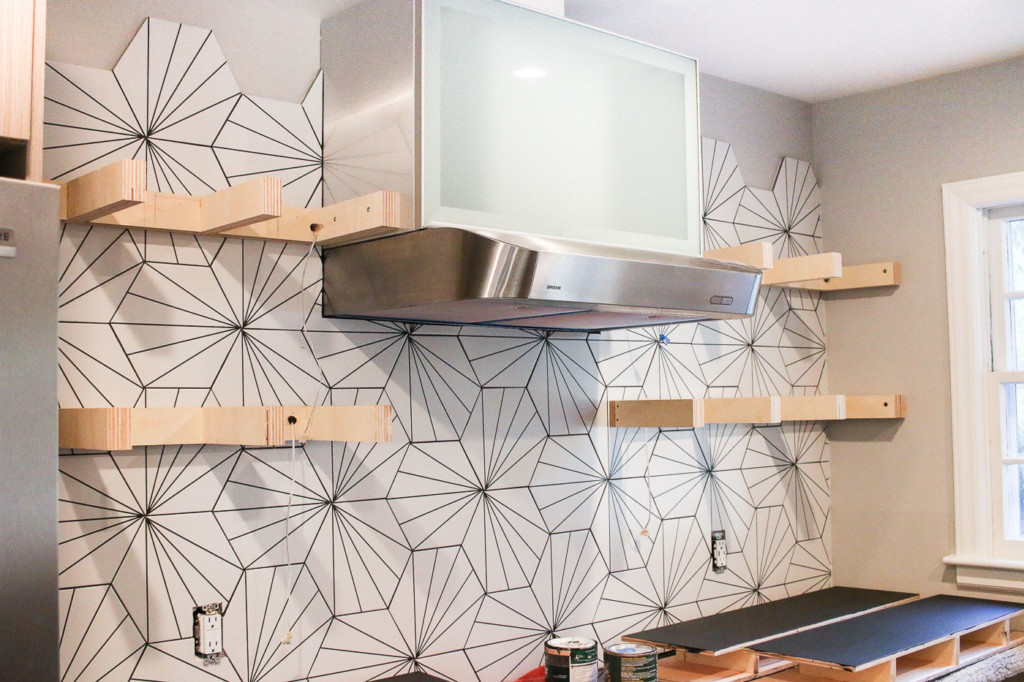
How to Secure Floating Shelves to the Wall:
It’s important to hang floating shelves on studs or blocking. Whenever I build a house or take it down to the studs, I add blocking where shelving will be hung. This greatly simplifies finding solid wood to hang the shelves on. I also take photos or video at this stage to remind me where the blocking is. To simplify the process one more step, I write the measurements of the blocking height and width on the studs that I can reference in my photos or video.
Using a laser level, mark the shelf location (you can use painter’s tape if you can’t write on the tile.) Drill through the wall (or tile) into the blocking and studs. Depending on where your power is for the LED lighting, plan how it will get inside the floating shelves. You may need to drill a hole through the back of the wall-mounted support and gently feed the wiring through the support before securing it to the wall.
Use structural screws to secure the shelf support to the wall. If your floating shelf touches another surface (like a wall or cabinet) add screws through the sides into those surfaces for additional strength.
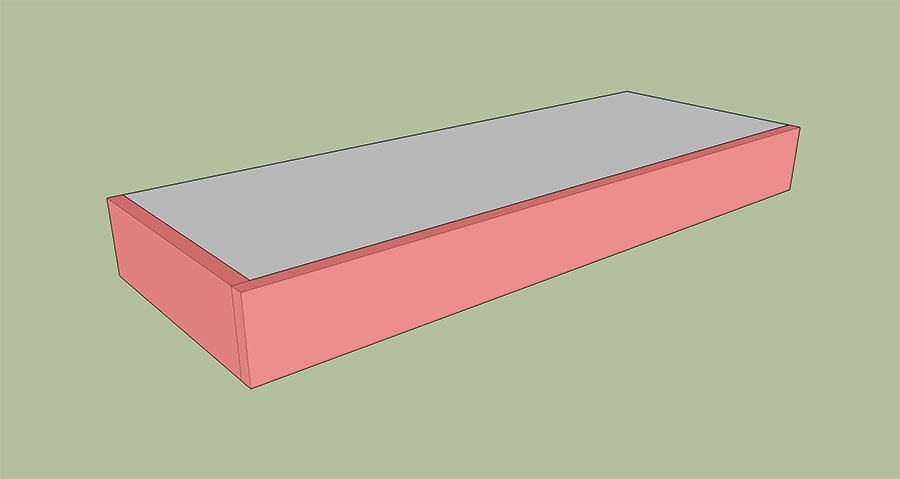
Slide the top and bottom shelving over the wall-mounted support as shown below.
Installing LED Tape Lighting:
Kichler has a fantastic video detailing how to install the tape lighting. Once you have power leads installed it’s so simple to hook up to the power supply. Then the tape backing is removed and you simply press the tape where you want it. In our case, we are setting it into the 3/8″ channel on the bottom of the shelves.
Watch the Kichler LED Tape Light Install video for more details:
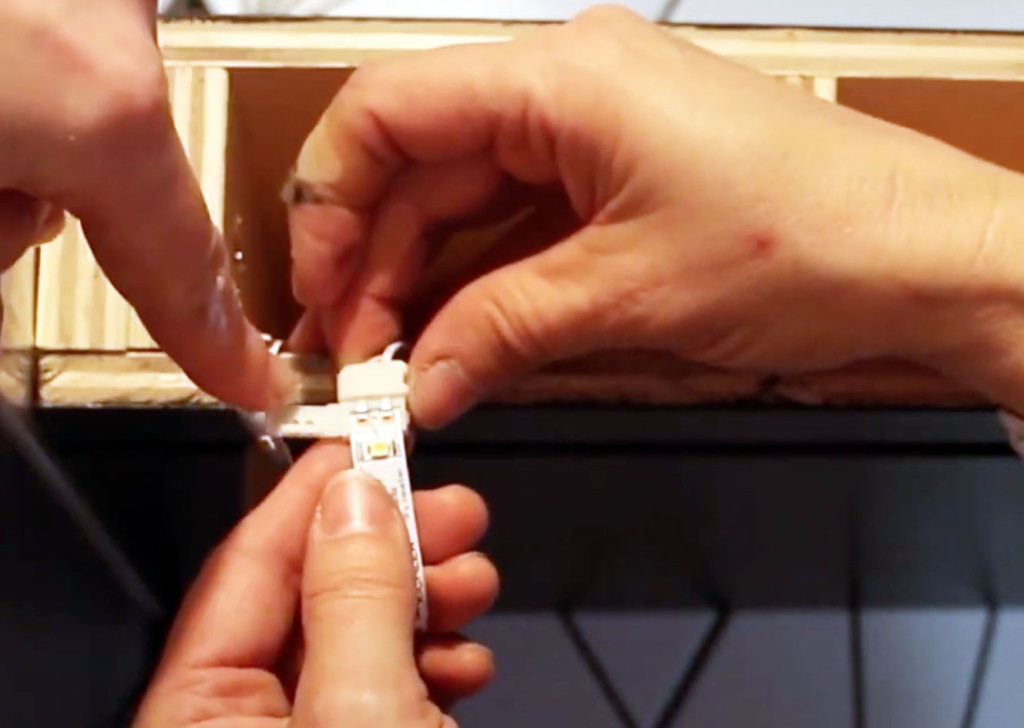
Find the power wires, and bring them toward the hole you drilled into the bottom channel of your shelving.
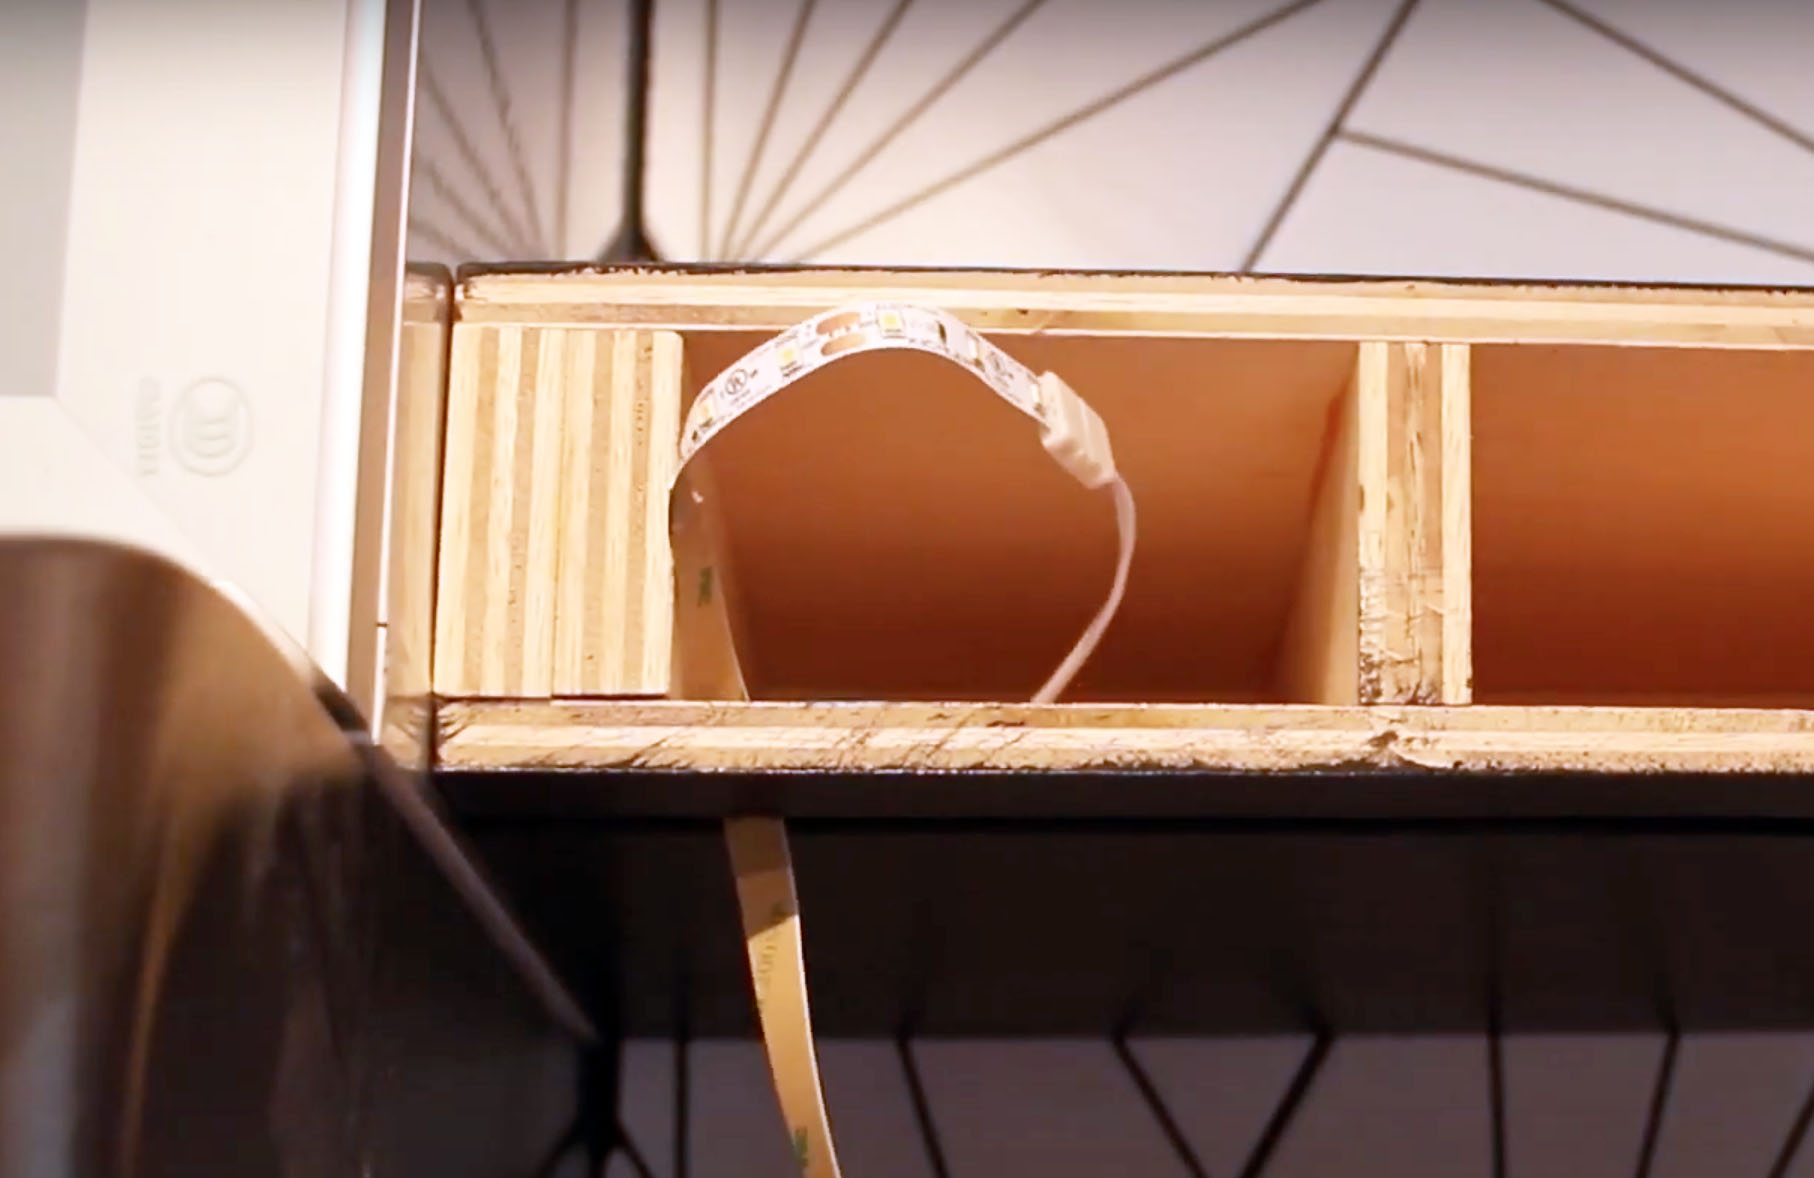
Peel back 1/4 inch from the end of your tape light and feed it up through the hole in the bottom of the shelf. Then follow the instructions provided with your tape light to connect it to your wiring. In this case, it simply slips under the connector (while lining up the + and – signs.)
Test the connection by turning on the light and make sure your LED tape light illuminates.
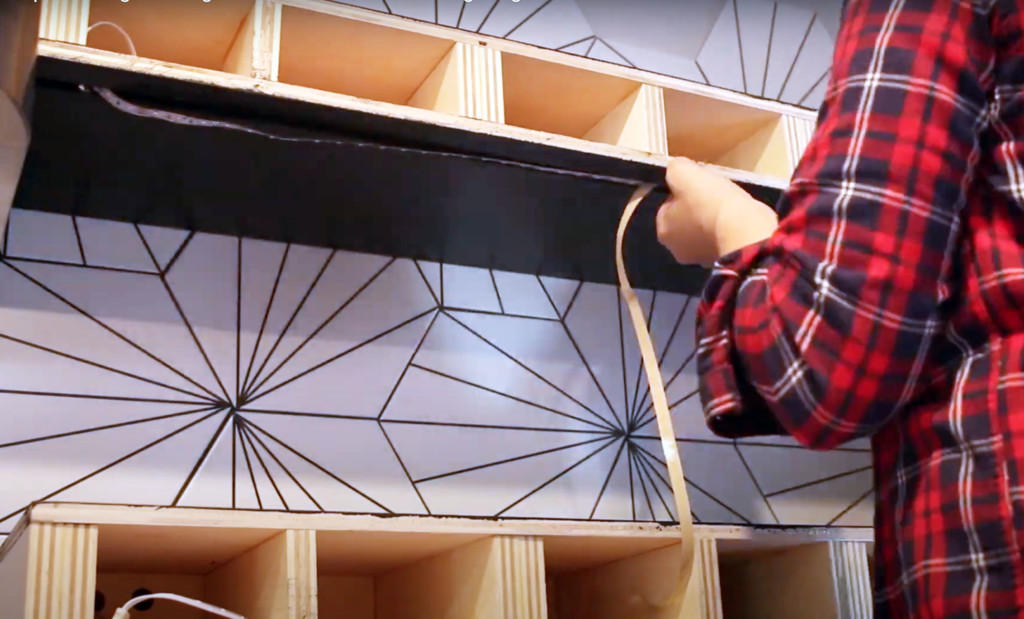
If the lights work, peel off the rest of the adhesive backing and secure the tape into the channel under your shelf. Trim the tape light only at the cut locations marked on the tape.
All that’s left to do is add the front and side trim to your shelves. Secure it to the arm supports with a few brad nails.
Then fill in the nail holes and touch up paint. Finish your shelving with a durable clear topcoat.
The Kitchen Reveal:
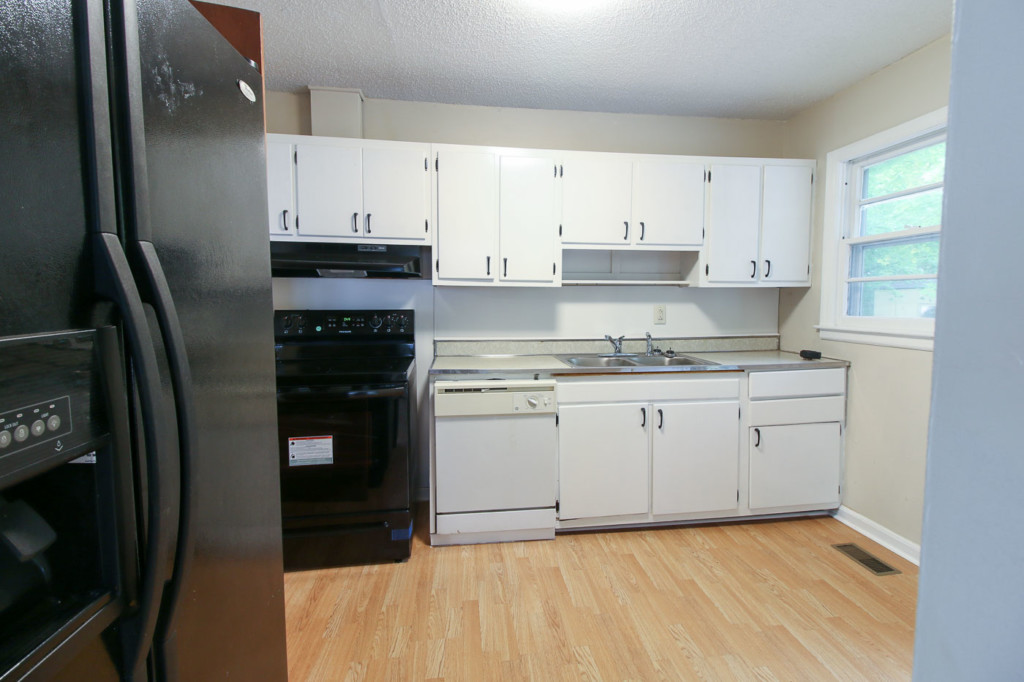
Before I show you the reveal, do you remember what the Millie’s Remodel kitchen used to look like before?
Shortly after purchasing the house:
During demolition:
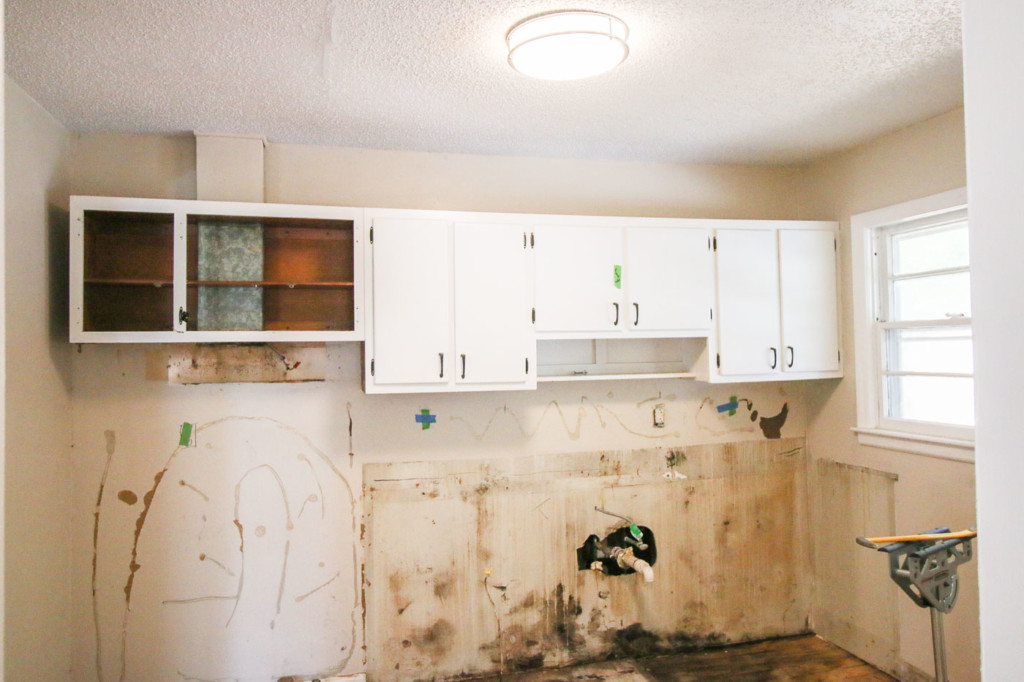
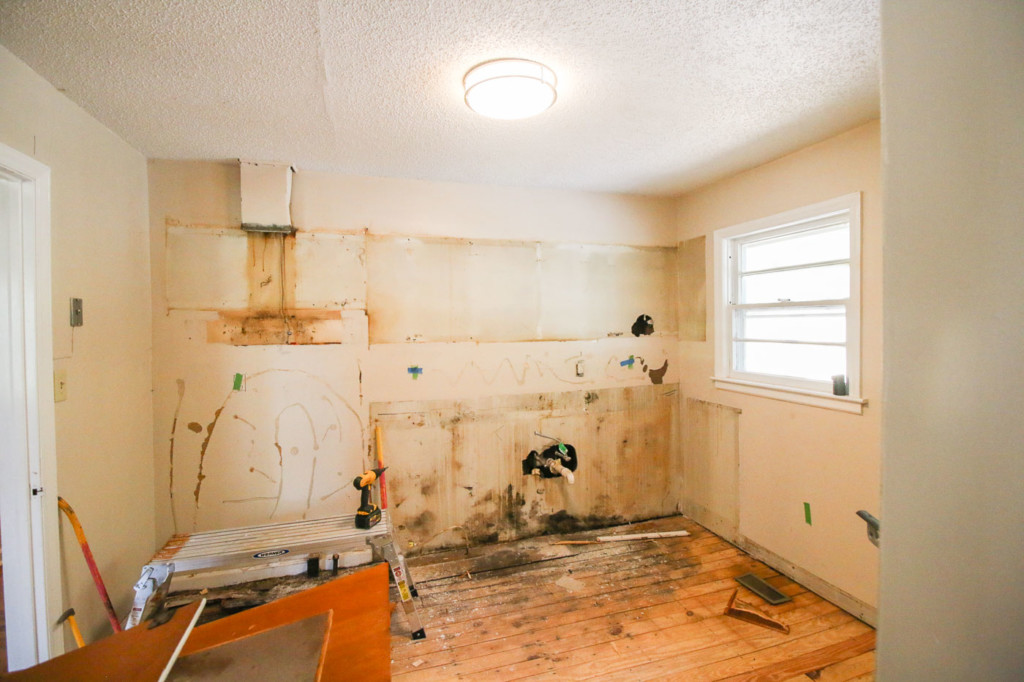
After cabinet and flooring removal:
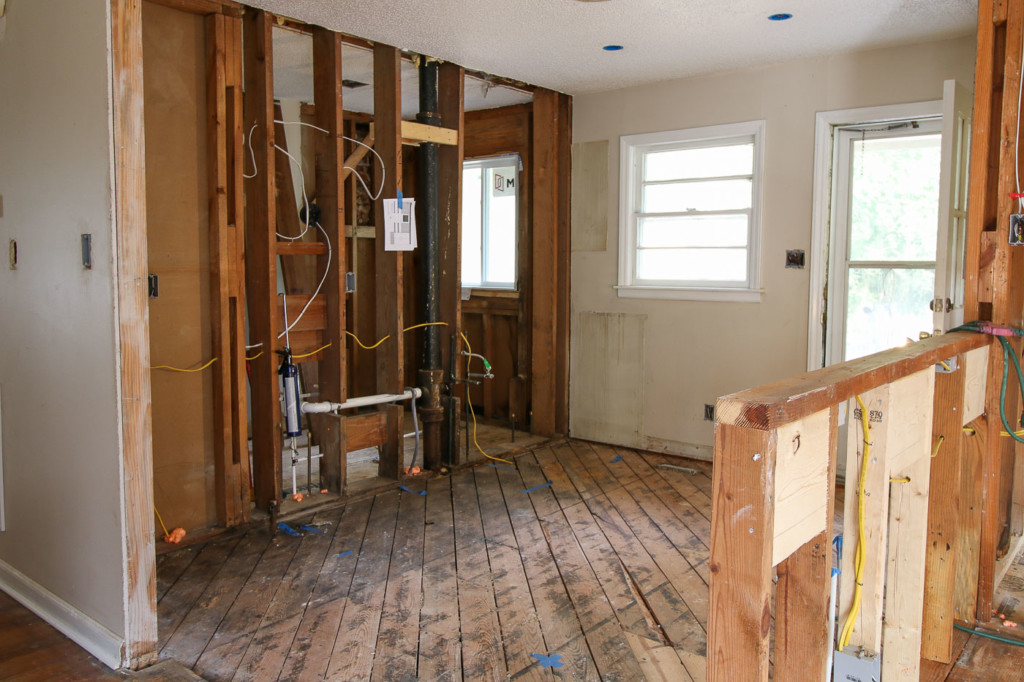
Down to the studs!
Finally, the amazing after!
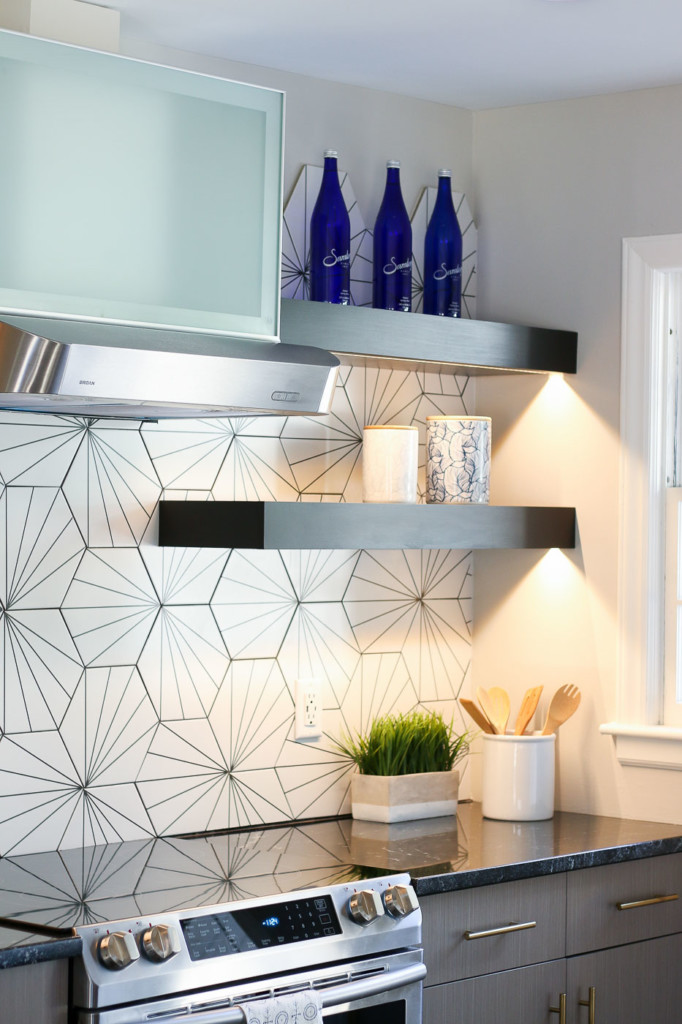
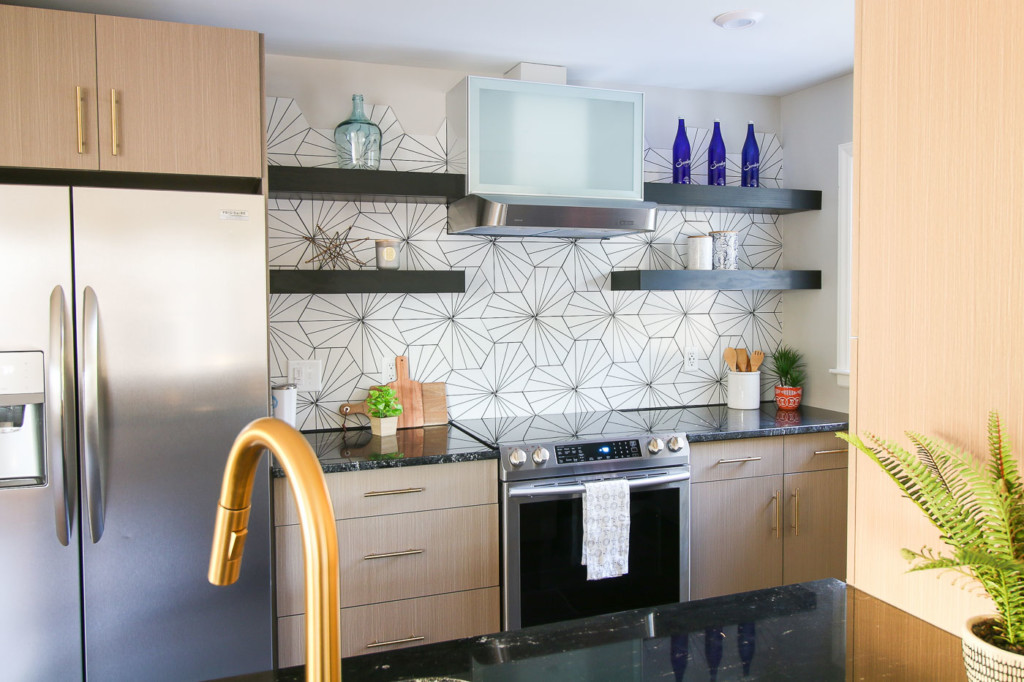
I can’t begin to tell you how proud I am of this kitchen. I ran into so many challenges, like black mold, a floor that needed to be leveled, then laying the floor tile, installing cabinets, and finally the backsplash and these gorgeous lit floating shelves!
I took a few risks on the design, but ultimately I love every inch of this kitchen. What do you think?
To see the full Millie’s Remodel series, click here.
![]()
Disclosure: Kichler Lighting is a Millie’s Remodel gold sponsor. I was provided with complimentary fixtures for the house. I was not told what to write. All opinions are my own.
Pin this image to save it and share it with a friend!

Leave a Reply
Want to join the discussion?Feel free to contribute!