Cracks in Drywall: 5 Steps to a Permanent Fix with 3M Patch Plus Primer
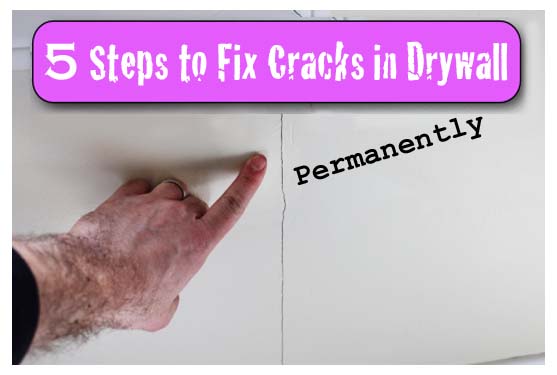
Do you have a crack in your drywall that keeps coming back?
Today’s post will help you fix this annoying problem in 5 easy steps using 3M’s Patch Plus Primer.
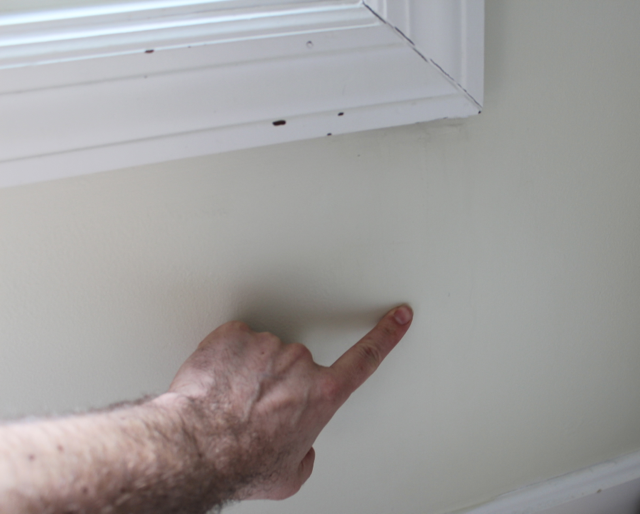
This weekend I was cleaning out the guinea pig cage that sits in our living room (did you know guinea pigs can live from 5 to 8 years, what the!!!) and noticed a crack in our wall under the window.
Apparently the previous homeowners tried to fix it since there was evidence of old joint compound around the crack.
Dealing with old rental homes has taught me a thing or two about drywall and plaster. After reading this post I guarantee you’ll be able to permanently fix any drywall crack in no time.
(I’ve included affiliate links for your convenience. I earn a small percentage from a purchase using these links. There is no additional cost to you. You can read more about affiliate links here.)
Materials:
- Fiberglass mesh drywall tape
- 3M Patch Plus Primer
- Putty knife
- 6 inch drywall knife
- Joint compound mud pan
- Sanding sponge
- Towel for your floor
- Your wall paint
- 2 to 3 episodes of Big Bang Theory
That’s not a bad supply list. My grocery list puts it to shame and is far more expensive (and that’s without buying Dogfish Head IPA beer).
Let’s get started and eliminate your cracked drywall 🙂
Instructions:
Step 1: Apply Fiberglass Mesh Tape to Your Drywall Crack
One of the biggest mistakes anyone can make is to just add joint compound or spackling to the drywall crack. Over time the crack will come back because the compound or spackling will never win the fight between it and your house settling. It’s like Pee Wee Herman challenging Mike Tyson.
Adding fiberglass mesh drywall tape to the crack is like giving Pee Wee anabolic steroids.
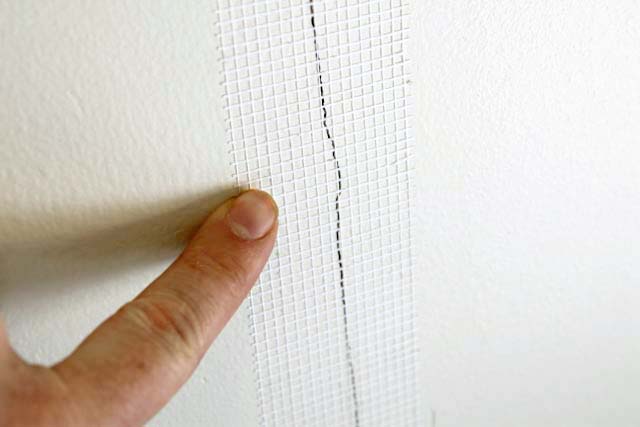
Center the tape on the crack. Since one side is sticky you can place it on the wall and get your Patch Plus Primer ready.
Step 2: Add a Thin Coat of Patch Plus Primer to the Drywall Tape
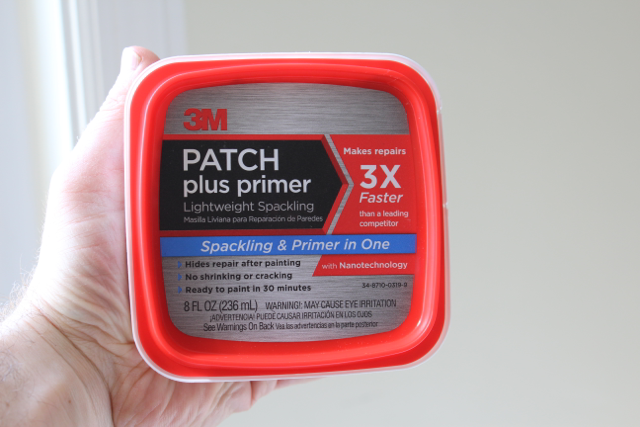
3M Patch Plus Primer is great for repairing cracks or holes in drywall because it doesn’t require a primer coat like traditional joint compound. So you save time and money 🙂
Big Tip: when you buy 3M Patch Plus Primer at the hardware store make sure it hasn’t been opened. Otherwise, it might be bad and unusable. The same principle applies to any product that comes in a container (including pre-mixed joint compound).
Apply a thin coat of Patch Plus Primer over your mesh tape. Just enough to fill the voids and make the tape adhere even more to the wall.
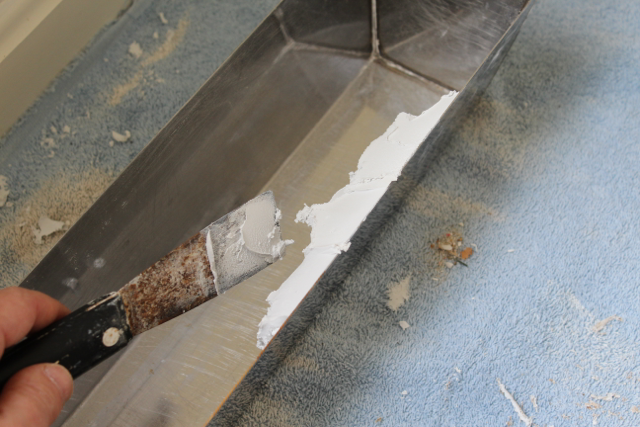
If your crack is long (say 2-5 feet) I recommend applying the patch plus primer to the tape with a 6 inch drywall knife. To do this, you’ll have to scoop some of the Patch Plus Primer into a mud pan to use the larger knife.
Add the spackling by starting in the middle of the tape. Spread the spackling on the tape in a downward motion from the center. Then go back and add the rest of the spackling moving upward from the center of the tape.
This stretches the tape along the crack and prevents it from wrinkling.
Allow this coat to dry for 30 minutes and watch 1 episode of Big Bang Theory.
Step 3: Add Your Second Coat of Patch Plus Primer
The reason for the light coat of 3M Patch Plus Primer in Step 1 is so you don’t have a big hump on your wall where the tape is located.
Use your 6 inch knife to put on a second coat of the Patch Plus Primer.
Make the width of the new coat be two inches to the right and 2 inches left of the center of the tape.
Then smooth out the spackling with your 6 inch drywall knife like you did in Step 2 (always starting in the center and moving toward the ends).
The key tip I have here is to apply slightly more pressure on the side of the knife that touches the drywall. This pressure change will feather the Patch Plus Primer and blend it into the existing drywall.
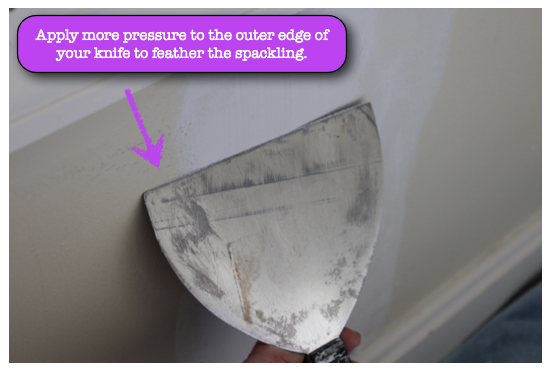 Depending on your skill and how perfect you want the wall you may have to apply a 3rd coat.
Step 4: Lightly Sand the Patch Plus Primer
For small drywall repair jobs I like to use a fine grit sanding sponge to feather the edges of spackling or joint compound. Lightly move the sanding sponge in a circular motion over the patched area. Circular motions will help blend the patch into the drywall.
It will take a well trained eye to notice where you made your repair.
Step 5: Paint Your Wall
The best part about the 3M Patch Plus Primer is that you don’t have to prime it.
Patch Plus Primer can be painted over after 30 minutes. Use a good quality paint brush or roller. I’ve been using a Purdy 2 inch brush for 2 years now and while the handle is rusted, the bristles look fantastic. I always rinse my brush in warm water then wrap it in Glad Press N Seal. Brittany also has a great tutorial on keeping your paint brushes looking new.
The wall looks pretty darn good, wouldn’t you say?
I’m gonna go out on a limb here but I think even Dr. Evil would be pleased with this job.
Now you know the secret to permanently fixing a drywall crack. This entire project can be done in one afternoon or over the weekend without breaking a sweat.
Stick around for a while! We have a lot more home and auto fixes and repairs for you:







Our house was built in 1997. We first noticed a very large horizontal crack in the wall around 2005. The builder thought it was just a bad piece of drywall, so he replaced it. The crack returned soon after and has slowly grown through the years. It expands during the winter months and closes during the warmer months. It begins in the corner and now covers approximately 8-10 feet. There is also a significant gaping crack on the adjoining wall, but it starts about a foot lower and covers about 3 feet. I’m not sure if this is important information for you to have, but we have 12′ walls with a vaulted ceiling. I’m afraid if we try your idea above that it’ll just happen again. Any other ideas for coverage?? Soffit? Racetrack? We appreciate your time. Thanks!
Good questions Jenny.
I’d use a different method to fix your cracks. It involves adding fiberglass mesh tape to the crack and applying 2 to 3 coats of setting-type joint compound. Setting-type joint compound is way harder than pre-mixed and the mesh tape can help prevent cracks that appear do to expansion and contraction of your house.
Add the mesh tape and a thin layer of joint compound for your first coat. Make the next 2 coats be successively wider, 6 inches then 10 inches and if need be 12 to 14 inches. This will help you feather the tape and smooth out the look.
Sand in between each coating of joint compound. Try to feather the edges of your joint compound so that you don’t need to sand a ton and make sure your sanding motion is circular to help with the feathering effect.
Please let me know if you have any questions, I’d be happy to help 🙂
I ended up using the fibatape and then using elastromeric custom patch that I got from homedepot. The guy said it’s a flexible joint compound and supposed to be the strongest one they sell. It only took 1 coat of this compound compared to 3 of the other that would just crack.
I’ll attempt to paint it tomorrow but definetely a full day project. I do have some before and after pictures if you want to see (let me know where to send them) just how bad this was and if you want to post it you can.
I’m hoping this might work. We have a crack in our basement wall that’s due to tree roots pushing against the house. We tried the traditional joint compound but it didn’t hold and the crack became visible again. The crack is diagional and about 4 feet long.
For a crack of that size you might want to use joint compound Megan. Apply the mesh tape over your crack then apply at least 3 coats of joint compound. I prefer lightweight setting-type compound (45 minute) because it sets up strong, can be sanded easily, and dries in 45-50 minutes.
Thus, you can be done with this project in one day. You’ll have to prime it then paint it. Let me know if you have any questions along the way 😉
Hi Dan,
Good question about texture.
I’ve had to do this myself and found it’s best to practice your texture technique on a scrap piece of drywall. You can buy an entire 4 foot by 8 foot sheet for less than $10 and cut it into 4 sections so that it’ll fit into your car if you don’t have a truck.
And you can buy either pre-mixed joint compound or powdered compound that you can mix up to different consistencies. I recommend setting-type compound (90) because it dries hard and gives you 90 minutes to texture it. You can use a number of different tools, but I like a 6 inch taping knife for skip coats and knocking down textures.
Let me know if you have a more specific question, I’d be happy to help 🙂
Any tips for textured walls? I have this exact problem, but dare not make the area very wide, because the texture will clearly not match the smooth repair… Help!
Hey Jon,
Yep, those cracks can be repaired as well.
Jeff
I noticed this works on vertical cracks but what about the diagonal ones coming from the corners of entry ways?
Jon,
It should work on those as well. ;-).
Wow, Jeff… one of the best and most needed tutorials I have ever seen….
Perfect detailed explanations that anyone could follow. Great Job!.
Jim, thanks for your question. You could use this example on ceilings, too. If your crack is longer than a few feet then it might be better if you use standard joint compound. If you decide to go this route I highly recommend using the fiberglass mesh tape with setting-type compound (the kind that comes in a bag and is mixed with water) because it dries hard yet can be sanded smooth.
You’ll probably need at least two-three coats of joint compound. Make each successive application two inches wider than the last and feather your coats at the edges. If you feel the expansion and contraction caused the cracks then insulation before the fix will definitely help. It must get pretty darn cold where you are!!
Let us know if you have any other questions.
Regarding your example to fix cracks in drywall using the “3M patch plus primer” product after first applying fiberglass mesh drywall tape, may I assume your example is also applicable to drywall ceiling joints? I have an 18 yr old drywall-finished garage attached to the house but because the garage attic was never insulated, the seasonal temperature extremes caused the expansion/contraction of all the drywall panels on the ceiling. The wall are ok but the ceiling needs repair. Should I install some attic insulation before the ceiling repair?
wonderful, organized, clear post. Thank-you so much!
Thanks Jaxi, glad to help any time 🙂
I take it this technique could also be used to cover a crack in a traditional plaster wall. Any differences in the technique?
Cath, the technique would be the same for plaster. I use mesh tape because it’s stronger than paper and sticks to almost any surface. You might have to apply more coats of the spackling but the crack shouldn’t come back.
I have a burning drywall question actually! I need to move my light fixtures above a bathroom sink: how large of an opening can you fix with a drywall patch kit before you have to actually put in a piece of drywall?
Laura,
If you use the metal and mesh tape patches, I don’t think they come any bigger than 5″ square. That would probably be the max I’d recommend. But, using a scrap of drywall to patch isn’t too difficult. I know Lowe’s sells 2′ square sections. You can read my drywall posts here: https://prettyhandygirl.com/2013/03/drywall-installation-tips-and-kitchen-progress-update.html and https://prettyhandygirl.com/2013/04/how-to-finish-drywall-spackling-or-mudding-sheetrock-joints.html
I had no idea they sold smaller sizes of drywall…I was picturing a huge sheet and me using a few inches. Thanks!
Great information! I have multiple drywall issues. The water heater is in the attic and sprung a leak. The drywall tape in the room downstairs came up due to the water. We had the drywall repaired, but it cracked again. In a fit of irritation, I pulled out the drywall tape in the corner. Can I use this same method described above to replace the tape and fix the wall? It’s an inside corner. We also have some areas on the ceiling where the tape has come loose. Will this method work for the ceiling, as well? Thank you!
Alathia, you can use either paper or fiberglass mesh tape. If you have a lot of repairing to do I highly recommend using standard drywall joint compound. My preference is lightweight setting-type joint compound because it dries a bit harder than pre-mixed compounds. Here’s a link to the product I use (which can be found in any hardware store)
http://www.usg.com/sheetrock-easy-sand-lightweight-setting-type-joint-compound.html
I didn’t think I was ever going to win the battle over wall cracks in my 1840’s house. Now I know what I’ve been doing wrong the last few years! Thank you. Now when I take on my next project, I will know how to do it correctly – tape first, then fill. So simple. Duh.
Wow Darlene, 1840’s!! Your house must be so cool and have a ton of character. Glad to hear this will help you 🙂