How to Fake a Fake Pumpkin (Faux Painting Tutorial)
 How to Fake a Fake Pumpkin
Have you seen those neon orange fake pumpkins and nearly vomited because you wouldn’t dream of decorating with them. I mean—get real—everyone would know they were fake. Ah ha, but have you seen the price tags? $1 – $6? For that price you might just be willing to take a leap of faith with me, wouldn’t you? Awesome, because I’m going to show you how to faux paint a fake pumpkin so you can decorate with them year after year and fool your friends.
Materials:
(I’ve included affiliate links for your convenience. I earn a small percentage from a purchase using these links. There is no additional cost to you. You can read more about affiliate links here.)
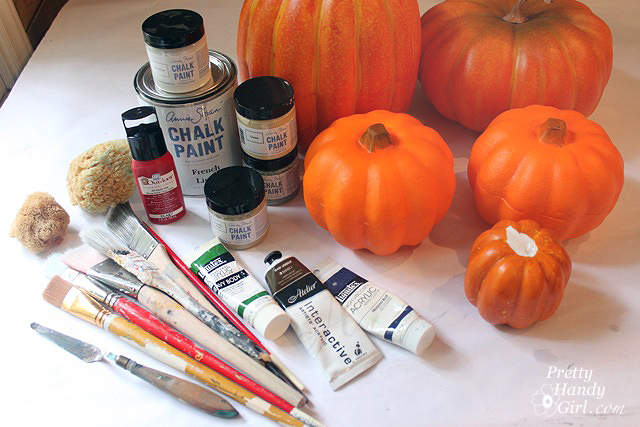
- Fake pumpkins
- Chalky Paint (Folk Art colors: Cottage White, Parisian Grey, Cascade, Spanish Moss)
- Acrylic craft paint – Brown and Green
- Sea sponge
- Stencil brush
- Medium round brush
- Fan brush
- Palette knife for mixing
- Container or palette for mixing
Instructions:
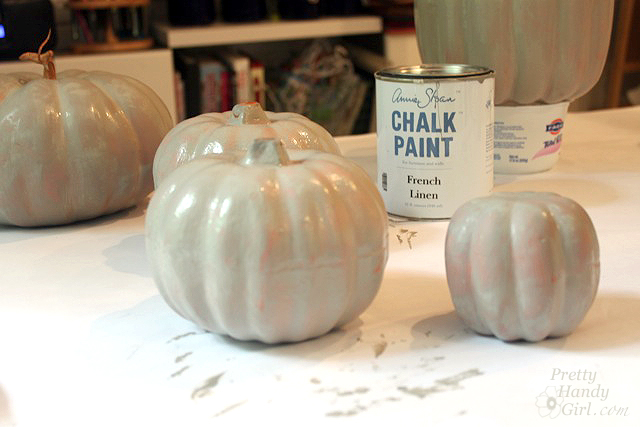
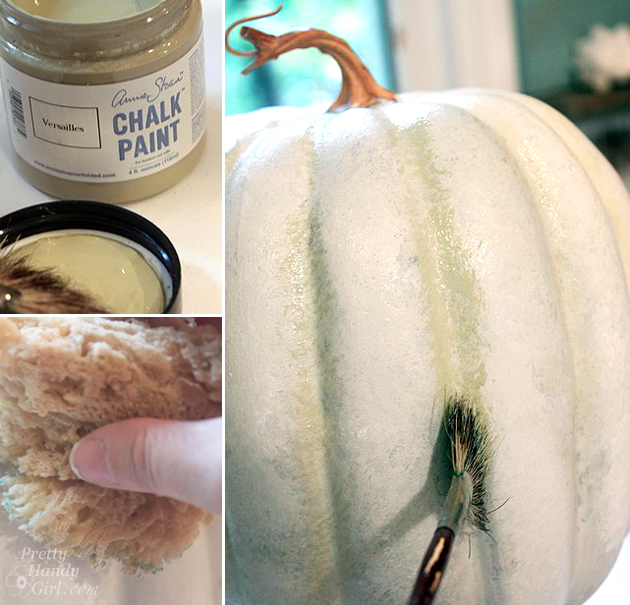
Start by painting all the pumpkins with Chalk Paint (use gray, white, green and blue paint.) Allow the pumpkins to dry.
Painting Realistic White Pumpkins:
It helps to look up some pictures of real pumpkins to refer to.

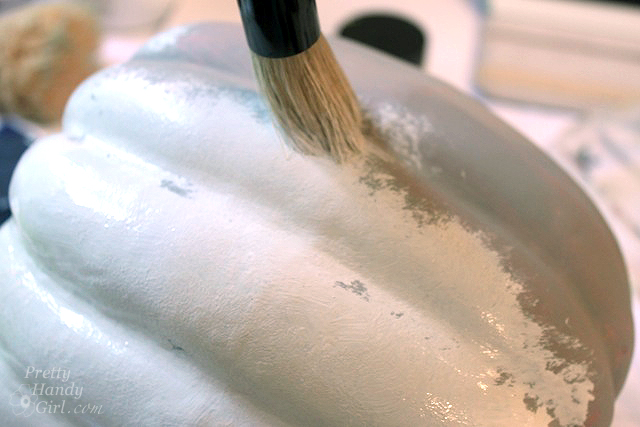
Using the stencil brush, paint a mixture of grey and white on one of the pumpkins.
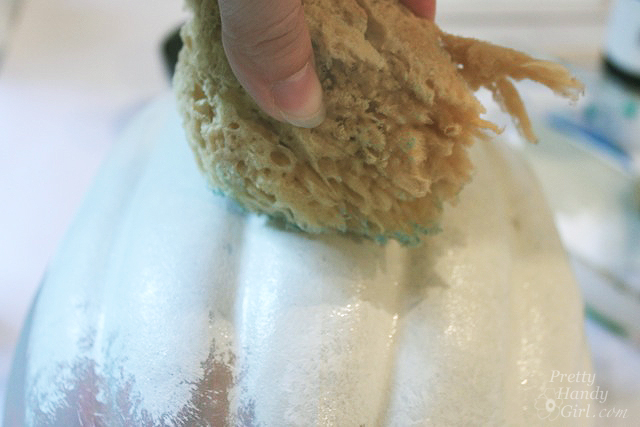
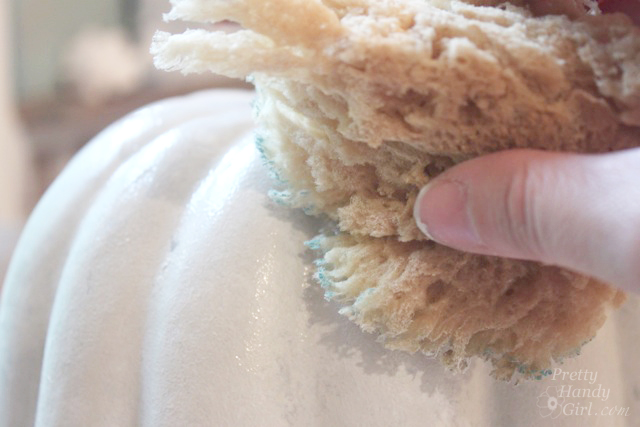
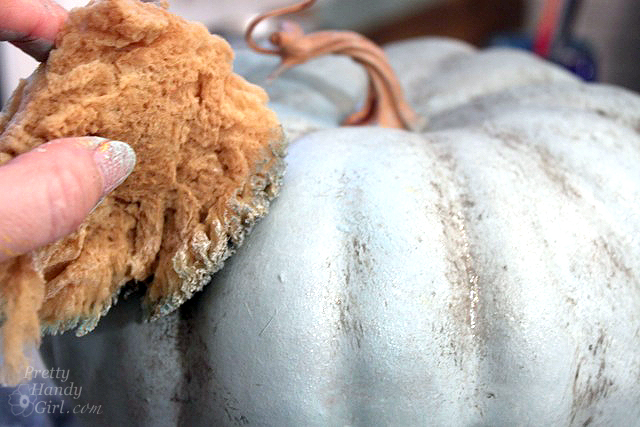
Before the paint dries, dab some of it off with the sea sponge. (Keep your sea sponge dry, not wet during the process.)
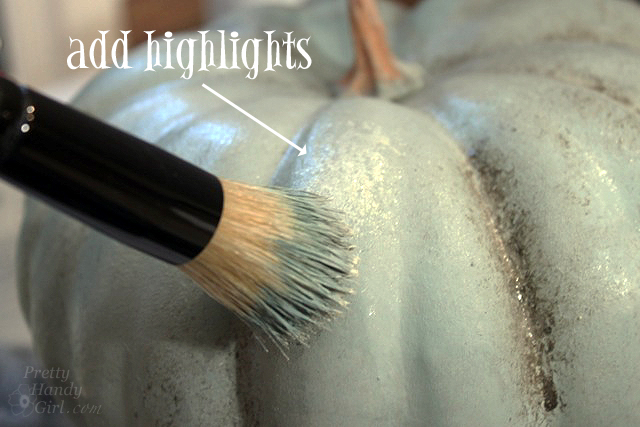
Dip the stencil brush into the white paint and add paint on the outer most bumps on the pumpkins. This is adding highlights.
Dab the highlights gently with the sea sponge to blend.
Use the fan brush dipped in a small amount of green paint inside the pumpkin ridges. Dab the ridges with the sea sponge to blend.
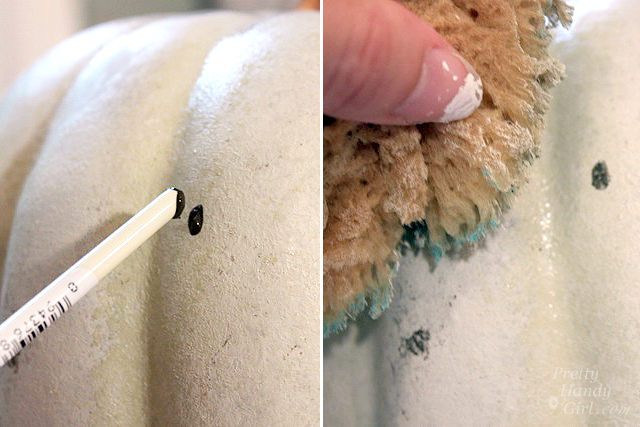
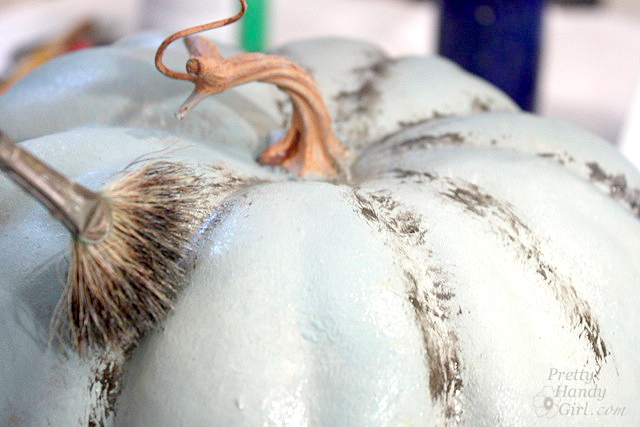
Have you ever seen a truly unblemished pumpkin? I think not. It’s time to add some spots or marks on the pumpkin to truly fool your friends. Dip the end of the paint brush into brown paint and dot it onto the pumpkin. Blot the spot with a sea sponge and maybe even transfer a few new spots with the sponge.
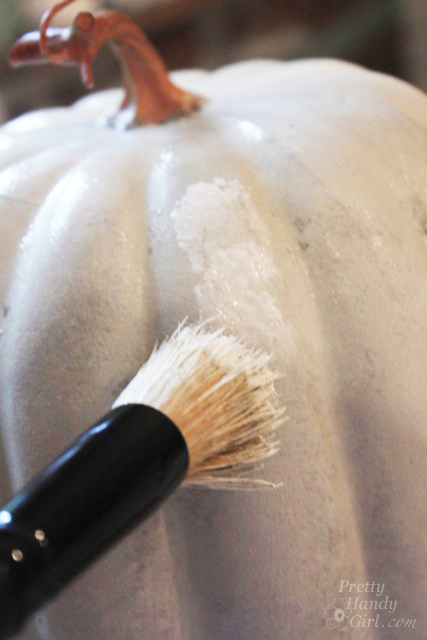
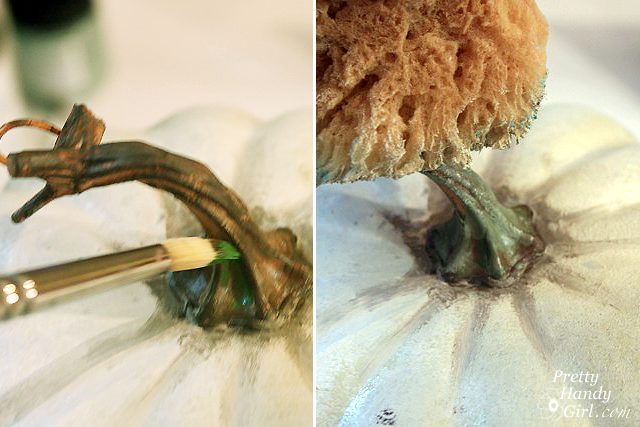
Paint grey around the base of the stem and into the grooves with the round paint brush.

Paint brown and green paint onto the pumpkin stem. Blend slightly with the sea sponge.
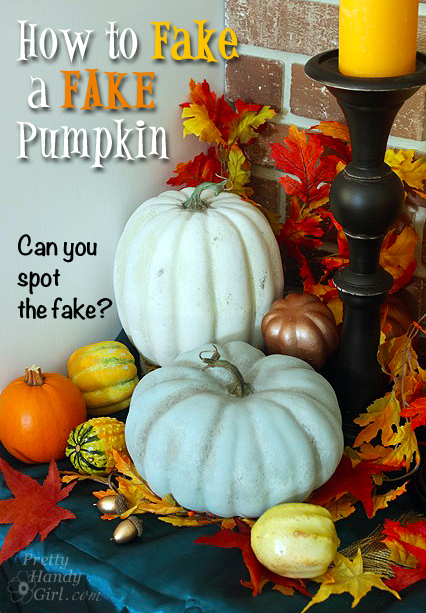
Can you spot my fake white pumpkin? Well, of course you can because I just showed you how to paint it. But, it will definitely fool your friends!
Painting Realistic Blue Pumpkins:
Painting blue pumpkins uses the same technique as painting the white pumpkins, only using a few different colors.
Use the stencil brush to paint blue onto another pumpkin. Dab the blue paint while it’s still wet with the sea sponge.
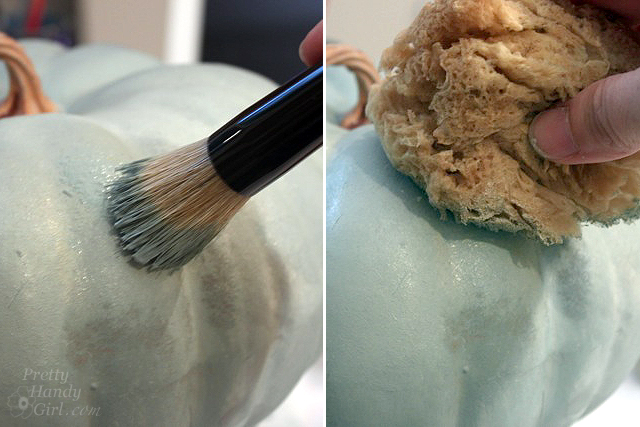
Use the fan brush dipped in gray and brown craft paint to fill in the ridges.
Dab the paint with the dry sea sponge to blend.
Add some highlights with a mixture of grey and white. This serves two purposes. 1) It adds dimension. 2) It tones down the excess blue on the pumpkin.
Paint the stem the same way you learned above.
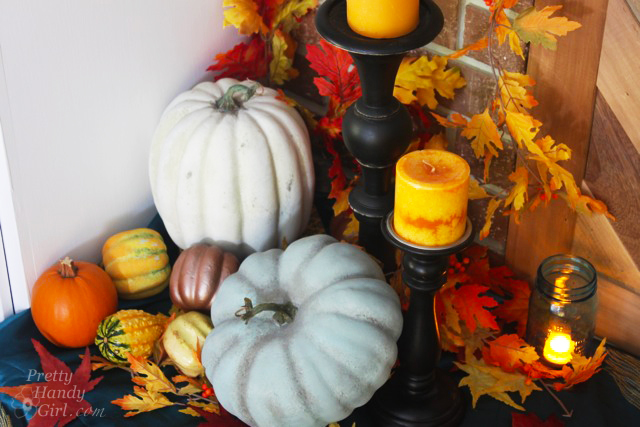
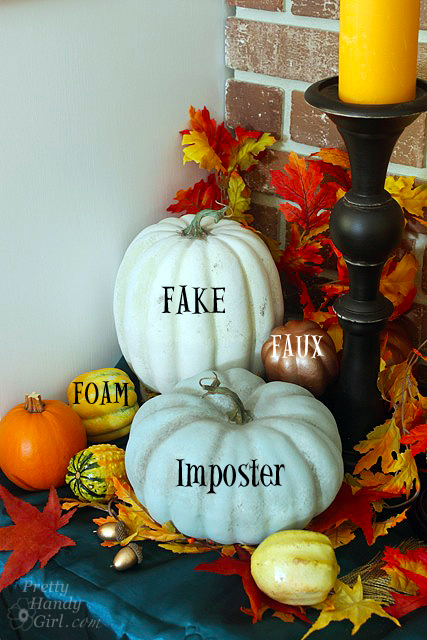
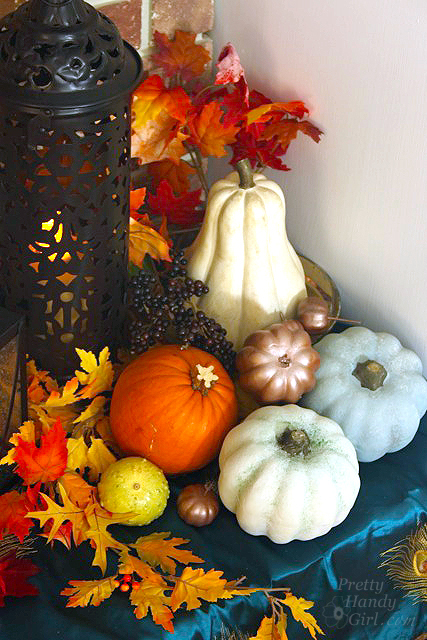
To truly fool people, set up your fake pumpkins with some real pumpkins and real gourds. Sooo, can you spot the fakes?

How many did you get right? The metallic gourd is simply spray-painted with copper spray paint. But, I did try my hand at faking a green and yellow gourd using the same technique as the pumpkins, but adding green to the top and yellow to the bottom.
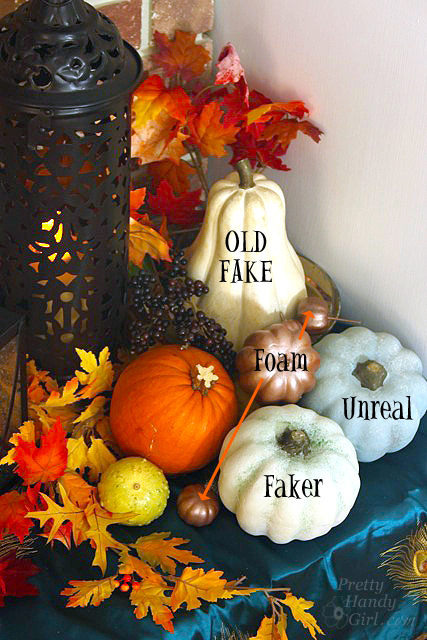
Okay, I’ll give you a second shot. Guess the fakes:
How did you do this time? Ha, you can now apply for a job as an art forgery detective ;-).
Now seriously, how many people will be viewing your pumpkins that close? Umm, next to no one. Normally they’ll view them from afar.
Get your paints and palette out and go fake some fakes! It will be our little secret.

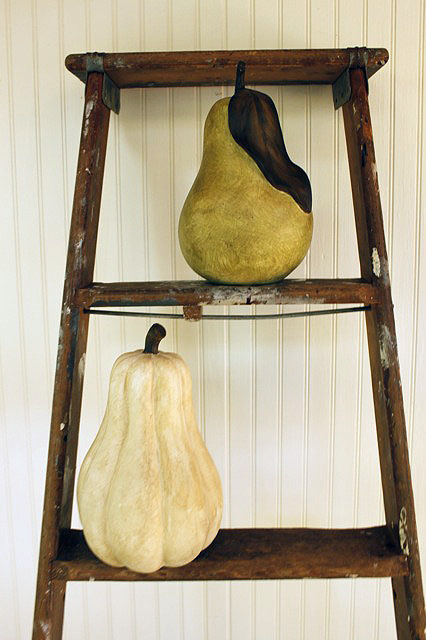
 Did you like this painting post? Ahhh, then I know you’ll like this Ballard Pear painting tutorial:
Or if you’re feeling like taking on a larger scale project…how about Faux painted bricks!

Or perhaps you’d like to perform some faux zinc painting magic:
You can do it! I know you can.

Absolutely amazing. Thank you
Yours look so real! I need to try the sponge method. I just painted mine straight up and didn’t do an fancy texturing.
I think the sponging or speckling makes all the difference.
Amazing tutorial! Thanks for the details (and wonderful pictures)
nicely done and the chalk paint probably also provides a finish similar to the real thing!
If it helps anyone on a super tight budget like I am, I shared a similar tutorial last month with cheaper supplies. I know a a lot of you hard core DIYers probably have loads of annie sloan chalk paint hanging around, but I dont, and if it helps, I’ve shared the supplies I used too 🙂
http://corinnaashley.com/how-to-paint-artificial-pumpkins-tutorial-tuesday/
Thanks, Corinna. I don’t have any Annie Sloan leftovers, either!
Glad it helps Terri!
Corinna, that is a great point! Thanks for sharing your frugal supplies! Love your pumpkins BTW.
Thanks Brittany, thats why I love blogging. So many ways to DIY, and its so much fun sharing! (I have shared your post to g+ btw 😉 )
Thank you so much for sharing this tutorial! Pumpkins are sooo expensive, especially if you need to buy a whole bunch. I love the “funny colored” ones too and they always seem to be more expensive. Going to catch some faux pumpkins on sale and/or clearance for next year. 🙂
Have a great week!
Amy
http://www.homesweetthriftyhome.com
Awesomeness! I have a faker sitting in my garage right now, and a ton of paint…whoop!
Those pumpkins are incredible! I’m not one to do the artsy thing, but I know people who are and will pass this on. Thanks.