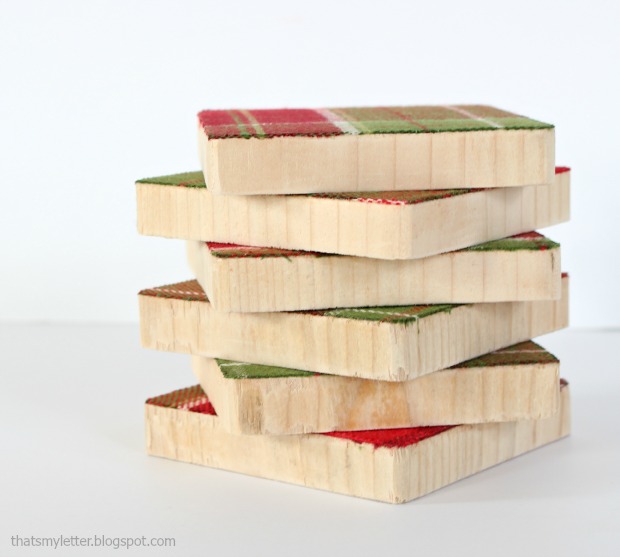
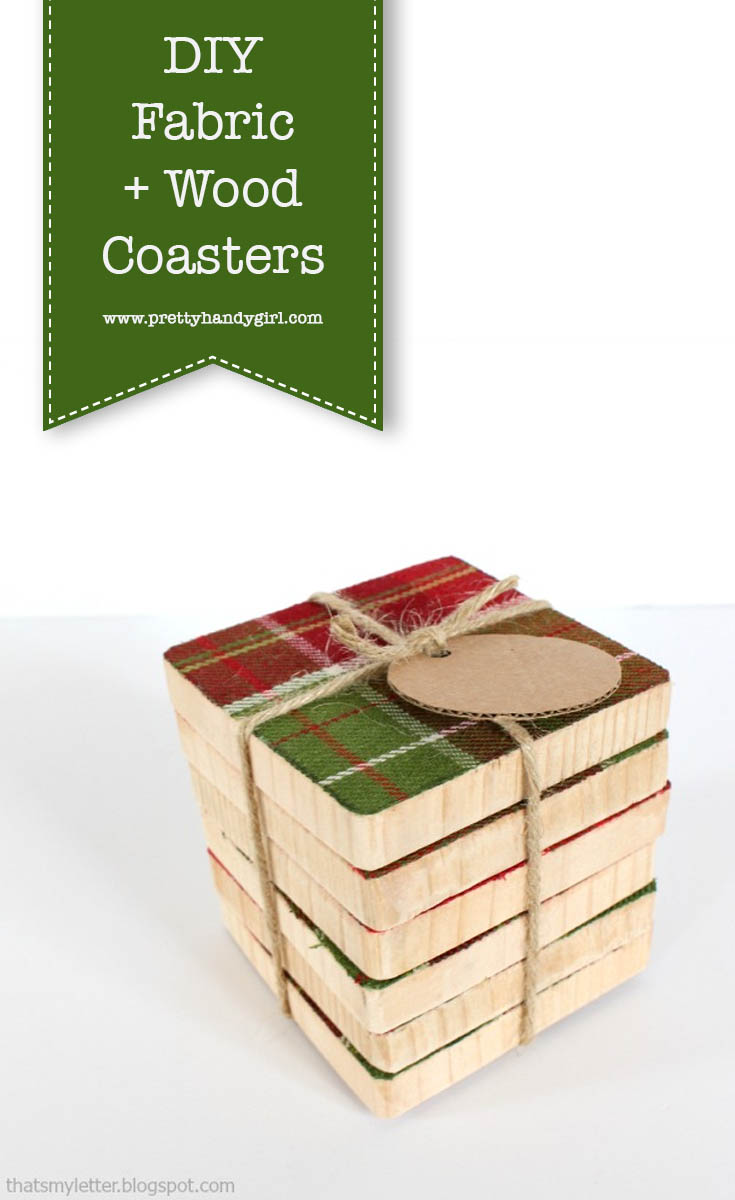
Fabric and Wood Coasters
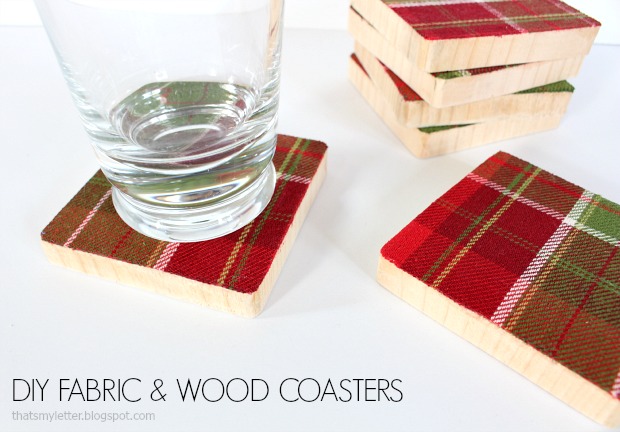
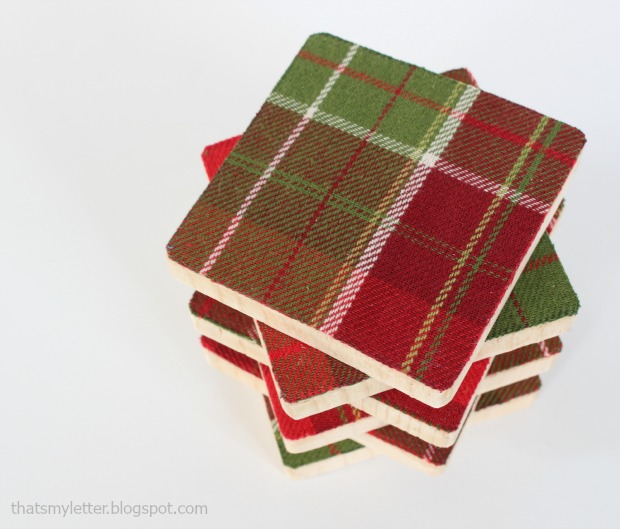
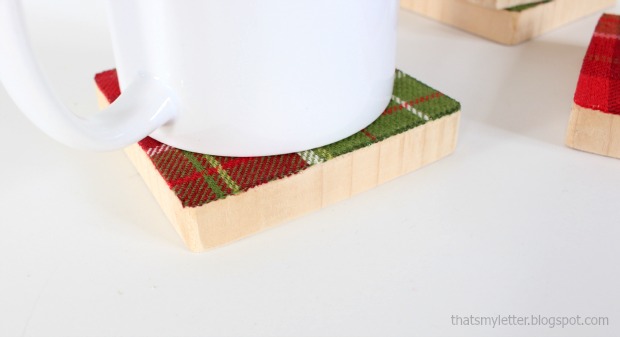
Pretty Handy readers we are nearing ever so close to the big day! Jaime from That’s My Letter here today to share a quick and easy last minute gift idea. These fabric and wood coasters add just a touch of holiday cheer to any coffee table and you just might already have the supplies on hand to make them!
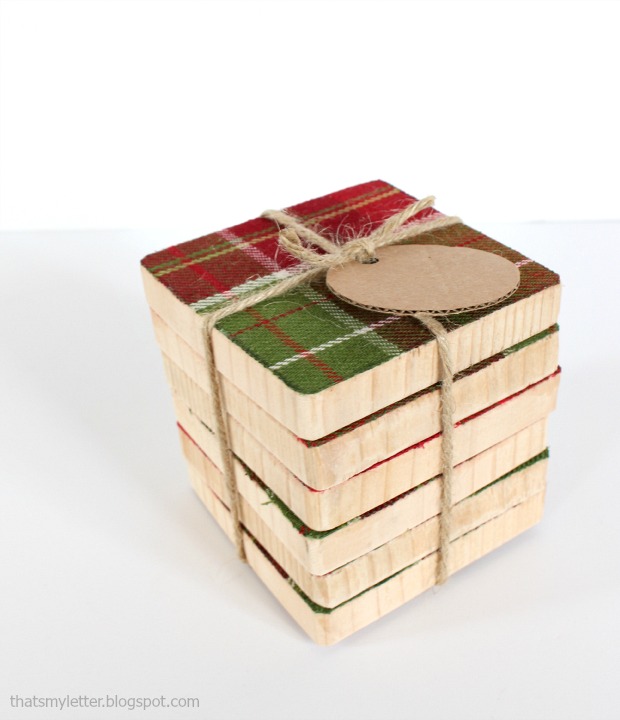
All stacked up and tied together they make a great hostess gift or a charming diy gift anyone is sure to appreciate.
The plaid fabric is completely on trend this year as we are seeing plaid and tartan everywhere! You could use nearly any fabric, this plaid happens to be a thicker woven cotton.
Below are the step-by-step instructions to make your own fabric and wood coasters. Always use all safety precautions when operating power tools.
Materials:
- 4×4 wood post scrap (1/2″ thick for each coaster)
- miter saw
- measuring tape & pencil
- sandpaper
- fabric (4″ square for each coaster)
- mod podge
- paint brush
- rotary cutter & self healing mat
Instructions:
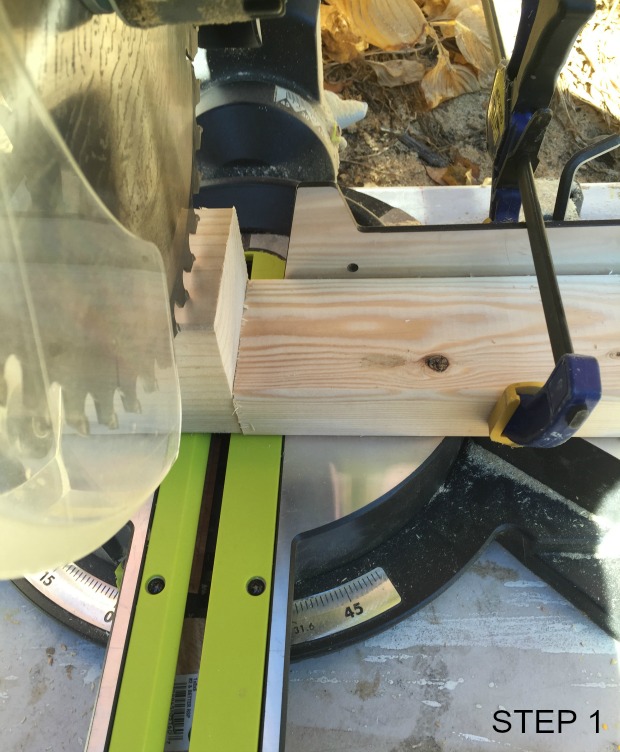
Step 1: Mark the 4×4 post for a 1/2″ cut. I recommend setting up a stop block (the 2×4 on the right in the picture below) and clamp it to your saw. This stop block allows you to make multiple cuts of same length without having to re-measure and mark your wood every time.

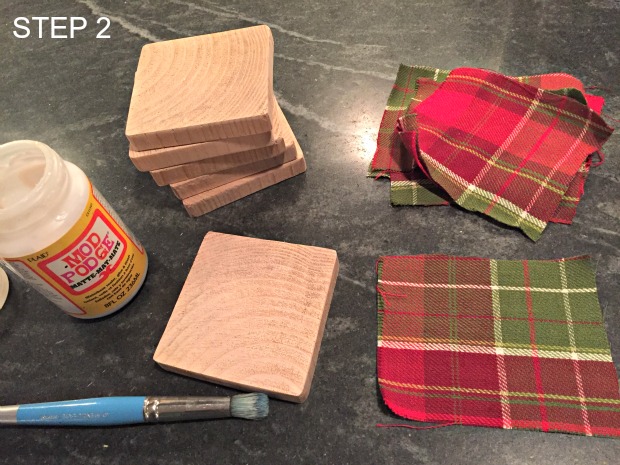
Step 2: Sand the edges of the wood cuts smooth. Apply a generous layer of mod podge onto the wood and press fabric in place smoothing any wrinkles. Let dry.
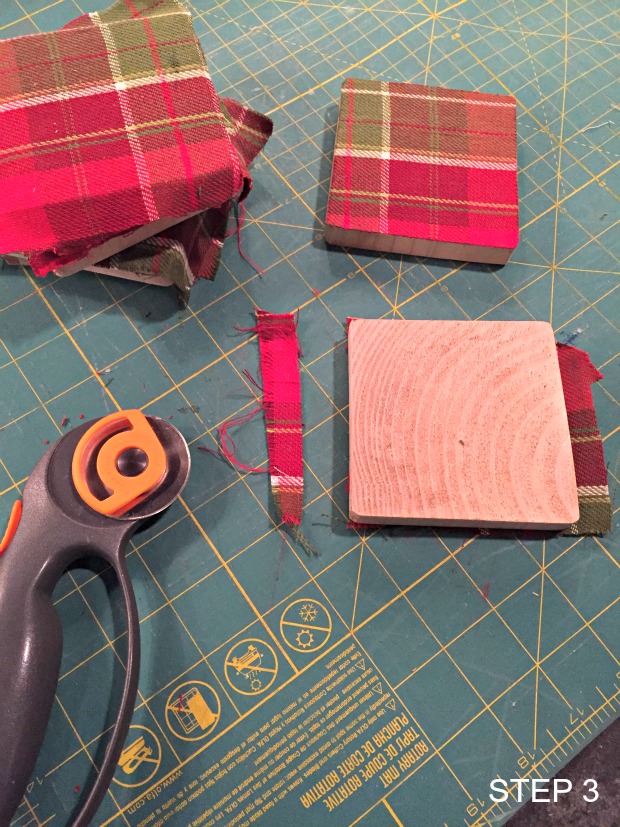
Step 3: Once dry, flip the coaster over with fabric side down and trim edges. Use a rotary cutter to get close up against the wood.
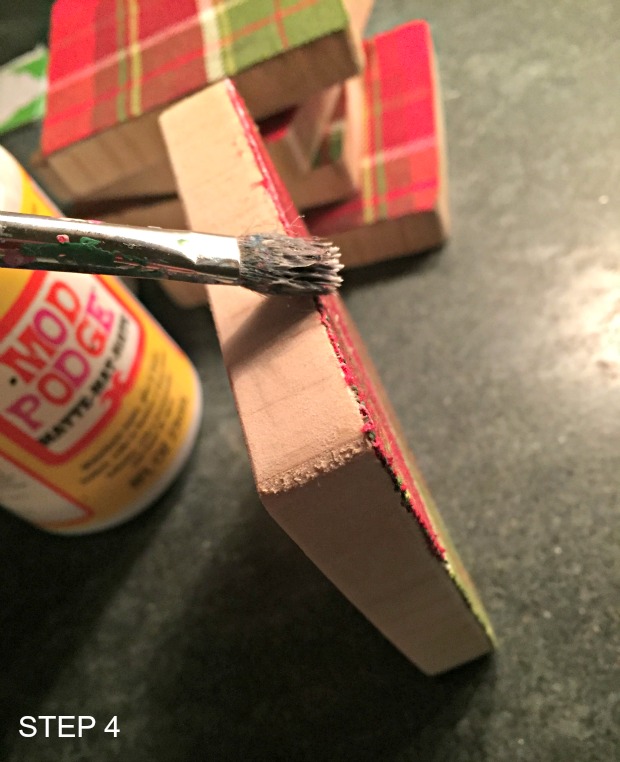
Step 4: Apply mod podge on the very edge of the fabric to keep fabric edges from fraying.
Stack up the coasters and wrap to give or enjoy on your own coffee table!
Hope you enjoyed this beautiful and easy holiday gift idea that’s great for any time of the year. Happy Holidays!

~See More of Jaime’s Projects~
Pin for later!

Oh my! how cute! I love these easy wood coasters Jaime.
pinned!
gail
Very cute! I love easy gifts like this. Here it is Christmas Eve and I still haven’t made my gifts yet. EEK!!! I’m making DIY wooden journals :). Thankfully, pretty simple! Merry Christmas!!
What a pretty, simple & easy little gift to make or to keep! Thank you!