• Home
  • About
  • My Home
  • Project Gallery
    • Decorating
    • Painting & Antiquing Techniques
    • Arts & Crafts
    • Build It
    • Electrical
    • Plumbing
    • Gift Ideas
    • Sewing
    • Tool Tutorials
    • Home & Auto Maintenance
    • Landscaping & Gardening
    • Photography
    • Recipes
    • PHG TV
  • My Toolbox
  • Contributors

Pretty Handy Girl

A DIY Blog Empowering You to Complete Your Own Project. Build it, Fix it and Do it yourself. Home project tutorials.

  • Contact
  • Advertise
  • Home
  • About
  • My Home
  • Project Gallery
    • Decorating
    • Painting & Antiquing Techniques
    • Arts & Crafts
    • Build It
    • Electrical
    • Plumbing
    • Gift Ideas
    • Sewing
    • Tool Tutorials
    • Home & Auto Maintenance
    • Landscaping & Gardening
    • Photography
    • Recipes
    • PHG TV
  • My Toolbox
  • Contributors
Home » accessories » Easiest Fall Wreath EVER!

Easiest Fall Wreath EVER!

September 30, 2013 Brittany Bailey 10 Comments

3.8Kshares
  • Facebook
  • Twitter

Easy Fall Wreath Tutorial

Who’s too busy to spend more than 5 minutes creating a new wreath for Fall? {Raising my hand high!} Well, I’m about to give you the Easiest Fall Wreath tutorial…EVER!

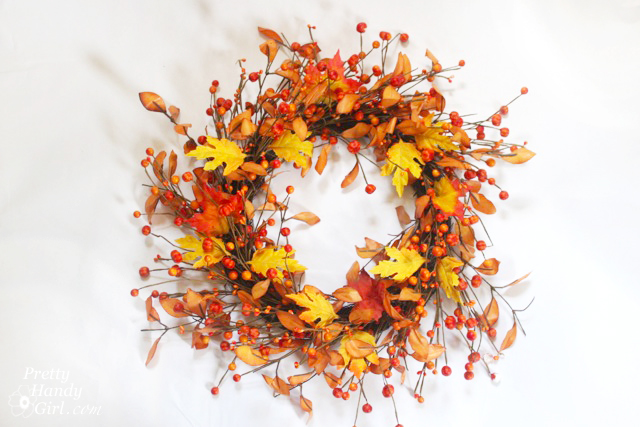
Do you have one of these store bought wreaths? Pretty, but maybe a little lacking in color. Or maybe you’re just sick of looking at the same store bought wreath going on ohhhh six years now?

Easy Fall Wreath Tutorial

Quick! Go grab these five things:
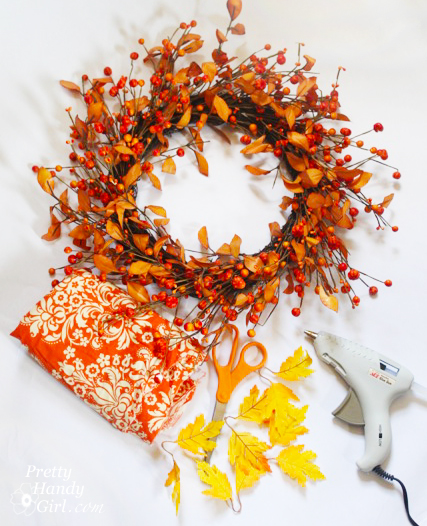
Easy Fall Wreath Tutorial

  • Wreath
  • Coordinating fabric or ribbon
  • Hot Glue Gun (with glue sticks)
  • Silk leaves pulled off a garland or other wreath
  • Scissors

Instructions:

Plug in the hot glue gun.

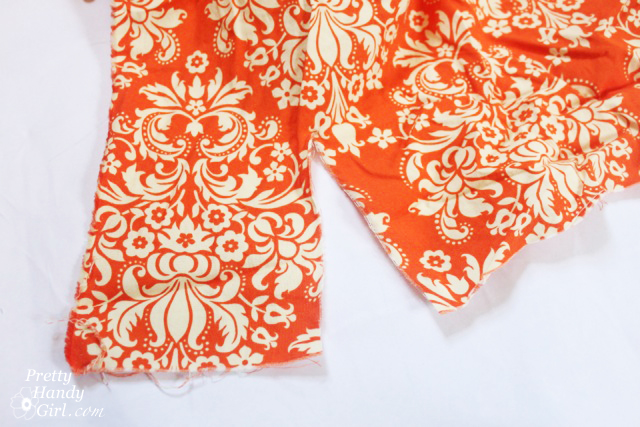
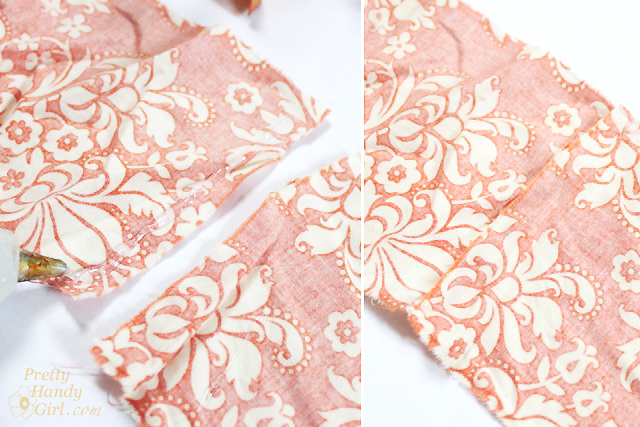
While it’s heating up, rip a  wide band of fabric for the ribbon.

Easy Fall Wreath Tutorial

Is the glue gun hot yet? Awesome. Put a dab on the wreath and push a silk leaf into the glue.

Easy Fall Wreath Tutorial

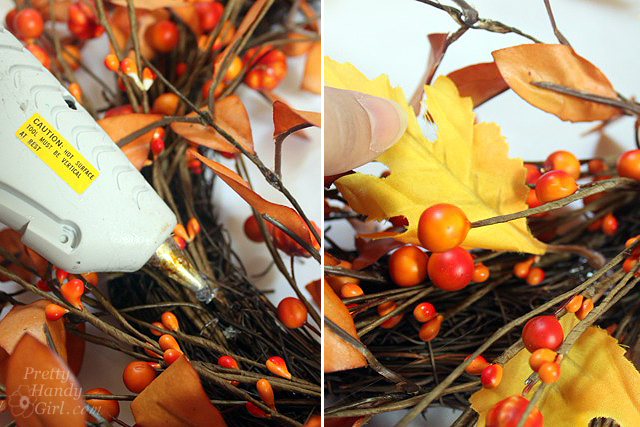
Repeat until you are thrilled with the results.

Easy Fall Wreath Tutorial

If your fabric band isn’t long enough, rip a second band. Run some hot glue on one end and lay the second piece on top. (No time for sewing…this is a quick tutorial, remember?!)

Easy Fall Wreath Tutorial

Wrap the ribbon around the top of the wreath and tie a bow. Pinch and tuck the fabric until you barely notice that you were too busy to sew the edges.

Easy Fall Wreath Tutorial

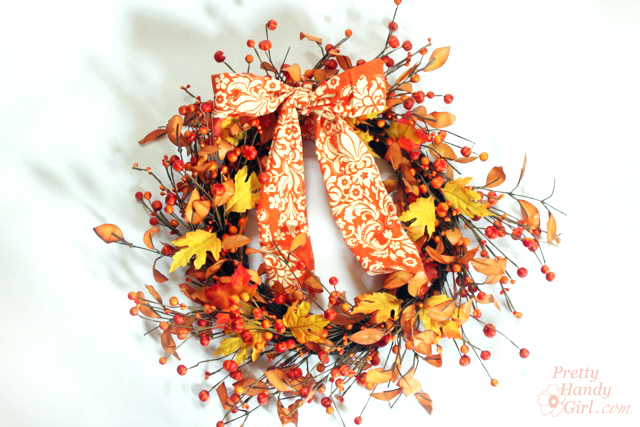
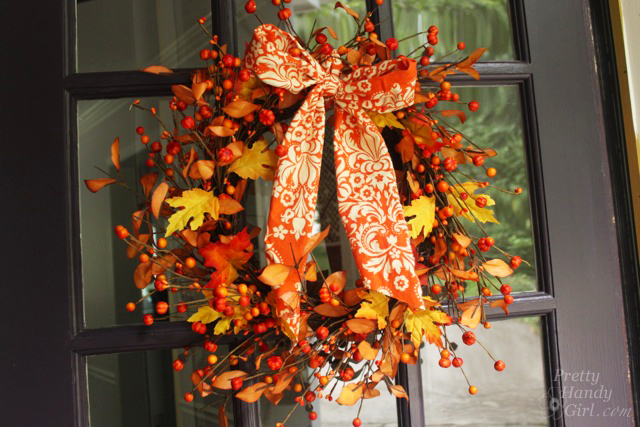
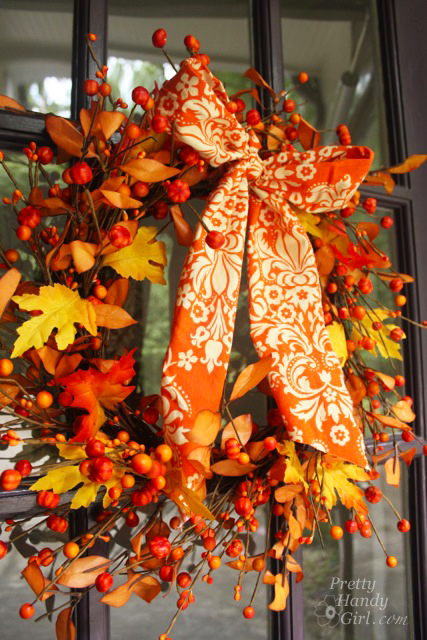
Slap that beautiful wreath on the door and call it DONE!

Easy Fall Wreath Tutorial

Or call it Gorgeous…

Easy Fall Wreath Tutorial

What are you doing still looking at my wreath? This was a quickie tutorial so you can get something else done now ;-).

Easy Fall Wreath Tutorial

Happy Fall Y’all!

PHGFancySign

Enjoy these 24 more Fall wreath ideas:24 Creative Fall Wreaths | Pretty Handy Girl

3.8Kshares
  • Facebook
  • Twitter

You might also like:

accessories, arts and craft, autumn fall decor, Crafts, decor, Decorating, Hot Glue, Upcycling, wreath

Comments

  1. crew says

    February 2, 2016 at 2:42 pm

    Quality content is the secret to attract
    the visitors to pay a quick visit the site, that’s what this site is providing.

    Reply
  2. Dawn says

    October 22, 2013 at 5:00 am

    Your wreaths are beautiful Brittany! I am planning on making a Fall wreath for my son Michael’s housewarming. He and his girlfriend Jackie will love one like you made for their front door. Great job on all your awesome wreaths.

    Reply
    • Brittany Bailey says

      October 22, 2013 at 10:24 pm

      Thanks Dawn and how sweet of you to make one for you son!

      Reply
  3. Helen G. Dickerson says

    October 2, 2013 at 11:57 pm

    Fall colors are really gorgeous. You made such wonderful masterpieces. Great job!

    Reply
  4. breanna says

    October 1, 2013 at 2:09 pm

    so pretty! and nothing makes me gladder (craftily speaking) than quick and easy. YAY!

    Reply
    • Brittany Bailey says

      October 1, 2013 at 7:13 pm

      Awww, thanks Breanna! Nice to see your name, miss you.

      Reply
  5. Shanna Gilbert says

    October 1, 2013 at 8:17 am

    Super cute! I love the bright colors, I’m going to have to try this!

    Reply
  6. Shirley Arocho says

    September 30, 2013 at 10:45 pm

    I love your wreath! So pretty!

    Reply
  7. Crystal says

    September 30, 2013 at 8:21 pm

    Gorgeous!! It’s so beautiful!! I love the ribbon!! Love the wreath!!

    Reply

Leave a Reply Cancel reply

This site uses Akismet to reduce spam. Learn how your comment data is processed.

Hi, I'm Brittany aka Pretty Handy Girl. I like the smell of coffee and sawdust in the morning. I live to break stereotypes and empower you to take on your own DIY project.

  • Email
  • Facebook
  • Instagram
  • Pinterest
  • Twitter
  • YouTube

Saving Etta - Follow the Adventure to Flip a Historic House

  • Email
  • Facebook
  • Google+
  • Instagram
  • Pinterest
  • Twitter

Privacy Policy

Affiliate Link Disclosure:

Pretty Handy Girl is a participant in the Amazon Services LLC Associates Program, an affiliate advertising program designed to provide a means for sites to earn advertising fees by advertising and linking to Amazon.com.

Copyrighted Content Permission

All images and tutorials on this blog are copyrighted material. Please contact me if you would like to borrow any media (photos, video or audio files), tutorials, or ideas from this blog. 99% of the time I would be happy to allow you to use one photo with appropriate credit and link back to PrettyHandyGirl.com (preferably to the same post it was borrowed from.) I can be contacted via email: PrettyHandyGirl (at) gmail.com.

© 2021 · Pretty Handy Girl ·

We use cookies to ensure that we give you the best experience on our website. If you continue to use this site we will assume that you are happy with it.Ok