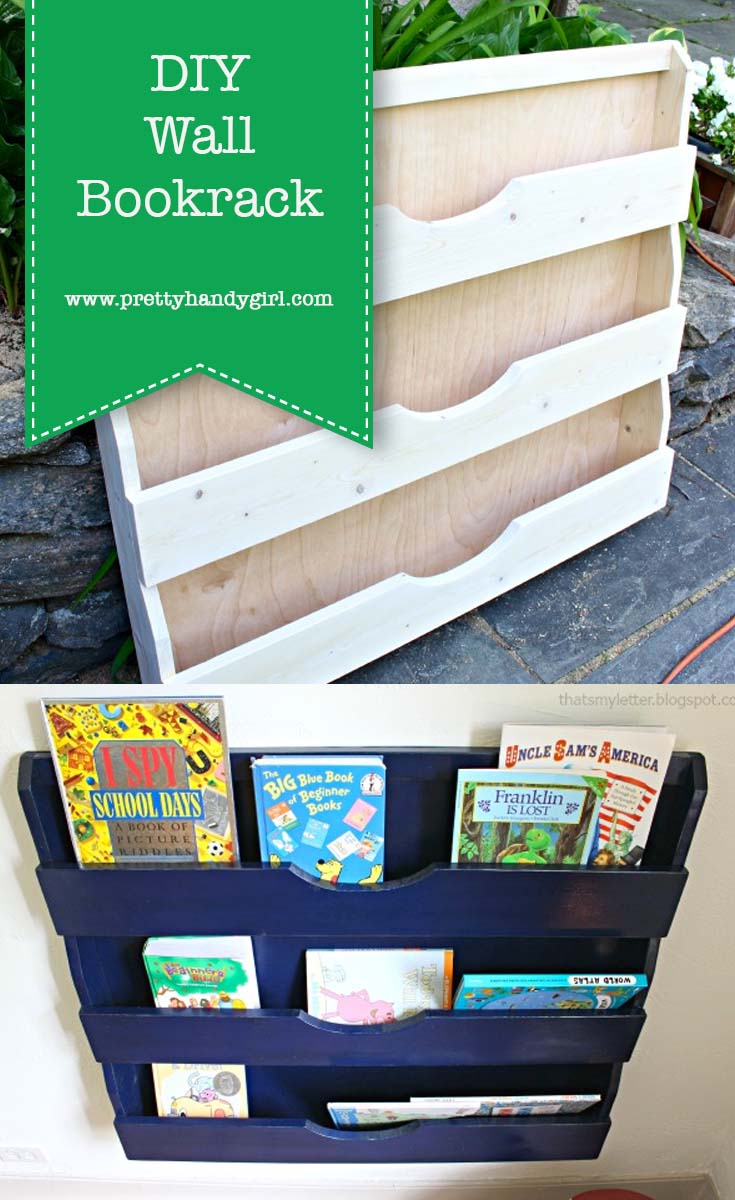
DIY Wall Bookrack
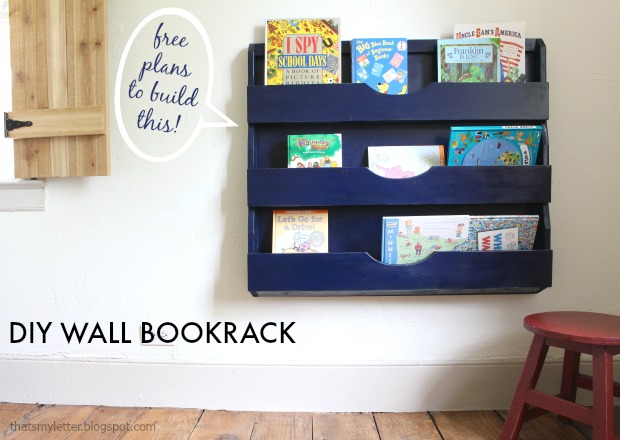
Who needs kids book storage that is easily accessible and holds a ton of books? I’m Jaime from That’s My Letter and today I’m sharing a DIY wall bookrack with free plans to build your own.
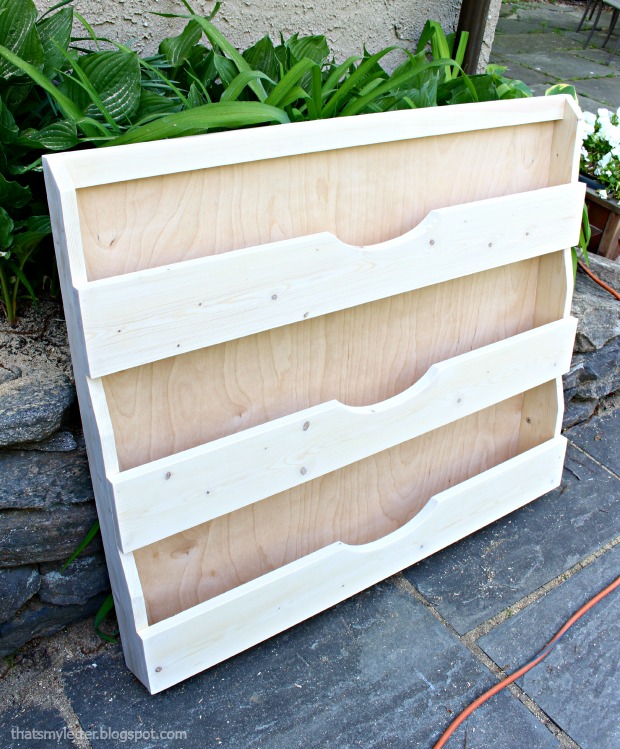
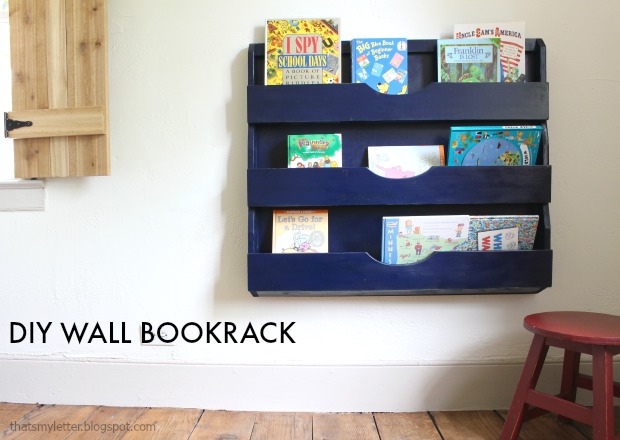
This bookrack building project will have all your books corralled in no time. The shelves are tapered and have plenty of depth for multiple books or thicker books.

Personally I love this display style storage because it allows kids to see the book covers, easily making reading more enticing!
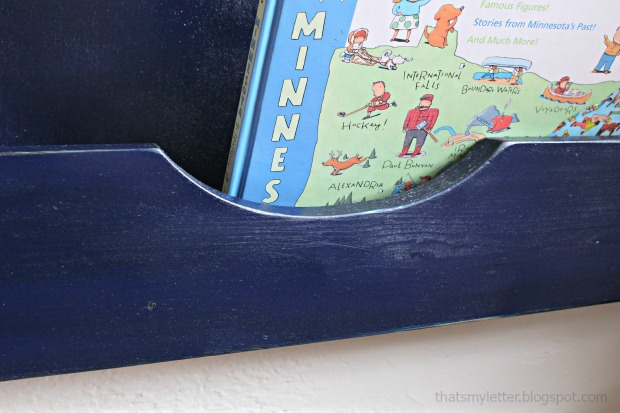
I added a center cut out for style points, but this is totally optional. It doesn’t affect the operation of the bookrack.
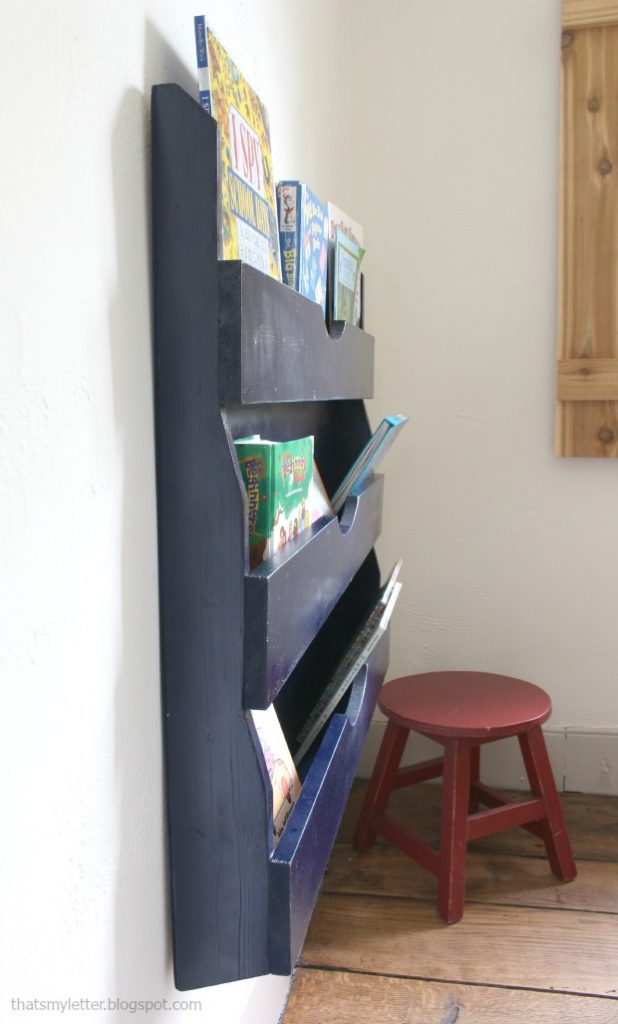
At only 4 1/2″ deep the bookrack is unobtrusive but still provides plenty of useful storage.
Materials:
- 1 – 1x5x10 pine board
- 1 – 1x4x10 pine board
- 1 – 1x3x6 pine board
- 1 – 1x2x6 pine board
- 1/4″ plywood (1/2 sheet)
- chop saw
- measuring tape
- pencil
- sandpaper
- wood putty
- drill
- pocket hole jig
- 1 1/4″ pocket hole screws
- 1 1/4″ & 3/4″ finish nails
- finish nailer or hammer
- wood glue
- french cleat
Instructions:
Click here to download the step-by-step instructions to construct this bookrack. Read through plans first before beginning.
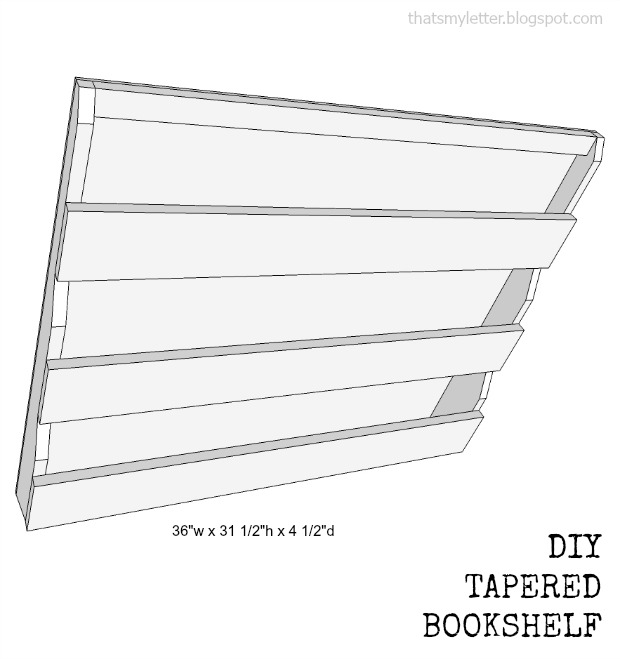
Cut list:
2 – 1×4 @ 31 ½” (sides)
3 – 1×5 @ 36” (shelf fronts)
1 – 1×4 @ 34 1/2” (bottom shelf base)
1 – 1×3 @ 34 ½” (middle shelf base)
2 – 1×2 @ 34 ½” (top shelf base & top cross support)
1 – ¼” plywood @ 36” x 31 ½” (back)
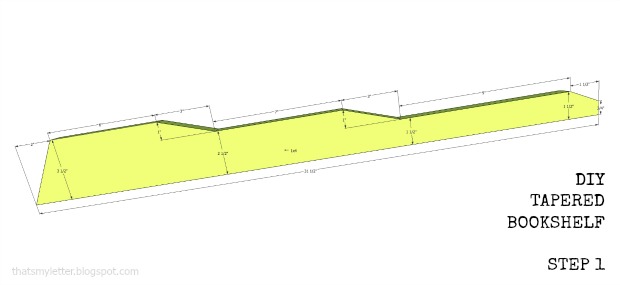
Step 1: Sides. Follow measurements in guide above to cut out sides. Use a jigsaw and clamps to hold your wood steady. Cut 2 sides.

Tip: To ensure sides are equal, clamp together then sand smooth.
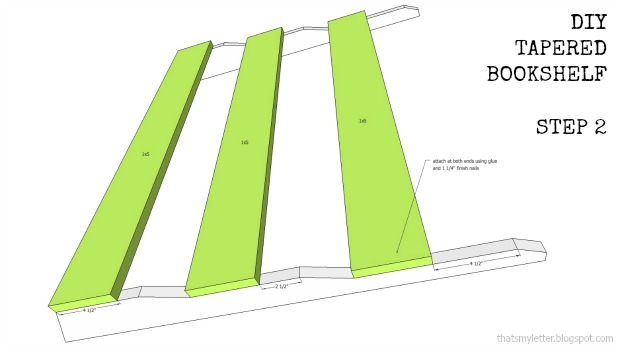
Step 2: Shelf fronts. Attach (3) shelf fronts to sides at notched locations using glue and 1 ¼” finish nails.
(Optional: Add cut out to front center prior to attaching shelf front. Use a jigsaw and sand smooth then attach to sides.)
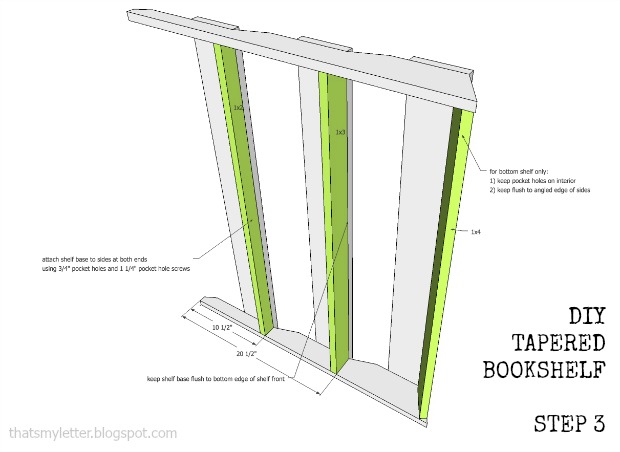
Step 3: Shelf bottoms. Attach shelf bottoms at back flush to the bottom of shelf fronts. Use ¾” pocket holes and 1 ¼” pocket hole screws. Keep the bottom shelf pocket holes on the interior side and keep the shelf bottom flush to the angled sides.
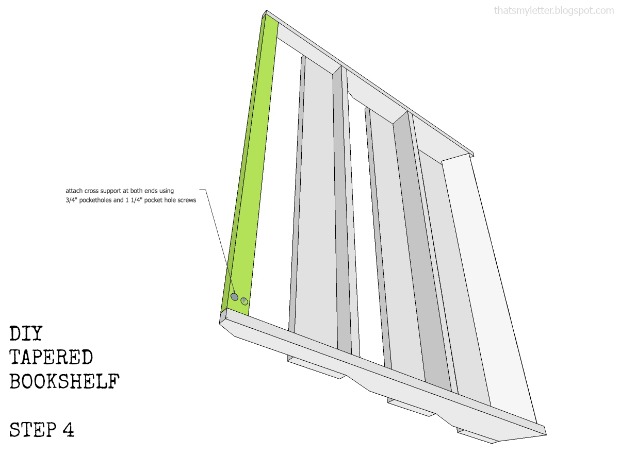
Step 4: Top support. Attach top cross support to shelf sides using ¾” pocket holes and 1 ¼” pocket hole screws.
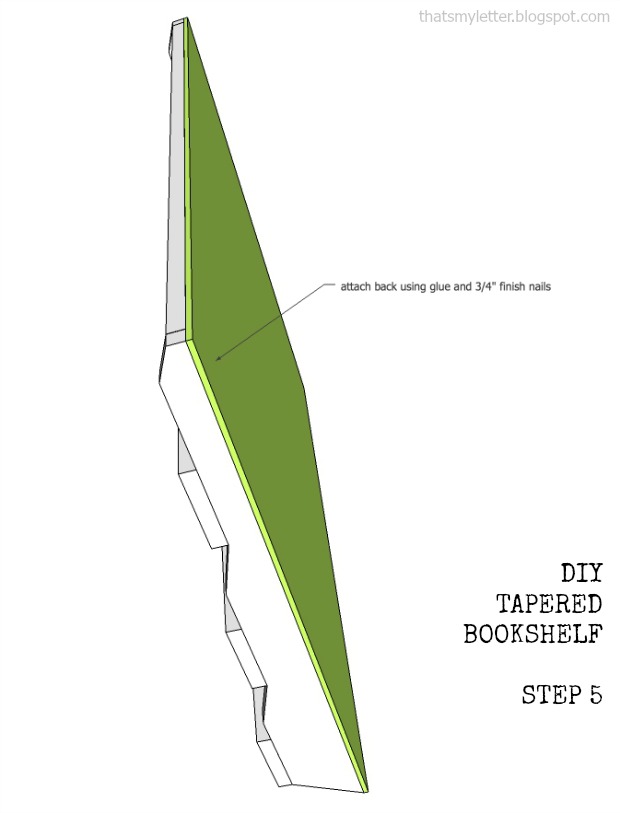
Step 5: Back. Attach ¼” plywood backing using glue and ¾” finish nails on all sides.
Sand smooth and apply wood putty to the nail holes.
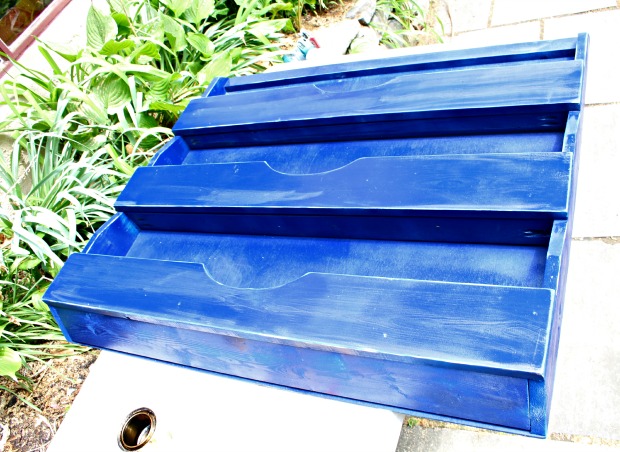
I choose to spray paint this bookrack navy blue (which came out very royal blue?) Spray paint is probably easiest for this type of project especially when getting down into the shelf pockets.
Sand again to distress the edges then apply stain and a poly sealer.
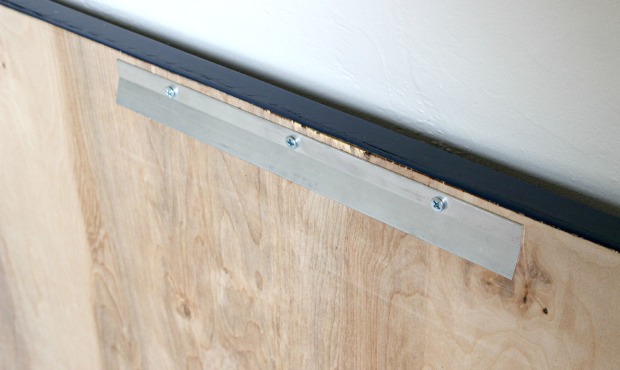
To hang the book rack, attach a french cleat at the center of the back. This is the easiest way to ensure level hanging and proper support. As long as the wall portion of the cleat is installed properly (into studs or using appropriate wall anchors) it should hold up to 100 pounds. That’s a lot of books!
This DIY wall bookrack is a pretty straight forward build that makes great storage for any kid’s space. Or a nice gift for new parents or a growing family.
Happy Building!

Pin for later!
I also am struggling to read the measurement numbers in step 1. Downloaded PDF and zoomed in, still blurry. =(
Wow, you must have been reading my mind! I’ve been debating how to store all our son’s books within easy reach of his bed without the shelves sticking out too far. This would be perfect!
I was just thinking, as narrow as this book rack is it could be inset between the studs. I have a place where that would be real handy. I may try this.
The measurements on Steps 1 through 4 are so small, I can read them…when I tried to enlarge them on the screen they got blurry. Help!!
My apologies Nancy. Try using the PDF file version of the plans, the link is above in the instructions portion.
I absolutely love this! Adding it to my project to-do list. My daughter would love it! Great work!