
DIY Tile Centerpiece
 DIY Tile Centerpiece
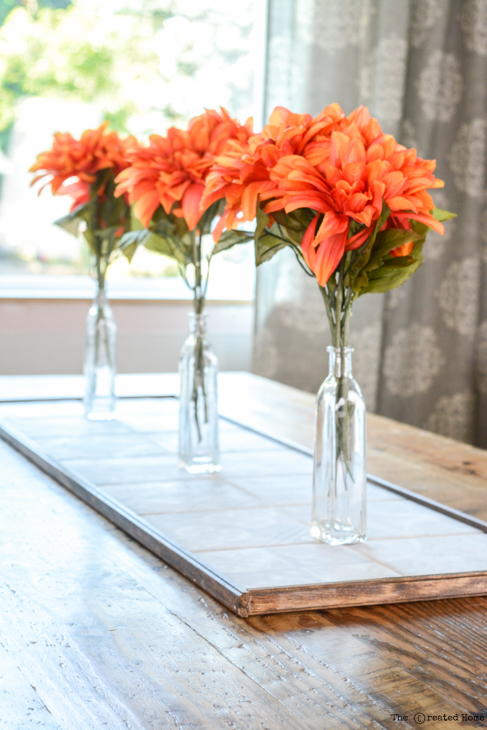
The holiday season is just around the corner, and there’s nothing quite like time spent with your friends and family gathered around the table. I know sometimes it’s all you can do to produce a delicious spread for your guests – details like a fancy tablescape are asking too much. Lucky for you, this DIY tile table centerpiece is the perfect solution for creating a gorgeous centerpiece that is easy to decorate and switch up for whatever occasion gathers your friends and loved ones around the table.
Materials:
(I’ve included affiliate links for your convenience. I earn a small percentage from a purchase using these links. There is no additional cost to you. You can read more about affiliate links here.)
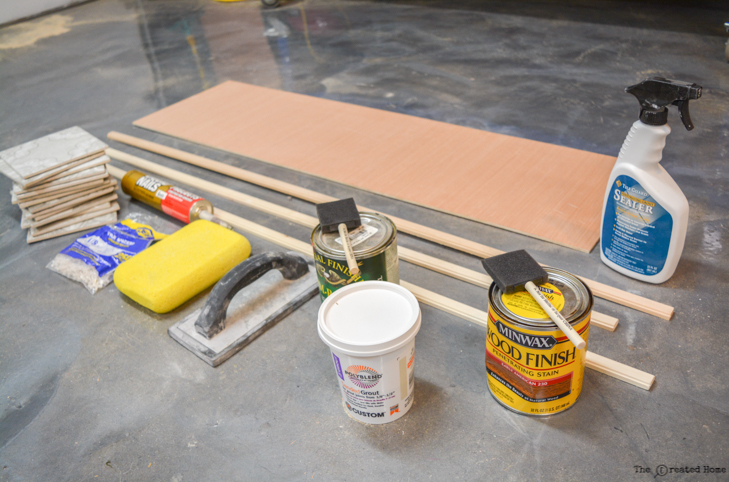
- Tile
- Grout
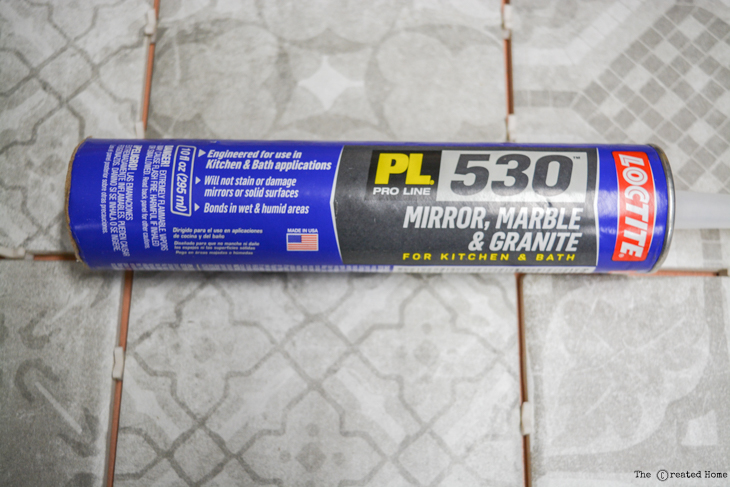
- Loctite Mirror, Marble, and Granite adhesive
- Construction Adhesive
- Grout sponge
- Decorative molding
- 1/4″ plywood
- Polyurethene
- Sponges
- Stain
- Grout float
- Spacers
- Tile sealer
- Table Saw or Circular Saw
- Pencil
(That material list may seem long, but hopefully you’ll have a few things laying around already. And luckily, most of the materials are inexpensive.)
Instructions:
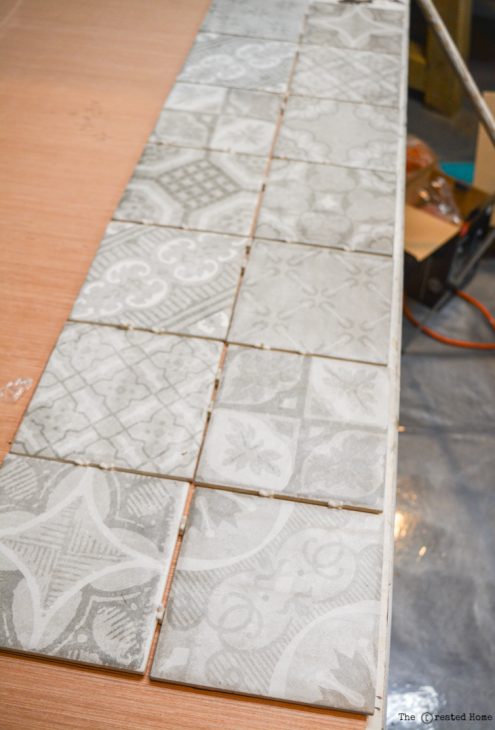
Step 1: Layout your tile on the 1/4″ plywood and trace around the perimeter to mark your desired size centerpiece. (I used 6″ x 6″ ceramic tile and 1/8″ spacers.) You can use any type of tile, but cement tile would look fantastic here! Cut the plywood to size using your table saw or circular saw.
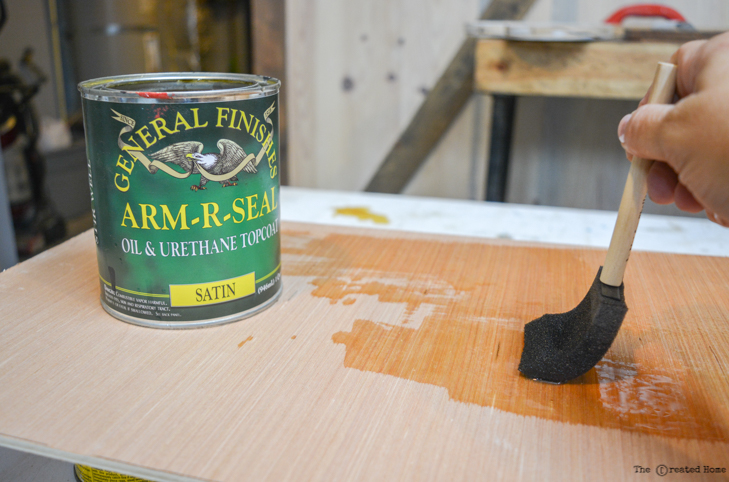
Step 2: Seal the plywood with polyurethane or other varnish.
Step 3: Apply the Mirror, Marble & Granite Glue to the back of your tiles. (Typically mortar is used to set tiles, but adhesive is less messy and perfectly fine for this application.) Do not use regular construction adhesive as it may stain or seep through the tiles.
Press the tiles firmly in place, separating with tile spacers. Let the adhesive cure for about 24 hours.

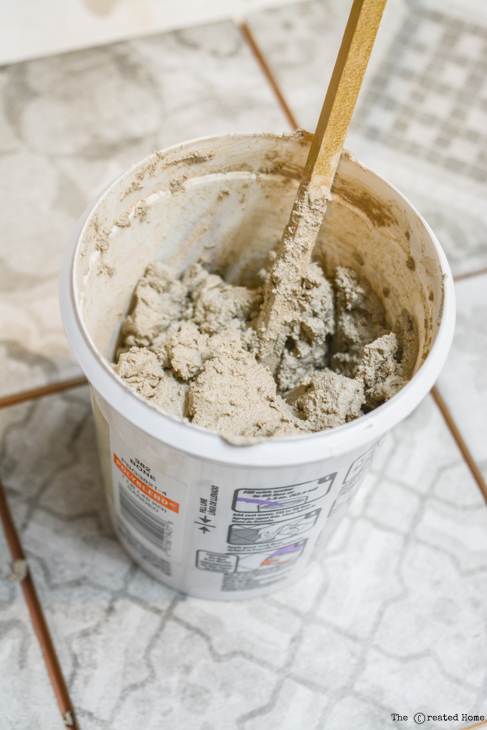
Step 4: Time to grout the tile. Follow the instructions on your grout container to mix grout to the desired consistency (usually like thick peanut butter.)
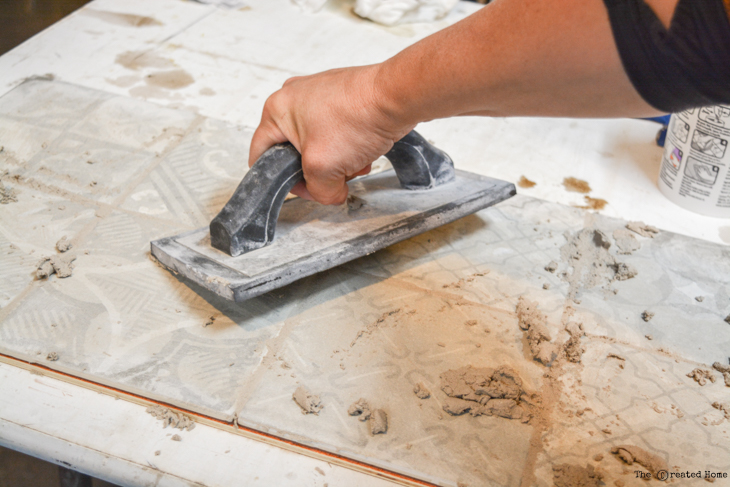
Spread the grout over the tiles. To get the grout into the space between the tile use plenty of grout and hold your float at a 45 degree angle. Scrape the float across the face of the tiles, packing the grout into the seams. Follow Brittany’s tutorial for grouting tiles if want to see a video tutorial.
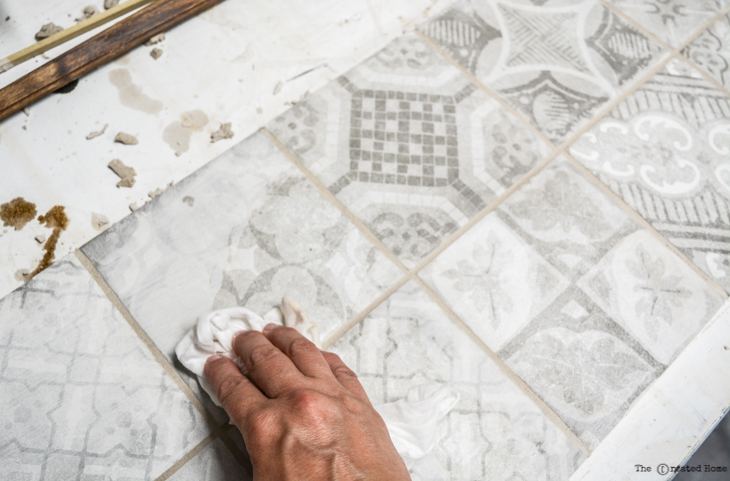
Step 5: Wait 10 minutes for the grout to set, then gently wipe off the excess grout with a damp sponge. Be careful not to wipe the grout out of the seams.
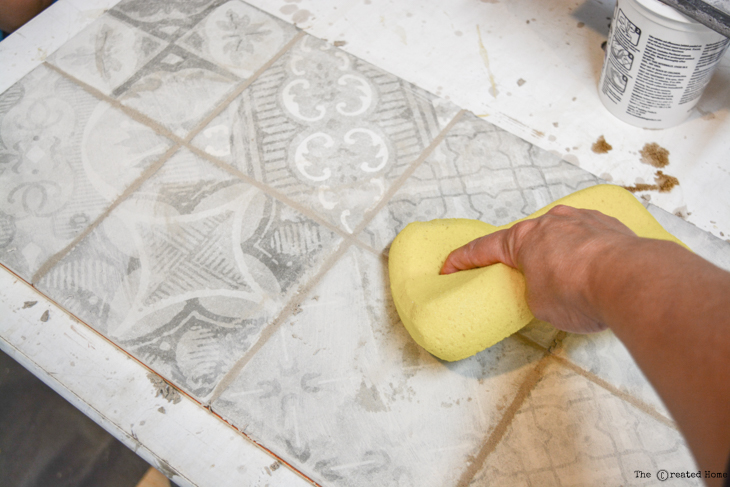
Step 6: After about two hours clean up the haze on the tiles with a damp rag or cheesecloth. Continue wipe down the tiles until they are clean.
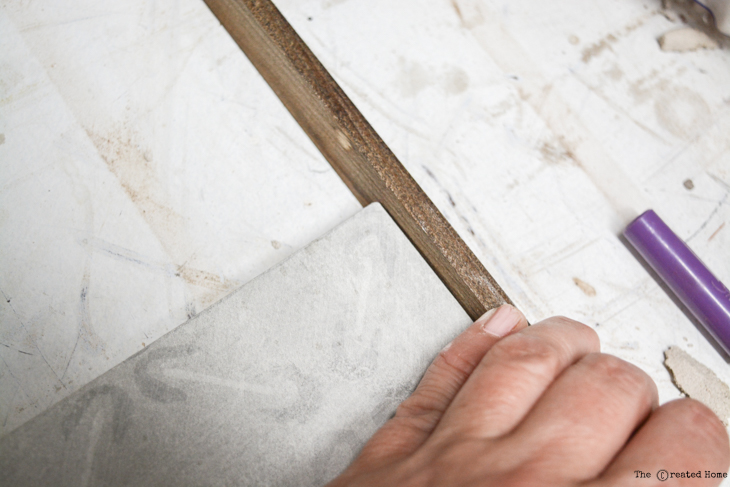
Step 7: Cut the decorative moulding pieces to fit around the sides of your tiled plywood tray. (Stain or paint the moulding pieces per your style.)
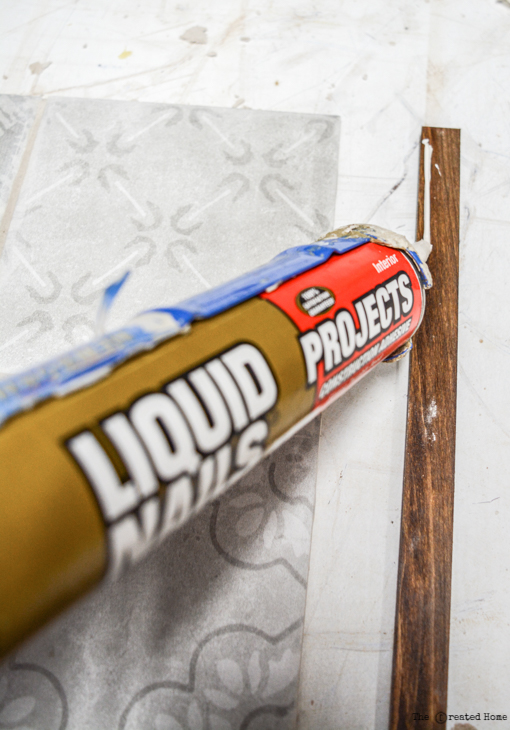
Adhere the wood moulding around the border of your plywood using construction adhesive.
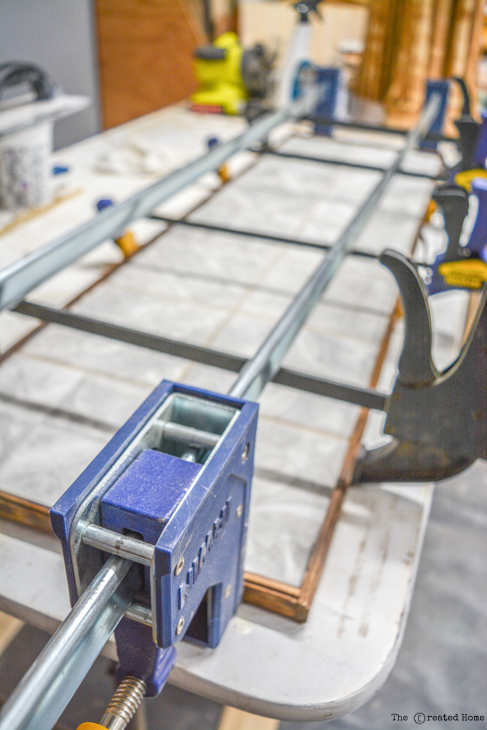
Use clamps to hold the pieces in place while the adhesive cures.
Use grout sealer per the instructions on the packaging to seal your tiles and grout.
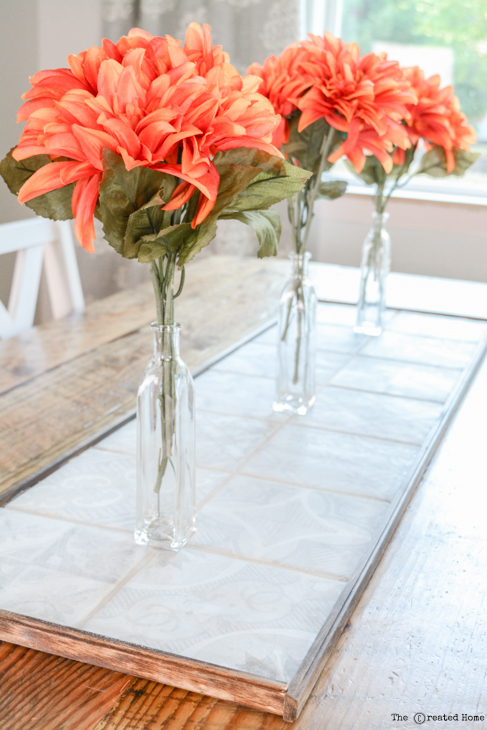
Step 8: Put the tile centerpiece on your table and decorate it up!
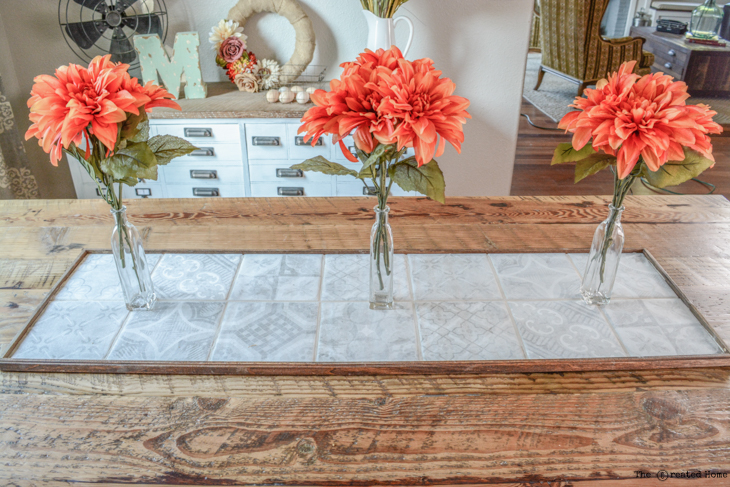
Obviously, this centerpiece can be easily customized to whatever look and size you like. Maybe consider one row of larger size tiles instead of a double row. Or a mosaic of smaller tiles would look amazing.
Besides looking attractive, tile makes for a good place to place hot dishes and protect your table top.
Pin this idea to share or to store for later:

That’s it! Be sure to share pictures if you make one for yourself. Thanks for reading, and happy entertaining!

~See More of Sarah’s Tutorials ~


This tile centrepiece is looking beautiful. This is an amazing tutorial.