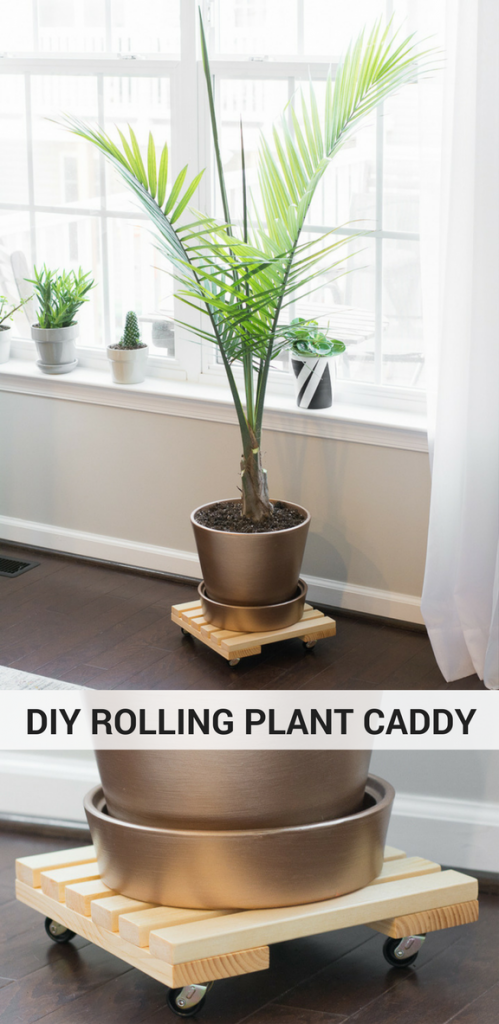
DIY Rolling Plant Caddy Tutorial
Hello everyone! I’m Brittany from by Brittany Goldwyn, and I’m back to bring you another easy and stylish tutorial! Last month I shared a tutorial on how to frame out a mirror using wood. This month I’m working with wood again to build a plant caddy.
One look at my Instagram feed and you’ll see that we probably have too many plants for our house, but plants make me happy, and I find that they are just the easiest way to decorate without spending a ton of money. We have quite a few big plants and moving them can be a beast. That’s where a rolling plant caddy comes in handy. Luckily, they are pretty easy to make. I made mine out of scrap wood that was left over from previous projects. I hate letting things go to waste, so I love a good scrap wood project!
If you’d like to learn how to make a rolling plant caddy, read on.
Materials
(I’ve included affiliate links for your convenience. I earn a small percentage from a purchase using these links. There is no additional cost to you. You can read more about affiliate links here.)
Lumber:
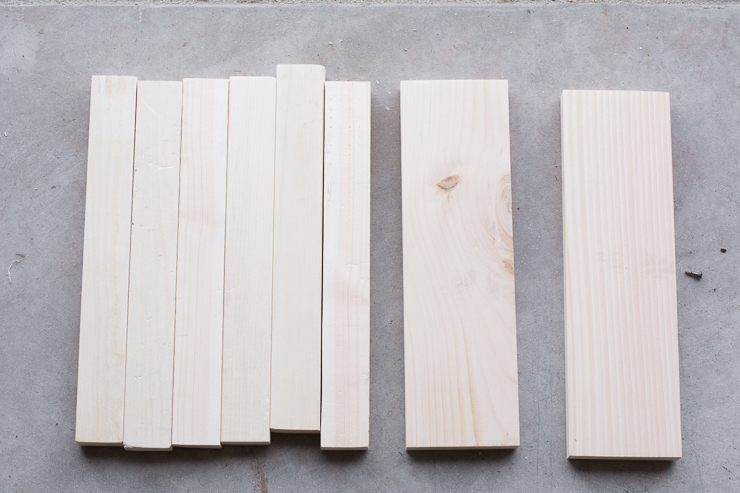
- (6) 1×2 pieces cut to 12 inches each
- (2) 1×4 pieces cut to 12 inches each
Tools and hardware:
- Miter saw or hand saw
- Drill
- (4) Swivel casters
- (16) 1-inch wood screws
Other:
Instructions:
Step 1: Cut and polish your pieces.
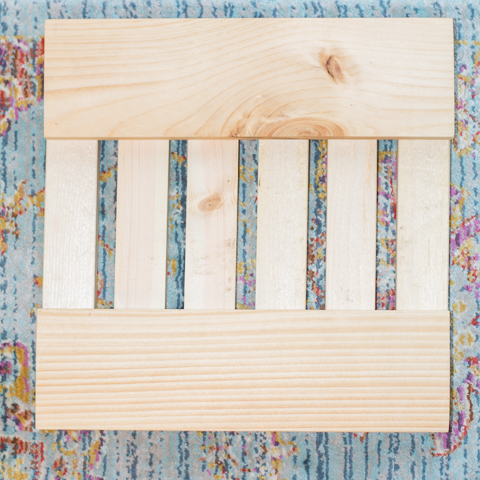
Use your saw to cut (8) pieces of lumber: (6) pieces of 1″ x 2″ cut to 12 inches each and (2) pieces of 1″ x 4″ cut to 12 inches each. I used pine for my plant caddy, but you can use any type of lumber you like. Cedar would be a good option if you plan to use your plant caddy outdoors.
Use medium or fine grit sandpaper to smooth out any rough edges on your pieces. Give each piece a good sanding to ensure it is polished.
Step 2: Stain the wood.
I have a lot of unfinished pine furniture and decor in my house, so I chose Minwax “Natural” stain. Feel free to choose the stain color you like. (For great instructions on how to stain and finish wood, check out this detailed post.)
Step 3: Assemble the caddy.
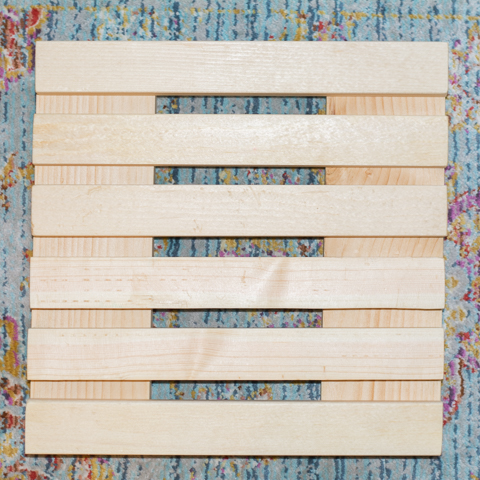
Once the pieces are dry, use wood glue to glue the 1″ x 2″ pieces to the 1″ x 4″ pieces as shown below.
View of the top:
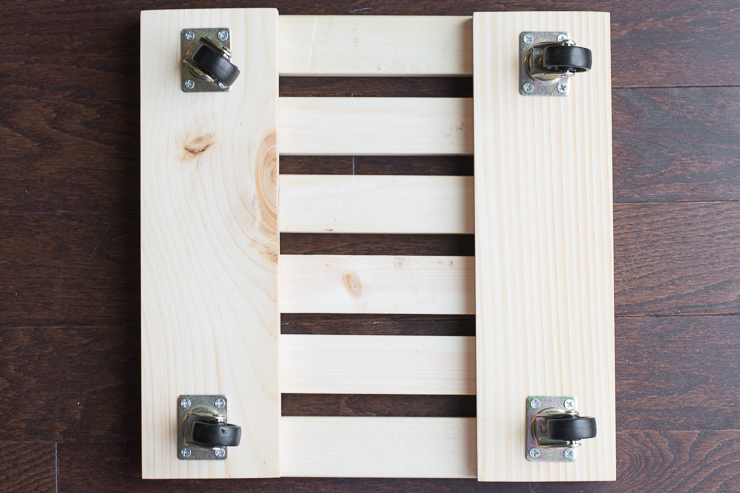
View of the bottom (the side you’ll attach the caster wheels to):
Add just a bit of glue for the side of each piece. Don’t use too much glue, or it will ooze out the sides when you assemble the caddy. Allow the glue to dry completely.
Step 4: Attach caster wheels.
Flip the caddy over and screw a caster wheel in each corner. Make sure to buy caster wheels that are graded for the weight you’ll need. (I used (4) casters rated at 20 lbs each.)
Step 5: Finish with polyurethane spray.
Use Minwax polyurethane spray to finish off the caddy and protect the wood from any water spills. This is actually my first time using an aerosol can of polyurethane, it’s much easier than brushing on the polyurethane and worrying about getting into the nooks and crannies of the caddy.
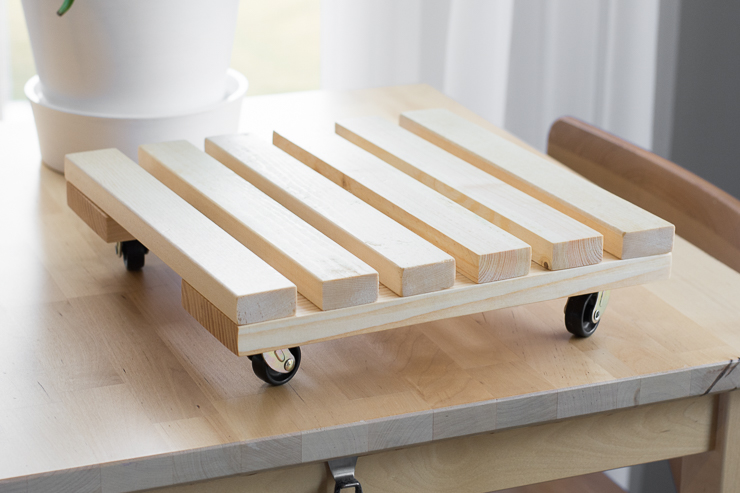
You can see the bit of added sheen in this photo:
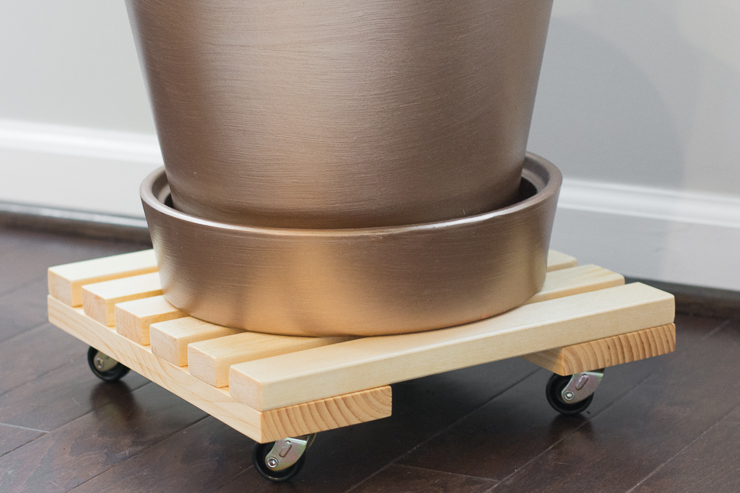
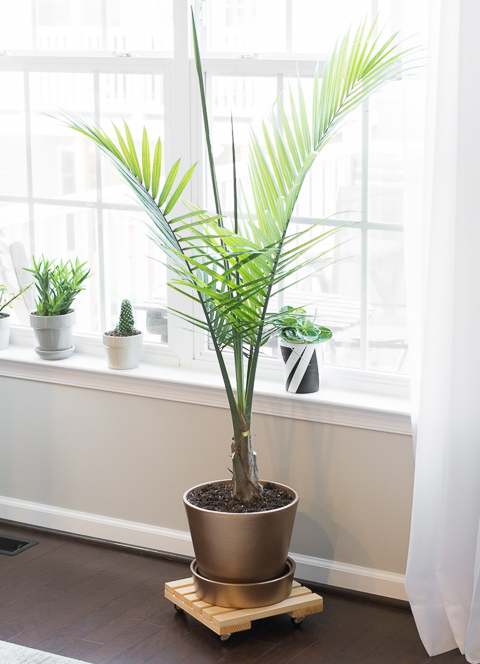
After the polyurethane is completely dry, place your plant on the caddy and enjoy being able to move your plant easily!
If you liked this project, you might like my tree stump side table, my indoor succulent care tips, my teacup planters, and my hanging indoor garden! I’ll see you next month but in the meantime, you can always visit me on my blog to see what I’m up to. Until next time!
 ~ Read More of Brittany Goldwyn’s Tutorials ~
Pin for later!


this is great i really like this idea, i am going to use this very same thing to build like a trailer for my atv to haul fire wood around my property. wheel barrel gets exhausting real quick. thanks again!
Fabulously! I bought a few of these years ago, but some has rotten. I need to replace them, but did not want to spend a lot of $$ replacing them. Thanks to you, I don’t have to now.
This is a great How-to—thanks. I think I can adapt it for my needs. I’ve got several plants on the outside porch, and I wanted to add some more—but it never made sense given the way I use the space. These are quick to make and they’d allow me to move smaller plants around as I switch from entertaining with the BBQ grill to reading or eating with the family.
Sometimes the best solutions are so simple! Now, on to see if I can bump up the design to allow for larger plants and the uneven decking surface!
The caddy looks good and I don’t think there is anything wrong if you choose to leave the planter on it permanently for a cornet setting. My dad is the guy with all the tools and he promised to make the same one for me only I need 2 I had told him. Thanks for the tutorial Brittany.
Maybe you can “help” your Dad while using his tools. I love to introduce others to trying a new DIY skill. This is a great project to start with.
Yes, you’re right – I will try to learn. The problem is he is too far away but now that I found your blog, I will try to learn some of the lessons watching your tutorials. Thanks so much Brittany!
These are very cool. I have some plant caddies but primarily outside. Love then, thanks for the tutorial.
That easy? I will try it! Have some pieces from a transport box in my garage! Thanks!