DIY Modern House Number Sign
 DIY Modern House Number Sign
A step-by-step tutorial on how to create a DIY modern house number sign that will update your homes curb appeal.
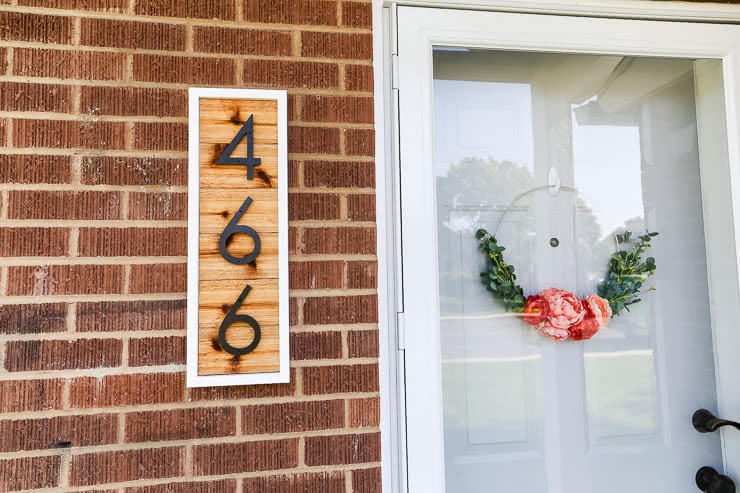
Do you want to update your homes curb appeal? Have you thought about upgrading the look of your homes house numbers? I’m Megan from TwoFeetFirst, and I am excited to share this project with you today. This is an easy DIY project that will update any front porch!
How much does it cost to build a house number sign?
The cost of this project will depend on the number of house numbers you need, plus where you purchase them. The project should cost about $30 (includes all materials) for a three number sign. If you happen to have some of the materials on hand, it will cost less.
DIY House Number Sign
Materials:
(I’ve included affiliate links for your convenience. I earn a small percentage from a purchase using these links. There is no additional cost to you. You can read more about affiliate links here.)
- House numbers (ones used were purchased on Etsy)
- 5/8″x 3.5″x 6ft cedar picket
- 1″ x 2″ x 8ft primed trim board
- white exterior paint (spray paint works)
- 100% Tung oil (optional)
- 1 ¼” finishing nails
- wood glue or construction adhesive
- two – keyhole hanger
- fasteners for wall
- white paintable silicone
- two – felt pads (optional)
Tools:
Instructions:
STEP 1: Decide on the layout
Before you can start cutting the wood, determine the layout for your house numbers. The easiest way to do this is by laying out the numbers on a solid surface. Move them around until you are happy with the layout.
Then measure the spacing between the numbers and the length from the first number to the last.
TIP: For a professional look, keep the spacing between the numbers the same.
If your spacing between the numbers is the same, add this equal spacing to the top number and bottom. By doing this, you increase the height of the sign.
(For example, my numbers had a spacing of 1.25″. Therefore, I added 2.5″ + my layout measurement (18.5″) which gave me 21″.)
SIDE NOTE: I also used the 3.5″ cedar boards to determine my space. If I used five pieces of the cedar, my distance would be 17.5″ and six pieces is 21″. So I decided to use 21″ to make things easy this way I was not cutting the boards width.
Also, add this spacing to the width of the widest number. This measurement will be what you cut your cedar board too. For example, my number 4 is my widest number, 3.5″. I then added 2.5″ (1.25″ two times) to this amount giving me the width of 6″.
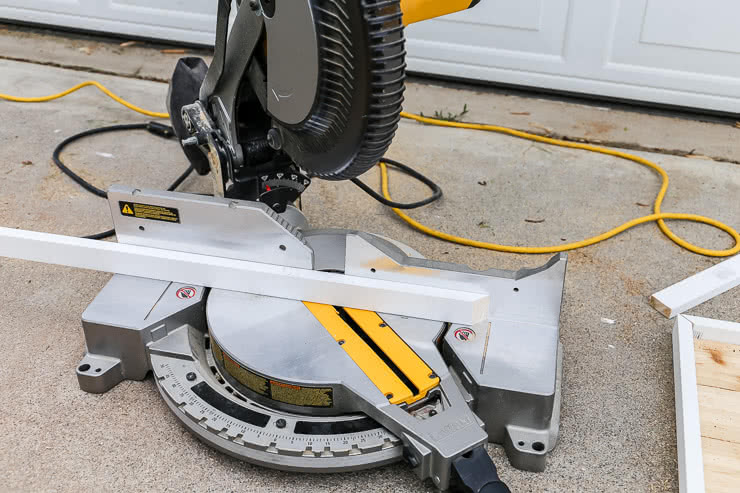
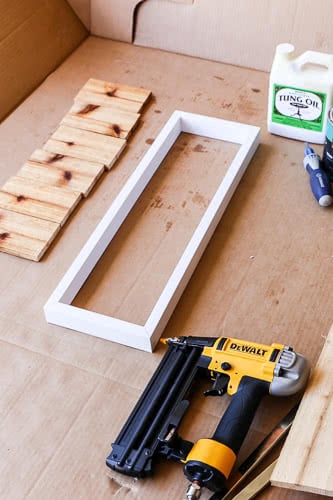
STEP 2: Cut the cedar boards
Now that you have determined the size of the cedar base, you can cut the wood. Cut the board to your width measurement. I will be cutting mine at 6″.
TIP: Use a scrap board clamped to the saw fence to insure the exact cut for all your cedar pieces.

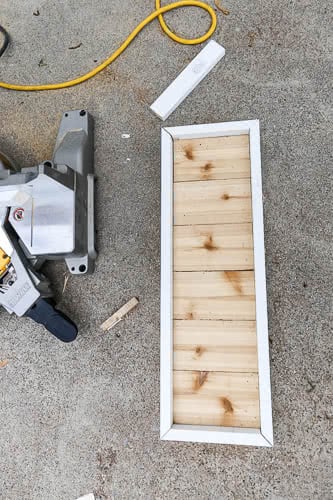
After cutting the cedar board, place them on a flat surface in a column. Then measure the length of all the pieces together, mine was 21″. Cut a piece of cedar board this length. This board will be the back support for the cedar pieces you already cut. We will call this piece the bracing.
Once the cedar boards are cut, cut your 1″x2″ trim. To cut the trim, rotate your saw to a 45-degree angle. Then cut an end of the 1″x2″ board (cut the board with the 1″ side facing up.)
Frame your cedar pieces with the 1″x2″ board. You need to add 1.5″ to the width of your cedar base. My width was 6″ so my measurement is 7.5″. This measurement will be the top and bottom of the frame.
Cut two 1″x2″ boards to this measurement. Remember you are cutting at a 45-degree angle, this measurement is the longest point of the 45-degree, the shorter will be the same width as your cedar boards.
Next, cut the side pieces of the frame (this will be the same length of your cedar base). Again you will need to add 1.5″ to the measurement, my height was 21″ so my size is 22.5″. Cut two 1″x2″ board at this measurement, (remember you’re cutting at a 45-degree angle).
Now test your 1″x2″ frame around the cedar base, adjust the boards if needed by cutting them to give you a snug frame.
SAFETY TIP: If your pieces are too small to hold safely, cut new pieces instead of risking personal injury. Always cut your shorter pieces from longer trim stock.
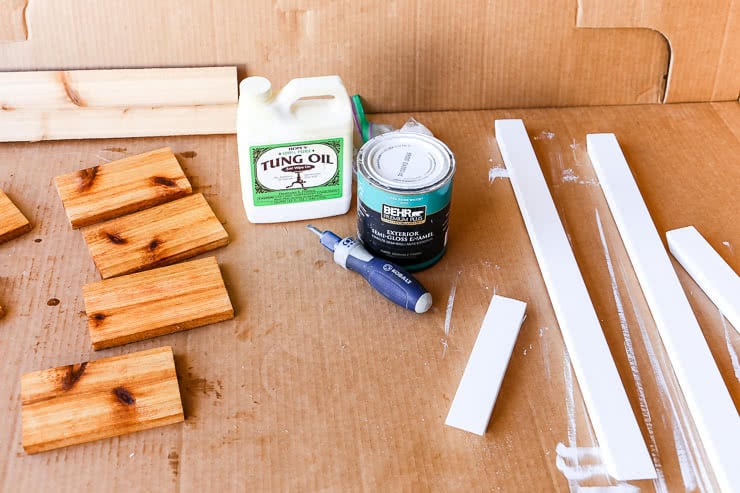
STEP 3: Paint the frame and seal the cedar
Once you’re happy with the frame, seal all the wood for outdoor use. Paint the 1″x2″ boards with outdoor paint and stain or seal the cedar boards with Tung Oil. Alternatively, you can leave the wood raw and it will grey over time.
SIDE NOTE: Tung oil helps waterproof wood plus it helps to bring out the color in the wood, see why it’s my favorite way to finish wood. I decided to paint the frame white and seal the cedar with Tung oil.
Follow the instructions on how to apply then let everything dry according to the instructions on the containers.
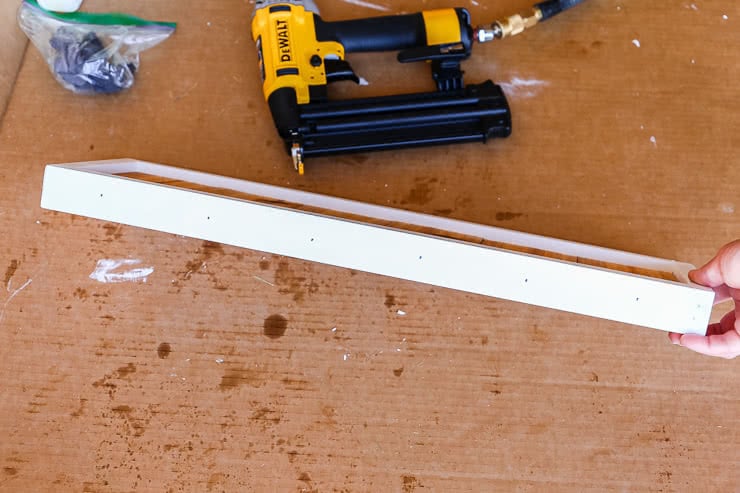
STEP 4: Build the frame
Once everything has dried, place the 1″x2″ pieces on a flat surface. Then arrange the pieces to make the frame.
Using 1.25″ nails, nail the 45-degree angles of the frame together.
Then place the cedar bracing inside the frame, center it then nail into place on the top and bottom.

To help protect the frame from outside elements, the joints (45-degree cuts) should be sealed with silicone. Apply silicone to the joints to seal the gaps.
SIDE NOTE: You will want to do this on any nail hole too.
Let the silicone dry then touch up the areas with paint. Let the paint dry completely before moving on.
Next is adding the cedar to the frame. Apply construction adhesive or wood glue to the cedar bracing. Then lay the cedar onto the bracing, rearrange if needed.
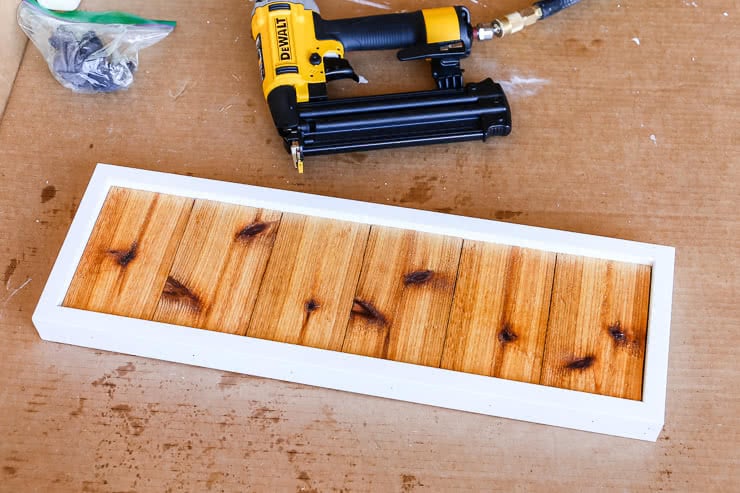
Secure the cedar boards to the sides of 1″x2″ frame with 1.25″ nails.
Again apply silicone to the frame to cover the nail holes. Once it has dried, repaint the areas with paint and let that dry too.
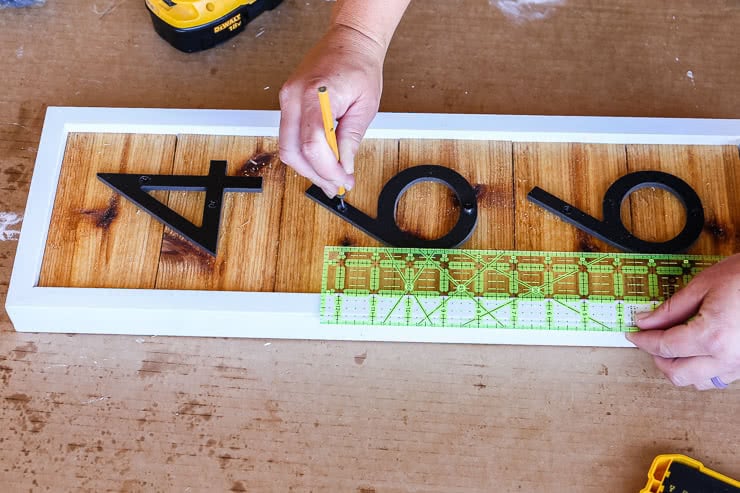
STEP 5: Install the house numbers to the frame
Now that the frame is built the house numbers can be installed. Place the numbers onto the frame then using a ruler align the numbers accorded to your predetermined layout.
Once you’re happy with the placement, use something (nail or pin punch) to make an indent into the cedar where a screw hole is for the house number.
Then pre-drill a hole (smaller than the actual screw for the numbers) in the indented places.
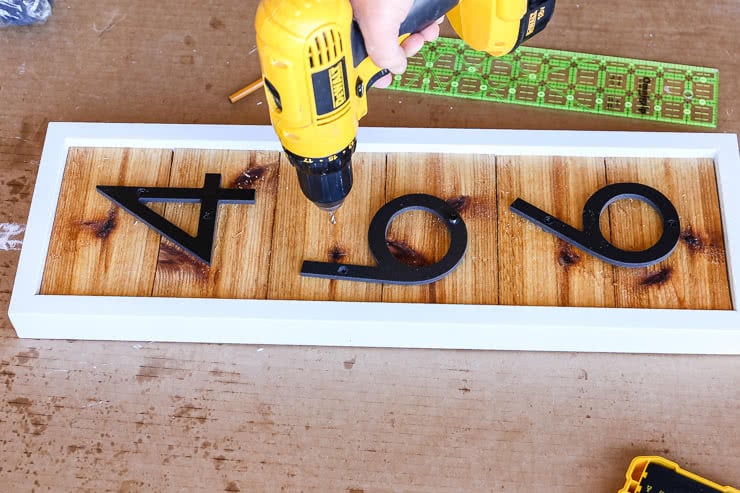
Attach the number to the frame using the pre-drilled holes.

STEP 6: Install hanging brackets and screws
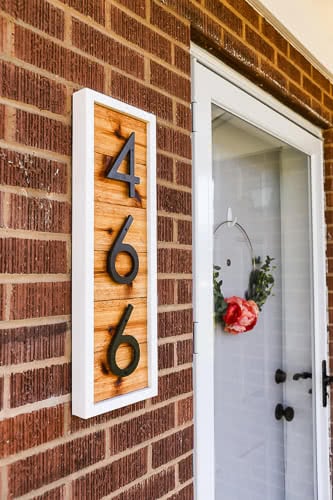
Now that the house number sign is built, you need a way to secure it into place. There are many ways to do this, but I decided to use keyhole hangers.
Before installing the hangers onto the sign, I would recommend installing the screws into the wall. To do this, measure the back of the sign were the center of the brackets will be placed (you should have an idea of where this will be). In my case, the distance was 6.5″-6.75″.
This distance is how far apart the screws on the wall will be placed, secure the screws to the wall at the height you want. Remember to use the correct screws for the material you are securing to (i.e. anchor screws for masonry if you have a brick, block, or stone wall).
TIP: Place one screw then measure the second to the distance you determined before plus use a level!
Once the screws are in place, measure the distance between them because it may have changed. Then attach the hanging brackets to the sign, make sure the distance from the center of the brackets is the distance measurement you just measured.
TIP: Use a drill bit to drill a slightly bigger hole where the screw head will be.

TIP 2: Only attach the top of the brackets then check the level by placing the sign on the wall. If everything is level, attach the bottom screws. If its not level, adjust one bracket until it is level then attach the bottom screws.
You can also place two felt pads at the bottom of the sign to keep it from rubbing against the wall.
Now you can hang your house number sign!
To help you with the process, here is a video on how to make a house number sign.
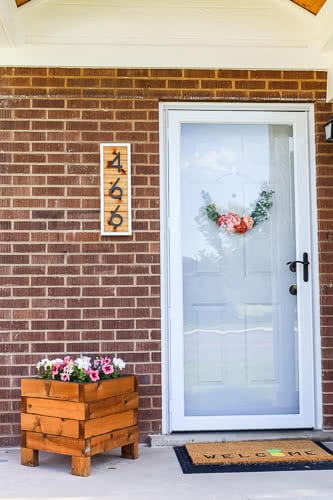
This DIY tutorial on creating a simple modern house number sign will help you update your curb appeal and will make you happy when you see it!

~Find more of Megan’s projects here ~

I cannot find the cedar picket! Where did you purchase? Thanks.
You can usually purchase cedar planks at your local lumber yard.