• Home
  • About
  • My Home
  • Project Gallery
    • Decorating
    • Painting & Antiquing Techniques
    • 31 Days of Handy Home Fixes
    • Arts & Crafts
    • Build It
    • Electrical
    • Plumbing
    • Gift Ideas
    • Sewing
    • Tool Tutorials
    • Home & Auto Maintenance
    • Landscaping & Gardening
    • Photography
    • Recipes
    • PHG TV
  • My Toolbox
  • Contributors
  • DIY Blogs

Pretty Handy Girl

A DIY Blog Empowering You to Complete Your Own Project. Build it, Fix it and Do it yourself. Home project tutorials.

  • Contact
  • Advertise
  • Home
  • About
  • My Home
  • Project Gallery
    • Decorating
    • Painting & Antiquing Techniques
    • 31 Days of Handy Home Fixes
    • Arts & Crafts
    • Build It
    • Electrical
    • Plumbing
    • Gift Ideas
    • Sewing
    • Tool Tutorials
    • Home & Auto Maintenance
    • Landscaping & Gardening
    • Photography
    • Recipes
    • PHG TV
  • My Toolbox
  • Contributors
  • DIY Blogs
Home » Centerpieces » DIY Lollipop Stand

DIY Lollipop Stand

April 16, 2014 Jaime Costiglio 2 Comments

623shares
  • Facebook
  • Twitter
  • Pinterest

lollipop stand

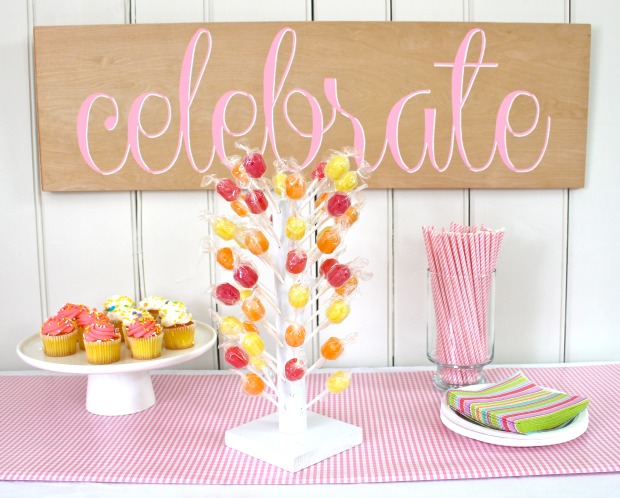
Happy Spring folks!  Jaime here from That’s My Letter back to share a fun DIY party decor idea: make your own lollipop stand.  I promise it’s fast and easy and adds tons of charm and sweetness to any party.

lollipop stand 2

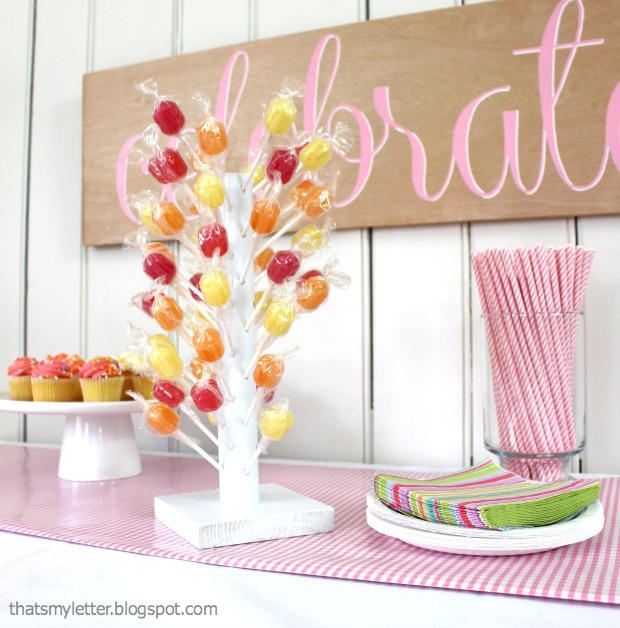
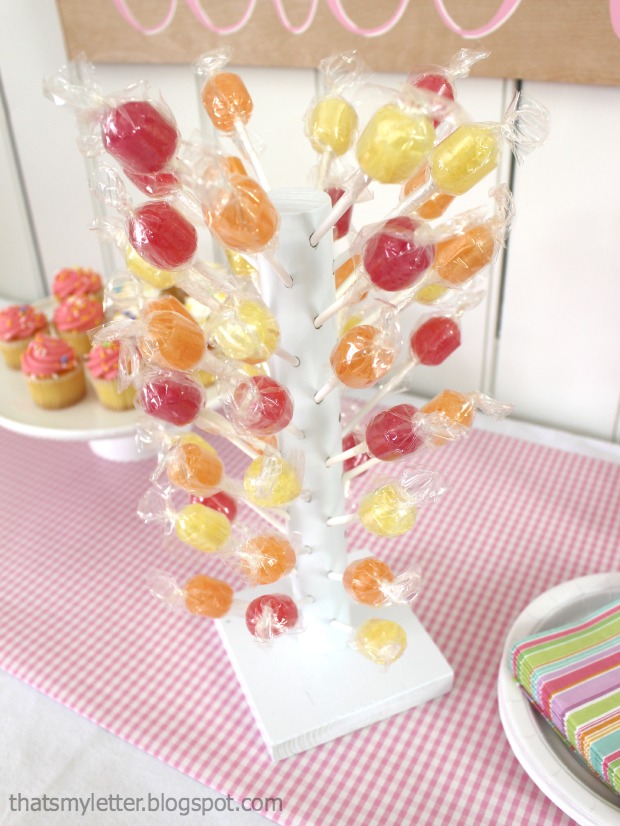
This lollipop stand holds a ton of lollipops – 52 to be exact!  You could probably even use this stand for cake pops.  (The tutorial for the ‘celebrate’ script sign can be found here.)

lollipop stand 3


Materials:

lollipop stand supplies

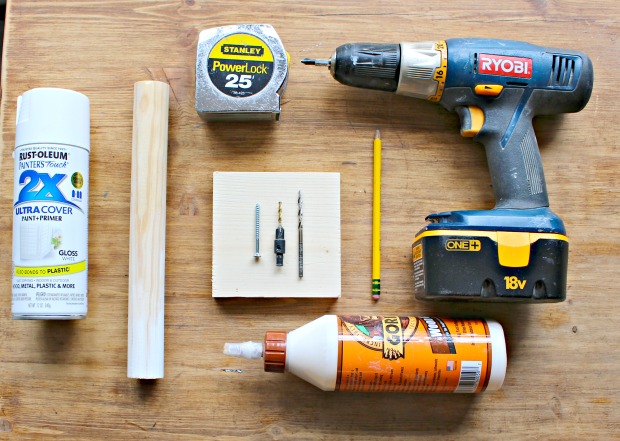
  • 1 – 1 1/4″ wood dowel x 11″ long
  • 1 – 1×5  cut to 4 1/2″ (or any scrap wood 4 1/2″ square x 3/4″thick)
  • white gloss spray paint
  • sandpaper
  • 1 – 2″ wood screw
  • countersink bit
  • 5/32 drill bit
  • pencil
  • tape measure
  • drill
  • glue
  • scotch tape

Instructions:

Step 1: Mark the center point on the 4 1/2″ square wood base.

lollipop stand step 1 & 2

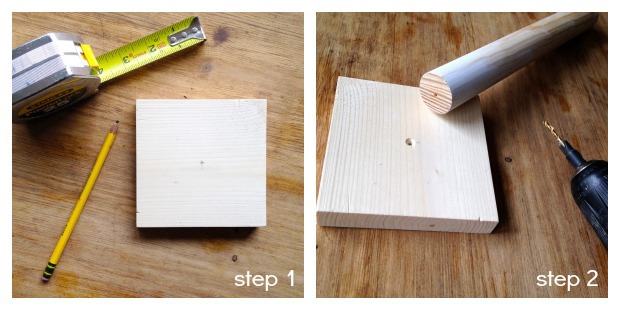
Step 2: Pre-drill a counter sink hole at the center of the square wood base.  Also pre-drill one end of dowel.

Step 3: Attach dowel to square base using glue and 2″ wood screw.lollipop stand steps 3 & 4

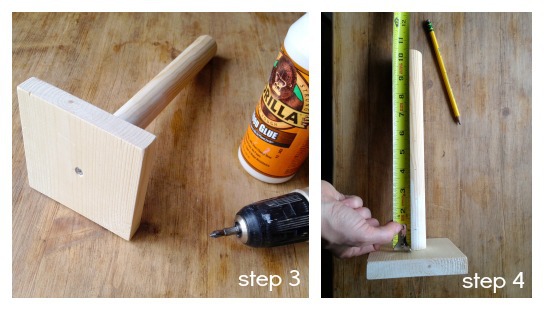
Step 4: Mark lollipop stick holes on dowel using a pencil. Begin your marks 1″ from base and mark every 1 1/2″.  Repeat on all four sides.

lollipop stand step 5

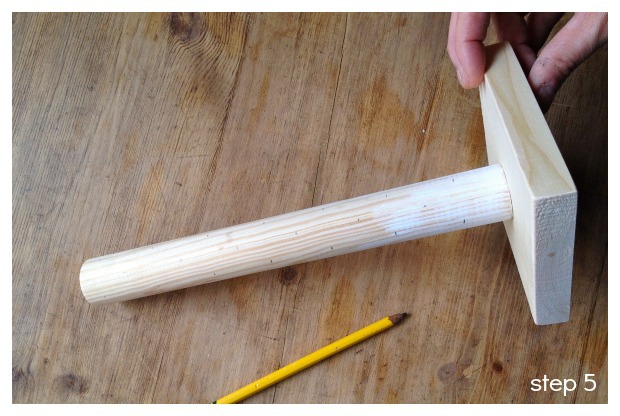
Step 5:  Now add more lollipop stick marks in between the original four sides (staggering the holes.)

Step 6:  Place a piece of tape around the 5/32 drill bit at the 1″ depth.

lollipop stand step 6 & 7

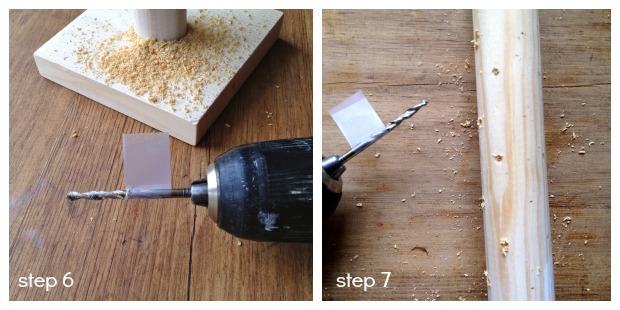
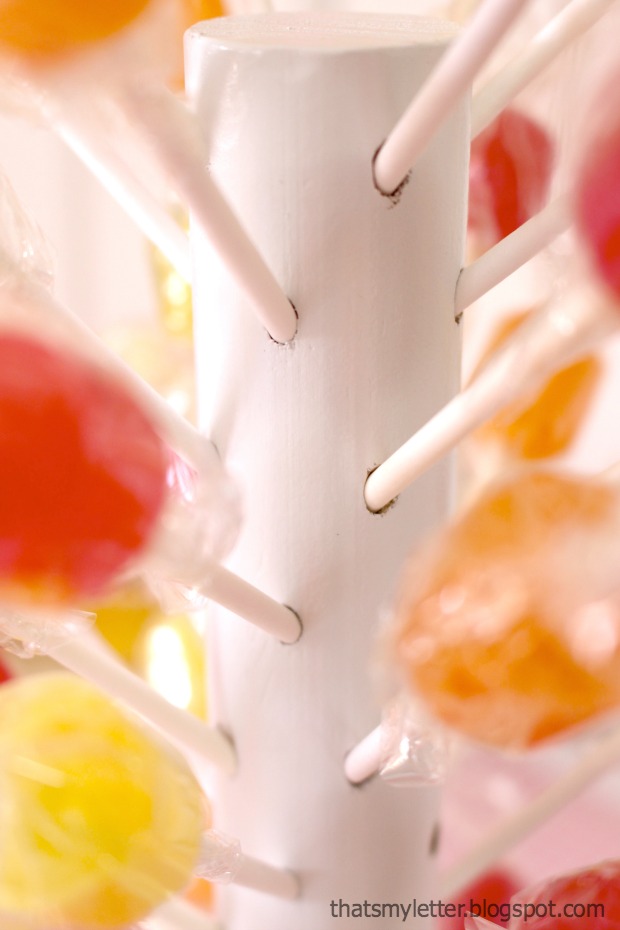
Step 7: Begin making ‘starter holes’ at the pencil marks.  Keep your drill at a 90 degree angle to the dowel and only drill a teeny bit into dowel.  This ‘starter hole’ will prevent your bit from slipping when you begin the angled holes.

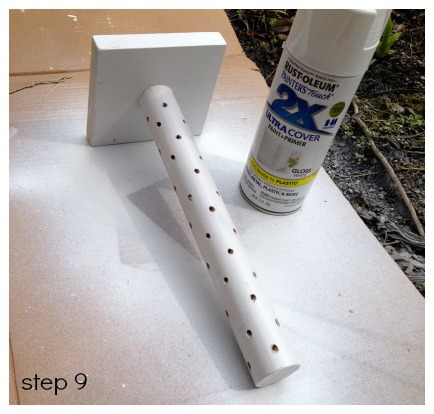
Step 8: Now make angled holes into dowel.  Keep drill at 45 degree angle to dowel.  The photo above on the right is only to show the angle of the drill bit going into the dowel.lollipop stand step 8
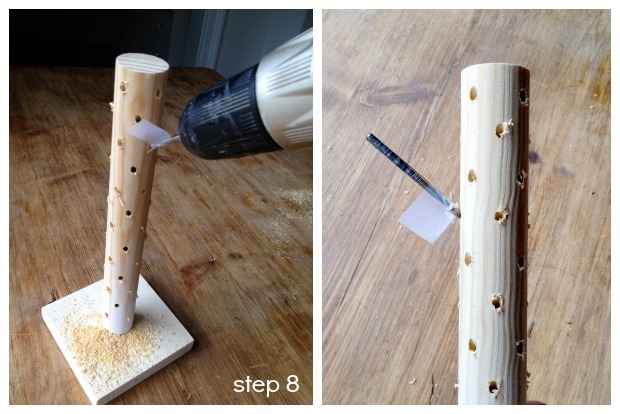
Step 9: Sand dowel smooth then spray paint the lollipop holder gloss white.

lollipop stand step 9

Fill all the holes with lollipops for a bright and cheerful addition to your party table.

lollipop stand 4

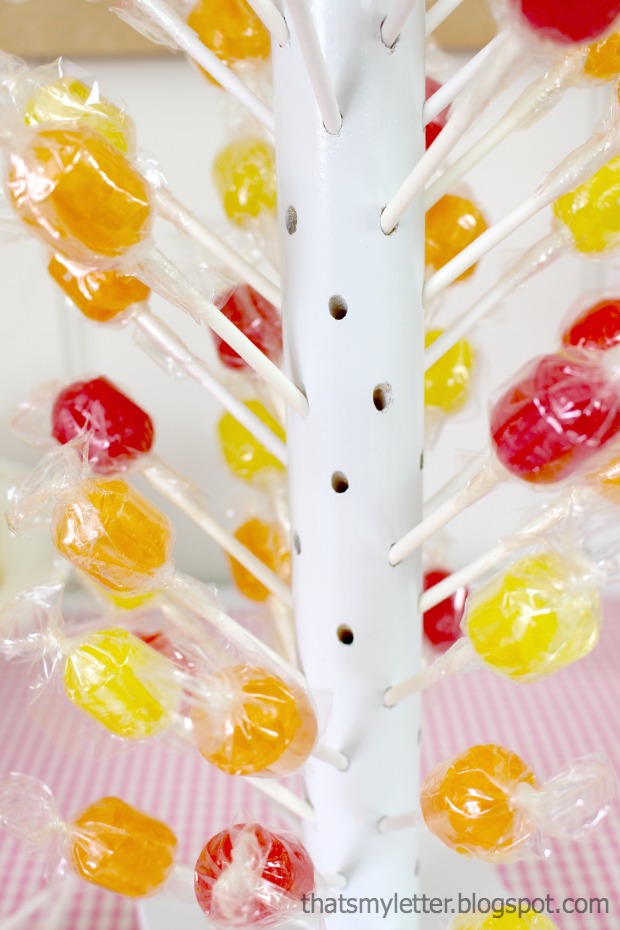
I guarantee the kids will be hovering around it!

lollipop stand 1Jaime signature~Learn more about Jaime~

623shares
  • Facebook
  • Twitter
  • Pinterest

You might also like:

Centerpieces, Contributor, decor, Decorating, DIY, Holiday decorating, party, Tutorial, Uncategorized

Comments

  1. Kim (TheKimSixFix) says

    April 17, 2014 at 4:24 am

    What a darling idea! Would be perfect for cake pops or rock candy too. Love it!

    Reply
  2. Felicita says

    April 17, 2014 at 8:20 am

    Love the Loly Pop – it’s the color I have been trying to find for our kitchen!

    Reply

Leave a Reply Cancel reply

This site uses Akismet to reduce spam. Learn how your comment data is processed.

Hi, I'm Brittany aka Pretty Handy Girl. I like the smell of coffee and sawdust in the morning. I live to break stereotypes and empower you to take on your own DIY project.

  • Email
  • Facebook
  • Instagram
  • Pinterest
  • Twitter
  • YouTube

Saving Etta - Follow the Adventure to Flip a Historic House

  • Email
  • Facebook
  • Google+
  • Instagram
  • Pinterest
  • Twitter

Privacy Policy

Affiliate Link Disclosure:

Pretty Handy Girl is a participant in the Amazon Services LLC Associates Program, an affiliate advertising program designed to provide a means for sites to earn advertising fees by advertising and linking to Amazon.com.

Copyrighted Content Permission

All images and tutorials on this blog are copyrighted material. Please contact me if you would like to borrow any media (photos, video or audio files), tutorials, or ideas from this blog. 99% of the time I would be happy to allow you to use one photo with appropriate credit and link back to PrettyHandyGirl.com (preferably to the same post it was borrowed from.) I can be contacted via email: PrettyHandyGirl (at) gmail.com.

© 2019 · Pretty Handy Girl ·

We use cookies to ensure that we give you the best experience on our website. If you continue to use this site we will assume that you are happy with it.Ok