
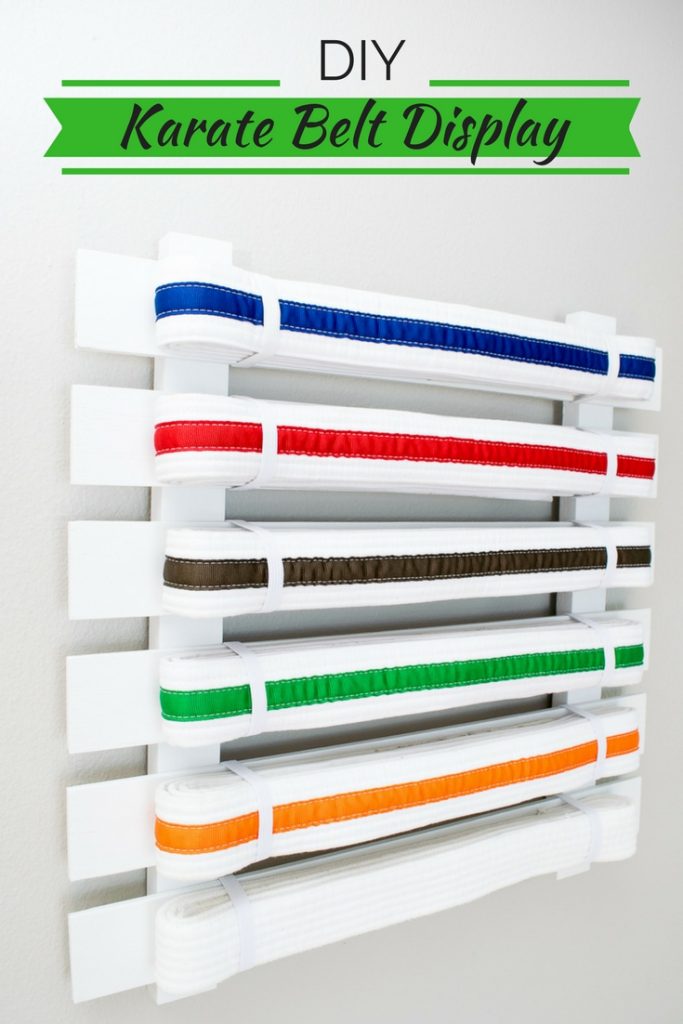
DIY Karate Belt Display
Hi there, Pretty Handy Girl readers! I’m Vineta from The Handyman’s Daughter, and I’m back with another awesome project to share with you. My son recently completed all the white belts for Tiny Tigers in Tang Soo Do, and has moved up to yellow. He’s so excited! To show off how far he’s come in the last year and a half, I built him this karate belt display rack to hang in his room.
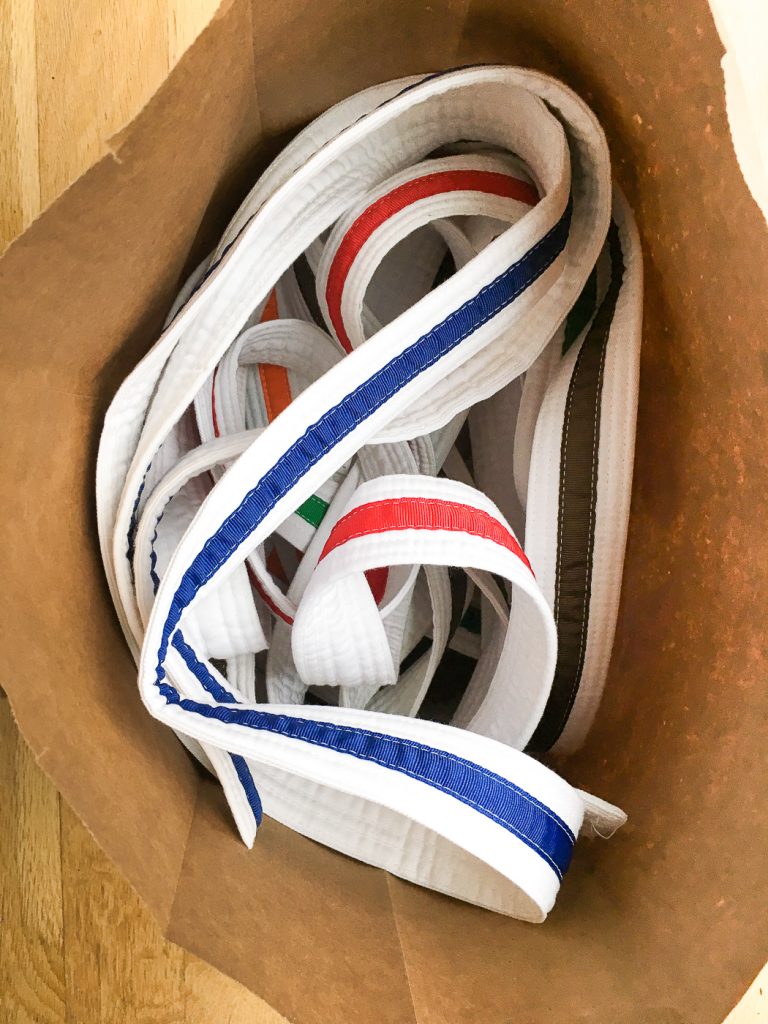
Every quarter, if he met the requirements, he was allowed to test for a new belt. After a few rounds, he had quite the collection! The old belts were tossed into a bag, shoved into the closet and promptly forgotten.
This karate belt display will show off his progress, and give his hard-earned belts the respect they deserve. Plus, it uses up some of the scrap wood I had lying around the workshop. BONUS!
Materials:
- 1/4″ plywood (a 2′ x 2′ piece is plenty)
- 1 x 2 board
- 5/8″ brad nails
- Wood filler
- Sandpaper
- 3/8″ elastic
- Staple gun and 1/4″ staples
- Picture hanging hardware
- Paint or stain
- Saw
- I used a miter saw and a table saw, but you could easily build this with just a circular saw.
Instructions:
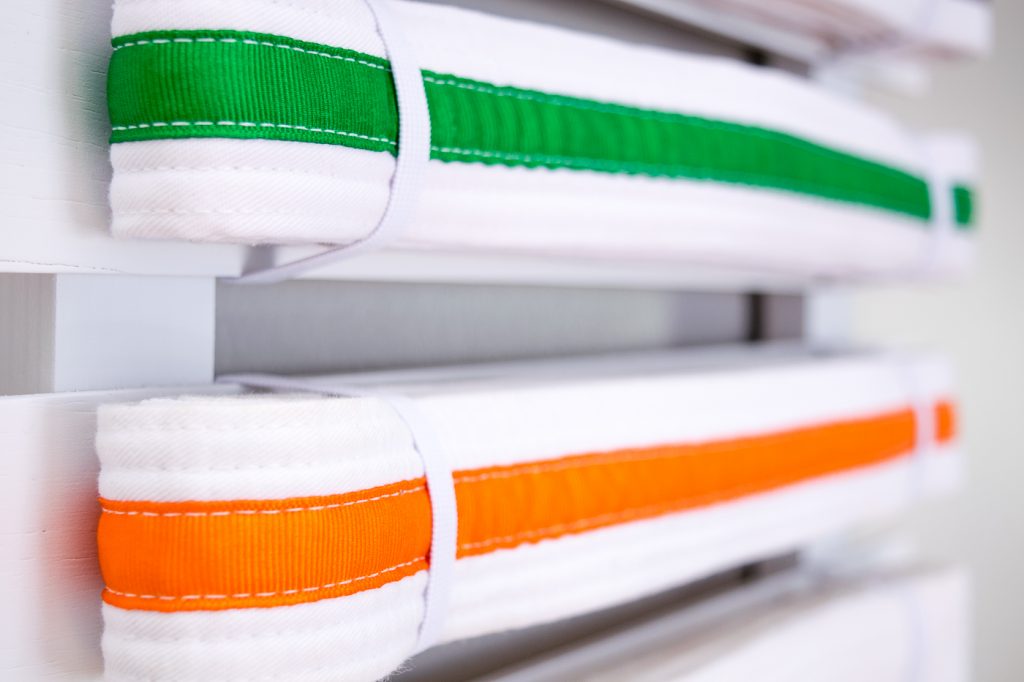
Start by measuring your karate belts. (My son’s are 1 ¾” wide.) Then fold it up to your desired display size. (Mine were approximately 15″ long.)

Each slat of the karate belt display should be a little wider than the belt and a few inches longer. I dug out a few pieces of scrap 1/4″ plywood left over from my fireplace remodel that were just big enough for this project. You could also use a 2′ x 2′ project panel from your home improvement store.
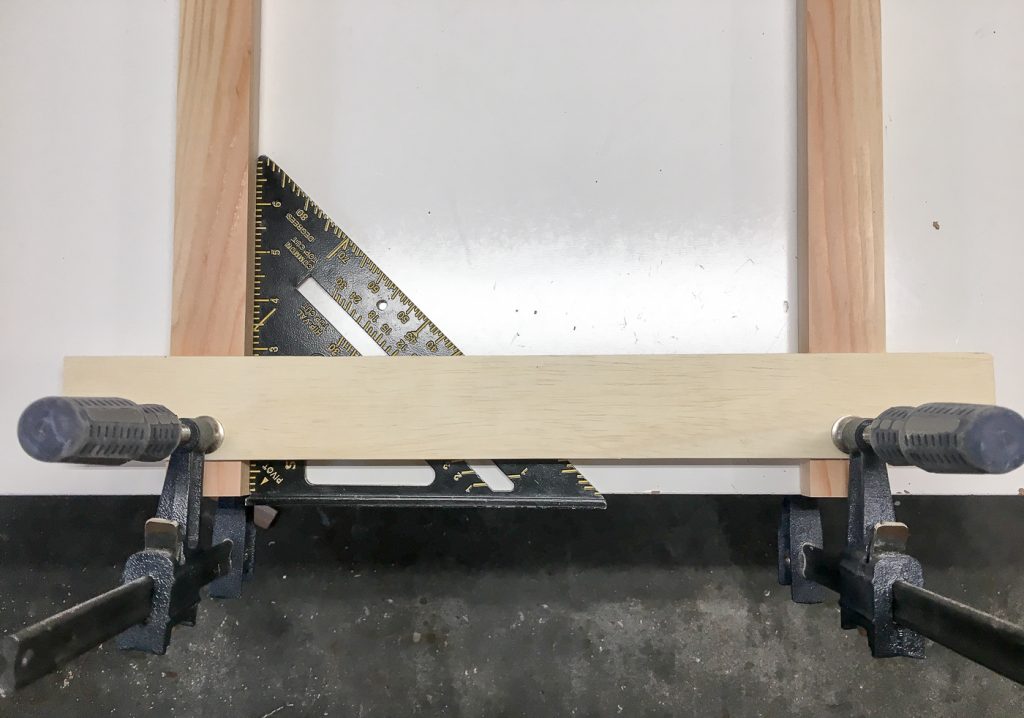
Cut your plywood slats to 2″ x 18″. I used my miter saw to cut all the pieces to 18″ long, then cut them lengthwise on the table saw.
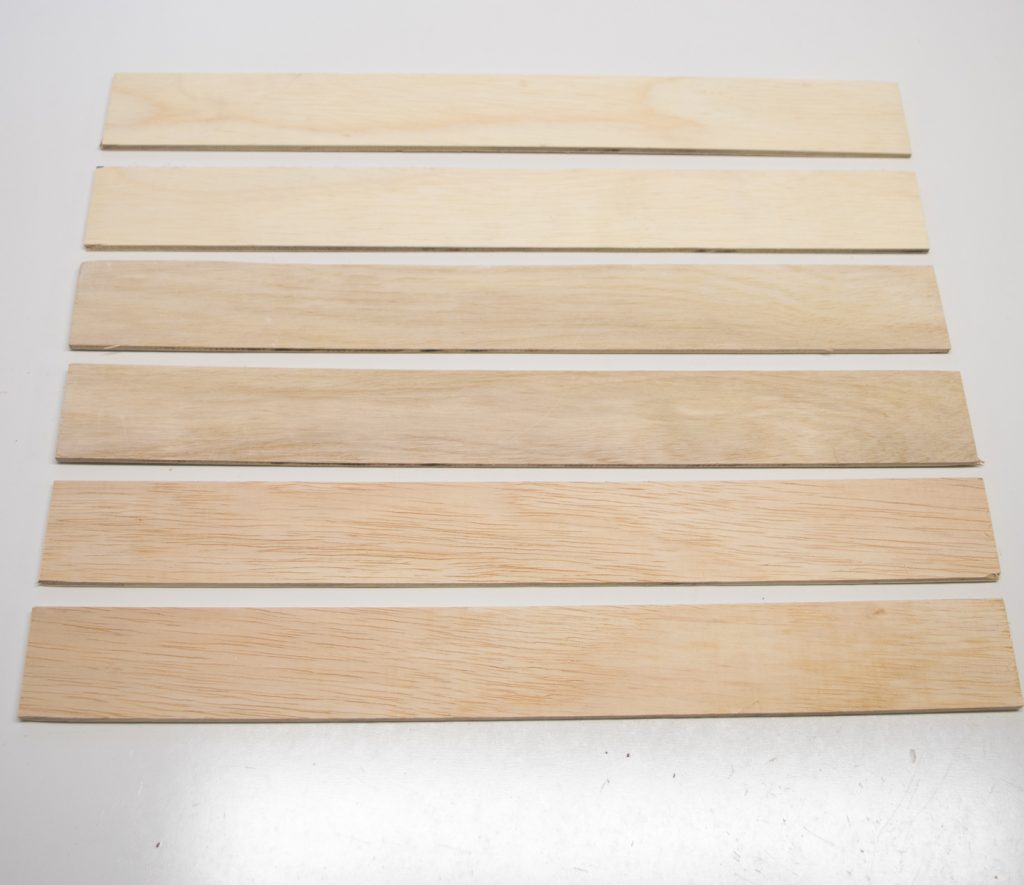
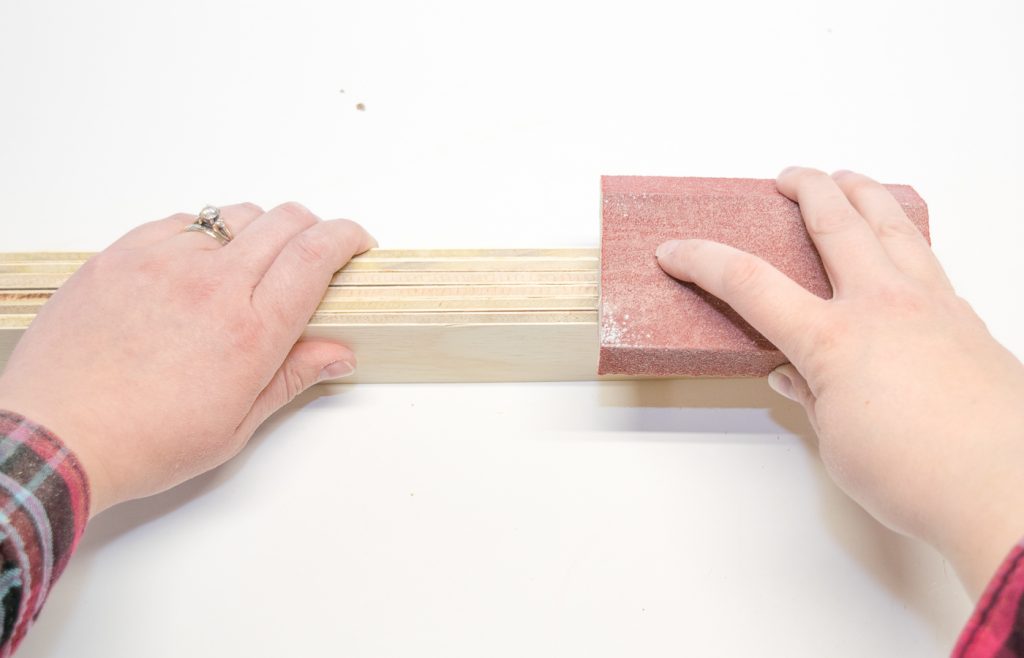
Next, cut two pieces of 1″ x 2″ to 17 ½”. Sand everything smooth with sandpaper. It’s quicker if you stack up all the slats and sand the edges with a sanding block to keep them the same size.
Now, you’re going to assemble the pieces to look like a fence. Start by placing your two 1″ x 2″ pieces on your work surface, then lay your first slat across them horizontally. Position the slats ¾” from the bottom and 2″ inches from each side. Check to make sure everything is square, then clamp them in place.
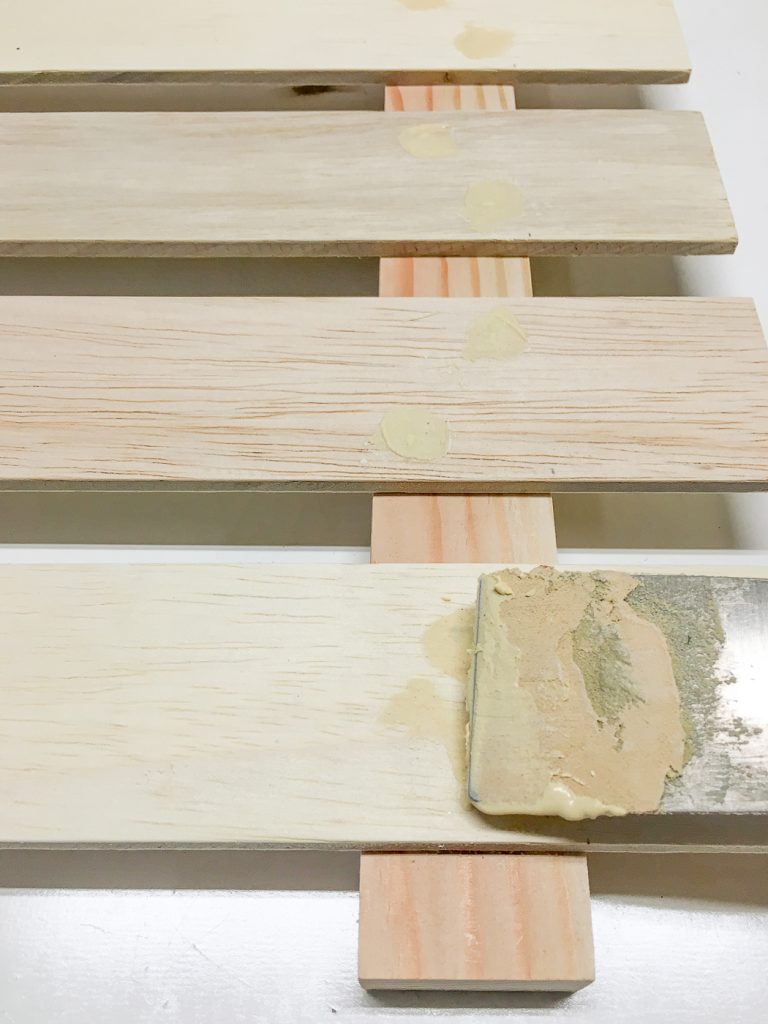
Nail the slats to the 1″ x 2″ pieces with 5/8″ brad nails. Use a scrap piece of 1″ board as a spacer and attach the rest of the slats the same way.

If everything is positioned correctly, there should be ¾” left at the top. When complete, your display should look like this.

If you’re a perfectionist like me, you can fill the nail holes with wood filler and sand the surface smooth when dry. The holes will be hidden behind the belts, so you could save yourself a step if you wish.
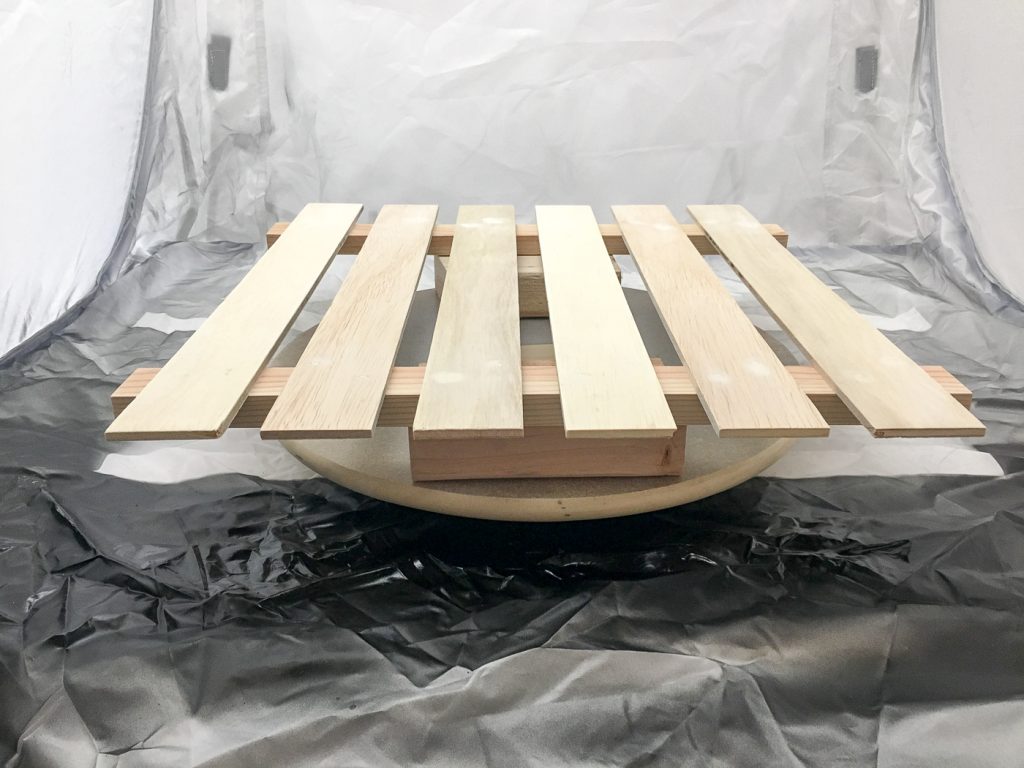
At this point, you could either stain or paint your karate belt display. I chose a white matte spray paint left over from spray painting my window blinds. (Don’t you love it when you can use up old supplies!)
It’s been raining non-stop for months in Seattle, so spray painting outside wasn’t an option. I used a tabletop spray shelter to prevent overspray in my workshop, and a lazy susan to elevate and turn the karate belt rack.
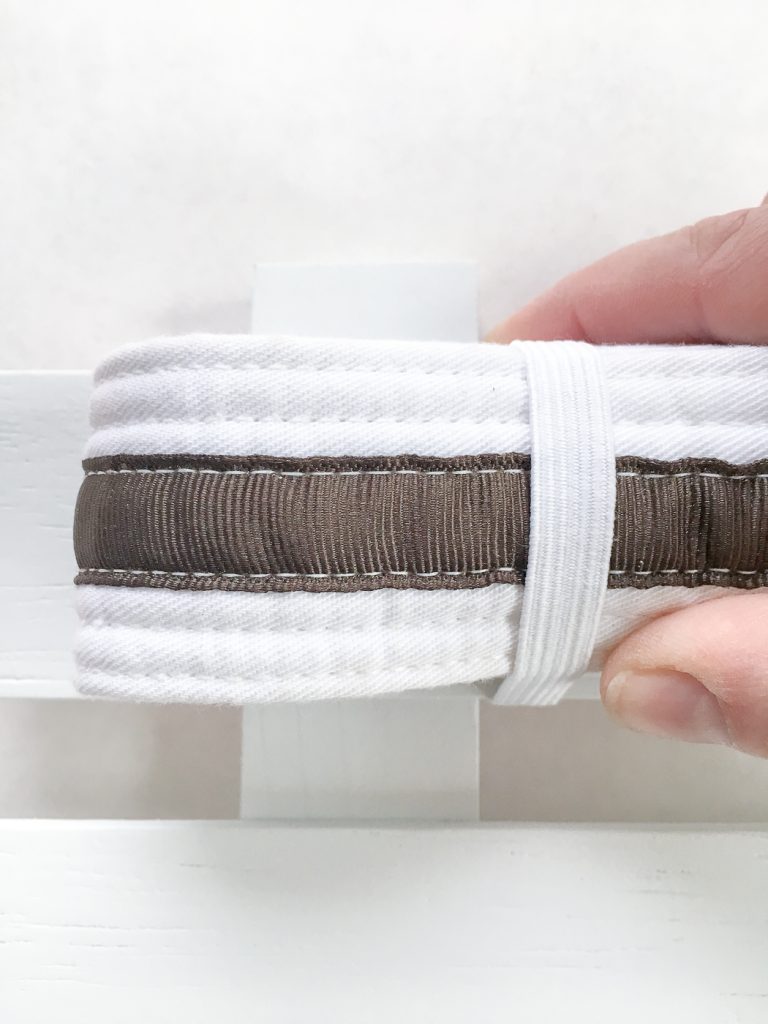
Once the paint is dry, it’s time to attach the elastic to hold the belts in place. Staple one end of the elastic to the back of a slat with a staple gun.
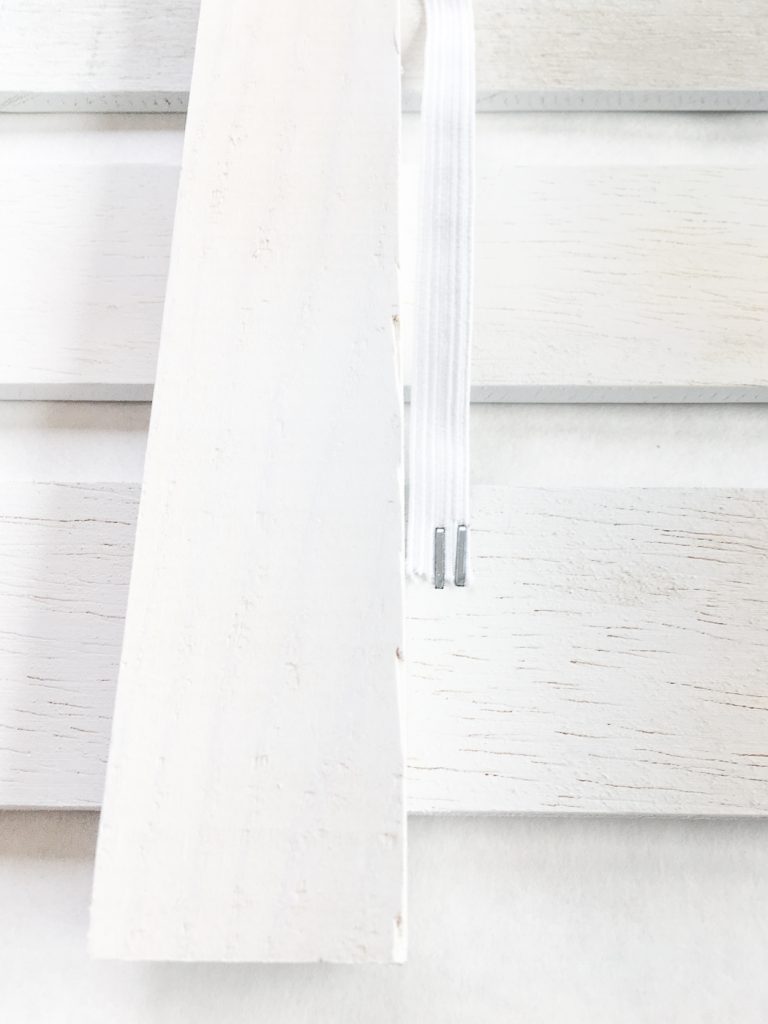
Place a folded belt on the front of the slat, and pull the elastic over it. You want the elastic tight enough to hold the belt in place without sagging. Fold the other end of the elastic to the back of the slat and cut it long enough to staple. (Mine are 5 ½” long.)
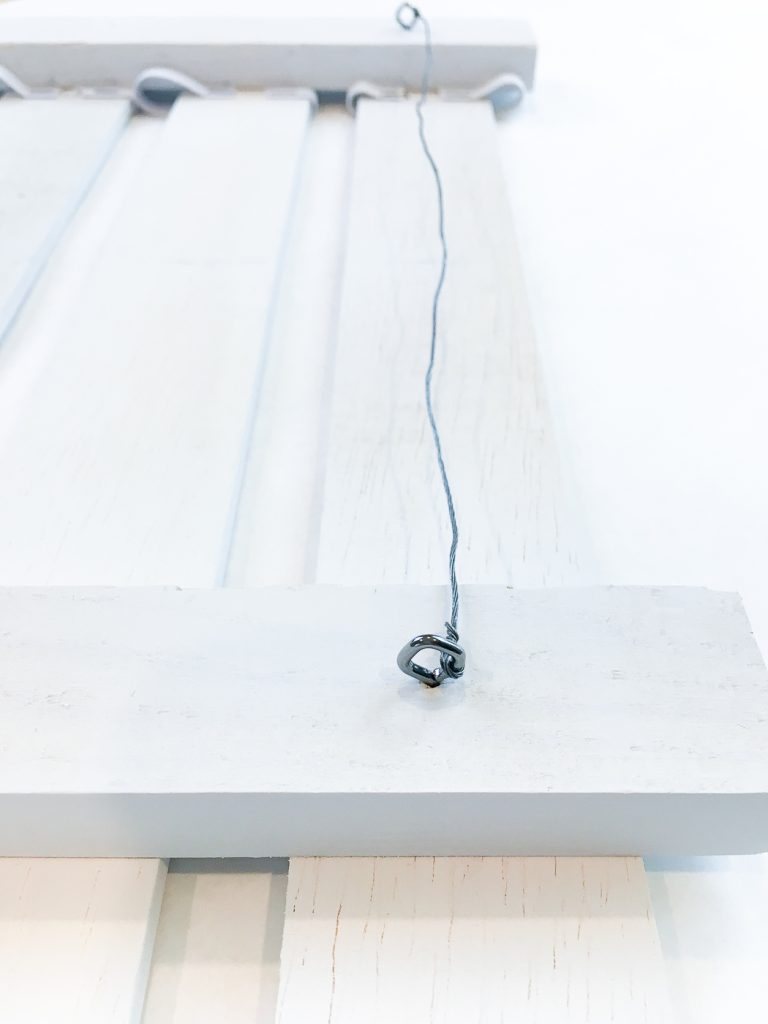
Repeat on the other end, and work your way down the slats. When you’ve attached all the elastic, flip the rack over and attach picture hanging hardware. (This can be as simple as two eye hooks and some picture wire between them.)
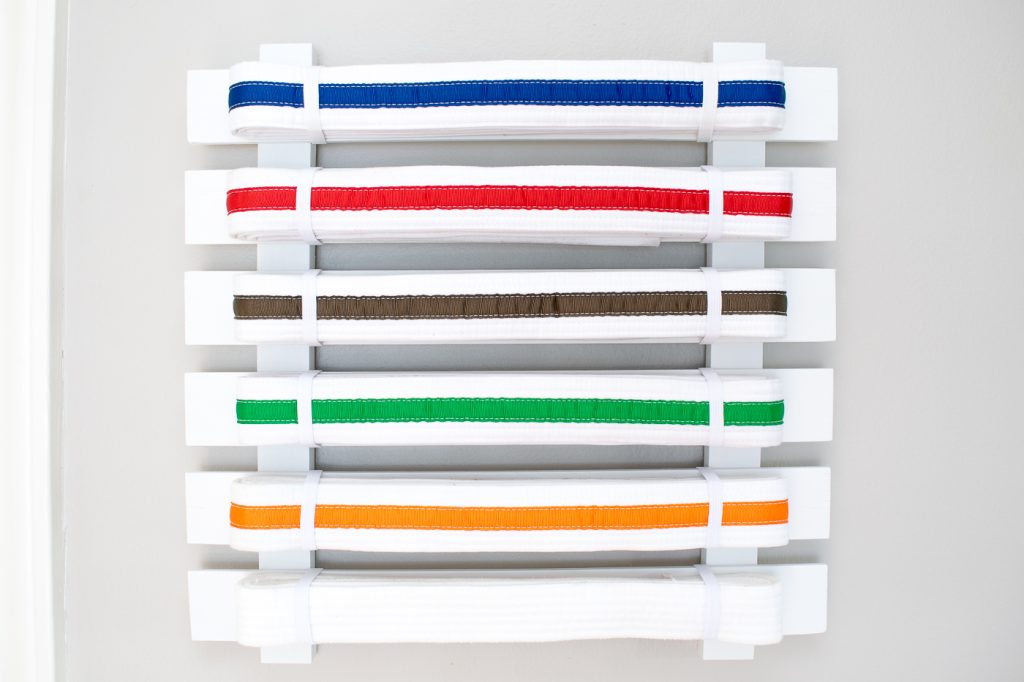
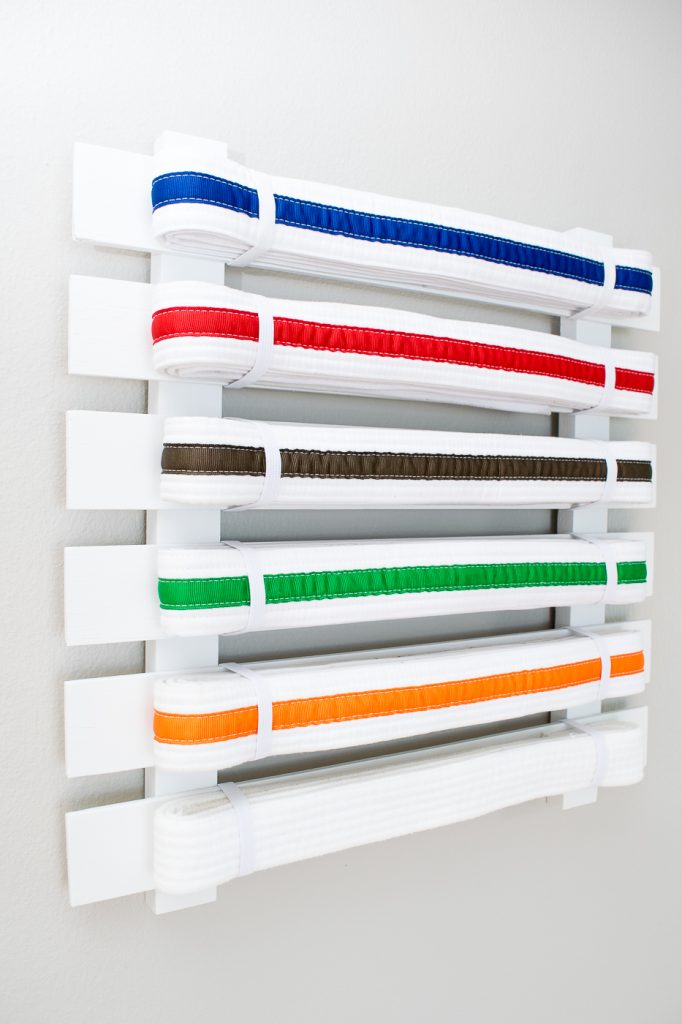
Slip each belt under the elastics, keeping the colors in the order they were earned. I mounted the karate belt display right next to his bedroom door, so he can be reminded of his hard work and get excited to go to practice. It also brings a nice pop of color to his gray bedroom walls.
Hope you enjoyed this tutorial! Don’t forget to check out all my other woodworking projects over at The Handyman’s Daughter!
Until next time!
 ~
~ 
This is such a great idea! I used to attend Karate class, but never thought of creating a display or even a rack for my belts (I just stored them in a box). Now, I’m considering this! 🙂