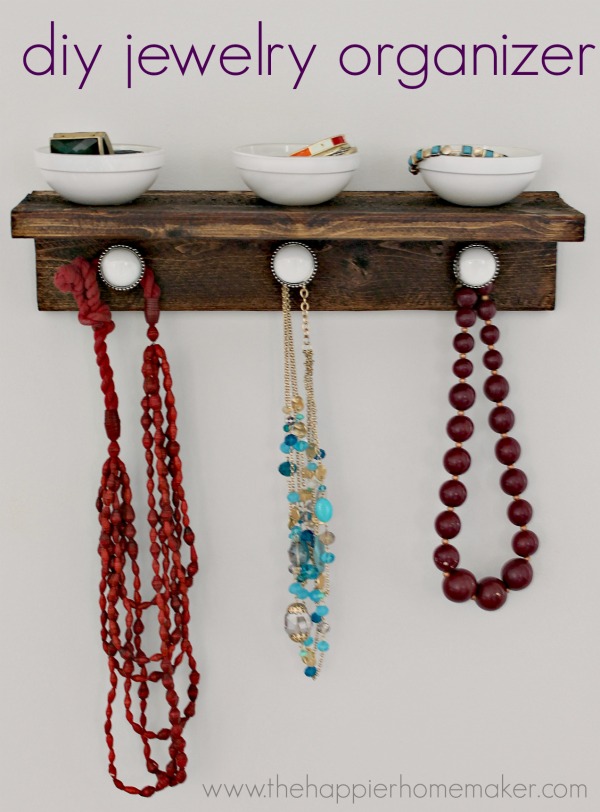
DIY Jewelry Organizer
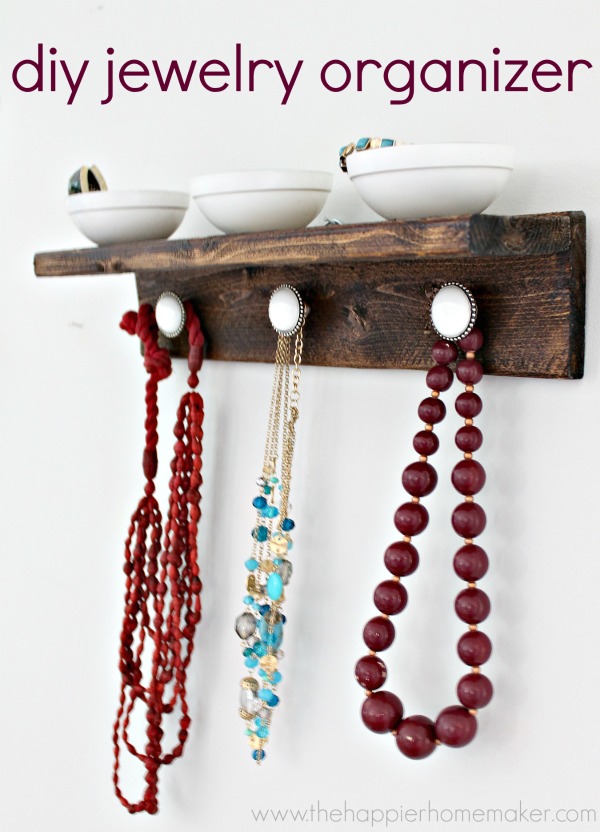
Hey there! I’m so excited to be here today and share with you a super easy way to keep your jewelry organized. I have three little boys, the youngest of which is two and he thinks it’s great fun to ransack my jewelry box now that he’s tall enough to reach it. I realized I needed to move my storage up onto the wall pronto! I’d love to show you how to make this super easy rustic wood organizer!
Materials
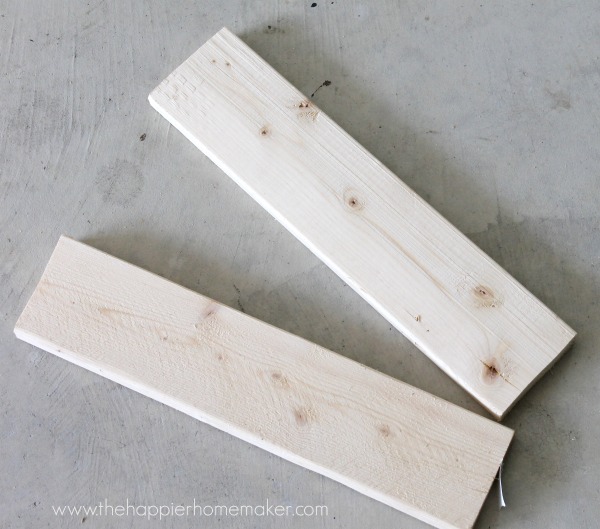
- scrap wood (I used a 30″ long piece of 1 by 3 board leftover from a previous project)
- circular saw
- safety glasses
- wood glue
- finishing nails
- hammer
- medium grit sandpaper
- wood conditioner
- wood stain/polyurethane
- drill
- knobs of your choosing with coordinating washer and nut (3)
- drill bit (width depends on the width of your knob screws)
- small glass kitchen bowls (I purchased a 4 pack at the dollar store)
- white spray paint/primer
- hot glue gun and glue
- large D-Ring hangars (1-2)
Instructions
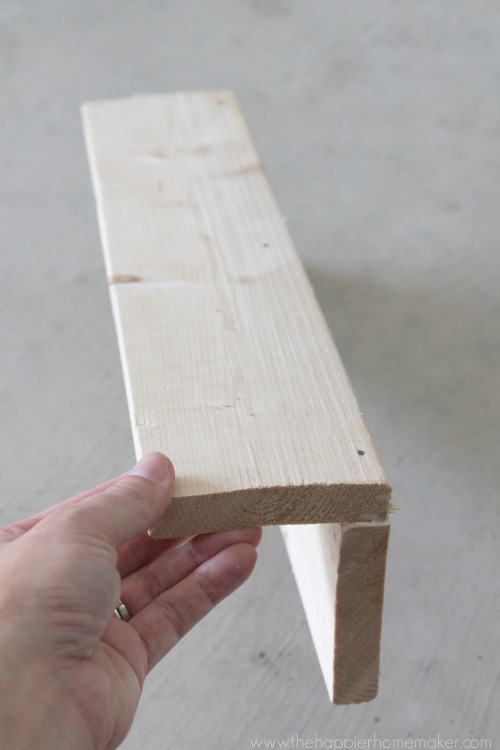
Cut your wood into two 15″ long pieces using a circular saw (be sure to wear your protective glasses!)
Apply wood glue to the long edge of one of your pieces-be sure to apply it towards the back edge and use only a thin line as it expands as it dries.
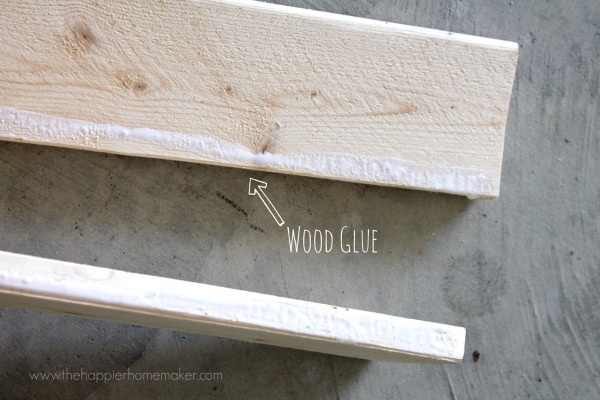
Have a helper hold the two pieces together in an “L” formation (or use clamps if you have them) as you secure it in place with 3 evenly spaced finishing nails. Allow the glue to dry according to the package directions.
Once your glue is dry, sand any rough areas/edges with medium grit sandpaper and remove any residual dust with a brush or tack cloth. Coat entire piece with wood conditioner. You can apply it with a paintbrush or clean cloth (I save my boy’s outgrown clothes to use for this purpose!)
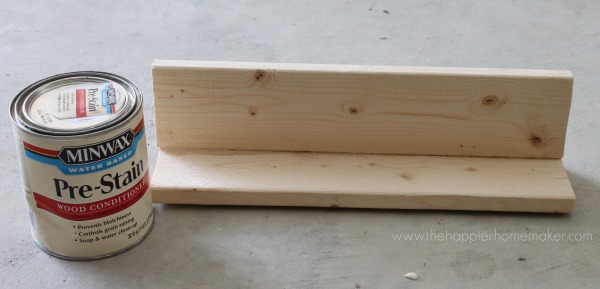
Allow the wood conditioner to dry for at least two hours before applying your stain. Finish with a coat of polyurethane or you can chose a stain that has an included polyurethane which saves an added step to finish it!
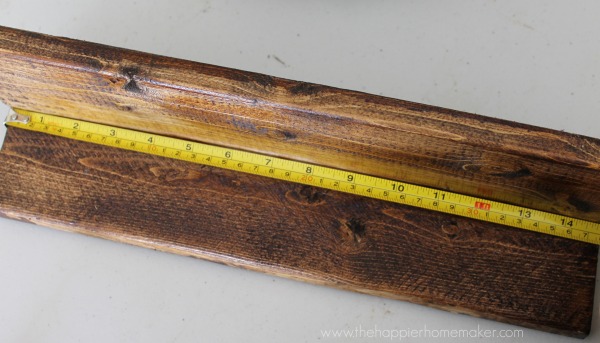
Allow the stain to dry overnight. Use a tape measure and pencil to mark spots for knobs. For three knobs, center one in the middle of the bottom board and the others 2.5 inches from each end.
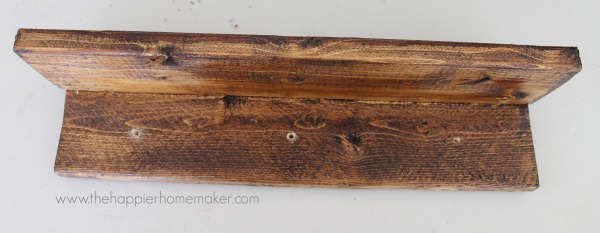
Pre-drill holes using a drill bit approximately the same size or slightly larger than your knob screws.
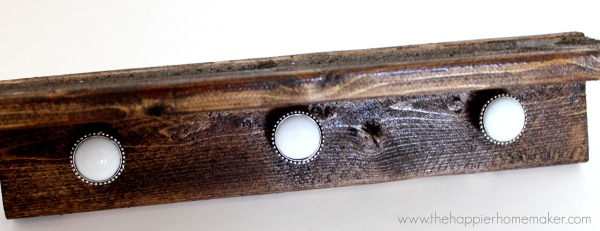
Insert knobs and secure to the wood with washers and nuts.
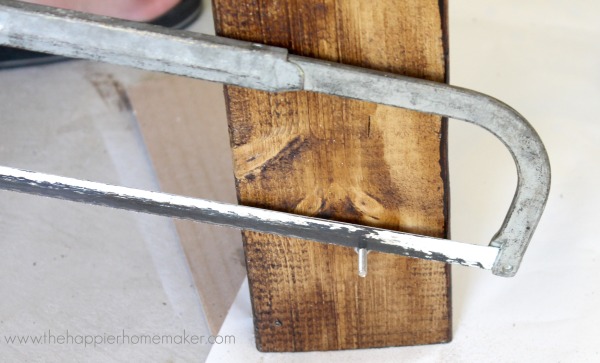
If the screws stick out too far on the back, use a hacksaw to trim off the extra length.

Place your glass bowls upside down on a protective surface and spray paint the exteriors. You can choose to use a primer suitable for glass as your first coat or choose a spray paint and primer in one. Allow to dry for at least four hours.
Once dry, center a bowl over each knob and secure with a healthy dollop of hot glue.
Attach a D-Ring hanger in the center of the back to finish up your organizer and it’s ready for the wall!
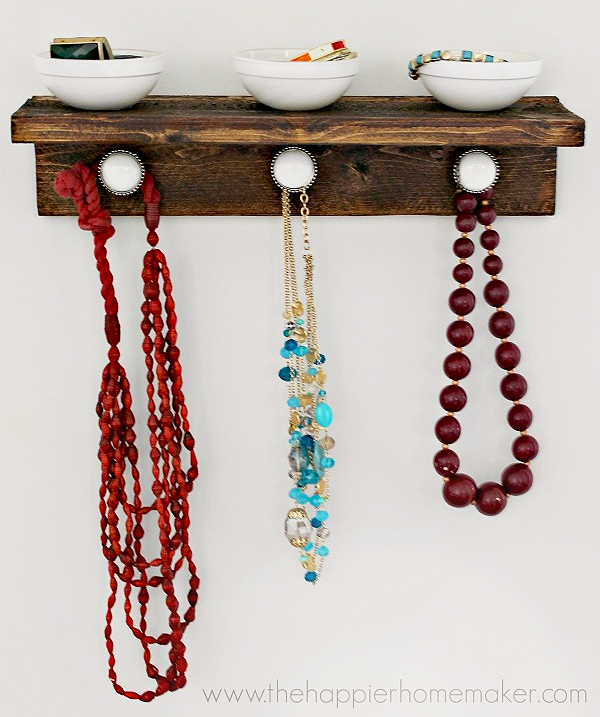
I love my new organizer and all of my baubles are now safe from chubby little toddler hands! That was an easy project, don’t you think?

I really like this and it looks like a simple project to handle. The few pieces of jewelry that I have left would fit perfectly 🙂 Will definitely put this on the list of things to try! Thanks for sharing
This is awesome! I love the rustic wood and I can’t believe those bowls are stuck on! Genius. Awesome work as always, Melissa!
Hugs,
Jamie @ somuchbetterwithage.com
Walmart has white bowls, sold separately, for ony a couple of dollars. You could also check our the Dollar Tree to see if they have them less expensive.
Oh and Where can I find the page which includes the gorgeous coffee table which is pictured in your site header?
Your amazing! I find you so inspirational and I think I might even go so far as to say I have a big girl crush on you!
Love this! Such and quick and easy DIY!
I’m thinking I might use a hole saw and drill out places for those bowls to sit down into the wood shelf rather than just gluing them on top. Great project.
Great idea Tena! I’d love to see how yours turns out!
I love it! I never would have guessed it was so easy to put together based on that first photo! It really looks like something much fancier in the end than just a couple of pieces of wood stuck together.
Thanks Courtenay! I think the best projects are the simple ones anyone can do!
The stain just makes this project and I love that you spray painted those basic bowls … adding this to my project to-do list 🙂
Thanks Keri!! That’s one of my favorite stains to use on projects!
Great project girl! I love the idea of painting the bowls, such a fresh look!
Thanks so much Jacque!!
I really like this. My wife would love it. And better yet, I think it may actually be within my skillset!
If I can do it, you can do it Nick!! I hope your wife loves hers! ~Melissa
Very cute outcome! The stain almost turned out like it wasn’t just painted but rather older. Love it, nice work.
Thanks so much Kathy!