
DIY Floral Spring Wreath for Your Front Door

Hello, Pretty Handy Girl Readers!
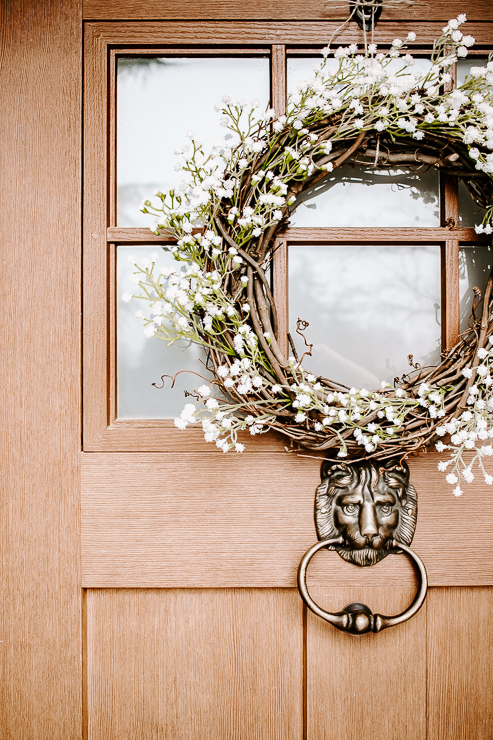
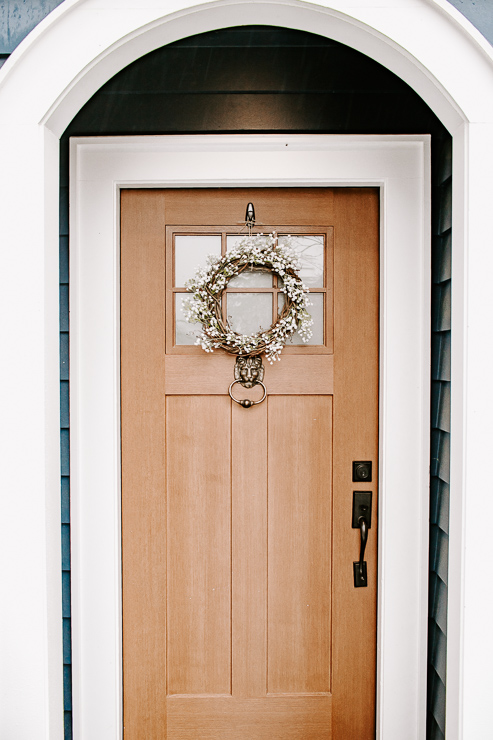
I’m back today with a fun project for your front doors! This beautiful baby breath’s wreath – perfect for Spring. I love making my own wreaths because I can customize them exactly the way I want. And I can save a bunch of money by making them myself, too.
The first thing I do before making any wreath is to collect some inspiration. I look at a bunch of shops, like Pottery Barn and Etsy to get an idea of what kind of wreath I want to make. I’ve learned the hard way that it can be extremely overwhelming (and easier to overspend) when you don’t have a plan in place first.
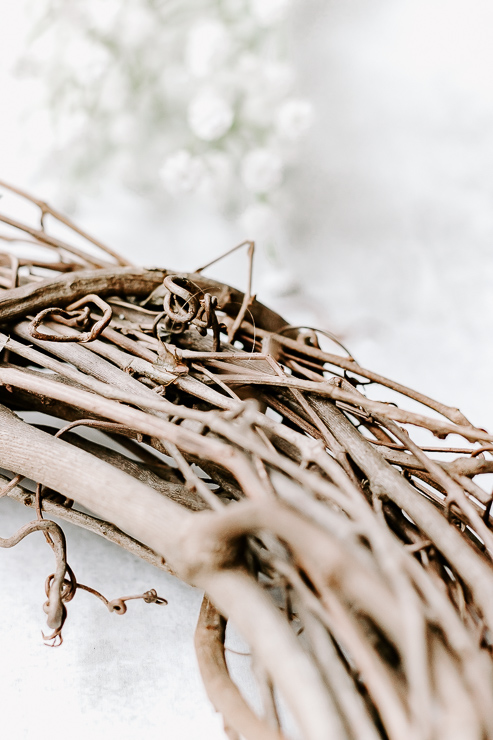
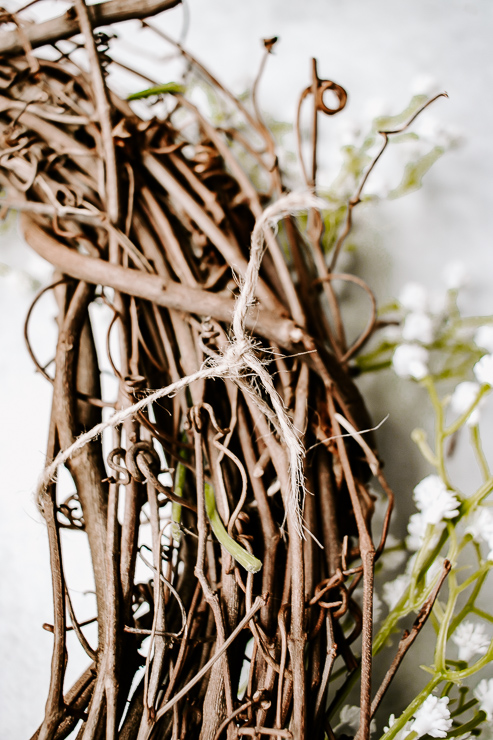
To make a wreath like this one all you need is a simple, inexpensive grapevine wreath and some faux flowers of your choice. In this case, I used all baby breath stems to keep a uniform look. Michael’s and Afloral.com seem to be the best places to get these materials at the best price. In fact, Michael’s is almost always running a sale on their floral department and you can usually find an additional 40% off coupon online. However, Michael’s can be overwhelming as I said before. They have so many options! It’s important to know what kind of wreath you want to make first so you can easily gather the flowers you need. Otherwise, you might be there all day! 🙂

Here’s another tip for you. While I really enjoy making wreaths, I don’t have the room to store a lot of them. So, I tend to make each wreath somewhat temporary. Meaning, I don’t permanently attach the florals. I like to have the option to change up the look using the same Grapevine Wreath. Another way to save a little bit more money!
So let’s get started.
Materials:
(I’ve included affiliate links for your convenience. I earn a small percentage from a purchase using these links. There is no additional cost to you. You can read more about affiliate links here.)
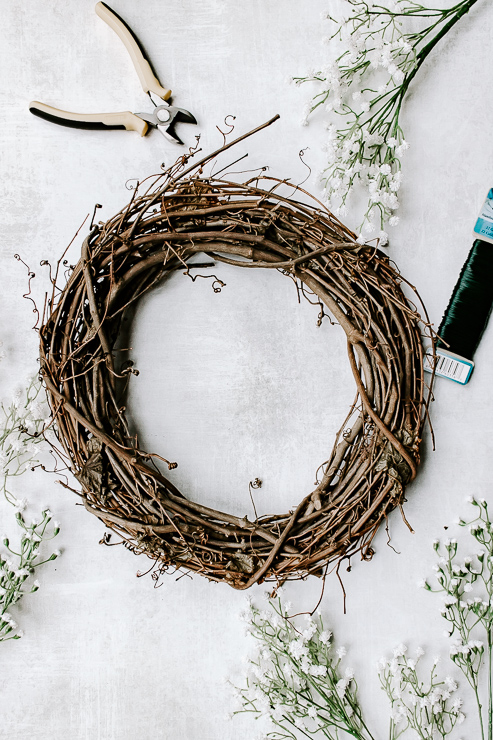
Grapevine Wreath (I used brass gift toppers from Target, Amazon and craft stores sell bells too.)
Scissors or Wire Cutters
Faux Florals of your Choice
Floral Wire – (optional, you may not need this)
Ribbon for Hanging
Instructions
Follow these steps to make this lovely Spring Wreath.
Step 1: Prepare your Floral Pieces
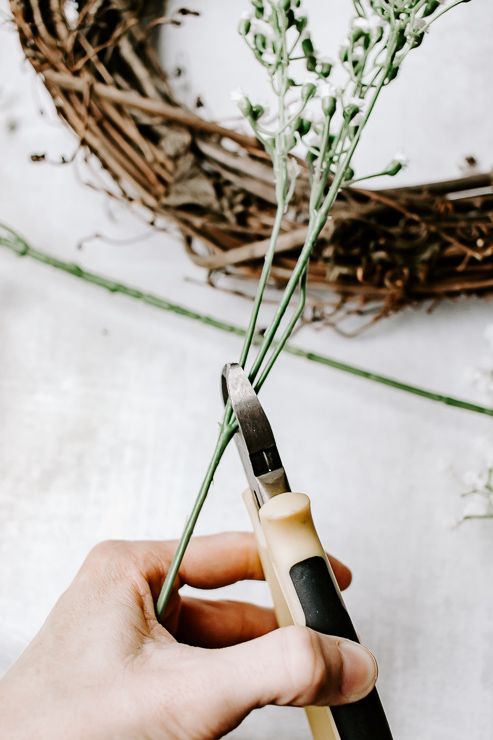
When you buy faux flowers, most of the time they come in bunches or with a very long stem attached. We need shorter stems and mainly individual flowers when making a wreath. Using your wire cutters, cut your floral bunches into individual flowers and cut any long stems a bit shorter.
Don’t cut stems too short! You do want some stem to be able to insert them snugly into your grapevine wreath.
Step 2: Start Attaching your Florals to your Wreath
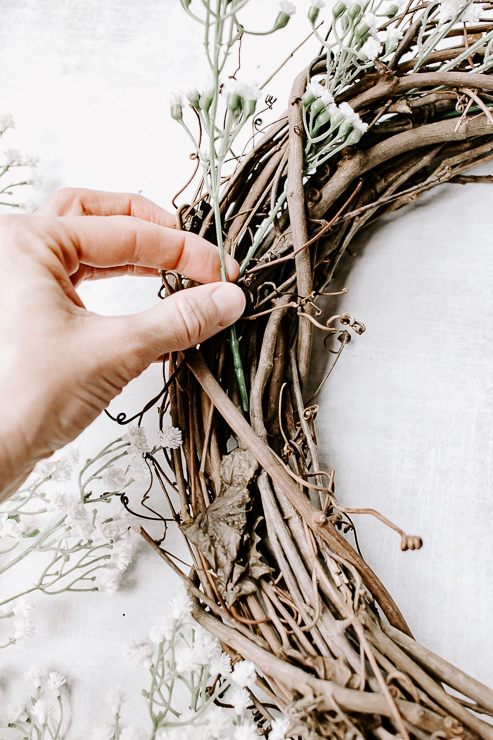
Now, you can attach your florals fairly securely just by pushing the stems snugly into the intertwined branches of the grapevine wreath. That is why you may not need any floral wire at all! I only ended up needing a little bit of wire to secure a few pieces. Use your wire cutters to snip off a piece of wire. With the wire holding your stem to the wreath, twist the back to secure it. You can carefully use your wire cutters to help twist the wire in the back. Be careful, the floral wire can be sharp!

Periodically pick up your wreath to make sure that your floral pieces are secure and not falling off.

That’s pretty much all you need to do to make this pretty wreath!
Step 3: Hang up your new Spring wreath
It’s time to hang it up! I use a command hook made especially for hanging wreaths.
I just attach a little loop of ribbon or string to the back of the wreath. Then, I just hang the loop directly on the hook.
It works really well and has never fallen off (even with young kids slamming the door one too many times!)
I really hope you enjoyed this project and it brings some Spring joy to your homes. If you love making wreaths, check out my other DIY Spring hoop wreath project here on Pretty Handy Girl.
Thanks so much for reading and being here today. I’ll meet you back here next month!

~ See More of Karen’s Tutorials ~

 Hello! I’m Karen, the creator of the Home Decor and DIY Blog: Decor Hint. I’m a Native of the East Coast, but I currently live in beautiful Seattle with my hubby, our two wonderful children, and our spunky wheaten terrier.
You can usually find me with some sort of craft in one hand and a coffee in the other. And I’m always rearranging furniture or moving lamps from room to room. I have a passion (read: obsession) for decorating, DIY, and gardening. In short, I love making my house into a home.
Like many, I’m inspired by what I see in home decor magazines, but I’m not so inspired by the price tags. Consequently, I love finding and creating beautiful budget-friendly home decor items. In a head to head competition, I bet you’d never know the difference between the designer items and my DIY creations! Many of my DIY projects focus on sewing, crafting, upcycling and organizing. Some of my favorite projects have been making pretty wreaths, sewing my own tassel hand towels, and crafting these trendy wood bead garlands. I can’t wait to inspire you and spark your creativity through my DIY projects.
You can always connect with me on Pinterest, Twitter or Instagram.


Nice wreath