DIY Cupcake Tray Carrier
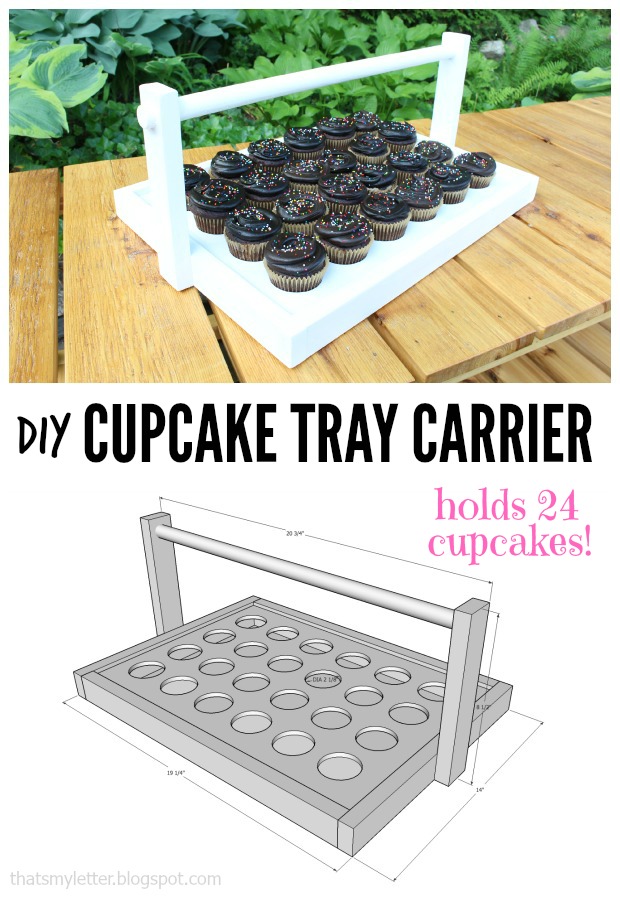
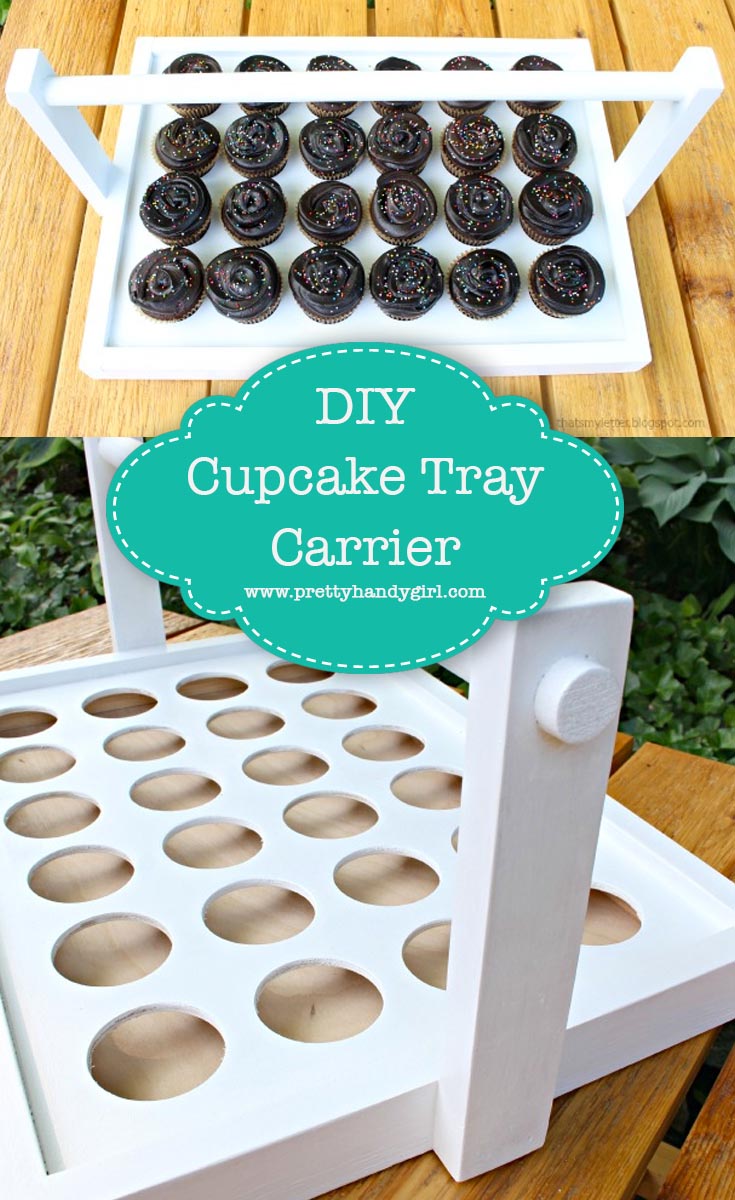
Jaime here from That’s My Letter today sharing a DIY cupcake tray carrier. It’s summer and that means lots of friends getting together for BBQ’s and outdoor parties. You can’t show up empty-handed to party, so why not take along this cupcake carrier? It makes the perfect display tray and portable carrier all-in-one, plus a very useful hostess gift too!
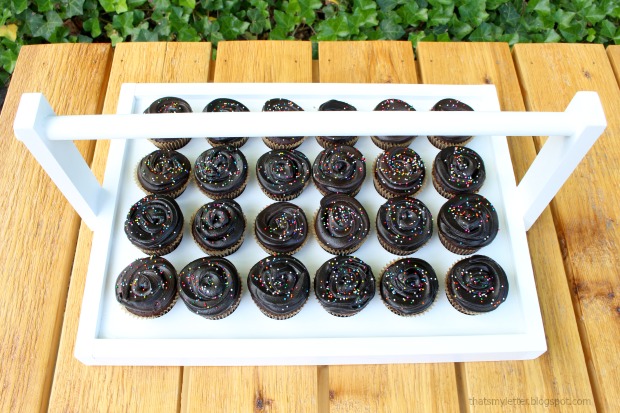
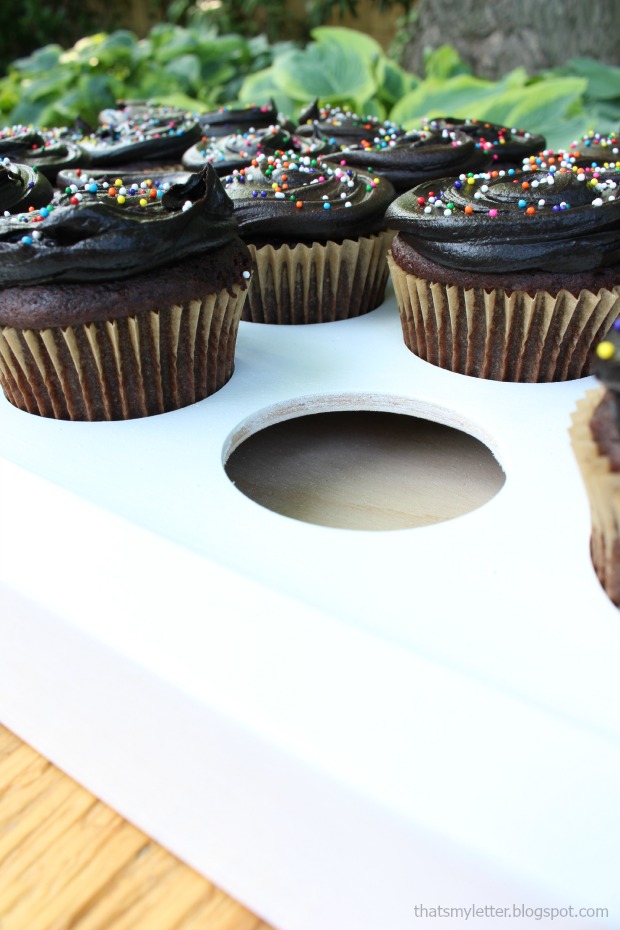
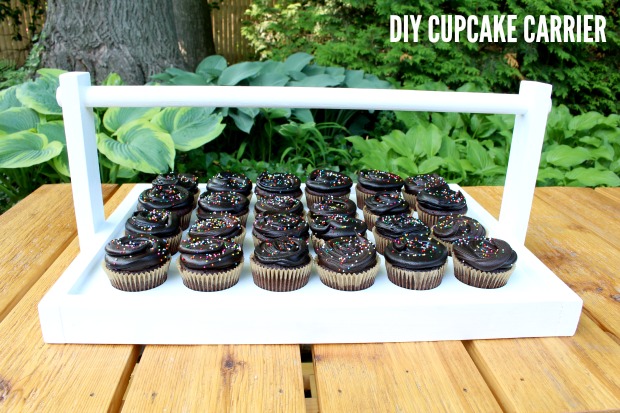
I filled this tray with 24 regular size cupcakes, chocolate on chocolate is the favorite around these parts.
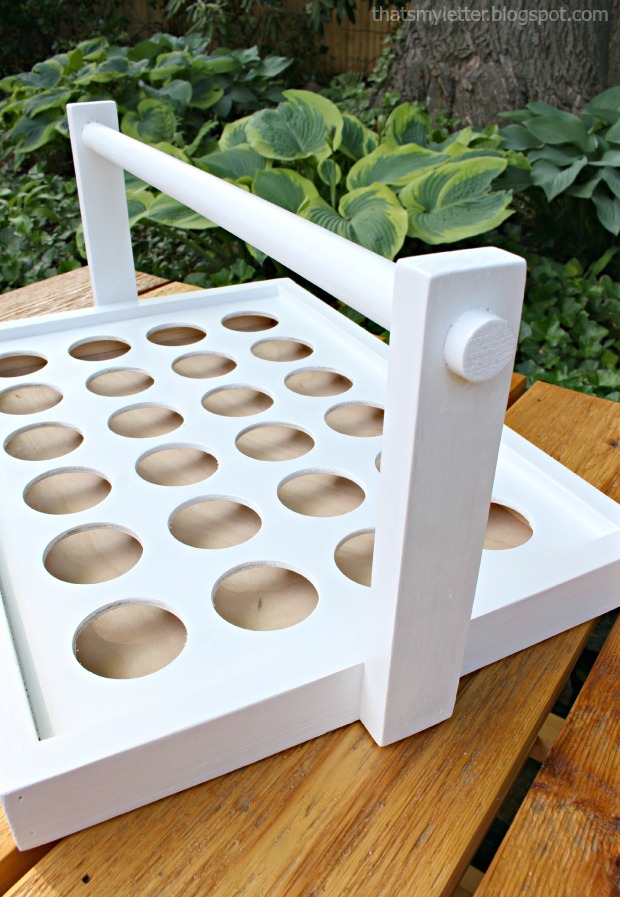
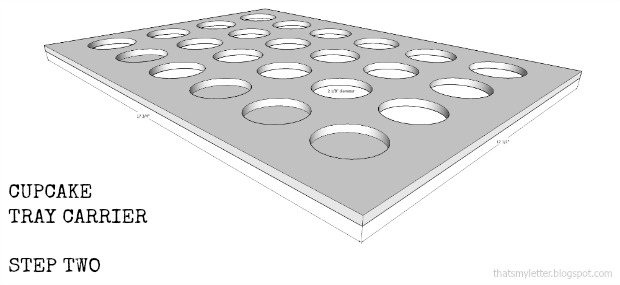
The tray is a fairly simple build, the trick is to create space between the top board (with all the cupcake holes) and the base so the cupcakes have a spot to sit down into.
Keep reading and I’ll show you how to make these holes as smooth as possible without tearing up the plywood.
Materials:
- 1- 1x2x8 pine board
- ¼” plywood handy panel
- ¾” circular wood dowel
- ¾” square dowel (6′ total)
- wood glue
- pencil
- measuring tape
- 1 ¼” & 3/4″ finish nails
- 2 1/8” hole saw
- ¾” spade bit
- circular saw, chop saw
- finish nailer

Cut List:
- 2 – 1×2 @ 17 3/4” (long sides)
- 2 – 1×2 @ 14” (short sides)
- 2 – 1×2 @ 8 ½” (handle supports)
- 2 – ¾” square dowel @ 17 3/4” (long spacers)
- 2 – ¾” square dowel @ 12 1/2” (short spacers)
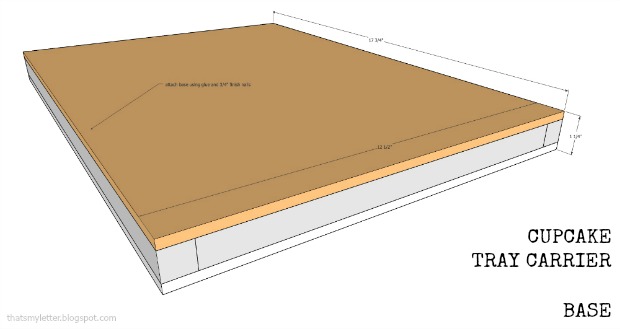
- 2 – ¼” ply @ 17 ¾” x 12 1/2” (top & base)
- 1 – ¾” round dowel @ 17 ¼” (handle)
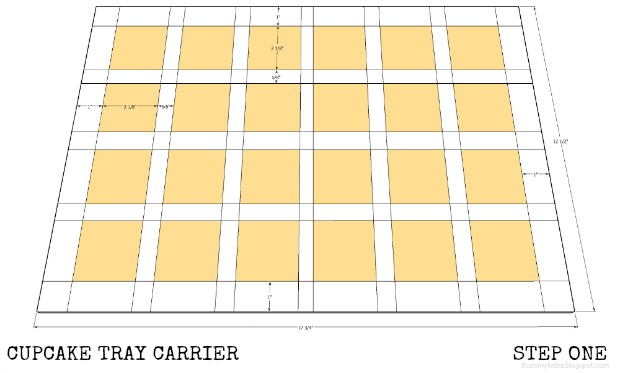
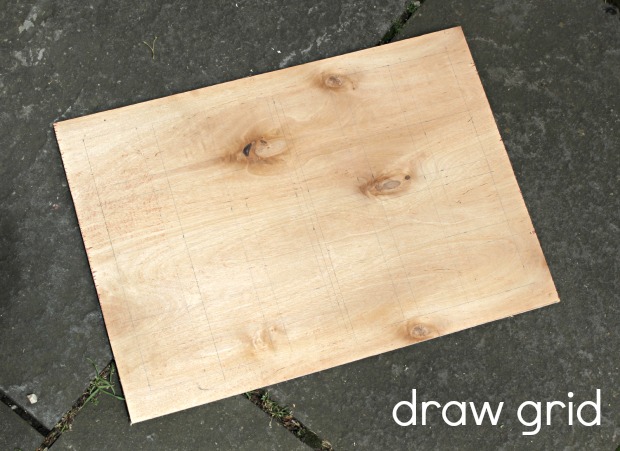
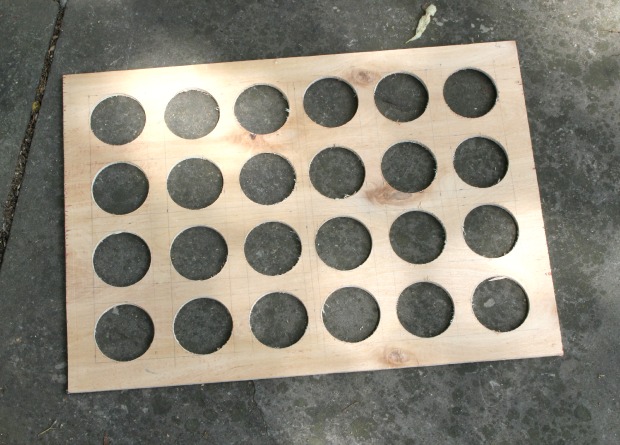
Step 1: Sketch grid as shown above onto one piece of ¼” plywood. The orange portion indicates where to drill 2 1/8” holes using a hole saw.
Step 2: Drill holes using 2 1/8” hole saw. To make the holes as smooth as possible without much tear out begin drilling on the grid side about 1/8″ down.
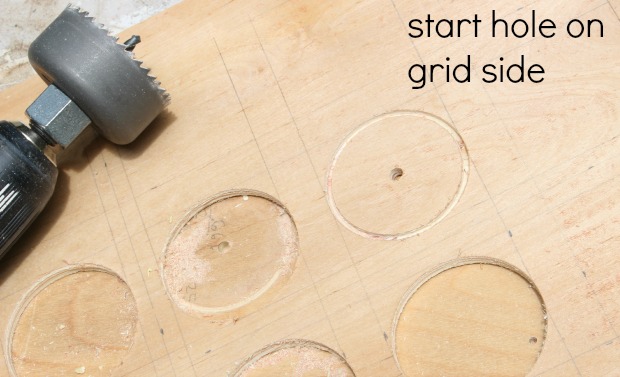
Flip the board over and find the center hole. *Be sure board is hovering over edge of table. Place hole saw bit into the center hole and finish drilling the hole.
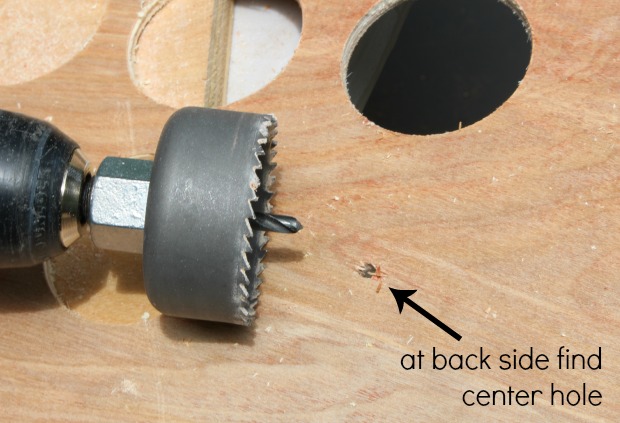
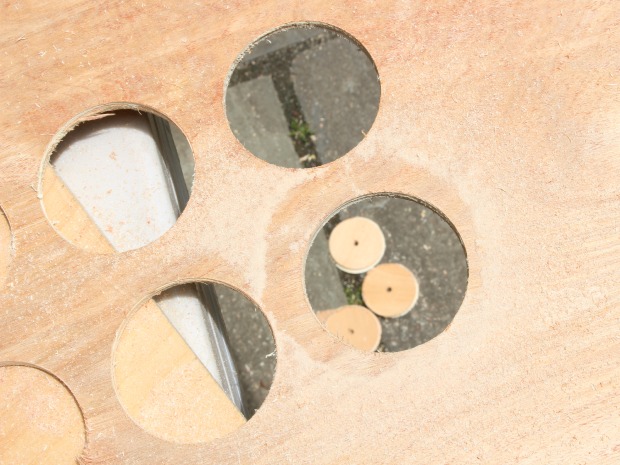
The circular plywood piece should pop through to the ground. Repeat this process for all 24 holes.
Sand the edges of the holes smooth.
Step 3: Attach long spacers to long side of top using glue and ¾” finish nails down through top.
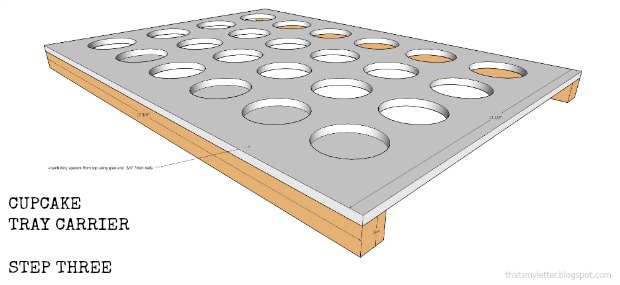
Step 4: Attach short spacers to short ends using glue and ¾” finish nails.
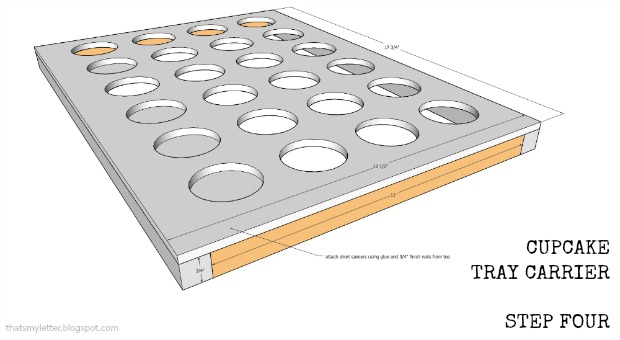
Then attach base from underside using glue and ¾” finish nails.
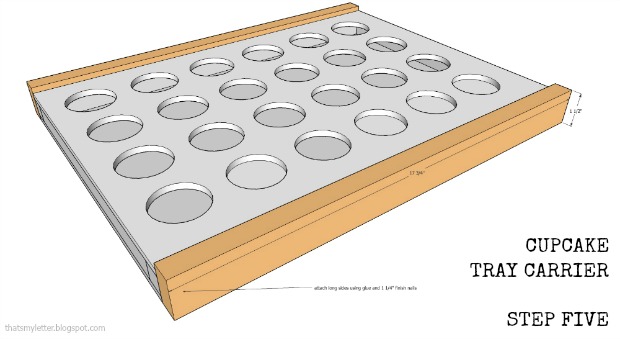
 Step 5: Attach long sides using glue and 1 ¼” finish nails.
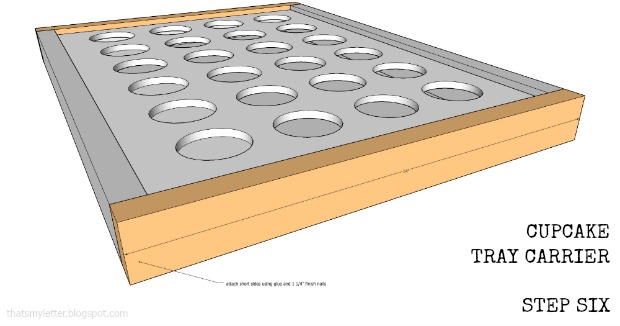
Step 6: Attach short sides using glue and 1 ¼” finish nails.
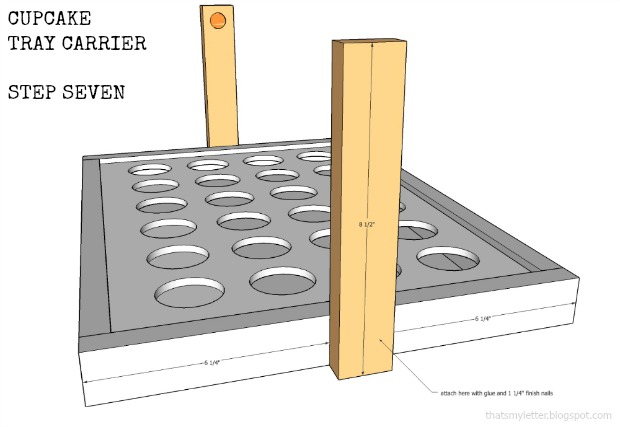
Step 7: Predrill ¾” holes into handle supports near top end, drill only about ½” deep into 1×2. Attach handle supports to tray using glue and 1 ¼” finish nails.
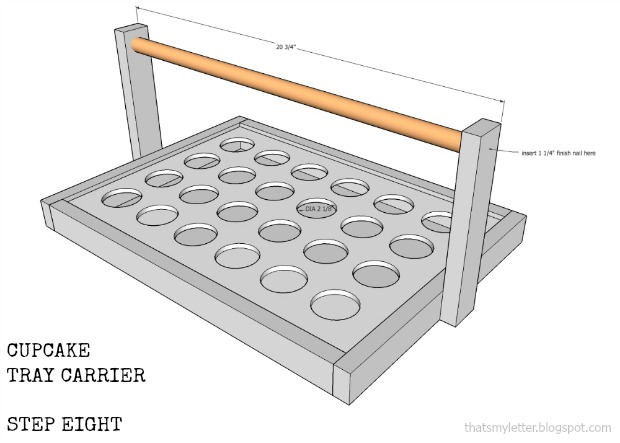
Step 8: Insert handle in between supports. Glue and attach using 1 ¼” finish nails through ends.
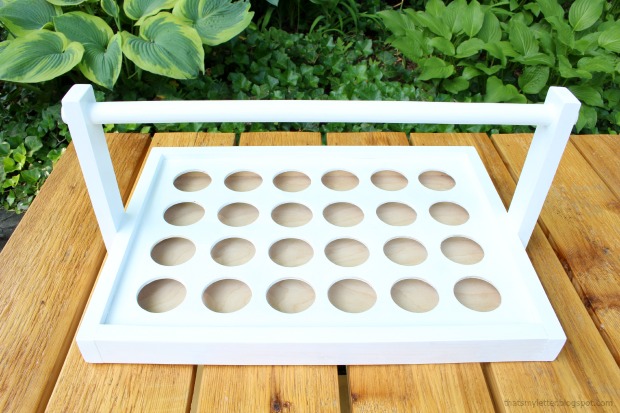
Fill all holes with wood putty then sand smooth. Paint your cupcake tray carrier with semi-gloss or gloss finish for easy clean up of any messy frosting!
Hope you enjoy this fun small build project.
This cupcake holder makes a great party accessory or gift idea too!
 ~
~
Pin for later!
This DIY cupcake carrier makes the perfect display tray and portable carrier all-in-one, plus a very useful hostess gift too! | DIY cupcake carrier | DIY cupcake tray | Pretty Handy Girl #prettyhandygirl #DIY #cupcaketray


I love this idea! My cupcakes are always to tall for my carriers. I have purchased every carrier available and have resorted to transporting my cupcake in cardboard file boxes. The only problem I have is they will tip over and getting them in and out is an issue. I am making this to use with plastic totes. I am so glad I found this tutorial!
THANK YOU, Jamie, for the tutorial! I am a DYI person and this answers all my questions on how to make my own cupcake trays for my business. YAY!!!!!
Again, THANK YOU!
Sweet Citrus, Etc.
Jaime, cute idea. I was wondering what your cost total was for this project. For $20 you can purchase a pre-made cupcake carrier that is dishwasher safe and has a lid to keep out all those pesky bugs at backyard parties.
This is darling, thanks for the great tutorial