DIY Concrete Desk Organizer
DIY Concrete Desk Organizer
Hi! It’s Sheri from Hazel + Gold, and I’m excited to share this DIY Concrete Desk Organizer tutorial with you! This organizer was born from necessity. Do you have a jar or cup-like pen holder? Have you ever knocked it over reaching for a pen or pencil? I did this all the time!
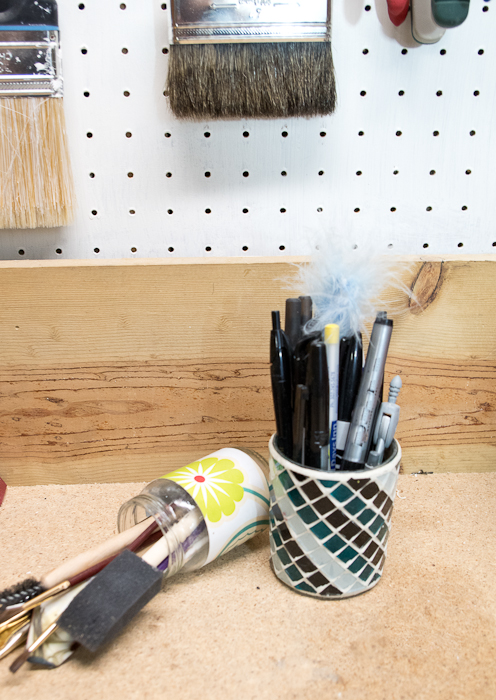
One reason they tip is because they aren’t big enough to hold all my items. The other reason is these containers aren’t weighted enough. I knew there must be a better way and I’ve been itching to use concrete for a project. It dawned on me I should make something out of concrete to store my pens, pencils, and paintbrushes. Fellow pen and utensil tippers, want to learn how to create this awesome DIY concrete desk organizer? Then let’s do it!
Materials:
(I’ve included affiliate links for your convenience. I earn a small percentage from a purchase using these links. There is no additional cost to you. You can read more about affiliate links here.)
- Fast Setting Concrete
- Wood to build a mold
- Wood Glue
- Petroleum Jelly
- Masking Tape
- Water
- Stir stick
- 2 Stemless Wine Glasses
- Utility Knife
- Copper Paint
- Paint Brush
- Felt pads
Instructions:
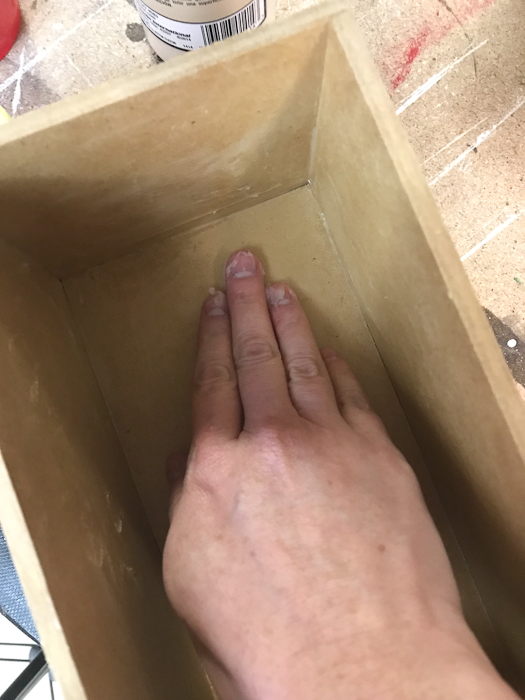
Cut scrap wood to create the box mold for the organizer. A rectangle is space saving and easy to create.
Use three pieces at 8 ½” x 4 ½” and two pieces 5″ x 4 ½”.

The longer pieces will make the bottom and sides, while the two smaller pieces create the ends. Spread wood glue along the joints. (Wood glue holds great but allows the box to be easily removed later on.)

Use clamps to assemble and secure the mold while the glue cures.

Let the glue dry for an hour. Then your box mold is ready for casting!
Prepping Mold and Adding Concrete:
To prevent the concrete from adhering to the wood, apply a thin layer of petroleum jelly on the inside of the box mold.
Collect your wine tumblers, concrete mix, water, and stir sticks. (I used large plastic cups to mix the concrete and ended up having to mix three different batches. If you have a larger container you can make one large batch.)

Mix the concrete according to the instructions on the package. You may have to do a bit of math because people typically use larger quantities of concrete and every concrete is different. I mixed it to a milkshake consistency and it came out perfect.
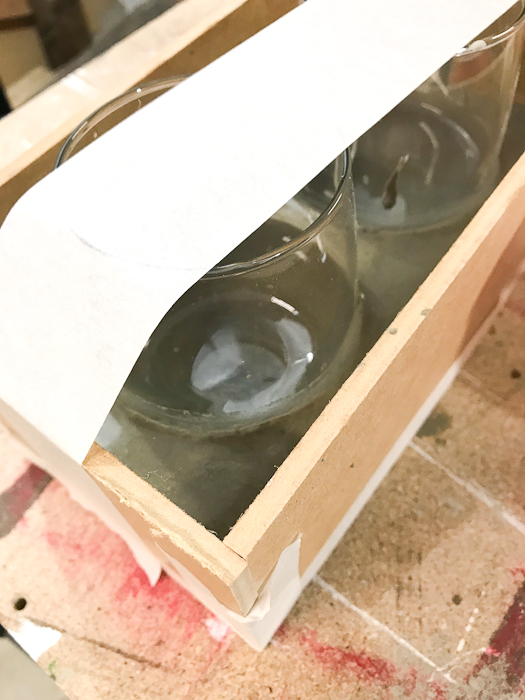
Pour the concrete into the mold, allowing room for the wine glasses.
Set the wine tumblers into the concrete. Make sure they are level, then use masking tape to hold them in place. Pour in more concrete until it reaches the height that you desire. Make sure the widest part of the glasses are submerged in the concrete to hold them securely.
Remove the mold:
Once the concrete cures (mine only took one day) remove the box mold. Use a knife to pry the sections apart at the joints.
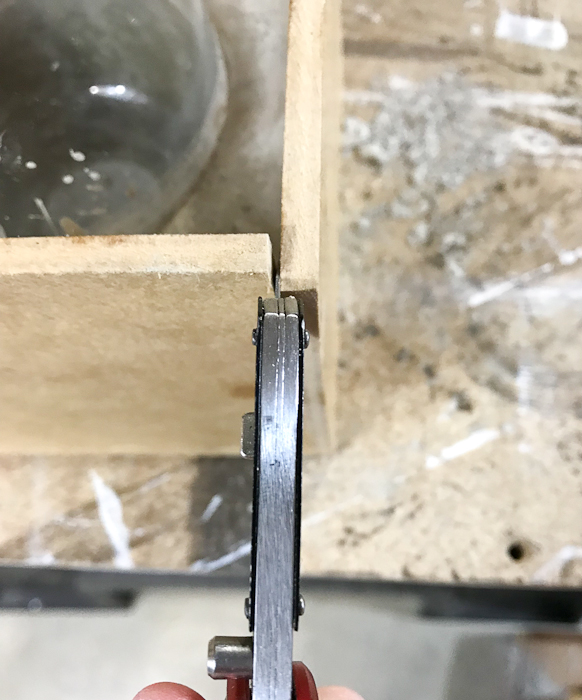
They should come apart easily.

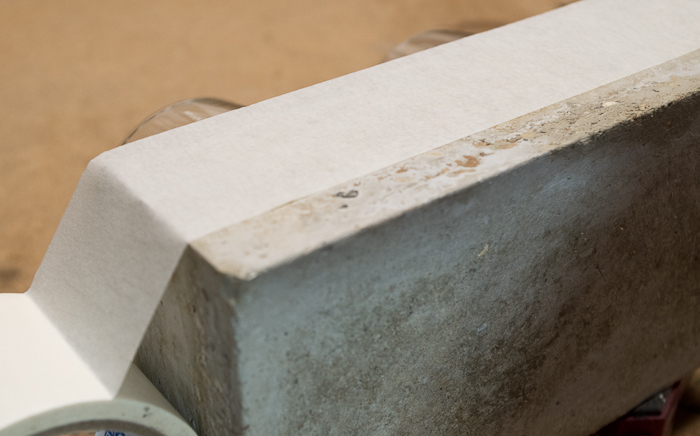
The sides may still look dark, but it will lighten up.
Clean up and Paint:
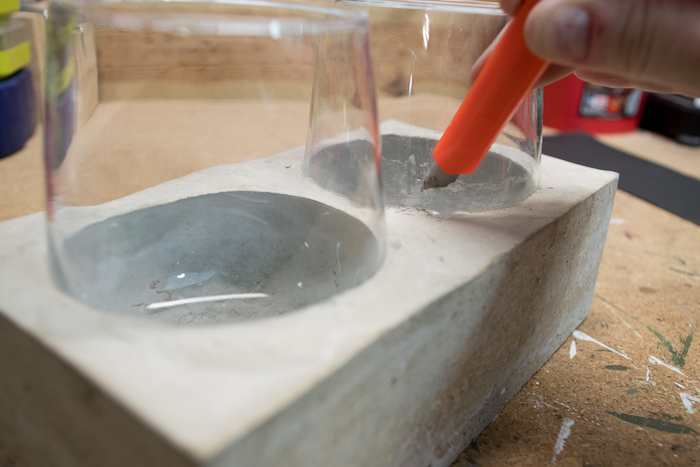
Clean off all the splatter marks from the glasses. Use a retractable knife to lightly scrape the residue off. Follow up with a soft cloth to clean the glasses. They should clean up easily!
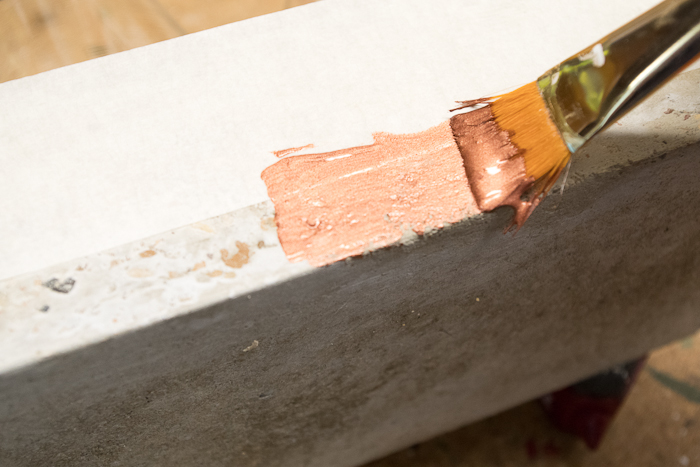
Time to make it pretty! Use some masking tape to mask off a line.
Paint the bottom section (or wherever you prefer) with metallic copper paint.
Add a piece of felt to the bottom to prevent your organizer from scratching the surface it sits on.
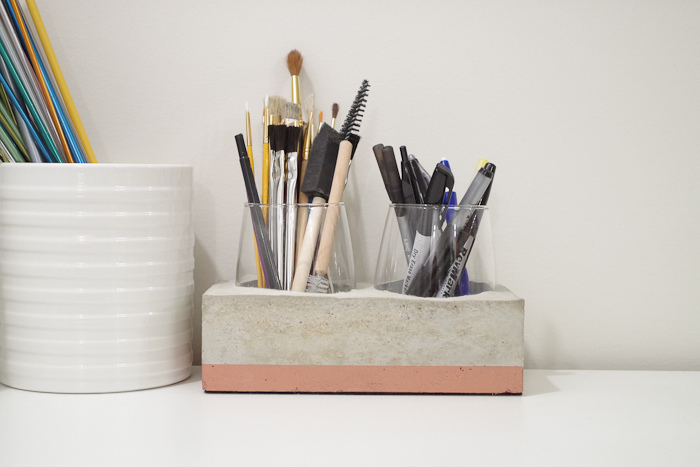
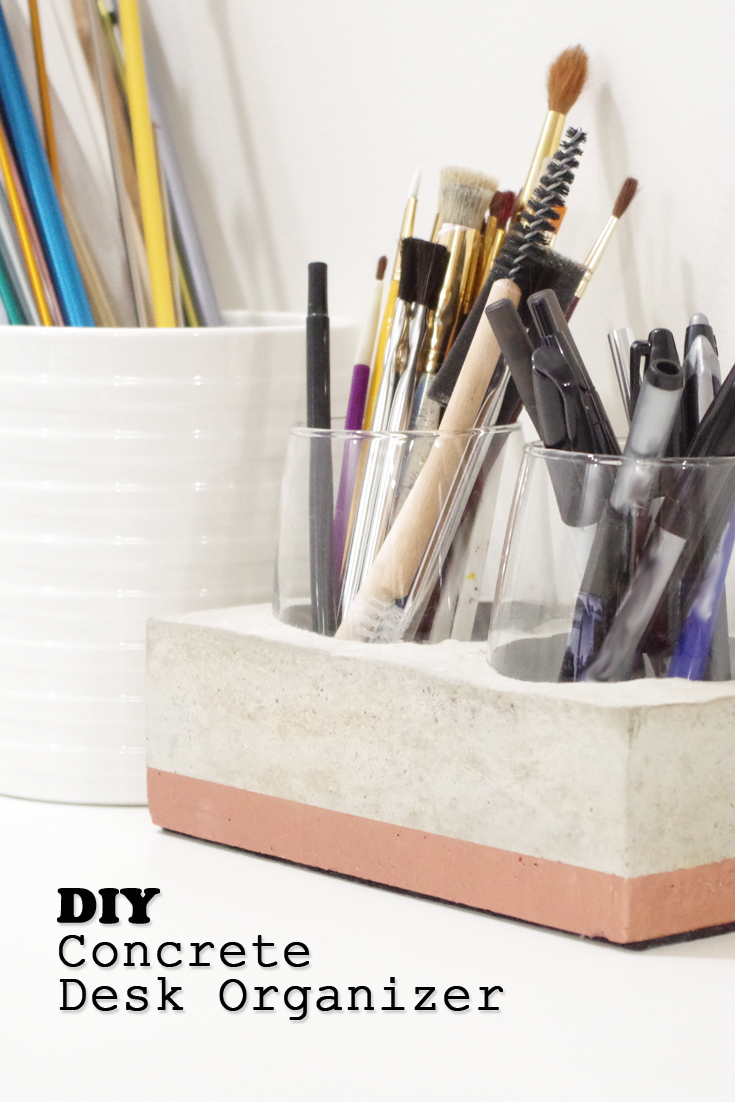
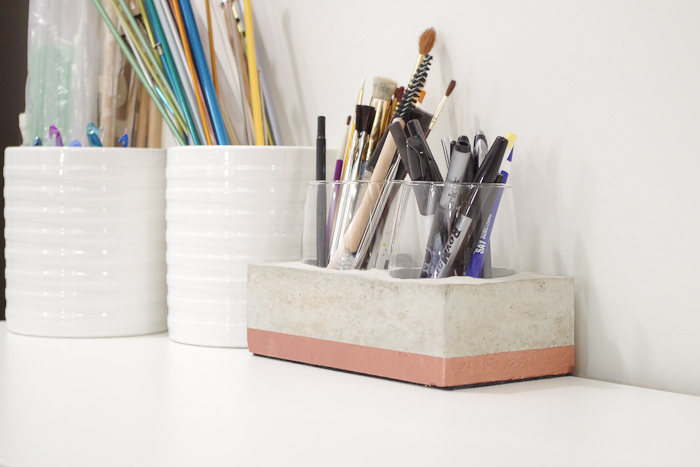
Your modern DIY Concrete Desk Organizer is finished!
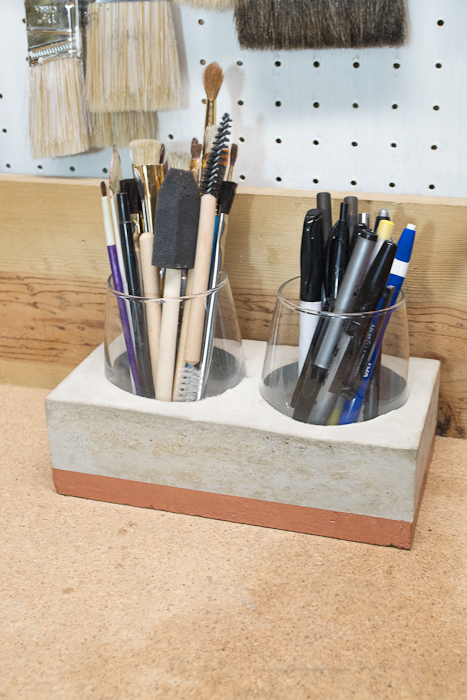
You can use it in your shop, the kitchen, your office, or anywhere you desire!
Wait until you see the huge number of supplies it will hold without tipping over!
What do you think? Would you make one of these DIY Concrete Desk Organizers? Share your thoughts in the comments below and remember to pin this image to Pinterest so no one has to suffer with tipping containers ever again!
Thanks for reading! Come on over to Hazel + Gold and say “Hi!”
![]()
 Hi, I’m Sheri from Hazel + Gold Designs. Here are a few fun stats about me: I
 When not working on projects, I enjoy spending time with my husband, four children, perfect dog, and ornery cat. You can find me on Facebook, Pinterest, Instagram and Twitter.
Read all of Sheri’s tutorials.


Leave a Reply
Want to join the discussion?Feel free to contribute!