• Home
  • About
  • My Home
  • Project Gallery
    • Decorating
    • Painting & Antiquing Techniques
    • Arts & Crafts
    • Build It
    • Electrical
    • Plumbing
    • Gift Ideas
    • Sewing
    • Tool Tutorials
    • Home & Auto Maintenance
    • Landscaping & Gardening
    • Photography
    • Recipes
    • PHG TV
  • My Toolbox
  • Contributors

Pretty Handy Girl

A DIY Blog Empowering You to Complete Your Own Project. Build it, Fix it and Do it yourself. Home project tutorials.

  • Contact
  • Advertise
  • Home
  • About
  • My Home
  • Project Gallery
    • Decorating
    • Painting & Antiquing Techniques
    • Arts & Crafts
    • Build It
    • Electrical
    • Plumbing
    • Gift Ideas
    • Sewing
    • Tool Tutorials
    • Home & Auto Maintenance
    • Landscaping & Gardening
    • Photography
    • Recipes
    • PHG TV
  • My Toolbox
  • Contributors
Home » arts and craft » Creative Gift Wrapping Day #2

Creative Gift Wrapping Day #2

December 17, 2010 Brittany Bailey 9 Comments

105shares
  • Facebook
  • Twitter

Welcome back! I have some more creative gift wrapping for you today. Next up at the wrapping station:

Clustered Butterfly Gift
 
Materials:
Wrapping Paper
Wire Ribbon
Butterfly hole puncher
Colored scrapbook paper or other colored paper
Snowflake embellishment
Elmer’s glue
Start by using the butterfly hole puncher and punch out oodles of little butterflies.
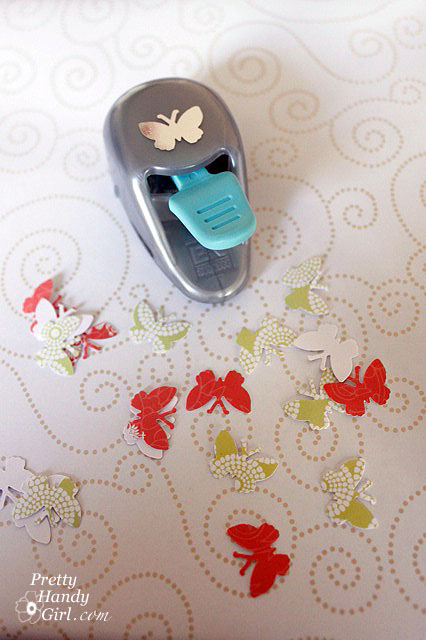
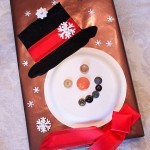
Crease and fold the butterflies in half to give them some dimension. It is okay to leave a few butterflies flat.

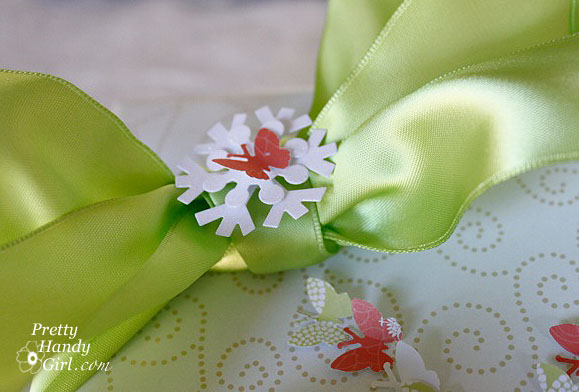
Gift wrap your present as you normally would. And add your ribbon and bow on diagonal corners.


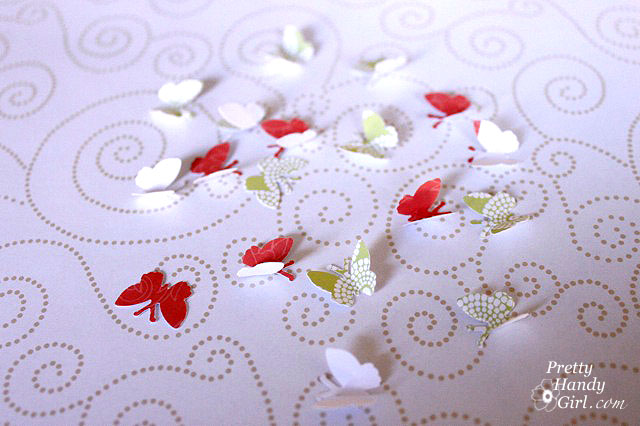
Use Elmer’s glue to place random dots onto your package.
 

Lay your butterflies on top of the glue. Keep adding butterflies until your cluster is done.

Add a snowflake embellishment and one butterfly on the bow.
“These are a few of my favorite things (butterflies in December!)”
I realize the butterflies are a little feminine, so I have a more unisex gift wrap up next:
3-D Christmas Tree
 
Materials:

Wrapping paper
Curly ribbon
1 – 12″ x 12″ scrapbook paper
Shiny embellishment dots or stickers
Elmer’s glue
Optional: Green construction paper or scrapbook paper for fringe grass at the bottom

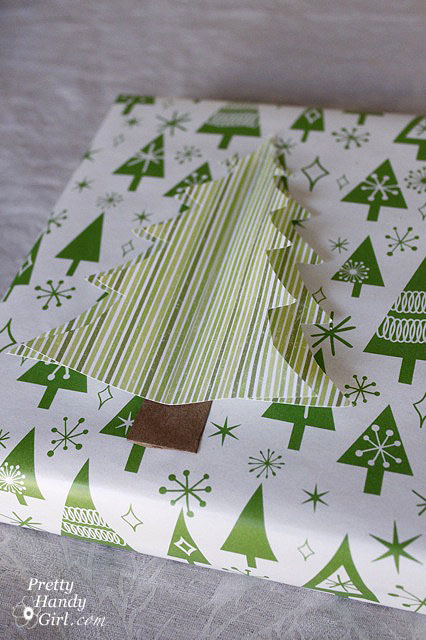
Wrap your package as you would normally.

Cut a small square out of craft paper for the trunk. Fold your scrapbook paper into quarters…

 …and cut along the fold(s) using the template below.

 
When you are done you should have two identical trees.

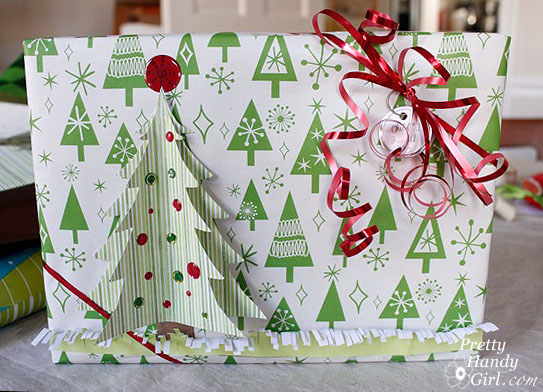
Glue the tree trunk down using Elmer’s glue. Run a bead along the spine of the tree and glue the first tree down on top of the trunk. Run a second bead of glue along the spine of the first tree and lay the second tree on top but slightly lower than the first.

Fold the left and right sides of the tree up to give them some dimension.
 

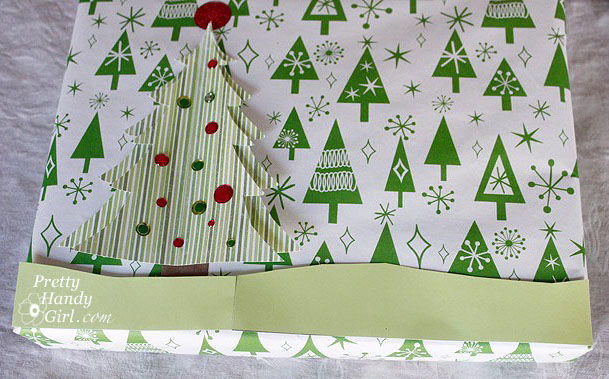
Add some embellishments or stickers to decorate your tree.

Optional: Adding Fringe Grass

Cut out a strip of green construction paper for your grass line. Tape two pieces together if you need to make it longer.

Cut fringes into the top edge of the green strip.

Using a pencil, roll the fringes over the pencil. I found this worked best on my thigh (probably because of that 10 lbs. of blogger bloat!)

 Glue your strip of fringed grass onto the package using Elmer’s glue.

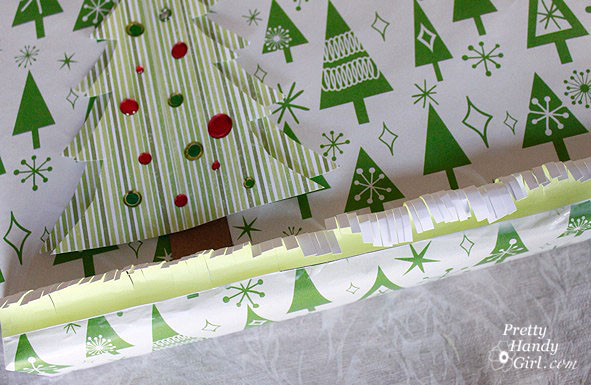
 Use your finger to push some fringes up and others down until you like the look.

 
Finish off your package by tying some curly ribbon onto it.
“Oh Christmas Tree, Oh Christmas Tree”
As I was falling asleep last night, I came up with a few more ideas for creative gift wrapping.  I hope to implement them tonight and then share them with you these final days before Christmas. In other words, I have SIX days of creative gift wrappings lined up for you. So be sure to check out Day #3.
105shares
  • Facebook
  • Twitter

You might also like:

arts and craft, christmas gift wrap, Crafts, Gift Ideas, gifts

Comments

  1. Vicki S says

    December 22, 2011 at 5:33 pm

    Really cute gift wrap, think I may have to use these!
    Happy holidays,
    Vicki

    Reply
  2. Charissa says

    December 18, 2010 at 12:25 am

    Ooh, I love the butterfly one! I've seen butterflies on gifts before, but it always looks fairly time-intensive. I like how your butterfly punch simplifies the process.

    Reply
  3. Melinda KE says

    December 17, 2010 at 4:44 pm

    Thanks for posting these wonderful gift wrapping ideas! I love the 3-D tree, I have some left over scrapping paper that I think will work perfectly!

    Reply
  4. Ⓙaη @ ฿◎ßßƴ℘ḯη❝﹩ ℬ◎aґdẘαʟк ツ says

    December 17, 2010 at 4:10 pm

    These are marvelous ideas! Thanks for the great pics and instructions!

    Reply
  5. The Rusty Teapot says

    December 17, 2010 at 4:08 pm

    ABSOLUTELY LoVe iT!you are so creative!

    Reply
  6. Sanja says

    December 17, 2010 at 3:53 pm

    Hvala što si podijelila s nama ove prekrasne ideje kako uljepšati poklon! Sviđaju mi se tvoji leptirići, kao i borići :)))

    Reply

Leave a Reply Cancel reply

This site uses Akismet to reduce spam. Learn how your comment data is processed.

Hi, I'm Brittany aka Pretty Handy Girl. I like the smell of coffee and sawdust in the morning. I live to break stereotypes and empower you to take on your own DIY project.

  • Email
  • Facebook
  • Instagram
  • Pinterest
  • Twitter
  • YouTube

Saving Etta - Follow the Adventure to Flip a Historic House

  • Email
  • Facebook
  • Google+
  • Instagram
  • Pinterest
  • Twitter

Privacy Policy

Affiliate Link Disclosure:

Pretty Handy Girl is a participant in the Amazon Services LLC Associates Program, an affiliate advertising program designed to provide a means for sites to earn advertising fees by advertising and linking to Amazon.com.

Copyrighted Content Permission

All images and tutorials on this blog are copyrighted material. Please contact me if you would like to borrow any media (photos, video or audio files), tutorials, or ideas from this blog. 99% of the time I would be happy to allow you to use one photo with appropriate credit and link back to PrettyHandyGirl.com (preferably to the same post it was borrowed from.) I can be contacted via email: PrettyHandyGirl (at) gmail.com.

© 2021 · Pretty Handy Girl ·

We use cookies to ensure that we give you the best experience on our website. If you continue to use this site we will assume that you are happy with it.Ok