Hello all! I have a fantastic DIY project today that will help you with storage, organization, and will free up floor space.
Recently my son moved into his first college apartment and as you would expect in a first apartment, space is at a premium. My son wanted to mount his TV on the wall and also have storage for games and his components. To solve both issues I came up with a floating TV shelf stand that would maximize his storage but also be perfect in small rooms (depending if he wanted it in the bedroom, living room, family room, or other spot.)
There are many tv stand designs we could have bought, but he wanted a floating look and something that went with his modern apartment vibe. Together we talked about several design options, but ultimately decided to build this simple DIY project together.
After building and finishing the floating shelf in my workshop, we transported it to his college town for installation. It was pretty straightforward, but we had to finish the build by drilling holes for cable management once we got to his apartment (and could see the size of the plugs.) Once it was hung, he fished the wires for the TV and components through the holes we made and plugged it into the wall. Then we filled the shelf with games and gaming components.
Measure your TV base before beginning. Feel free to enlarge the width of your floating tv stand. It’s not recommended to increase the depth of your shelf by more than an inch or two. Making your shelf deeper than 12 inches can cause your shelf to sag or not be as sturdy on the front edge.
This shelf is very easy to build and doesn’t require any special tools. You can have it completed in a couple hours and hung on the wall in about five minutes.
First you’ll need a few building materials and the right tools. I’ve listed them below for your convenience.
Floating TV Shelf Materials:
(I’ve included affiliate links for your convenience. I earn a small percentage from a purchase using these links. There is no additional cost to you. You can read more about affiliate links here.)
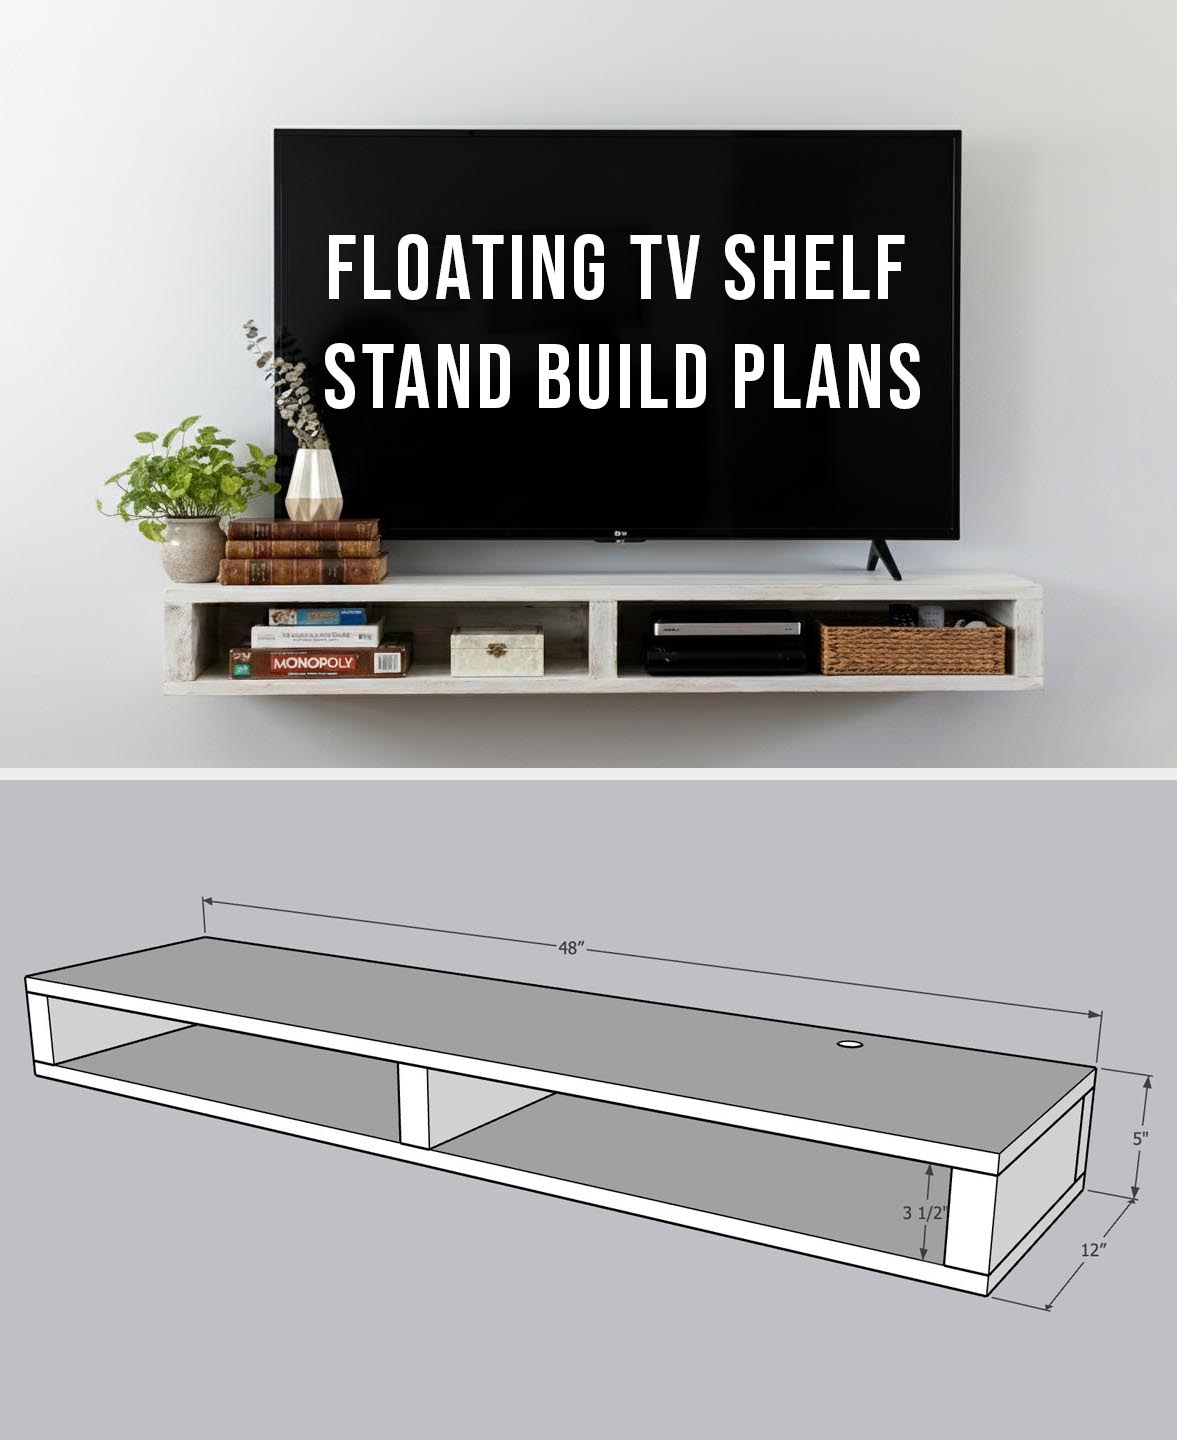
Depending on how tall you want your shelf, you can either use a 2″x 4″ (which would make the opening in your shelf 3 ½” tall). Or you can use a 2″x 6″ (which would make the opening 5 ½” tall). If you have a table saw, you can rip whatever size board to the custom height you want. (For this build, I ripped a 2″x 6″ down to 4″ wide for my frame.)
Once you determine the width you want, cut a piece at 48″ long. Then, cut your three pieces at 10 ½” long.
Installation Instructions:
It’s crucial that you install your shelf to wall studs for a secure installation. For this tutorial I am assuming you are mounting your floating shelf on a wood construction wall with drywall. If you have another wall type, you may need other use strong anchors (masonry anchors or other) to secure your shelf.
Use a level to make sure the shelf is level. Locate at least 2 studs (3 is better) behind the shelf and use structural screws at least 4″ long to attach through the back of the shelf into the studs. And that’s it. You’re done!
This shelf frees up space below for more storage or to keep a minimal and modern look in your home.
https://prettyhandygirl.com/wp-content/uploads/2017/09/Floating-TV-shelf-styled.jpg7681344Shara Mhttps://prettyhandygirl.com/wp-content/uploads/2021/07/PHG-logo-tagline-2020-1030x211-R.jpgShara M2026-01-02 07:00:002026-01-06 08:20:55How to Build a Floating TV Storage Shelf Stand
4replies
Dana says:
How exactly dis you mount the shelf to the wall? Did you use anything soecific? Did you use a shelf bracket for support? Or just a screw right through the shelf to the stud? Just worried about weight of tv and the shelf
The screws are driven through the back of the shelf (2×4 board the supports are attached to) and into the studs. Because the depth of the shelf is only 12″, the shelf should hold the weight of a flat screen TV and components without any problem.)
What a great. Idea. I love this , fabulous