Woodland Fairy Garden in a Jar – Styled x3
Have you been following Stacy Risenmay’s Styled x3 series? It’s addictive y’all! It’s kind of like the “who wore it best” in the home decorating world, but there’s no shaming. The way it works is Stacy buys three of one item and ships two of them to selected bloggers and keeps the third for herself. Then it’s time for all three recipients to get creative and use it or transform it. It’s so fun to see how each blogger uses the item. Wait until you see how I transformed my item into a Woodland Fairy Garden in a Jar!

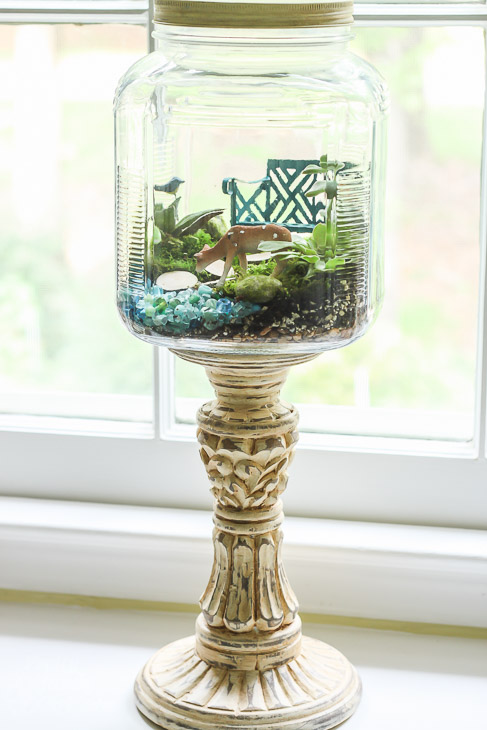
This is what arrived on my doorstep:
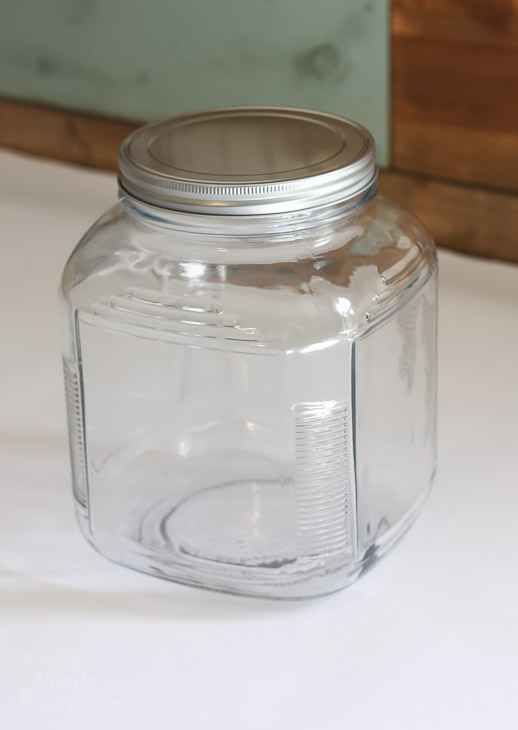
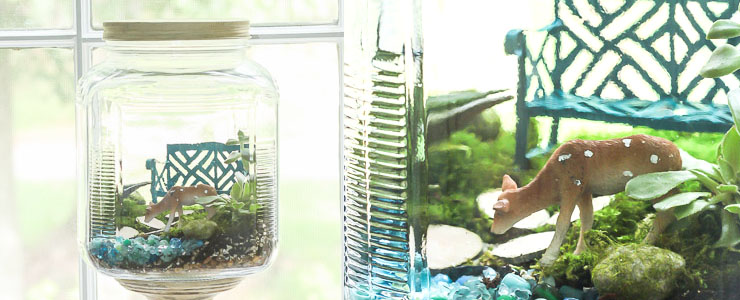
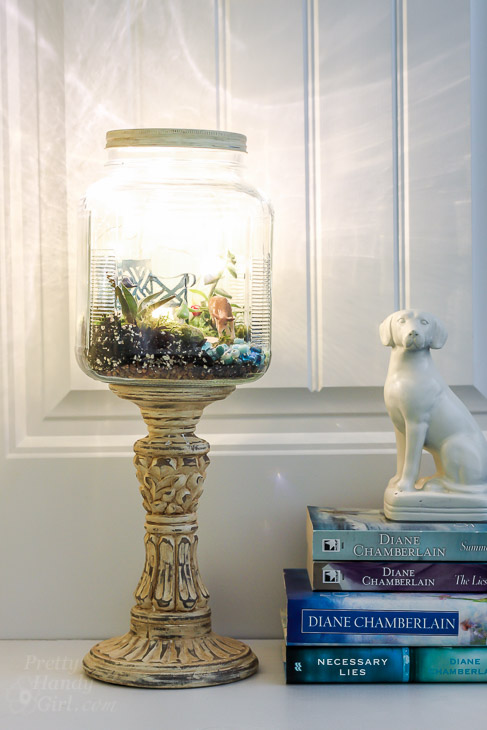
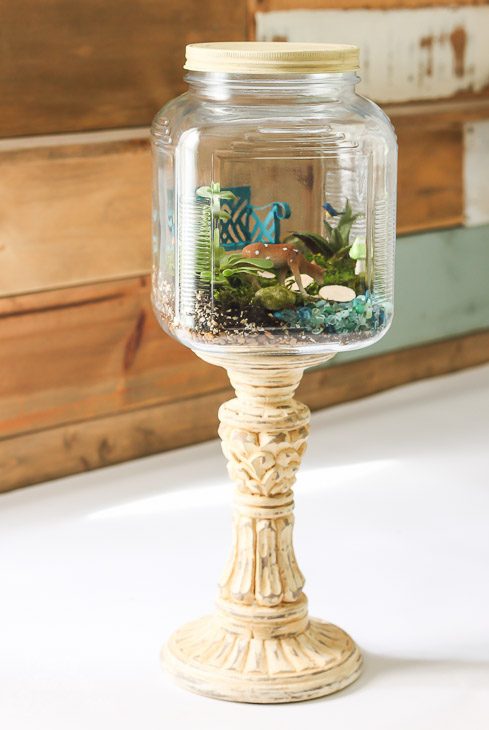
A big ole empty glass container. But, it had so much potential! I could fill it with anything. Part of me wanted to turn it on its side and build a little miniature ship inside. But, then I wised up and decided to create a Woodland Fairy Garden in a Jar. I’ve been dying to create a fairy garden. There’s a fun coffee shop near us that also sells fairy garden supplies. The boys and I love seeing all the fairy gardens there and longed to make one of our own.
It was a lot fun picking out decorations and creating this fairy garden. Want to make your own? Let’s get to it!
(I’ve included affiliate links for your convenience. I earn a small percentage from a purchase using these links. There is no additional cost to you. You can read more about affiliate links here.)
Materials:
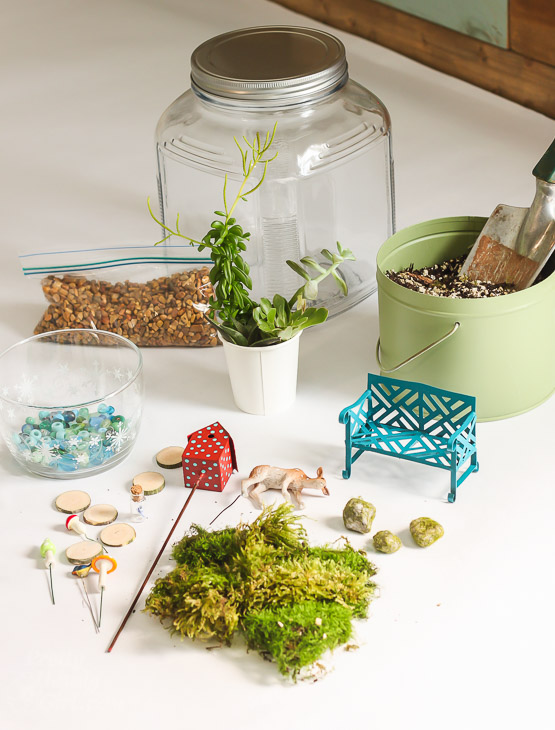
- Empty Glass Container
- Potting soil
- Small pebbles
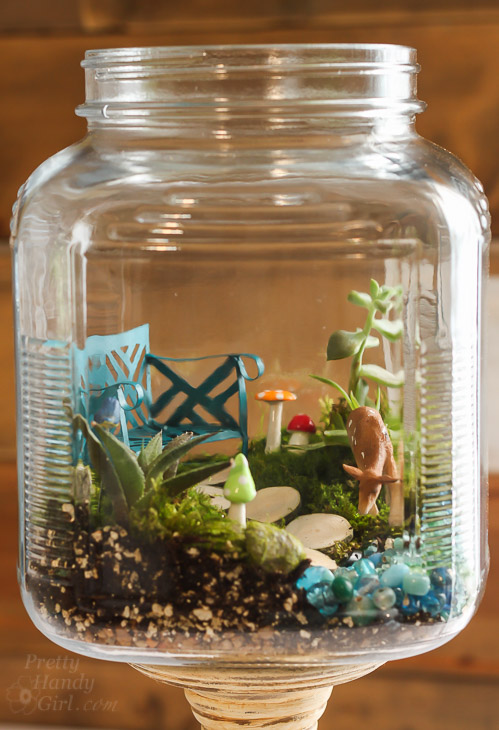
- Succulent plants
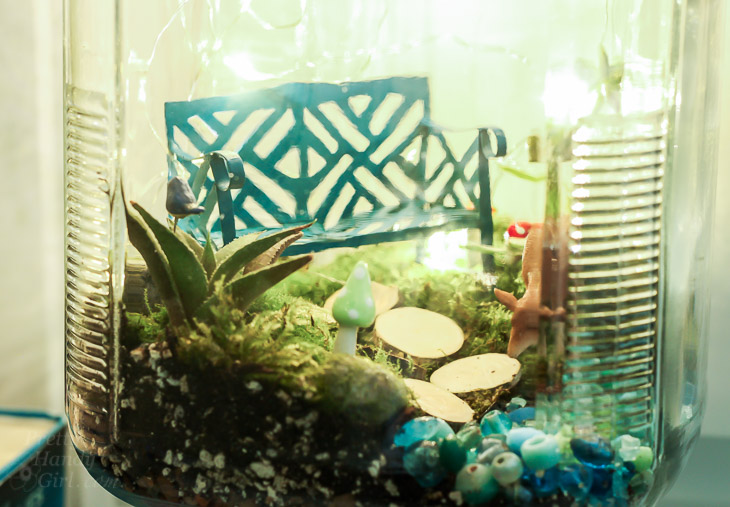
- Moss
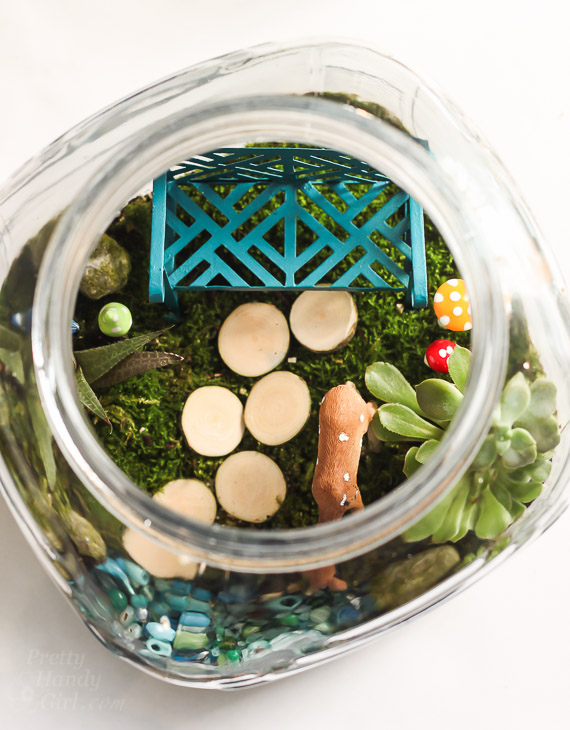
- Fairy stones
- Stepping Stones
- Miniature Garden Bench
- Fairy mushrooms
- Deer
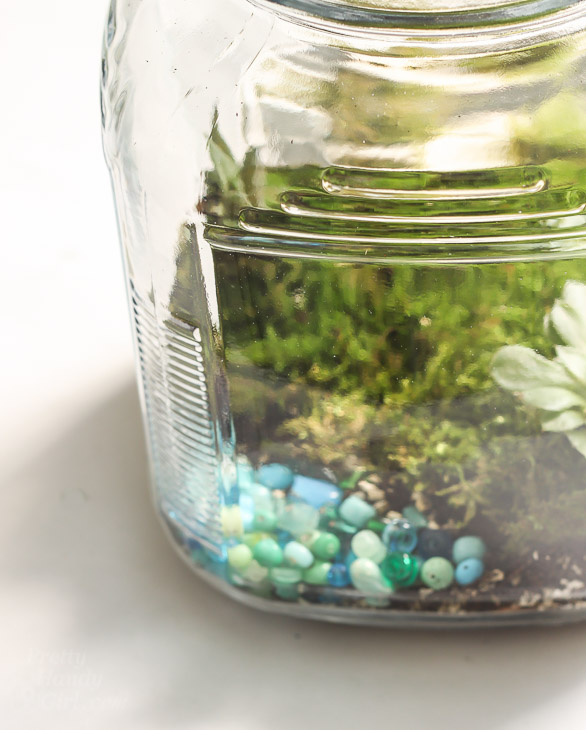
- Blue beads or crushed glass for water
Optional:
Instructions:
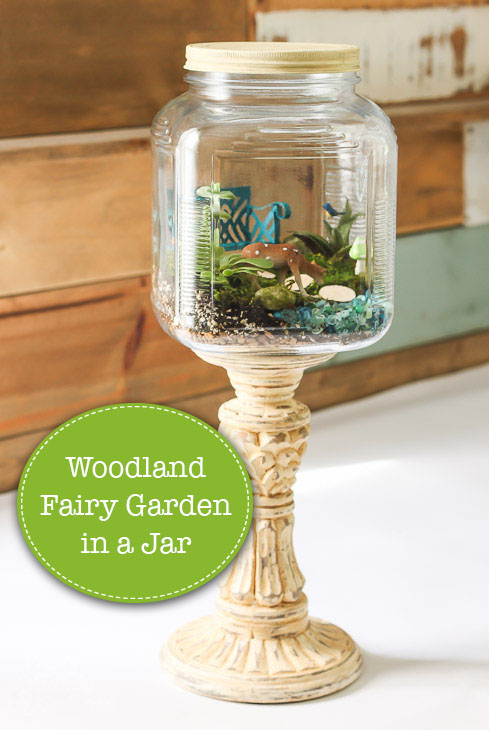
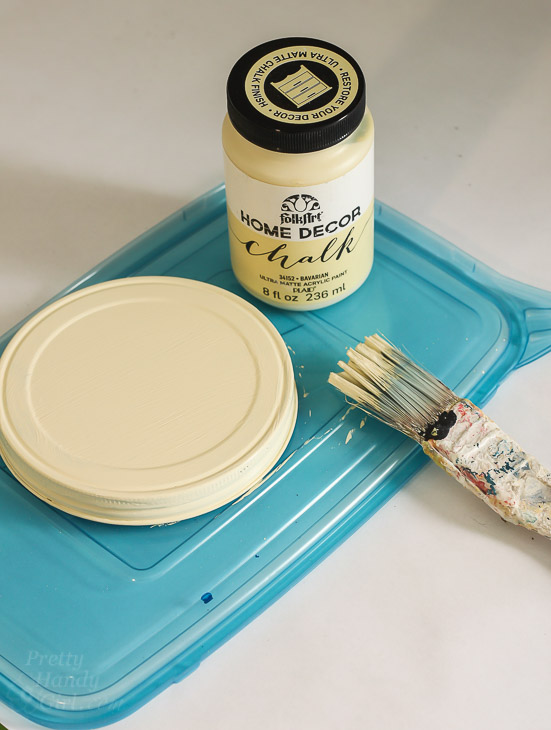
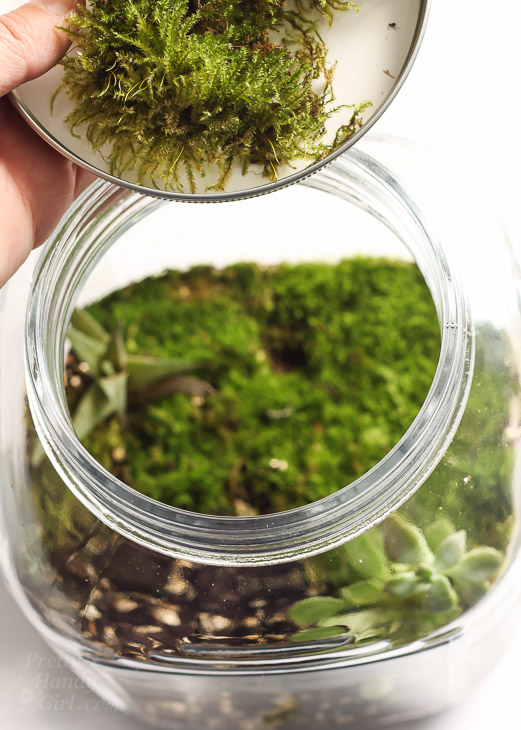
If you want, paint the lid for your glass container using chalk paint. Set it aside to dry.
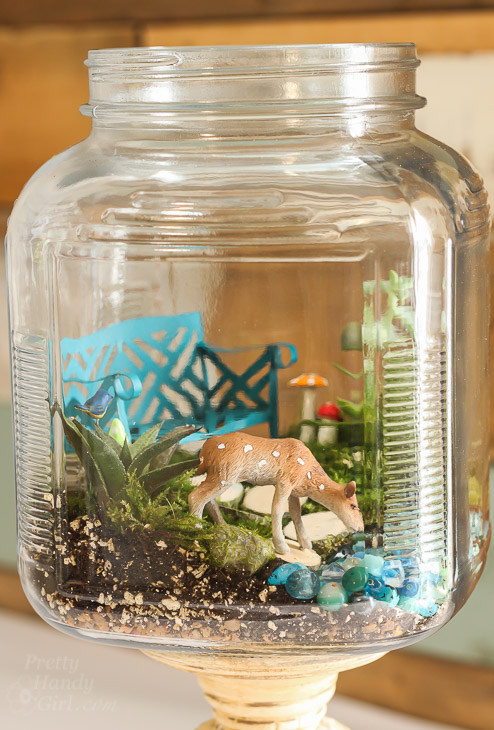
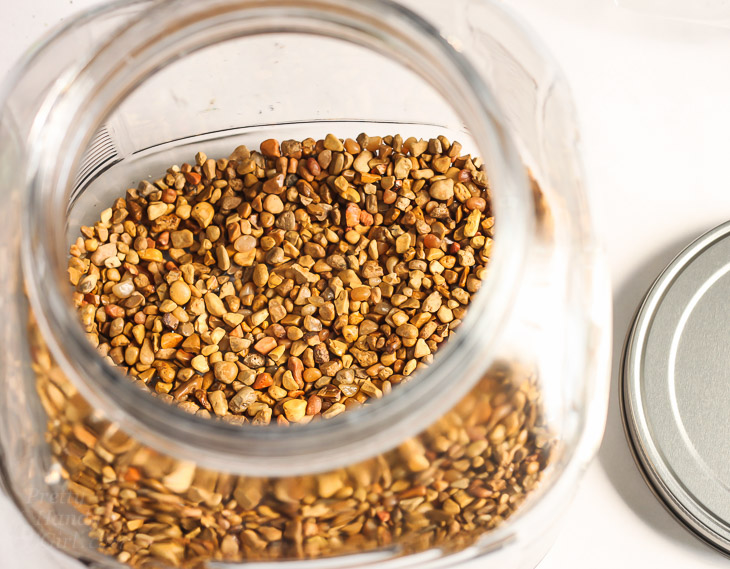
Add pebbles to the bottom of your jar for drainage.
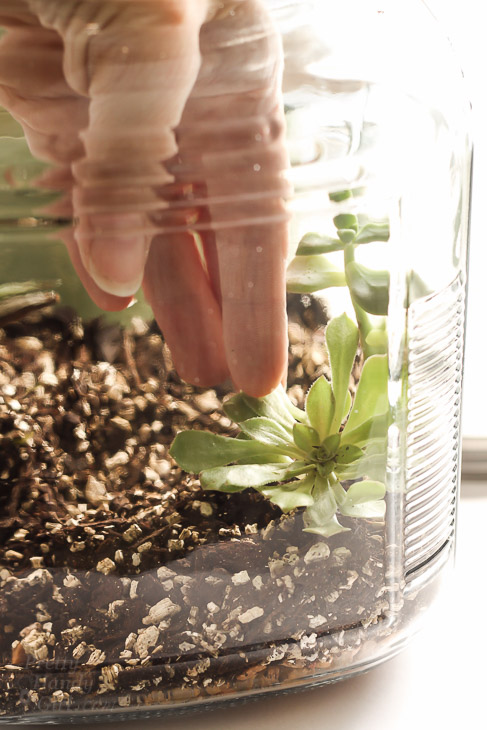
Add a layer of potting soil on top of the pebbles.

Place succulent plants into the soil.
Place moss on top of the dirt and around the plants. Leave room for a water feature if you want one.
Pour blue beads or crushed glass for your water feature.
Place the bench and any other large pieces in the container first.
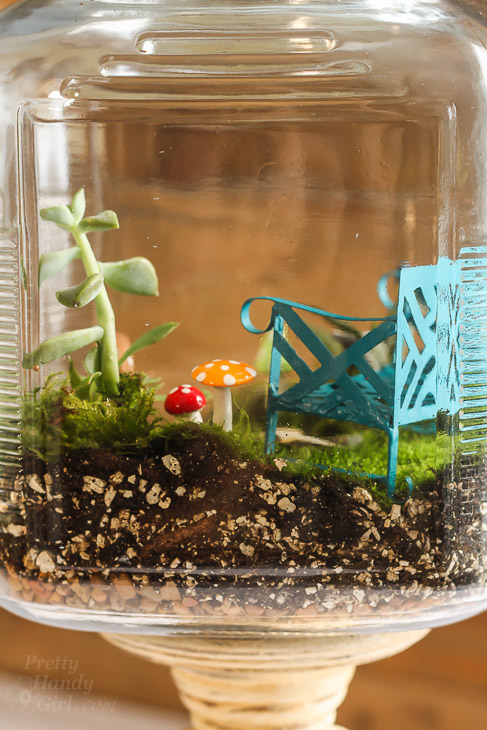
Create a walking path with wood slices, bottle caps, or other flat objects. Add the smaller decorations. Am I forgetting anything? Oh “deer”! For a woodland fairy garden, you should have at least one animal. Add a deer. 😉
I placed our garden on a candle holder. You don’t need to add the lid unless you are worried about little fingers getting into the garden. Succulents actually don’t need a ton of moisture.
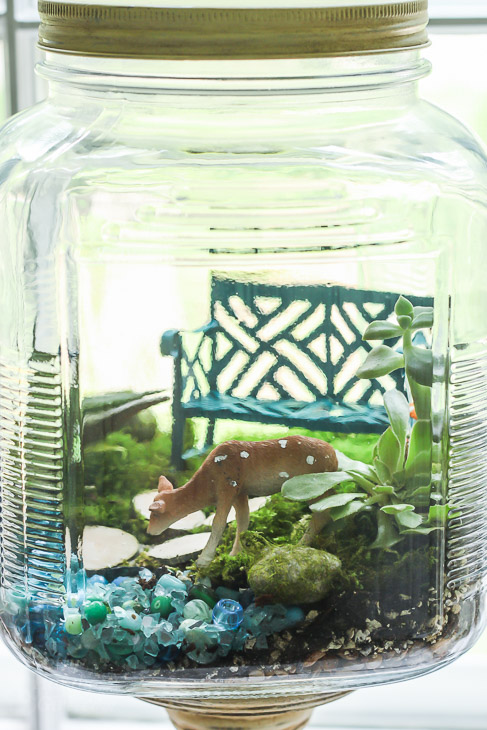
It’s fun to move the deer around from time-to-time.

I added some battery powered fairy lights to our garden.
If you place the fairy garden in a child’s room it would make a whimsical night light.
Aren’t you curious to see the other Styled x3 transformations with the same glass container? Go visit Not Just a Housewife and Uncommon Designs.
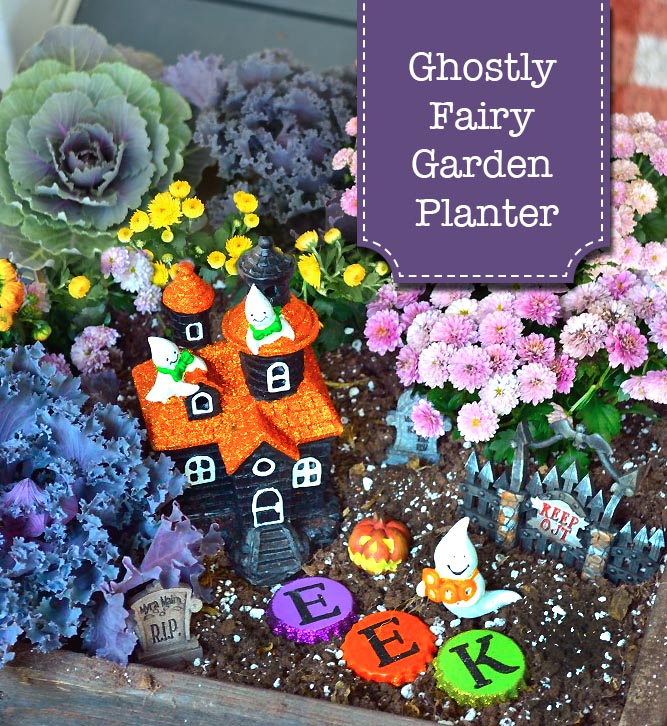
Hope you enjoy making your own fairy garden. Jillian and her crew made this fun Ghostly Fairy Garden for Halloween.
Have a great rest of your week!
![]()


Ok, this is super cute. My daughter would love to make one of these with me!
We’ve got some older jars, will have to give this a try! Very cute.
You should probably try to disinfect the jar with hot water and bleach and then let it sit for a few days and clean it again with hot soapy water. That should kill all of the stuff that may be leading to the mold. Lysol works also, but again you should let it sit out a few days outside preferably with a coffee filter over it to keep out bugs or dirt.
Any problems with mold? I just replanted my terrarium (a huge vintage jar handed down from my aunt which I was mesmerized with as a child when I visited – she had it planted up too, many many years ago) and everything molded! I replaced the plants again, left the lid off and it molded again. Right now it’s sitting outside on the porch cause I don’t know what to do with it. The plants I had in it previously outgrew it and never had mold problems.
This is adorable!! Where in Raleigh did you get the fairy garden supplies? I’d love to give this a try.
That is so stinking cute! That bench! And the pathway! Everything is so adorable.
I never thought of doing this in a jar! We meant to make a fairy garden outside this summer. . .but it has not happened yet. We could do so in the jar this fall/winter to get us ready for a larger summer project then. Thanks for the ideas!
I agree – the jar idea is wonderful!
Awesome little details in your terrarium. Love the deer and that bench is the perfect touch.
Thanks for some neat ideas. Jars are fantastic because there are so many fun things you can do with them.