Updating a Nightstand {Lowe’s Creative Idea}
The best way to give your room a makeover on a budget is if you can use your existing furniture. Notice that I didn’t say using it “as is”. Heck no! Update your solid furniture by adding moulding, paint and new feet!
(Pretty Handy Dog is already staking his claim on his preferred spot on the new bed.)
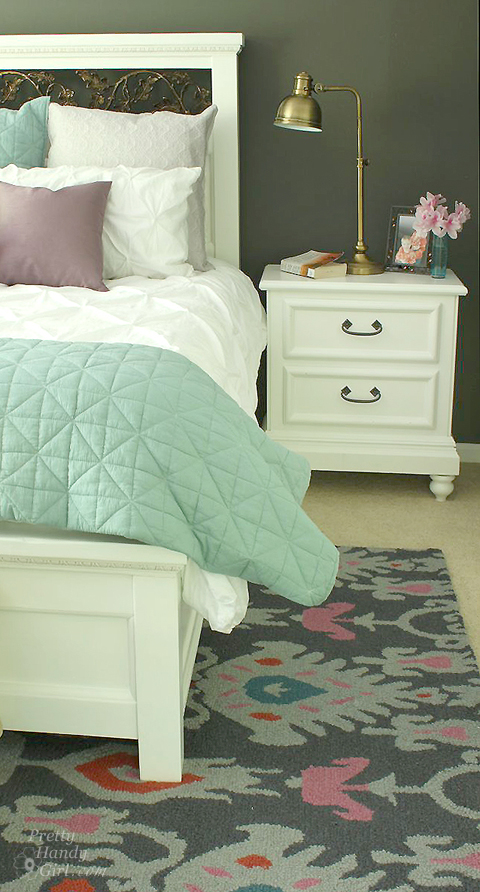
When I decided to build our new bed, I wanted to use our existing nightstand and vanity to save money. But, the nightstand was a little too short for the new bed height. By adding new feet and painting it the same color as our new bed, I was able to give the knotty pine nightstand a second life.
(I’ve included affiliate links for your convenience. I earn a small percentage from a purchase using these links. There is no additional cost to you. You can read more about affiliate links here.)
Materials:
- Nightstand
- Baseboard moulding
- Sanding sponge
- Wood putty
- Putty knife
- Zinsser BIN primer
- Paint (used Benjamin Moore Advance)
- Paint brush
- 4 Tulip Feet
- 4 Straight Leg Top Plates
- Gorilla Glue
- Hammer
- Finish nails
- Miter saw
Optional:
- Scrap 2×4 pieces of lumber to brace base
- Kreg jig and pocket screws
- Drill
Instructions:
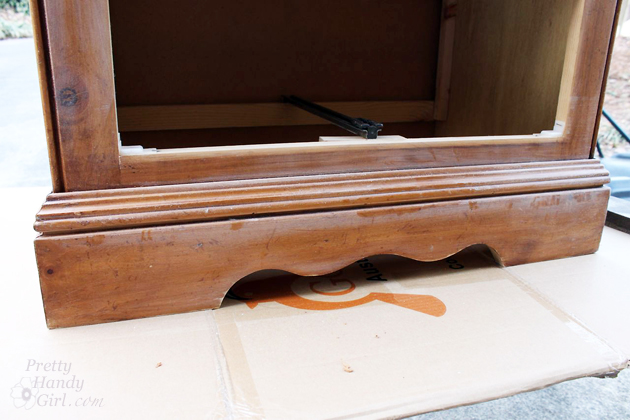
Start with a solid night stand. She may have some dated curves, but that’s nothing a little baseboard moulding can’t fix!
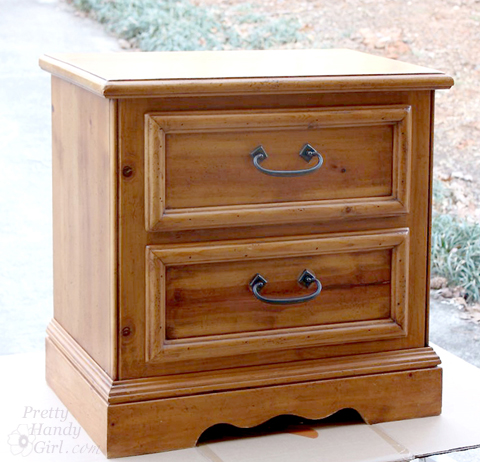
Remove the drawers. Clean out any dust bunnies and lost love letters out of the back.
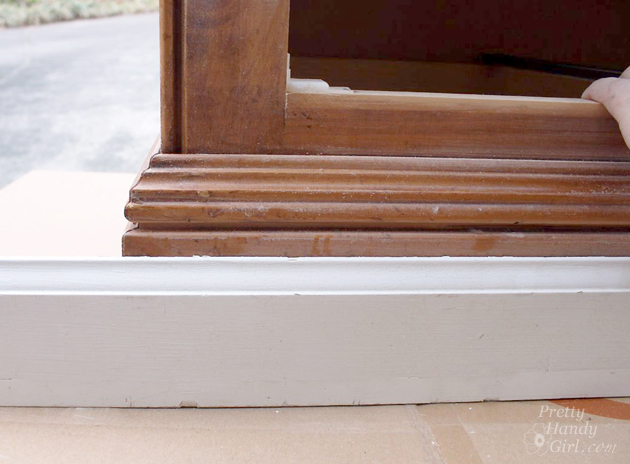
Cut an interior facing 45 degree angle into one end of the baseboard moulding. Line up the bevel against one end of the front of the nightstand. Mark the opposite corner of the base where you need to cut.
Cut baseboard piece for the left and right side of the night stand. The back of the baseboard will be a straight cut instead of a bevel cut.
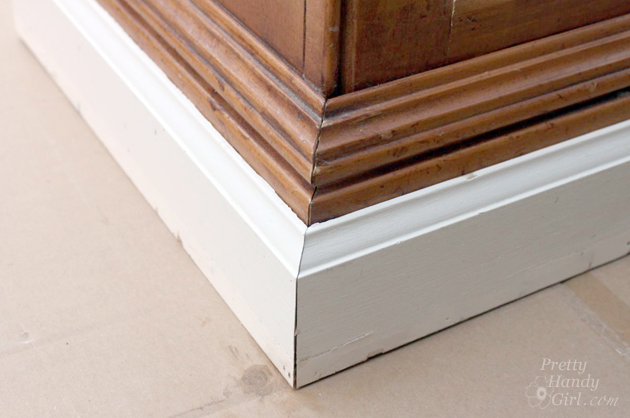
Apply Gorilla Glue to the back side of the baseboard trim.

Press the baseboard in place against the base of the nightstand and secure with finish nails.
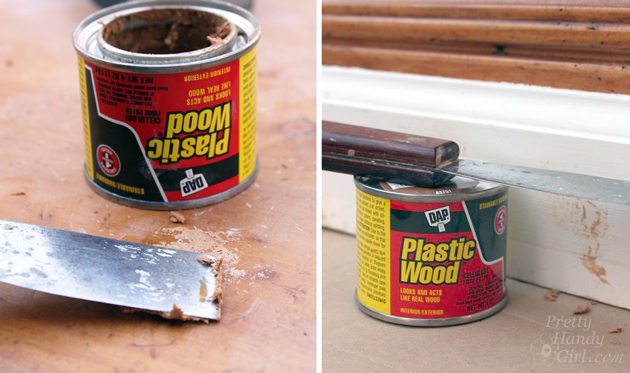
Patch any nail holes with wood putty. (Side note: I also filled several of the “factory added” dimples on the dresser to give it a smoother finish.) Allow the putty to dry and sand smooth with the sanding block. Lightly sand the entire nightstand. Wipe off the sanding dust with a damp rag.
Prime the nightstand with one coat of Zinsser BIN primer. (I highly recommend a shellac-based primer for knotty pine furniture. It seals the knots and protects the sap from staining later.)
After the primer has dried, lightly sand the nightstand.
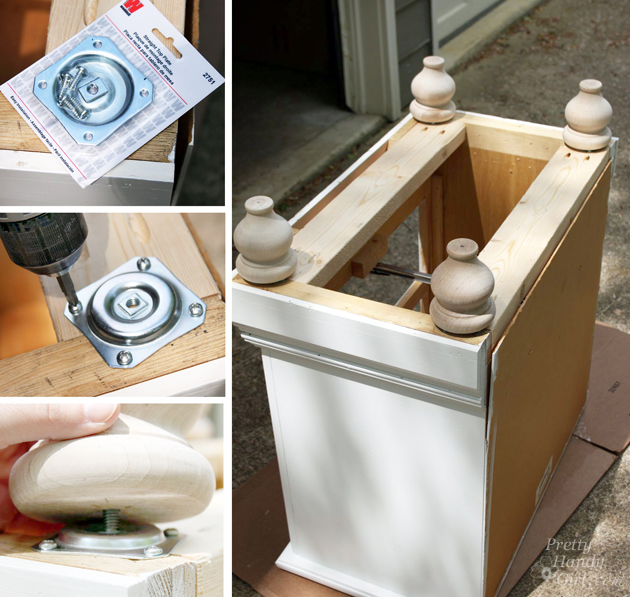
Turn the nightstand upside down and assess where you want the new feet to attach.
If you don’t have a wood support to attach them to, first say, “Dang It!”
(Warning: Lego Movie reference! Did you happen to picture Batman & Wonder Woman?)
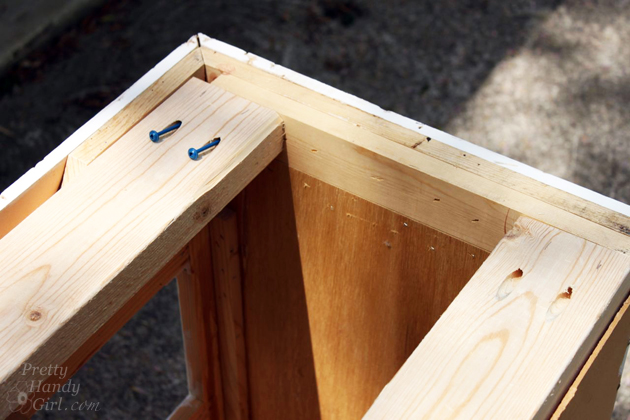
Then cut two 2×4 studs to fit into the base of the baseboard. Use a Kreg Jig to drill pocket holes into each end of the 2x4s.

Secure both 2×4 pieces to the inside of the front and back of the base of the nightstand.
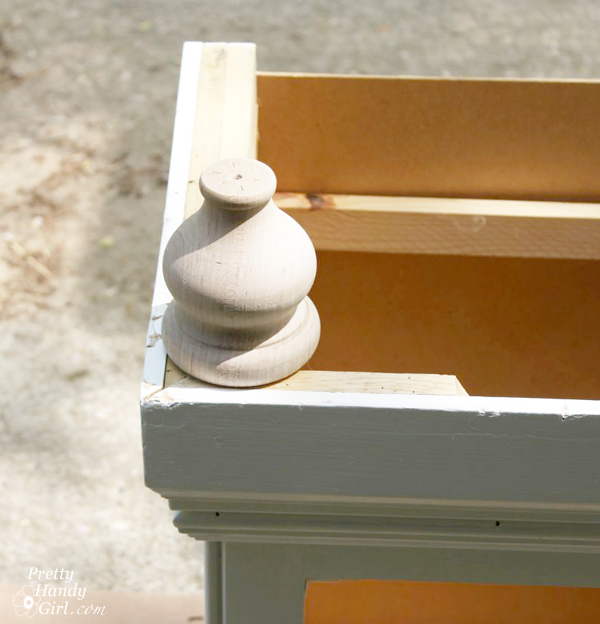
Add straight top plates for the feet to the base of the nightstand. Screw the new tulip feet into the brackets.
Paint your nightstand and its new feet with at least two coats of paint.

For added protection you can finish with a coat of polycrylic. I used the Benjamin Moore Advance paint which has a hardener in it, so I skipped the poly top coat.
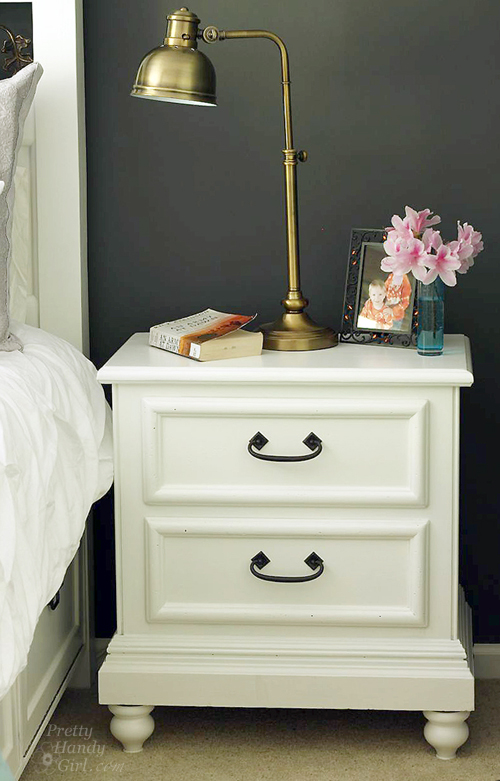
She’s a whole new lady now! She’s the perfect height next to our new bed. And I didn’t have to buy a new nightstand!
Look around your home. Do you have any pieces of furniture that you can transform with paint and new legs?
![]()
Want more furniture transformation ideas? Subscribe to the Lowe’s Creative Ideas magazine:

Or view more creative ideas from the Lowe’s Creative Idea bloggers!
There’s also a magazine app so you can have inspiration on the go! And, don’t forget to follow Lowe’s on Pinterest or on Instagram!
 Disclosure: As a #LowesCreator, I was provided with a Lowe’s gift card to purchase supplies for this post. I was not told what to write. All ideas and words are my own.

Hi! Thank you so much for this tutorial! I am refinishing some bedside tables that I found from a garage sale, and they had really awkward bottoms to them. The baseboard idea is genius! I’ll show you the before’s and after’s when I’m finished! Thanks again!
It turned out so beautifully! I wish I had the knack for DIY stuff like you clearly do.
This is absolutely beautiful!!
Thanks Penny.
This is awesome! This will definitely be helpful with my plan to raise and reface my night stands. Thanks for sharing.
We(with hubby) have updated our headboard too, to white and added a soft touch of tufted headboard.
Ah, so there’s a thing called ‘straight top plates’ for tulip feet– I could never figure out how to attach them to anything! Lovely piece you re-created. Great ideas I can use. Thanks!!
May I ask what color paint you used for the nightstand and bed? I’m doing a similar project and having difficulty choosing a shade of white. White is so complicated.
Brittany, sure! I used Benjamin Moore Impervo paint. It’s their off the shelf white paint. No mixing required.
Hi Brittany, it looks great! I have a similar nightstand I picked up at a garage sale. Transforming it into an attractive piece of furniture is the plan. I just needed some motivation and your post got my creative wheels turning.
Thanks for this inspiring post.
Love this!! Amazing difference!
Thanks Sara!
That is a very clever idea, I really like the way the product turned out.
I am probably gonna try something similar with an old table at home.
Deodua, I hope you’ll share pictures! I’d love to see your transformation of a table.
Wow, it turned out so cute! I love the feet, that was a stroke of brilliance. I’m filing this for my daughter’s room makeover (whenever that is, haha!)
You did such an amazing job redoing everything! I have been planning on making a bed frame myself. Maybe one day I’ll get around to it! Thank you for the inspiration!
-Lara
I have many many things I can transform with paint alone – thanks so much for this post and inspiration!!
You are so clever, my friend! I love that you just covered the bottom curvy part… I never would have thought to do that.
Wow, what a transformation! I really love how you added the extra trim at the bottom – what a difference it makes. If you want to, I’d love for you to share this post on my blog at Motivational Monday: http://thediymommy.com/motivational-monday-13-craft-diy-home-decor-link-party/
That’s a super transformation from before to after. I kept looking at the nightstand & wondering what you did to get the curvy bottom to be gone…Wonderful job & it’s so much prettier too!
You really did a great job transforming that. I love the new legs. I would love for you to link this up to my Sizzle into Summer party that opens each Tuesday evening at 8pm EST. Hope to see you there. http://diybydesign.blogspot.com
Love it! And you didn’t even have to buy new hardware. Great job!