Plenty O’ Storage from One Board
Before we get started, did you enter the $1,000 Build.com #LoveItMoment giveaway? Only a few days left, so get crackin’!
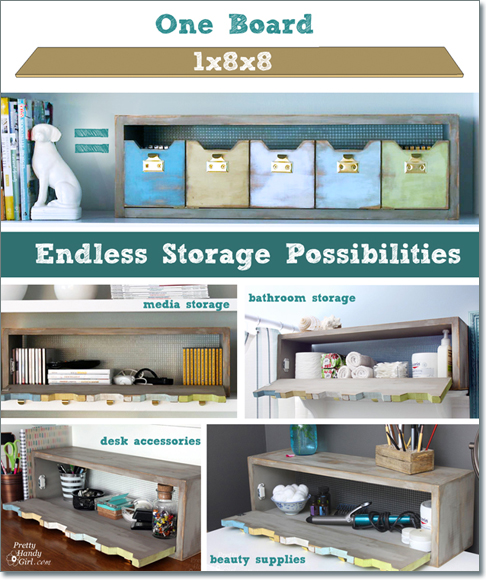
What would you say if I told you that I took one board…one 1″ x 8″ x 8′ board and created a faux cubby box with Plenty O’ Storage that will work in any room in your home!
This is a project born out of the #OneBoardChallenge. What’s that you ask? In short, it’s a challenge thrown down by Jen from House of Wood. She challenged 17 bloggers to make something amazing out of one 1″ x 8″ x 8′ board.

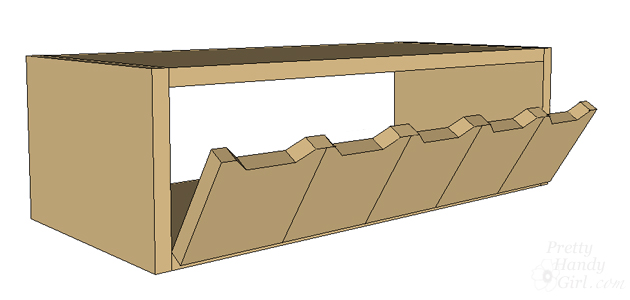
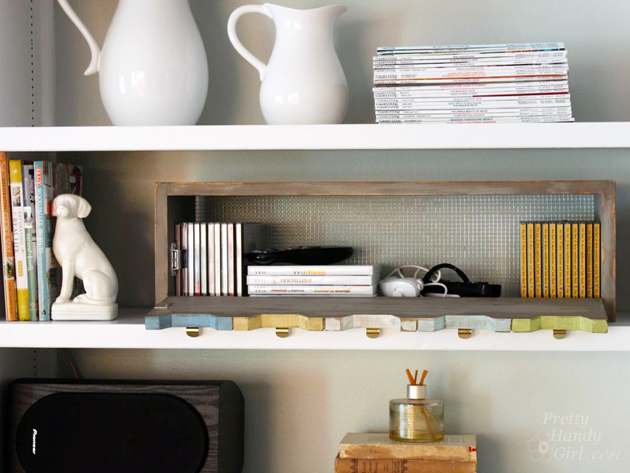
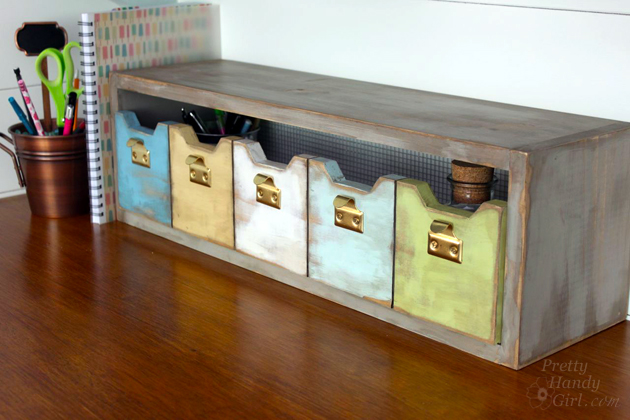
I’m here to show you how that one board can be cut up and turned into this beautiful fake cubby storage box:
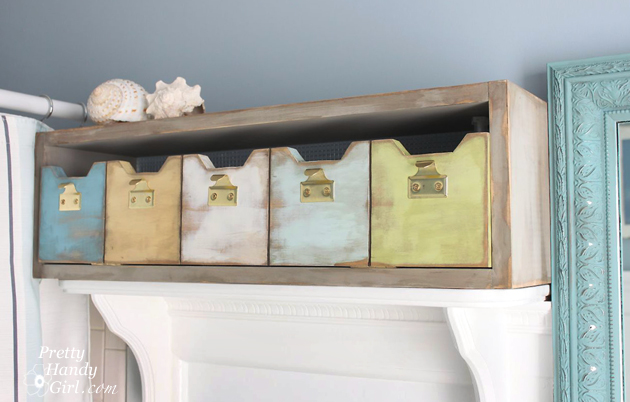
And it can store anything you don’t want in plain sight.

Today I’ll show you how to build your own Storage Box with Plenty O’ Storage!
Materials:
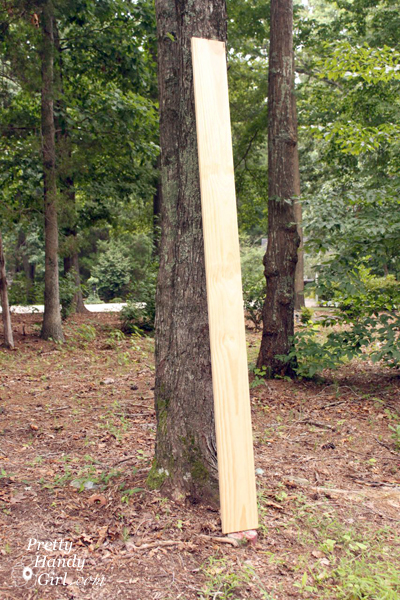
- 1 – 1″ x 8″ x 8′ board
- Drill
- 3/32 drill bit
- Philips head screwdriver
- Wire mesh
- Tin Snips
- Staple gun
- 1/4″ staples
- Pencil
- 2 – 2″ hinges
- Magnetic latch
- 5 – Sash hook lift hardware
- 4 – {6 x 2 1/4″} wood trim screws
- Miter saw
- Table saw
- Jig saw or Bandsaw
Cut list:
(Note that a 1″ x 8″ board is actually 3/4″ x 7 1/4″. Cut list sizes are actual sizes.)

- 1 – 5 1/4″ x 25″
- 2 – 7 1/4″ x 25″
- 2 – 7 1/4″ x 8″
- 1 – 2″ x 25″ (optional for hanging cleat or back stop)
Instructions:
Cut your 1×8″ board into the pieces listed in the cut list above. Most cuts can be made on a miter saw, but you’ll need a table saw to rip the 2″ board and to cut grooves into the face of the storage box. Alternatively, you could skip the fancy details and create a plain face.
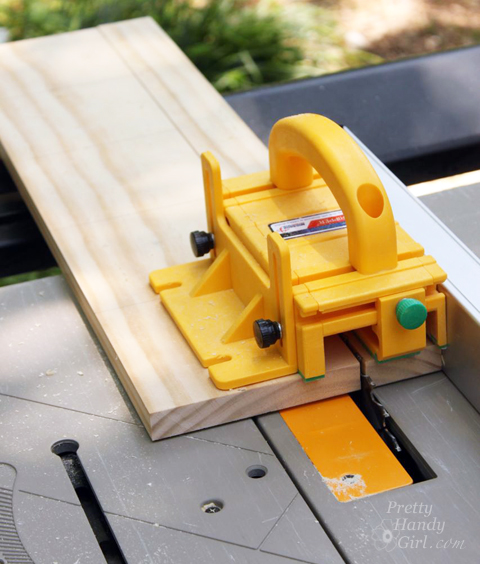
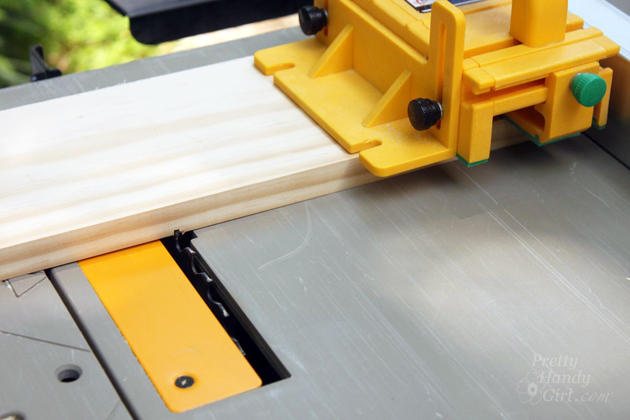
Set the table saw depth to 1/8″ above the saw table. Set the fence at 5″. Cross cut the board along the saw blade to cut grooves into the board. Rotate the board and cut across the other ends of the board. Set the fence at 10″ and repeat on both ends.
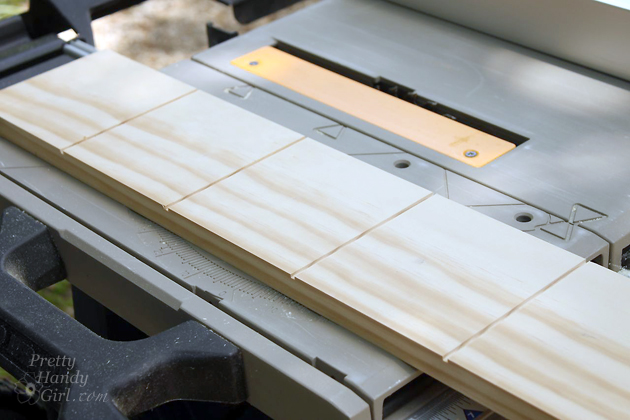
Your board will look like this when you flip it over:
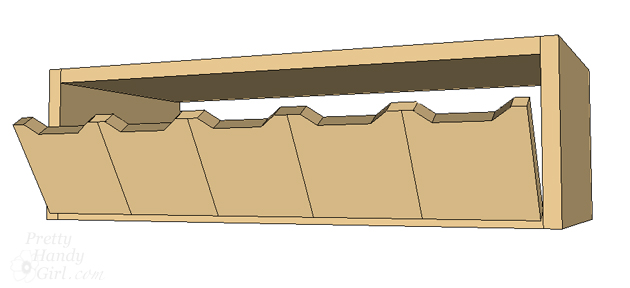
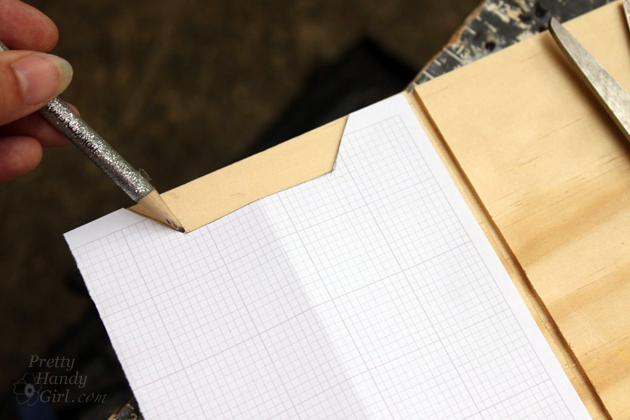
Download the template shown below, print and cut out the shape.

Using the template to trace the cut out onto the top of the face sections.
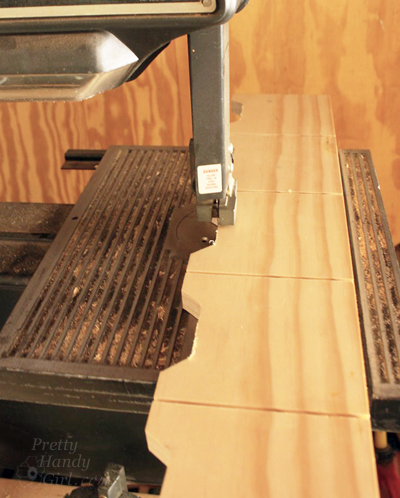
Use a jigsaw or bandsaw to cut the face profile.
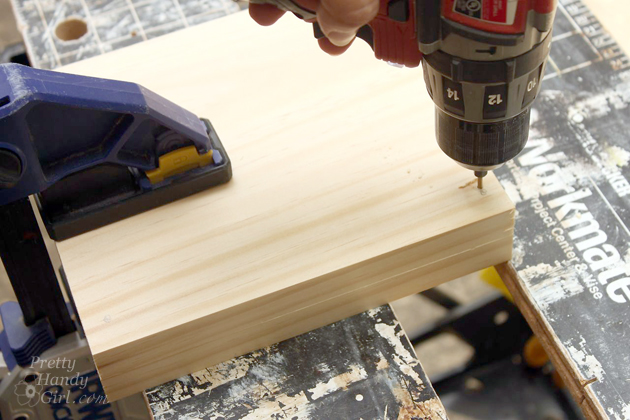
Pre-drill holes into the four corners of the two 8″ x 7 1/4″ boards.
Collect the four sides of the box ( 2 – 7 1/4″ x 25″ and 2 – 7 1/4″ x 8″)
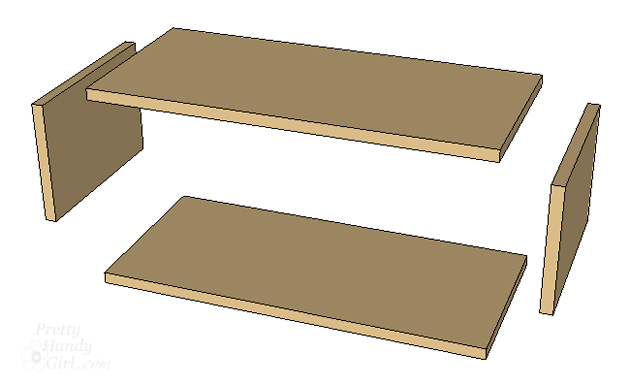
Drive wood screws into the sides and into the base of the box.
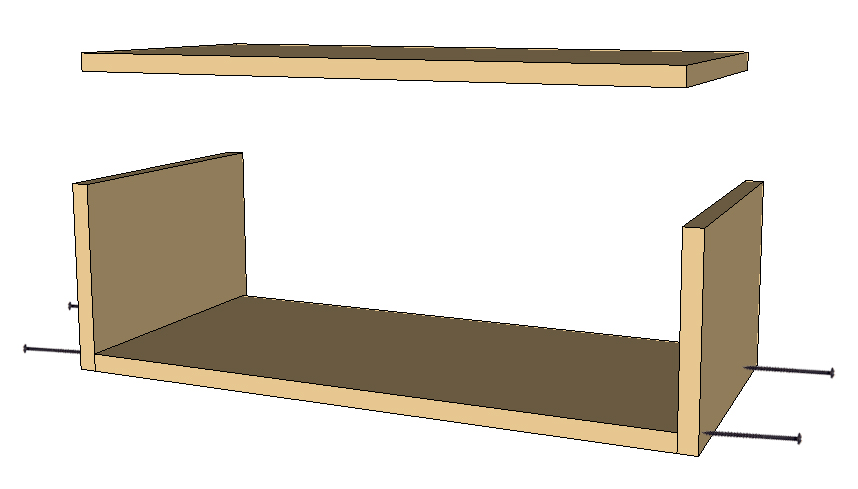
Drive wood screws into the tops of the sides and into the top of the box.

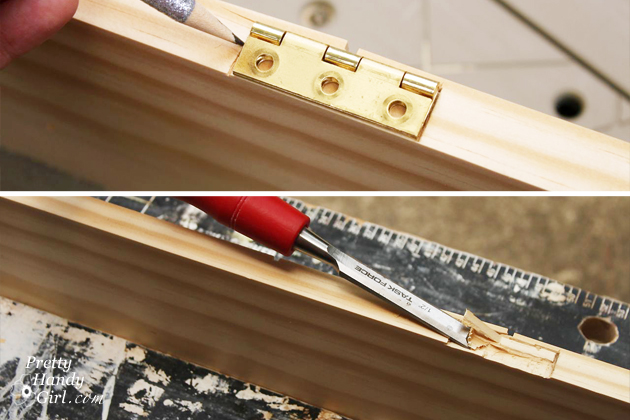
Trace the location of the hinges onto the bottom of the face. Chisel out enough wood to allow the hinge to rest inside the face.
Line up the face with the opening in the box.
Trace around the hinge onto the inside of the base of the box.
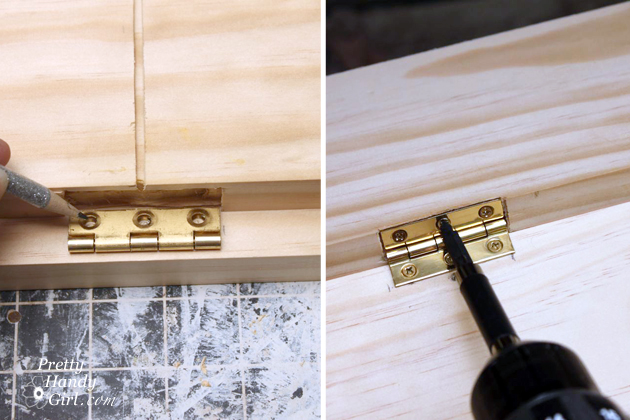
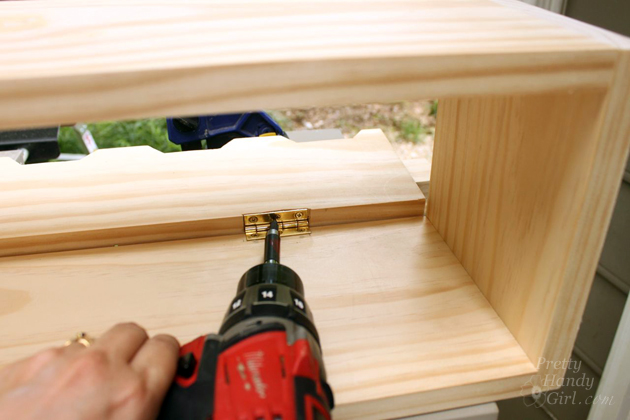
Attach the hinge to the box and the bottom of the face.
Attach the magnetic latch to the inside of the box. Attach the metal piece onto the inside of the face of the box.

Paint your storage box. If you like how my box looks, you can duplicate this rustic painting technique.
Attach the sash hooks to the front of each face section.
Cut wire mesh to the same size as the back of the storage box.

Staple the wire mesh to the back of the storage box.
If you don’t have wire mesh, you could attach the 2″ x 25″ board to the back of the storage box on the bottom to keep items from rolling out the back.
Alternatively, you can use the leftover 2″ x 25″ board to hang the storage box to the wall. Attach it to the inside of the box with nails or screws. Drill holes into the board to accept screws for hanging (be sure to screw into wall studs or use good wall anchors when hanging.)
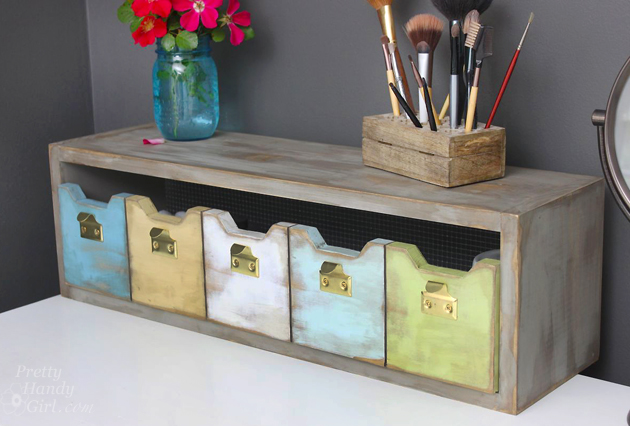
Your storage box will look right at home in any room in your house. Use it in your bedroom…
…to hide beauty products.

Use it in the bathroom…
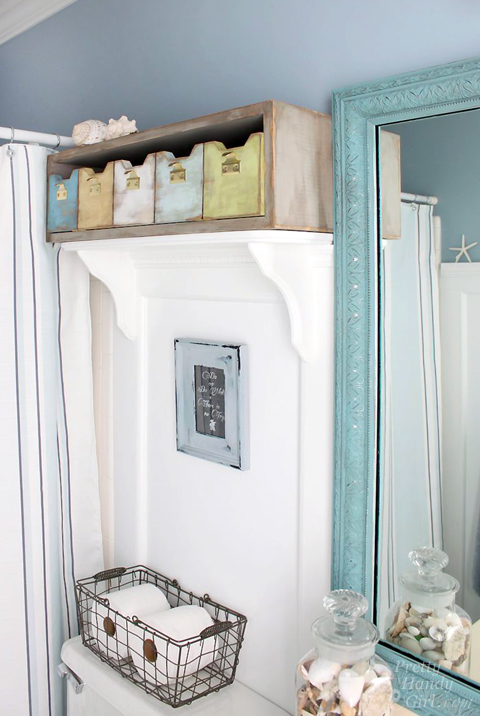
…to hide toiletries.
Use it in your living room…
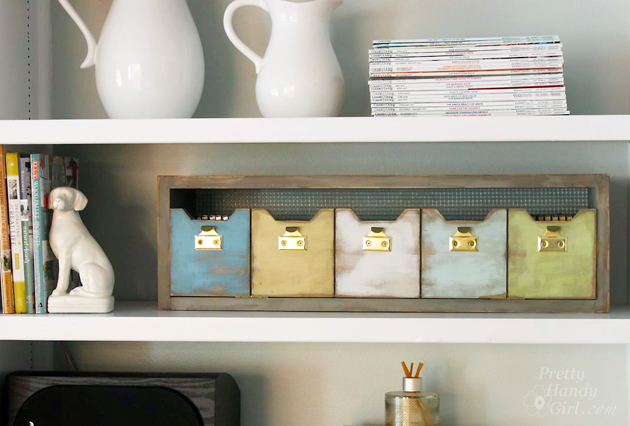
… to hide CDs, games and remotes.
Use it on your desk…
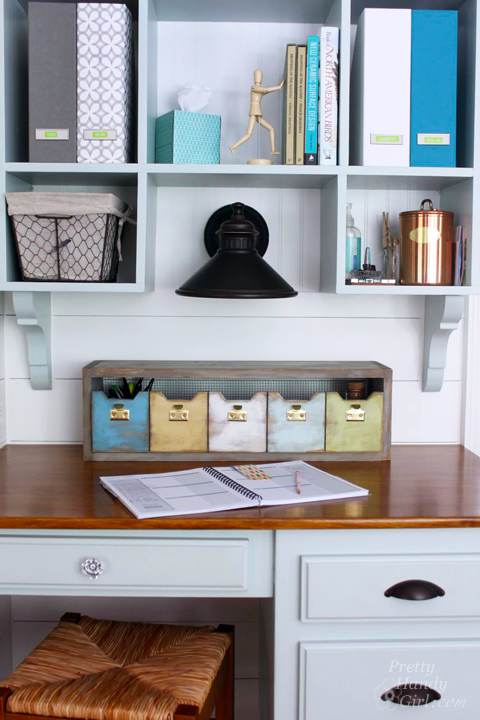
… to hide desk accessories.

You could also use this storage box in a laundry room, kitchen or playroom. Wherever you need hidden storage, this beautiful box with Plenty O’ Storage is sure to be useful.

Want to see what else you can make with one board? Check in with these bloggers to see what they did with their #OneBoardChallenge! I promise you will be amazed!
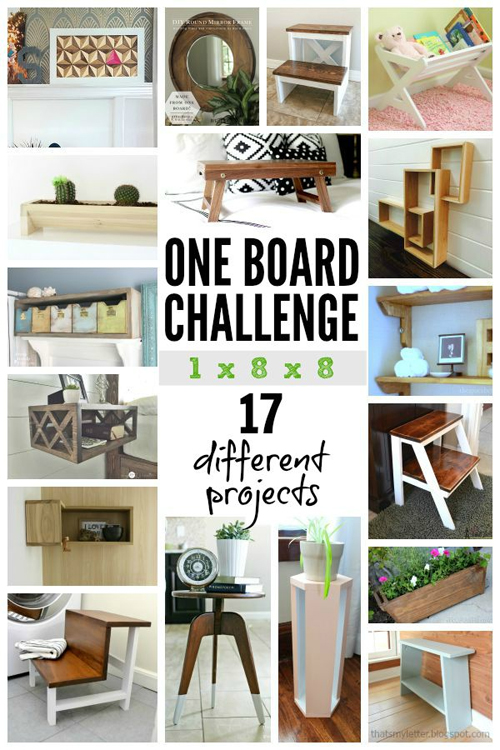
Katie, Addicted 2 DIY – Rustic Step Stool / Jaime, That’s My Letter – Bench
Amy, Her Toolbelt – Kids Step Stool / Elisha, Pneumatic Addict Furniture – Modern 3-Leg End Table
Sandra, Sawdust Girl – Three Tiered Display Shelf / Brittany, Pretty Handy Girl – Cubby Storage Box
Karah, the space between – Wood Shelves / Brad, Fix This Build That – Kids Bookshelf
Jenn, Build-Basic – Round Mirror / Mindi, My Love 2 Create – Floating Nightstand
Pauline, My Altered State – Indoor Planter / Bethany, Sawdust & Embryos – Geometric Art
Kim, The Kim Six Fix – Flower Box / Sarah, The Ugly Duckling House – Modern Step Stool
Jessica, Decor Adventures – Hexagon Plant Stand / Karah, the space between – Wood Shelves
Emily, Merrypad – Floating Corner Shelf / Jen, The House of Wood – Folding Lap Desk
![]()
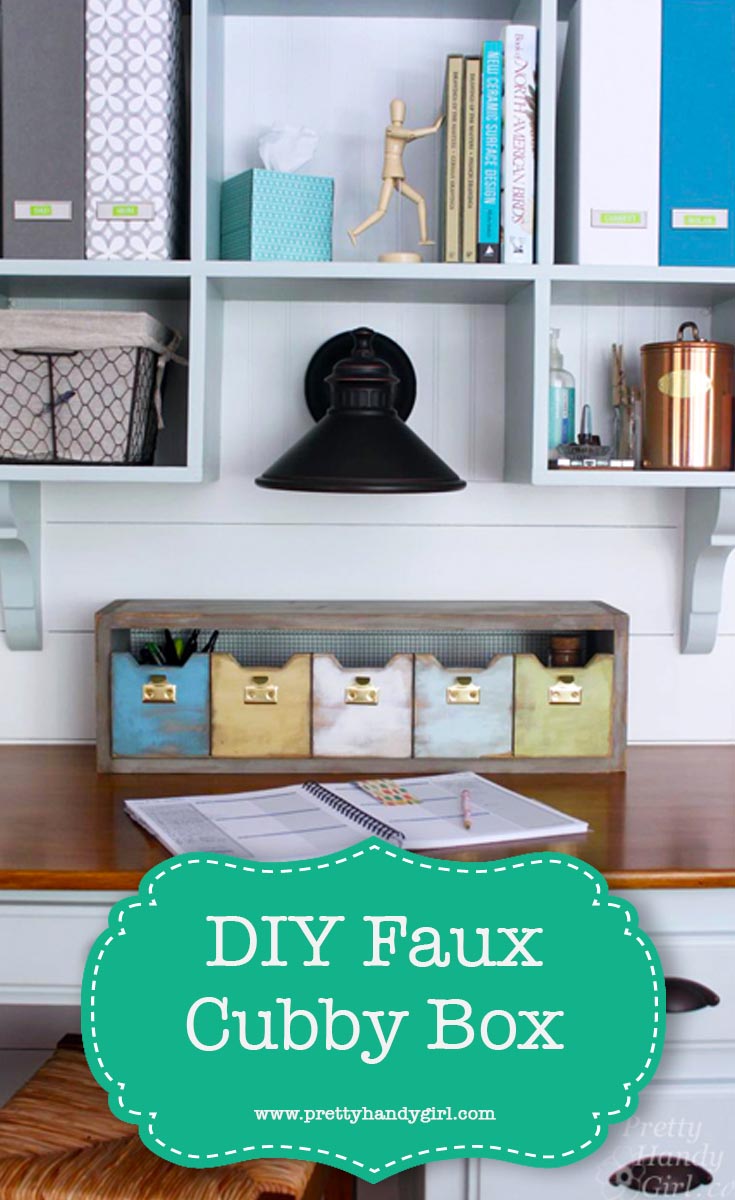
Pin for later!


Brittany you are so sneaky, you totally had me on this one! I love everything about this project, how cleaver it is, how versatile it is, and your beautiful paint job, the colors are perfect! I totally want to make one, it makes me smile!
Ha! Thanks Mindi.
What a darling idea!! I want all of these genius one board items everyone in the challenge has made!! Smart ladies!!: )
So deceiving, in a good way. I love it, and I want one now. Beautiful colors too.
Thanks Pauline. I aim to deceive!
What a creative idea, Brittany, that turned out great!
Oh my goodness, this is fantastic!!! Pinned and Inspired to make one, just have to buy some tools! :o) Thanks for the plans!
This is so cool! It seriously looks amazing!
Just as everyone, I thought they were individual boxes too! What a fabulous idea & awesome tutorial. I know I must have a place for this one! Thank you!
This is amazing. I, too, thought they were individual boxes and knew my measuring and woodworking skills would never be able to duplicate. However, the design, and your wonderful directions, make me think this will be possible. Off to look at the rest of your blog!
LOVE LOVE LOVE!!! At first I thought it was filled with the little boxes and thought, I bet I’ll never find those- then I scrolled down and saw how you did it! My husband insists on having the TV over the fireplace and no matter how I decorate the mantle all I see is the ugly cable box. I have tried several different ways to disguise it and none have worked. This is PERFECT! It will match my decor and the front can be folded down to access the box! I am so exited to get started on this!!!! Over from Kim Six Fix and am enjoying the tour!