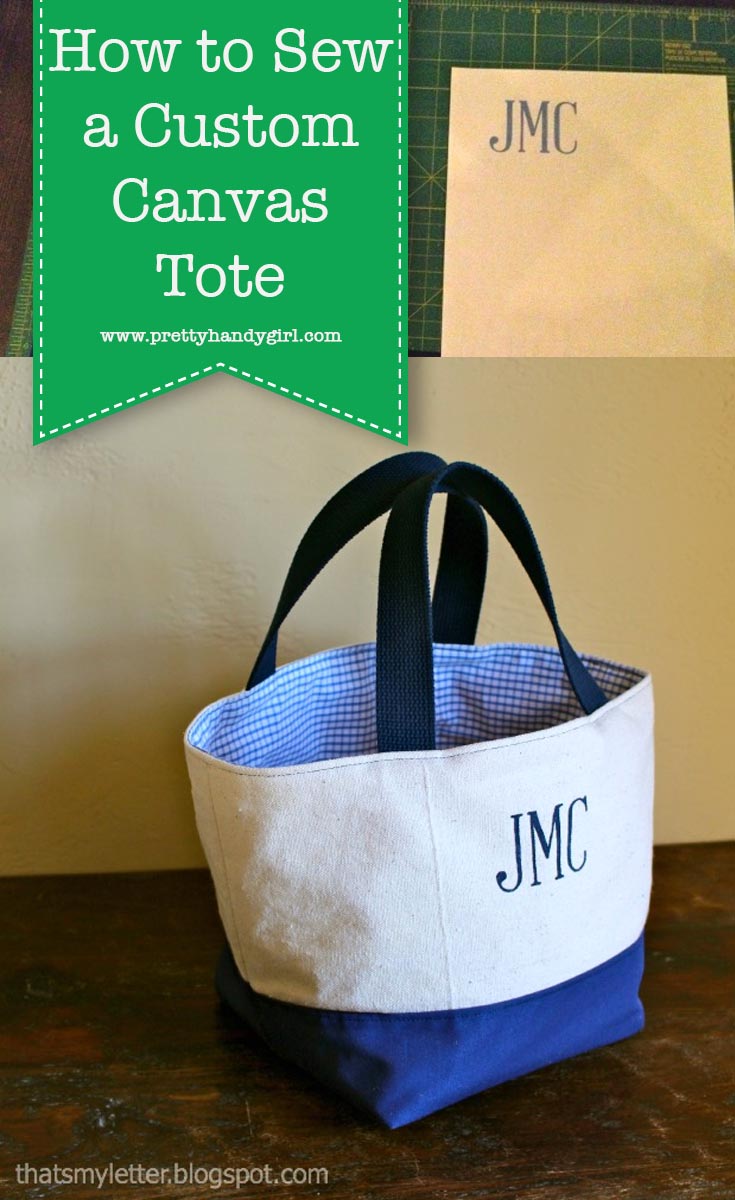
How to Sew a Custom Canvas Tote
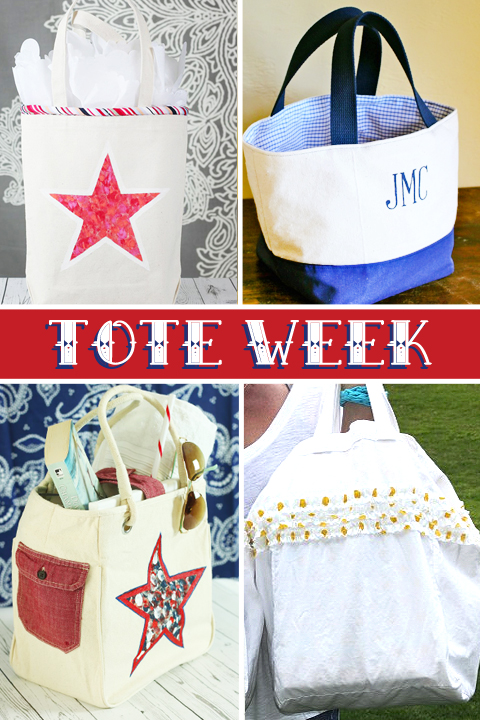
Hey guys! Do you know what today is? It’s the beginning of Tote Week! What, you had no idea? Tote Week here on Pretty Handy Girl is five days devoted to Tote Bags! Learn how to sew adorable tote bags and how to customize store bought tote bags.
If you’re just joining in here’s the line up:
- Monday: How to Sew a Canvas Tote Bag
- Tuesday: Dress Up a Store Bought Tote with Piping
- Wednesday: Reusable Tote Bag Sewing Tutorial
- Thursday: Customizing a Tote Bag with an Old Shirt
- Friday: 21 Ways to Make and Decorate a Tote Bag
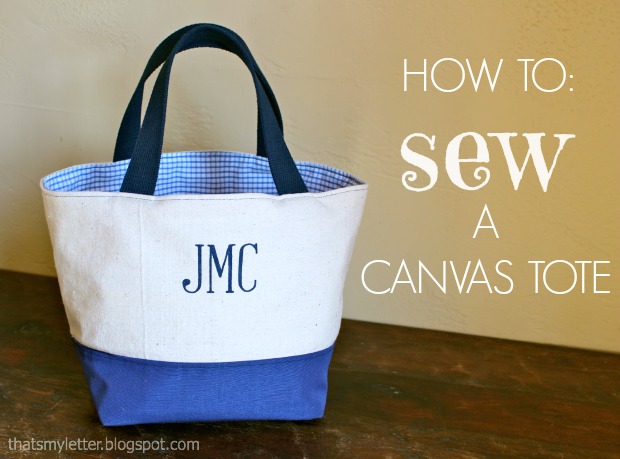
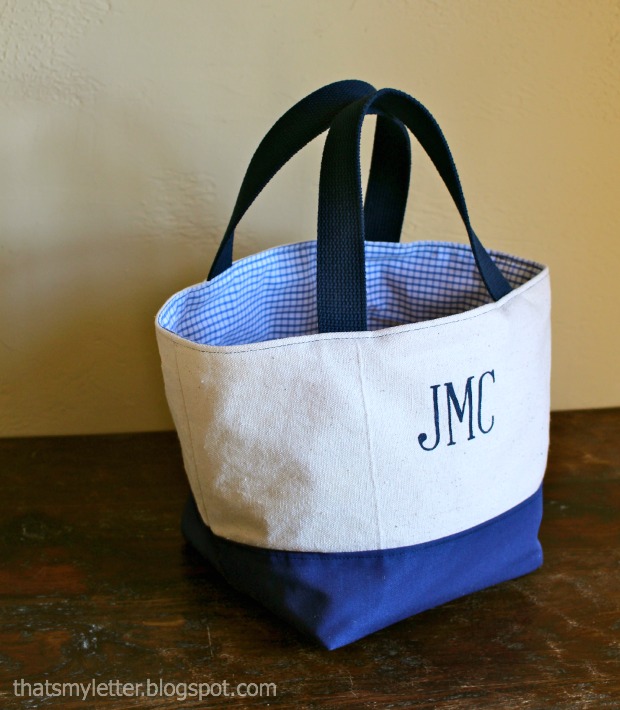
To start us off, Jaime is here to give you the basic sewing tutorial to make your own lined (and monogrammed) tote bag. Jaime is from That’s My Letter, a blog filled with DIY Tutorials. Today, she’s showing you How to Sew a Custom Canvas Tote complete with painted monogram:

This tote makes a great everyday bag or purse, just big enough for all the important stuff but not too bulky. The finished size is 16″w x 9″h x 8″ square at the base, and the handles extend about 6″ in height.

The tote is fully lined and includes an interior zippered pocket. The zipper is easy as pie I promise! I’ll show you how down below.
You can add any monogram or name to personalize the tote. Then you’ll be making canvas totes as gifts for all your friends.

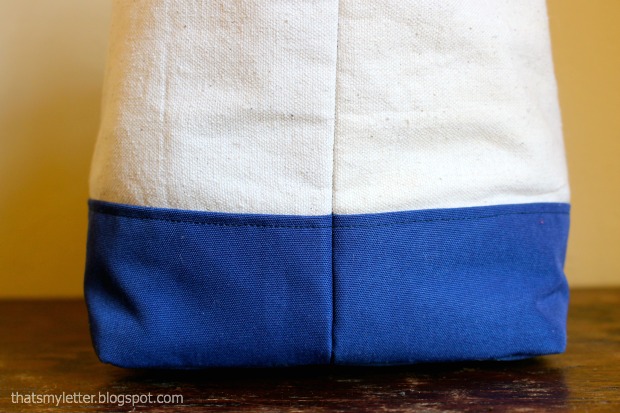
The square base makes for a nice wide tote and the canvas is super durable:
Materials:
- drop cloth canvas (1 yard)
- blue canvas (1/2 yard outdoor patio fabric Sunbrella or the like)
- lining (1 yard)
- medium weight fusible interfacing (1 yard)
- firm interfacing – 9″ x 9″
- 1 1/2″w cotton webbing (1 yard)
- 9″ zipper
- lightbox
- small paintbrush
- acrylic paint
- sewing machine, thread to match, iron, seam ripper
Materials Cut List:
Base:
- 1 – blue canvas 9″ x 9″
- 1 – lining 9″ x 9″
- 1 – drop cloth canvas 9″ x 9″
- 1 – firm interfacing 9″ x 9″
Body:
- 2 – drop cloth canvas 10″h x 17″l
- 2 – med. fusible interfacing 10″ x 17″
- 2 – lining 10″ x 17″
- 2 – blue canvas 4″h x 17″w
Handles: 2 – 1 1/2″w cotton webbing @ 17″l
Instructions:
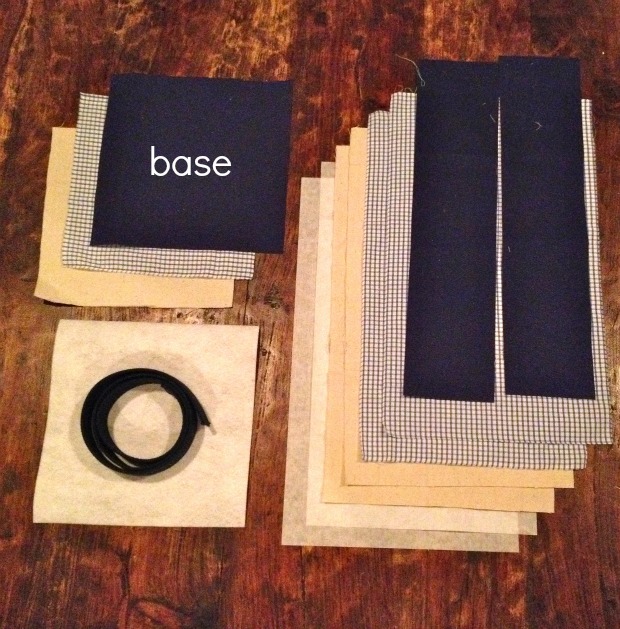
Step 1: Cut materials (see cut list above).
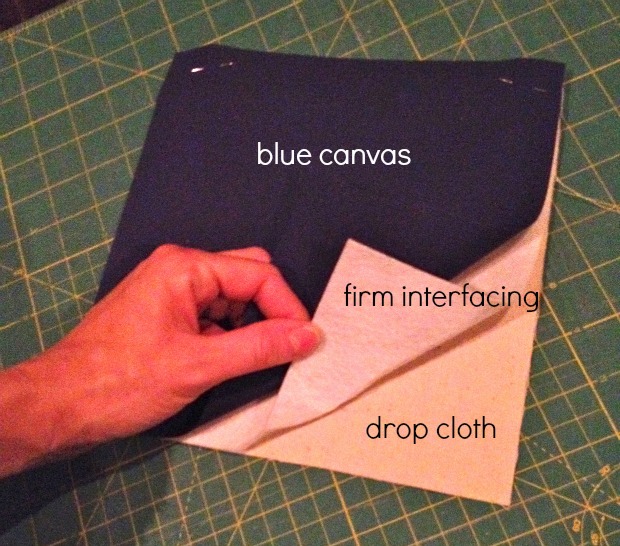
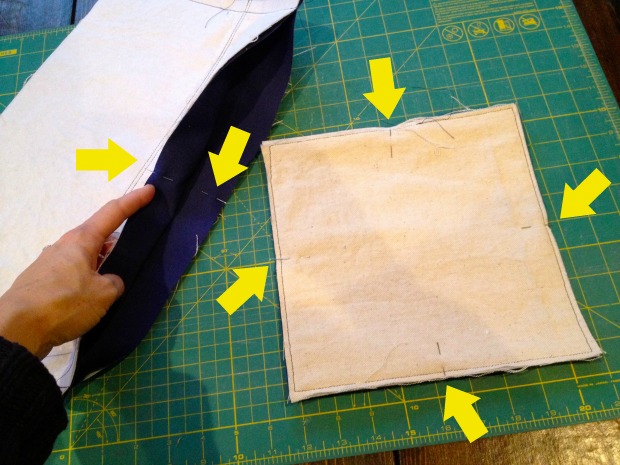
Step 2: Prepare base. Sandwich drop cloth, firm interfacing then blue canvas.
Step 3: Flat line stitch around the base sewing 3 layers together. Set aside.
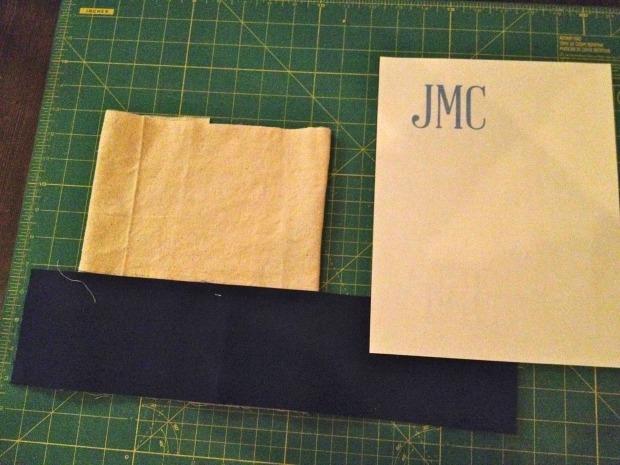
Step 4: Painting the monogram. Print out desired letters (I used Abraham Lincoln font at 175 point) and determine center of one piece of drop cloth.
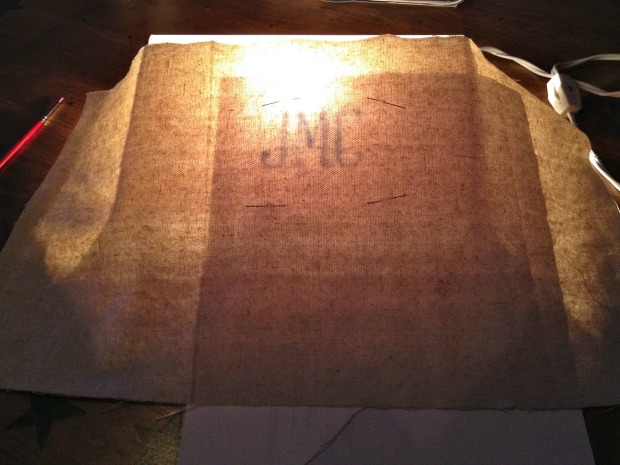
Step 5: Place the printout behind the drop cloth and pin in place. Put everything on top of a lightbox and you should see the printed letters coming through the drop cloth.
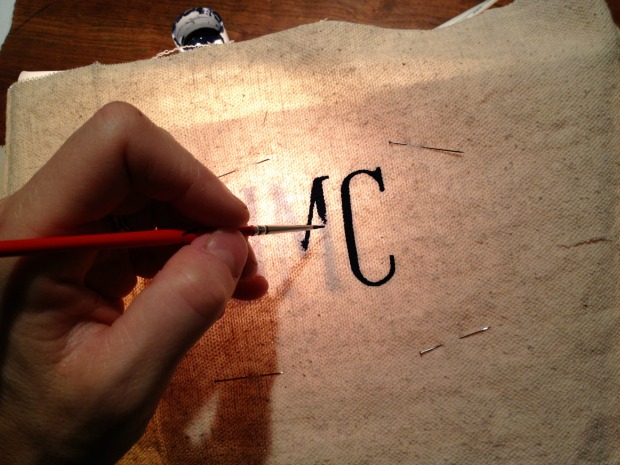
Step 6: Paint the monogram following the outline of the printout.
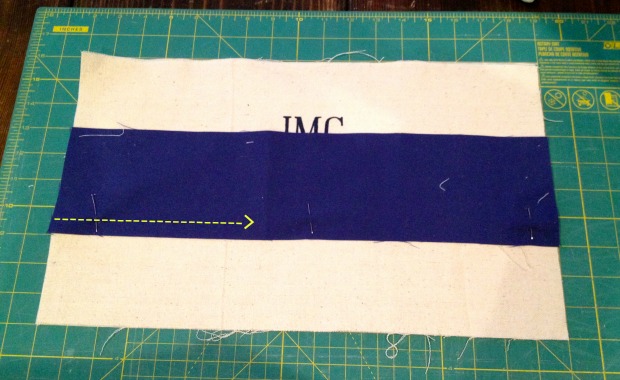
Step 7: Prepare to add the blue canvas strip to the tote body. Pin the blue canvas 3″ from the base of the drop cloth and sew a straight stitch with 1/2″ seam allowance.
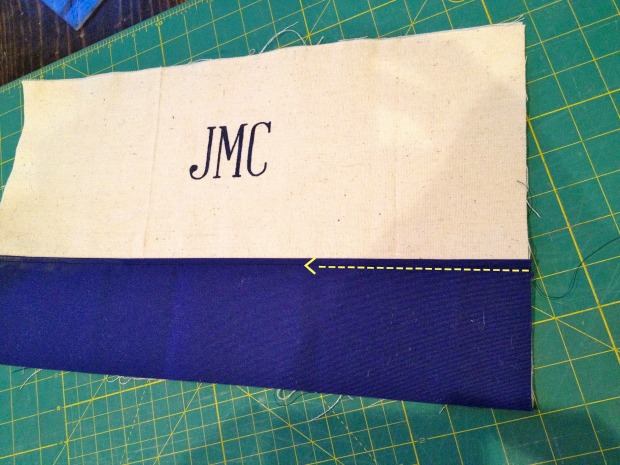
Step 8: Press blue canvas down flat to drop cloth and top stitch in place. Repeat Steps 7 & 8 for tote body back.
Step 9: Place tote body front and back right sides together and sew side seams using 1/2″ seam allowance.
Step 10: Mark center of tote body front and back with a pin. Mark centers of each side of square base with a pin.
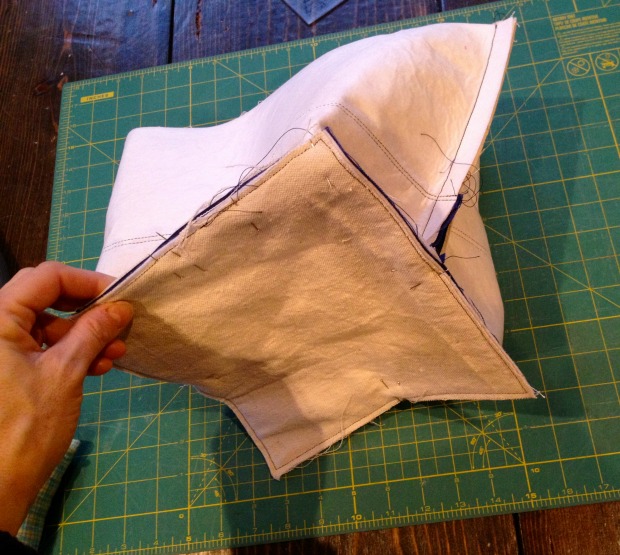
Step 11: Match up center points of front and back with centers of square base then match up side seams with centers of other 2 sides. Sew base to tote body with 1/2″ seam allowance.
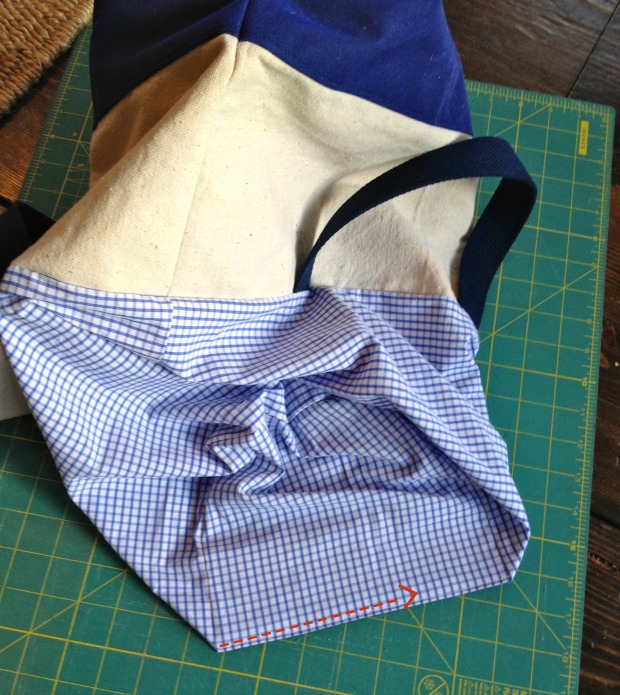
Step 12: To ease corners make a small clip (at arrows) in tote body.
Repeat the above process (Steps 9 – 11) for the lining sewing the front and back together and then add the square base. BE SURE TO LEAVE ONE SIDE OPEN AT THE BASE!! (See Step 17 picture down below.)
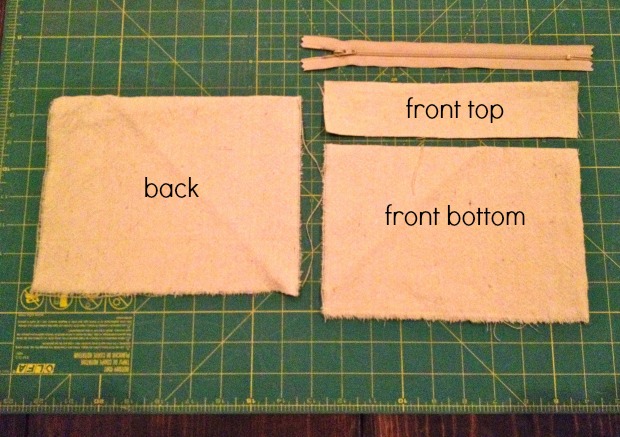
Step 12: Prepare interior zippered pocket. Cut drop cloth as follows:
- 1 – back: 7″h x 9″w
- 1 – front bottom: 6″h x 9″w
- 1 – front top: 2″h x 9″w
- 9″ zipper
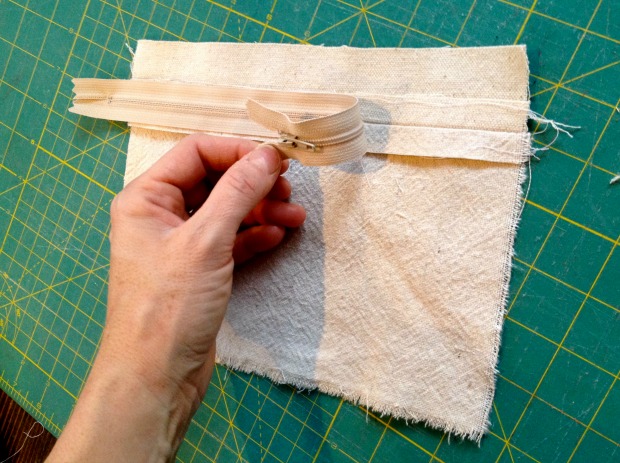
Step 13: Sew the front lower and upper pieces together with 1/2″ seam allowance. Press seam open and place zipper face side down directly over seam, pin in place. Using your zipper foot sew zipper in place.
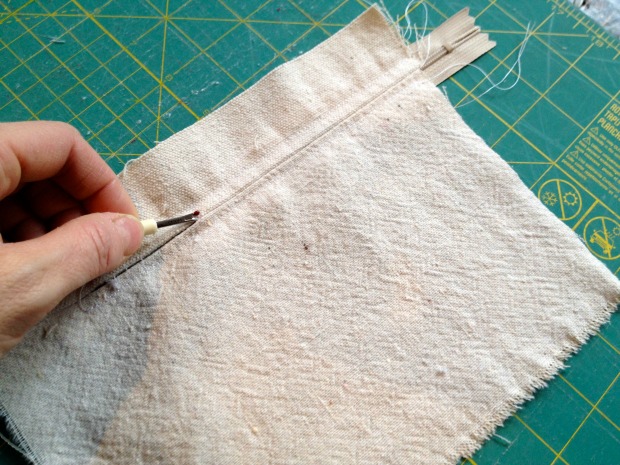
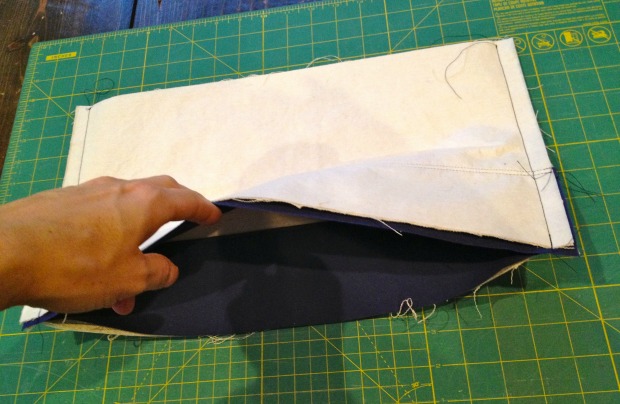
Step 14: Flip over to right side, using a seam ripper GENTLY open the seam to reveal your zipper!

Step 15: WITH YOUR ZIPPER PARTIALLY OPEN place right sides together and sew around all four edges using 1/2″ seam allowance.
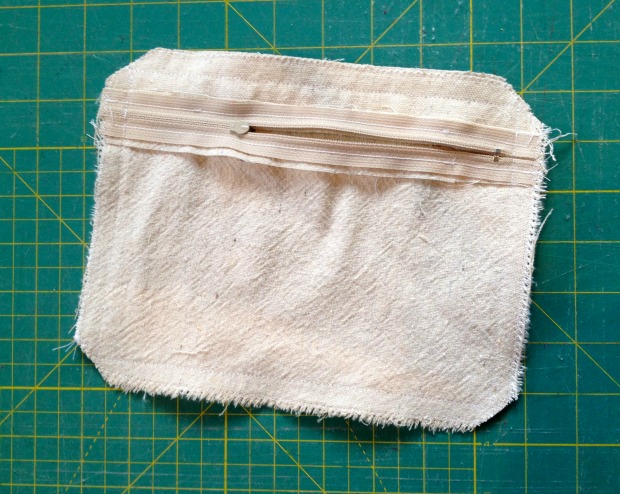
Step 16: Clip the corners and turn right side out through the zipper hole.
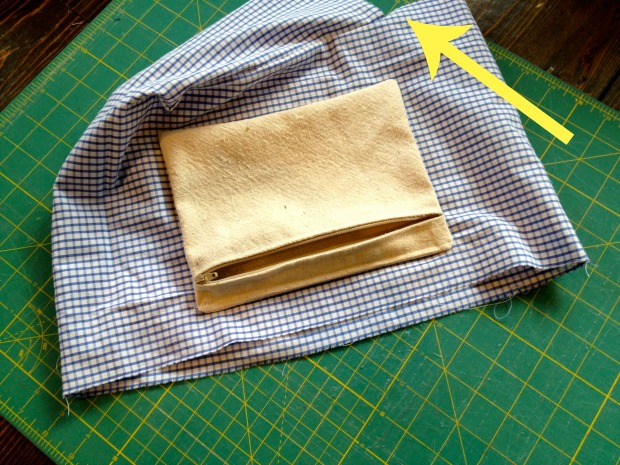
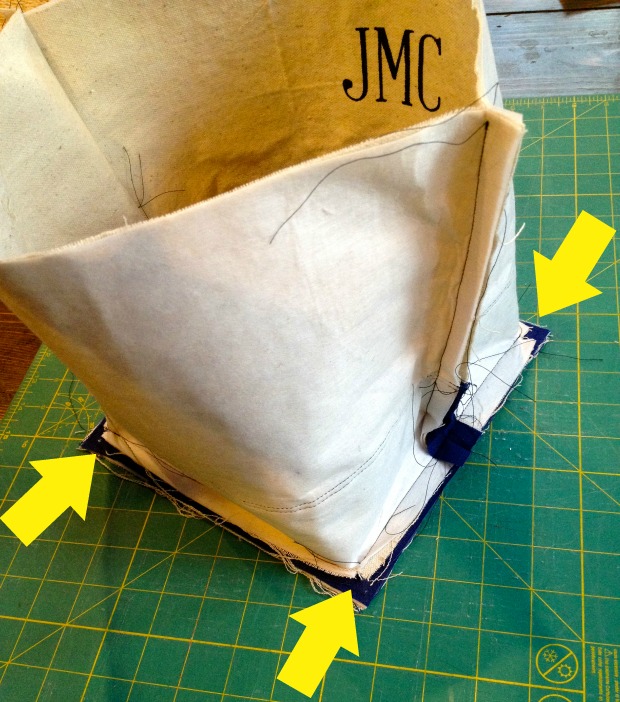
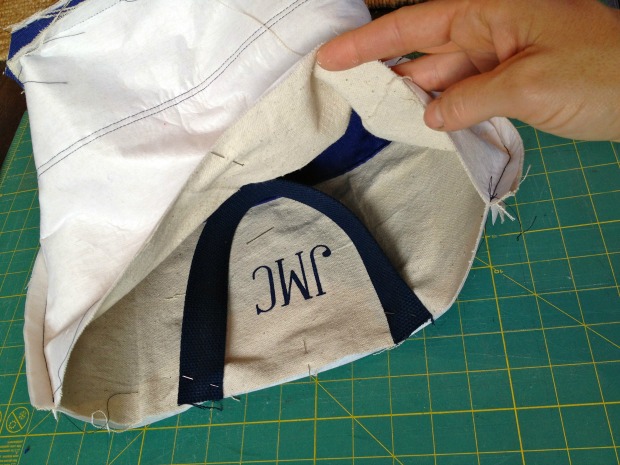
Step 17: Determine placement of zippered pocket on the lining and top stitch in place. (You can barely see in the picture the opening in the lining base at the top of the picture.)
Step 18: Pin the handles onto the drop cloth exterior, both sides equidistant from the center.

Step 19: Shove the lining (right side out), down into the tote (right sides together). Pin top edge lining up side seams. Sew together using 1/2″ seam allowance.
Step 20: Turn tote right side out through hole in lining. Top stitch lining base hole shut. Push lining down into tote.
Top stitch top edge of tote using contrasting thread for a finished look about 1/4″ in from top edge.
Thanks for sticking with me, it’s worth the effort! Happy tote making.

Pin for later!

Wow lovely custom tote bags! I really appreciate the step-by-step tutorial you did.
Love the bag; however, I do not trust myself to free hand a monogram. I am going to buy a stencil and take that route. Do you know how many inches the initials. I googled it – but come up with nothing all that helpful. thanks!
Hi there! Fab pattern! One question: If I want to make a bigger size, can I simply add inches to each piece as appropriate? Thanks so much!
Absolutely. You might want to cut your pieces out and dry fit them together with pins to see if it’s the size you want.
Thanks so much! Going to get to work on my giant tote bag this week! Will post when complete. I can’t seem to find the perfect one to carry all my stuff… 🙂
I’d like to use a little bit heavier fabric. Do you have any suggestios or resources to figure out the type of sewing machine I would need?
Hi. That looks great! Can you tell me if it can be washed, and if the paint will stay on after washing?
Thanks
I’m a HUGE fan of Jaime’s work! Thank you for sharing such a great tutorial. Though my sewing skills are nonexistent, I hope to be able to sew a bigger version of this canvas tote for library runs – I never leave the library with less than 40 books for my voracious little readers in the house.
🙂
Amazing bag! Thank you for the detailed tutorial!
Pretty cool bag here Brittany & Jaime! Love those nautical colors, great tutorial. Thank YOU!