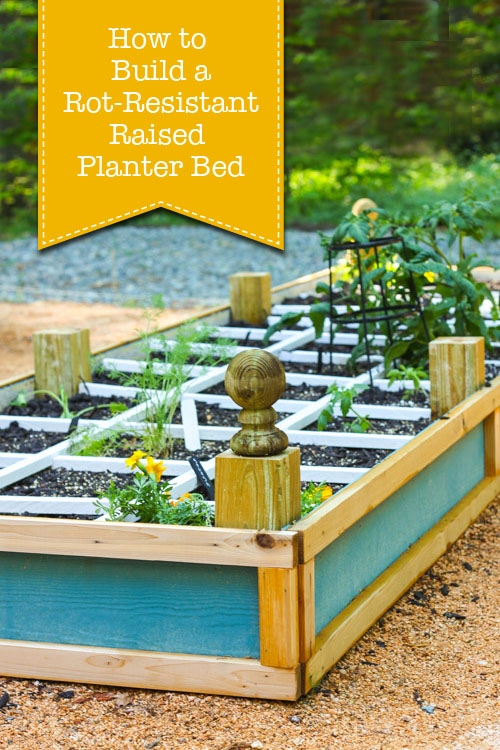
How to Build a Rot-Resistant Raised Planter Bed
I’ve wanted to start a vegetable garden for three years! Each Spring something comes up and it doesn’t happen. This year is the year, I told myself. I’m going to build Raised Planter Beds that are rot-resistant (because who wants to build anything that has to be re-built after a few years. Not me!) Luckily, the spot I had in mind gets plenty of sunshine throughout the day.
I spent some time researching and pricing the materials for this project. My criteria was:
- Rot-resistant
- Minimal chemicals for rot-resistancy
- Easy on my budget
- Attractive to look at
These Raised Rot-Resistant Planter Beds check off all those requirements!
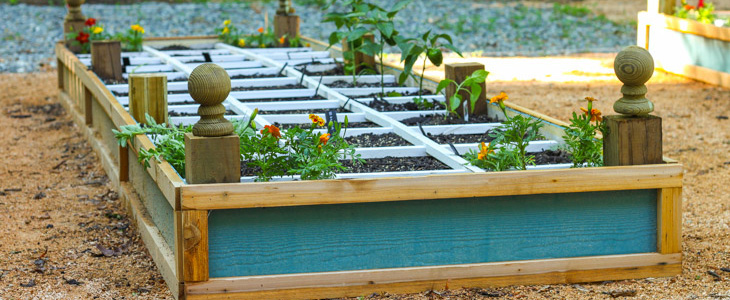
The main material for the beds is fiber-cement siding aka Hardi-Plank. The material is a cement-based product meant for exterior application on houses. It is also bug-resistant which means it should hold up to an apocalypse.
The one negative about fiber-cement siding is that it is very flexible and cannot be used without a structural support. To solve that problem I decided to add a beautiful cedar trim on the outside of the siding. And internally, I created support with pressure-treated 4×4’s and an internal 2″x4″ pressure treated support. (These are the only chemical-treated lumber I used in this build. If you are concerned about leaching, you can prime your lumber before using it in your planter bed. Instead of priming, I chose to plant flowers closest to the posts and plant the vegetables further away.)

Are you ready to learn how to Build your own Rot-Resistant Raised Planter Beds?
Before we get started, let’s thank the guys at EcoScraps for sponsoring this post.
What? You haven’t heard of EcoScraps? This company is awesome! They are saving the planet one bag of garden product at a time. Seriously, Dan and Craig (the founders) were in college at an all-you-can-eat buffet and were disgusted by all the wasted food. They devised a plan to convert restaurant scraps and waste into natural and organic compost soils and plant food. In 2017, EcoScraps will keep 75 million pounds of food from landfills by turning it into compost (aka black gold for your garden.) You rock EcoScraps!
You can read more about their products when it’s time to fill that beautiful planter bed you built. Right now, let’s get building!
(I’ve included affiliate links for your convenience. I earn a small percentage from a purchase using these links. There is no additional cost to you. You can read more about affiliate links here.)
Tools & Materials:
- 1 – 4″x4″x 8′ pressure-treated post
- 3 – 8″ x 12′ hardi-plank (cement siding)
- 6 – 1″ x 1 1/2″x 12′ cedar planks (if not available, you can rip them from a 1″ x 8″x 12′ plank on a table saw)
- Box of 1 1/2″ galvanized fastener nails
- 8 – 2 1/2″ wood screws
- Miter Saw
- Table Saw
- 4- finial post caps
- Drill
- Drill bits
- Hammer
- Finish nailer
- 1″ and 2″ finish nails
- Paint
- Paint roller
- Compost
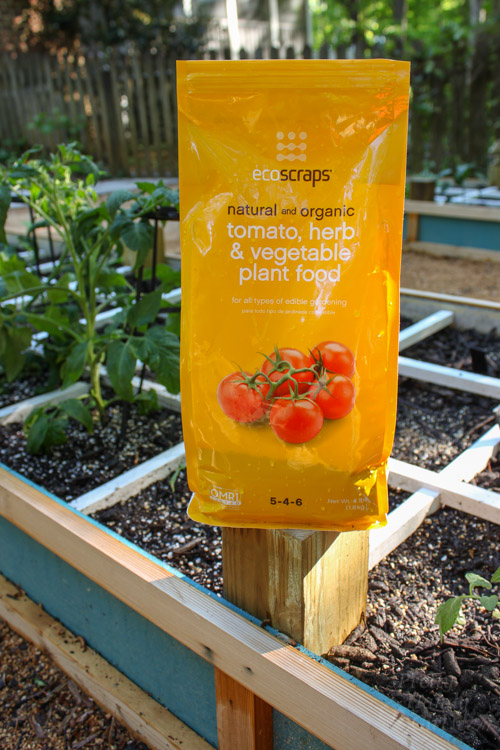
- EcoScraps Tomato, Herb and Vegetable Plant Food
Cut List:
- 2 – 8″ x 12′ hardi-plank cement siding
- 2 – 8″ x 3′ hardi-plank cement siding
- 12 – 1″ x1 1/2″ x 5″ cedar trim
- 4 – 1″ x1 1/2″ x 38″ cedar trim
- 4 – 1″ x1 1/2″ x 12′ cedar trim
- 8 – 4″ x 4″ x 12″ pressure treated posts
- 2 – 2″ x 4″ x 3′ pressure treated lumber
Preparation:
Cut your lumber per the cut list above. Cut your Hardi-Plank siding to size. (Note: You may want to use an old blade or a masonry blade in your saw for cutting. The cement siding can dull your blade.)
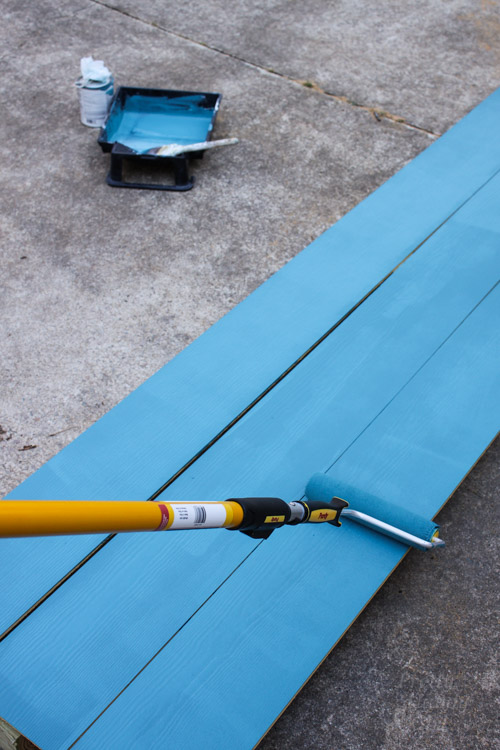
Paint your siding the color of your choice. I used Calypso Blue by Benjamin Moore. Allow the siding to dry.
Instructions for Assembly:
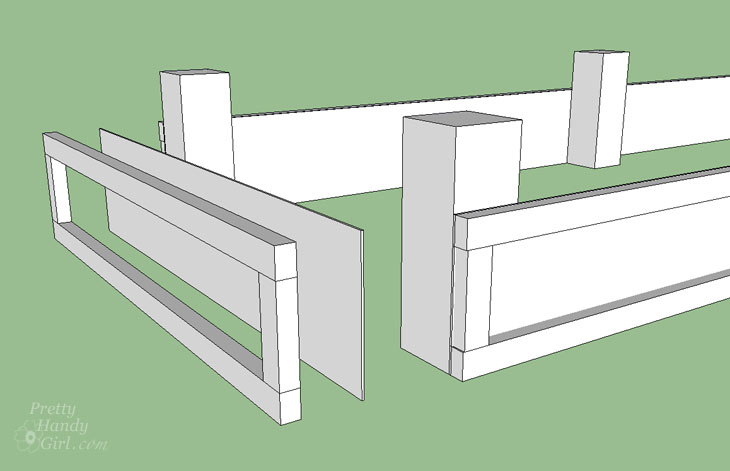
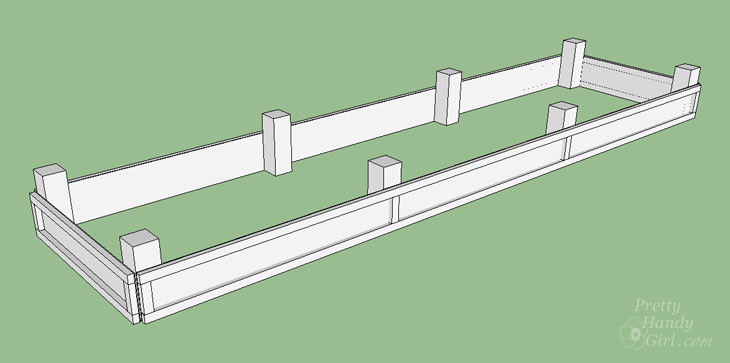
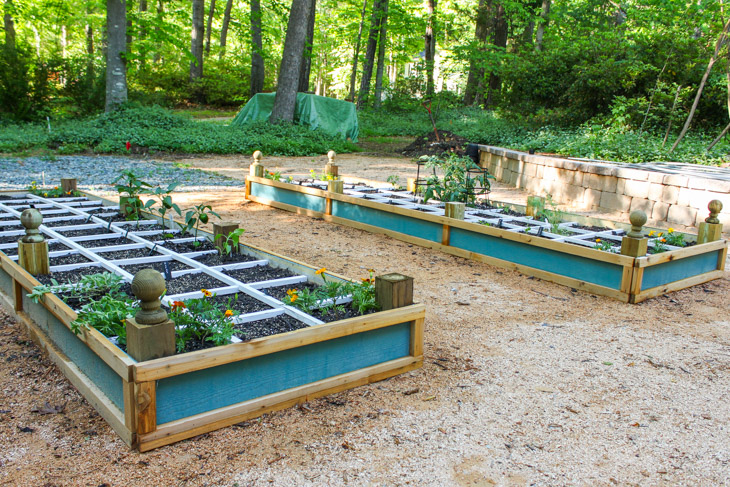
Line up four 4″x4″x12″ posts on the ground. Lay your hardi-plank siding on top of the posts. Line up the siding with the bottom of the posts. Space one post at each end and the two posts in the middle. The middle posts will line up at 4′ and 8′
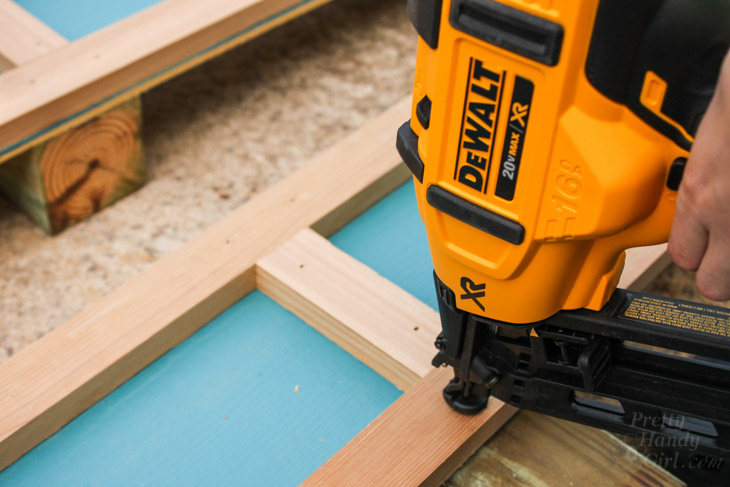
Nail the siding to the 4″x4″ posts. (Or enlist your little laborers to do it for you. LOL.) Be careful not to nail the nails too deep or it will crack the cement siding.
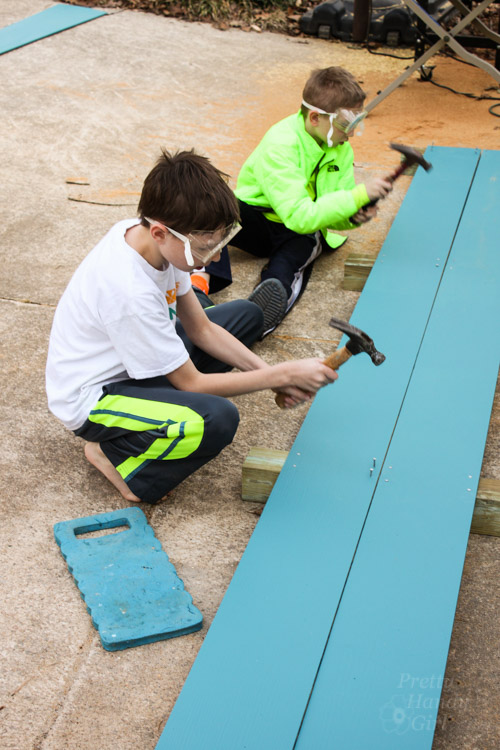
Repeat for the opposite side.
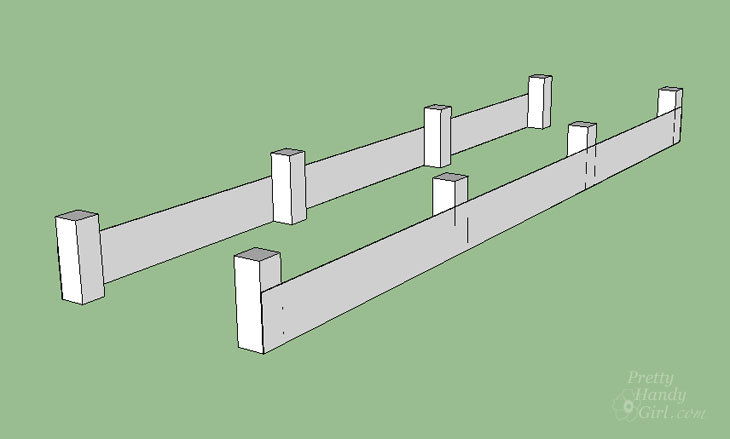
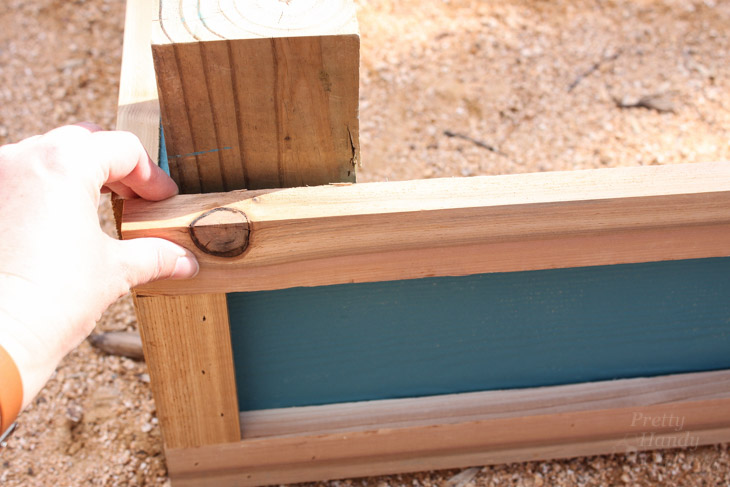
Lay out the cedar trim pieces on top of the siding.
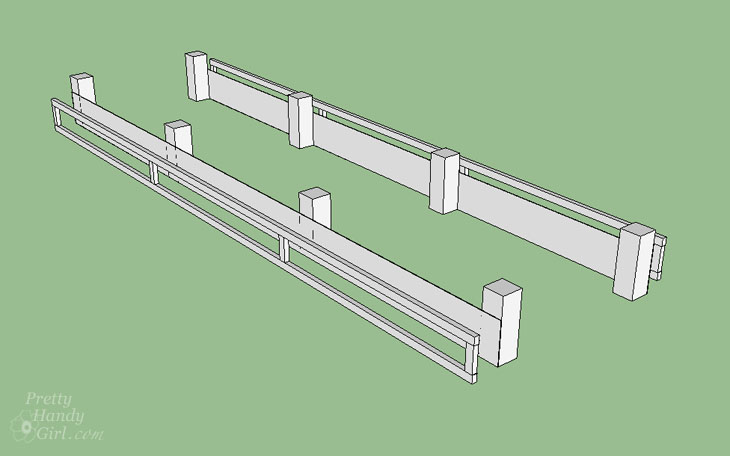
Nail the 12′ lengths of cedar trim to the top and bottom.
Nail the 5″ pieces on the sides and at the 4′ and 8′ mark (where the posts are.) See diagram below:
You should have the two sides of your planter bed completed now.
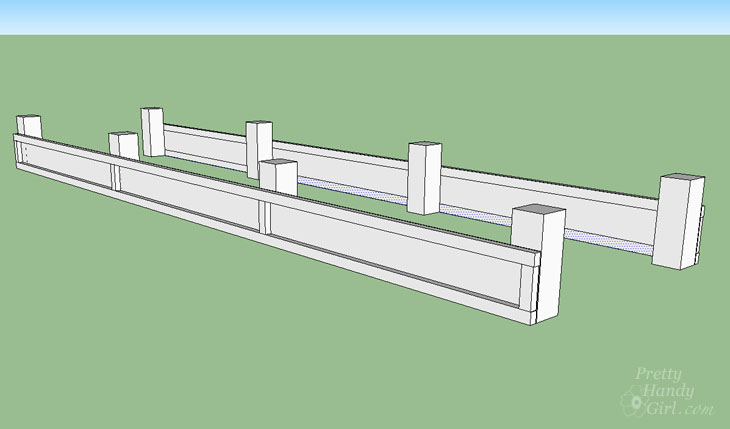
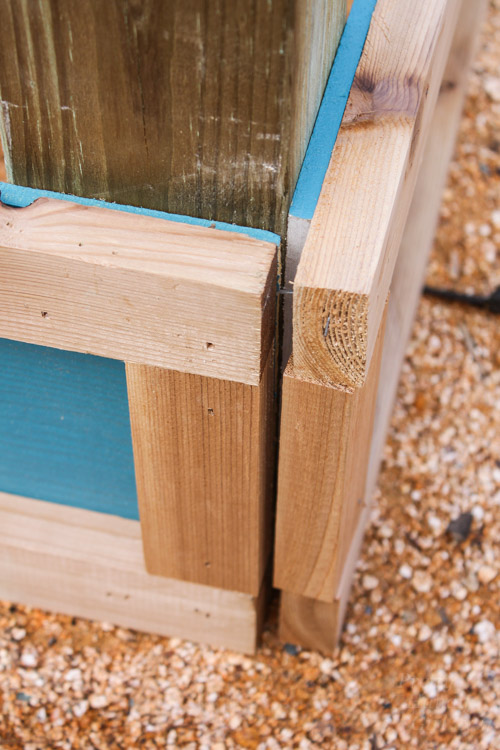
Position the two sides 3′ apart. Line up the 3′ section of hardi-plank siding against the edges of the 4×4 corner posts.
Nail the siding to the corner posts.
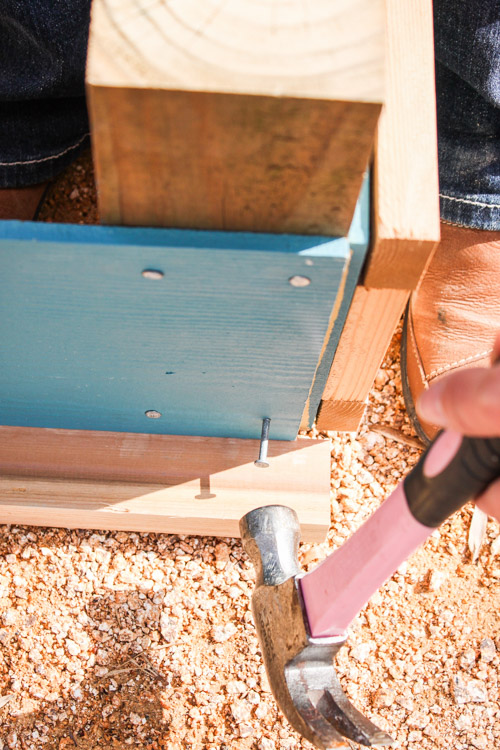
Line up one of the 1″ x 38″ pieces of cedar on the bottom of the siding. Nail it into place with finish nails.
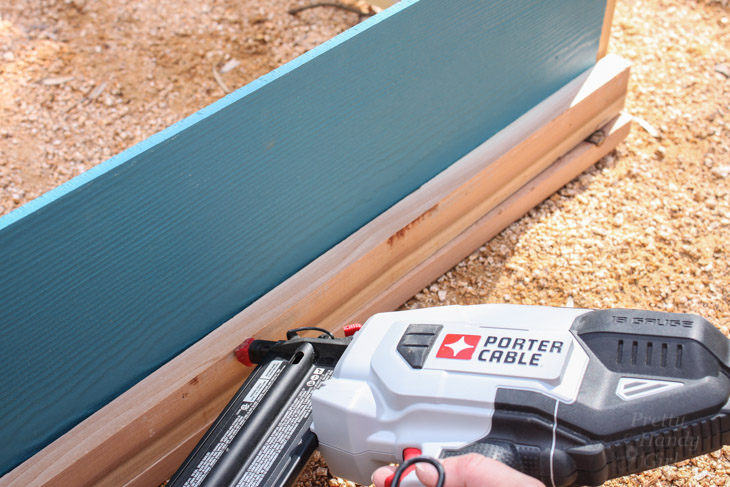
Next, nail the 1″ x 5″ cedar trim pieces over the ends of the siding and into the adjoining sides of the planter bed.
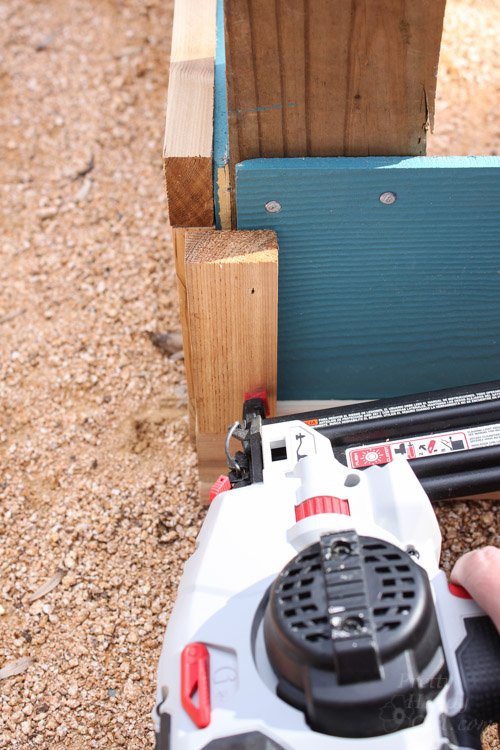
You may have a slight gap, but that’s okay. I won’t tell anyone if you don’t.
Position the remaining 1″ x 38″ piece of cedar trim at the top of the siding and secure with finish nails.
Now that the one end is secured, repeat for the opposite side.
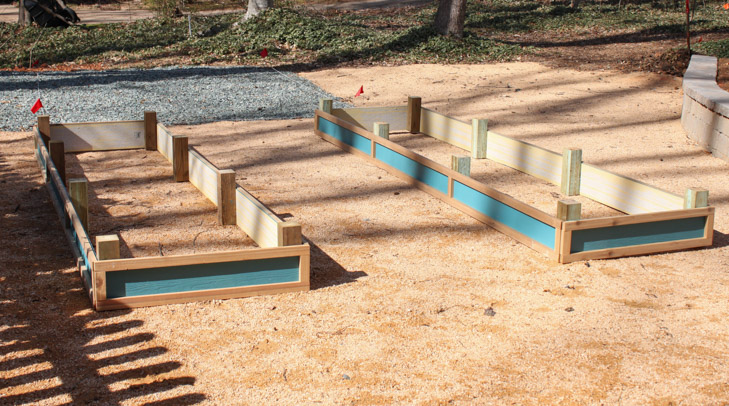
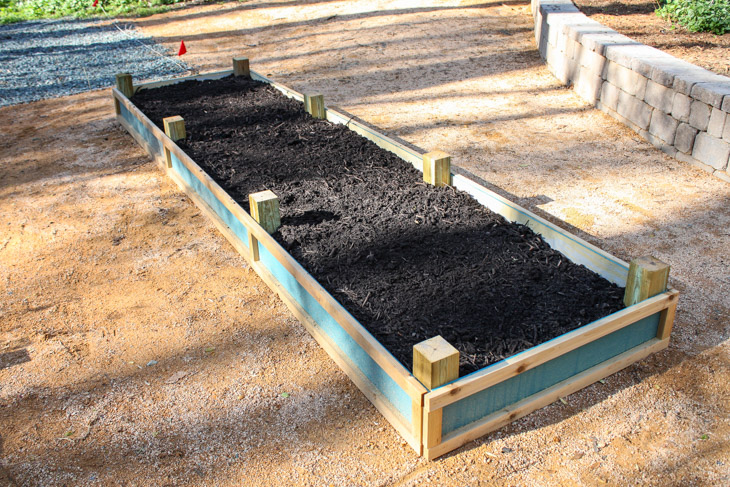
Your bed should look like this:
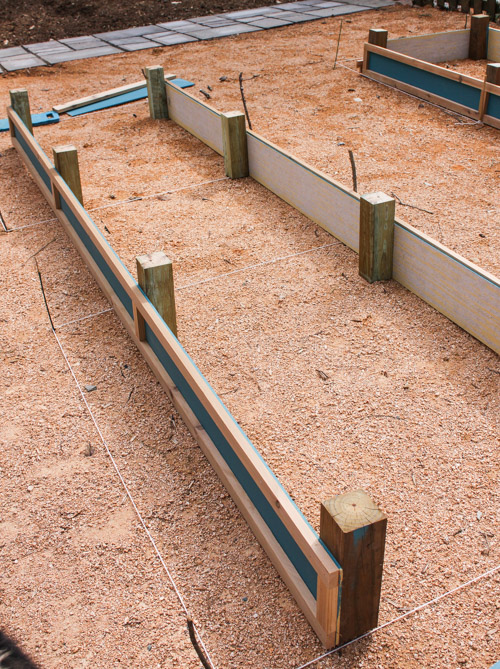
Before filling the planter beds with dirt, you must secure two 2″ x 4″ x 36″ support pieces inside the planter with 2 1/2″ wood screws.
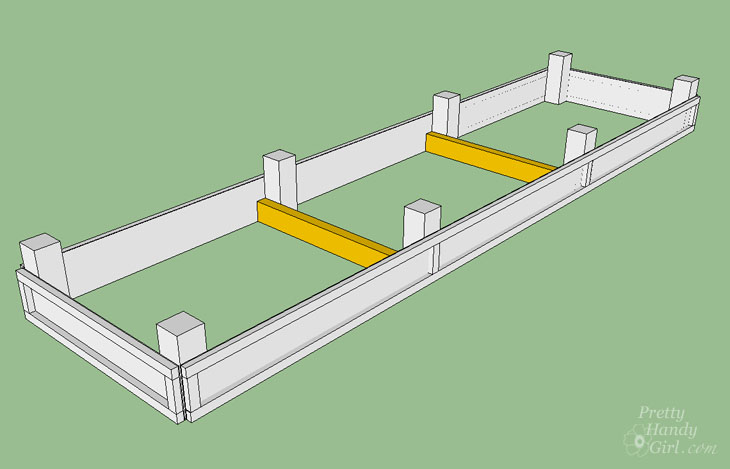
The support pieces are installed at the 4′ and 8′ location inside the planter. This prevents the sides of the planter bed from bowing out.
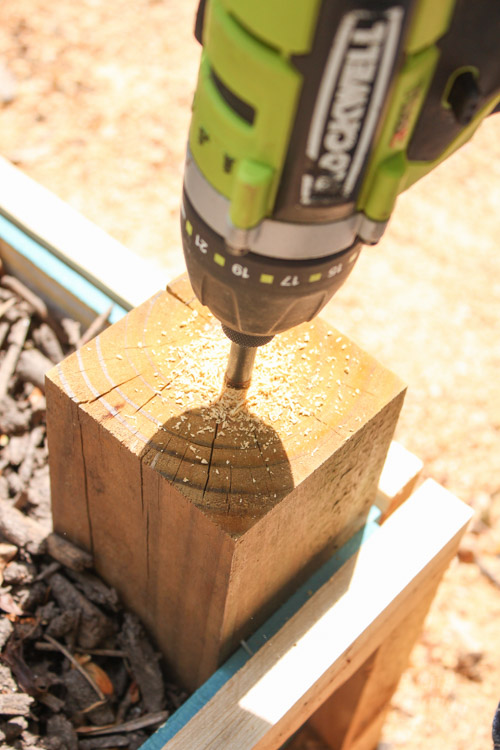
For a decorative touch (and for adding trellis supports later) drill a hole into the 4×4 posts of the planter bed.
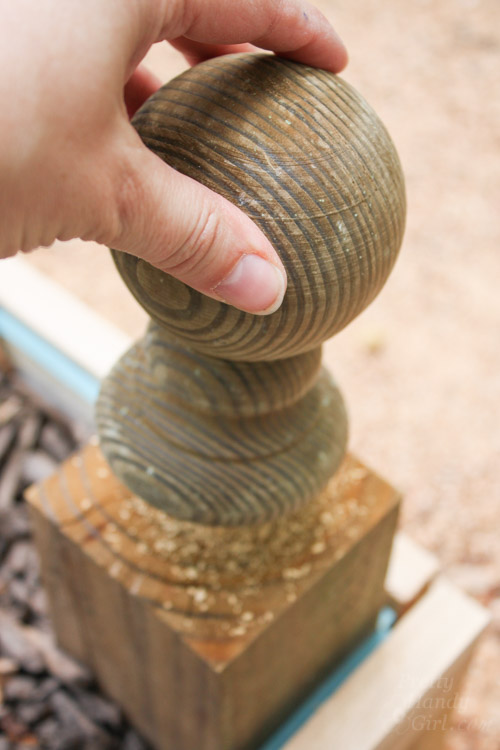
Add a finial post cap to the corner posts.
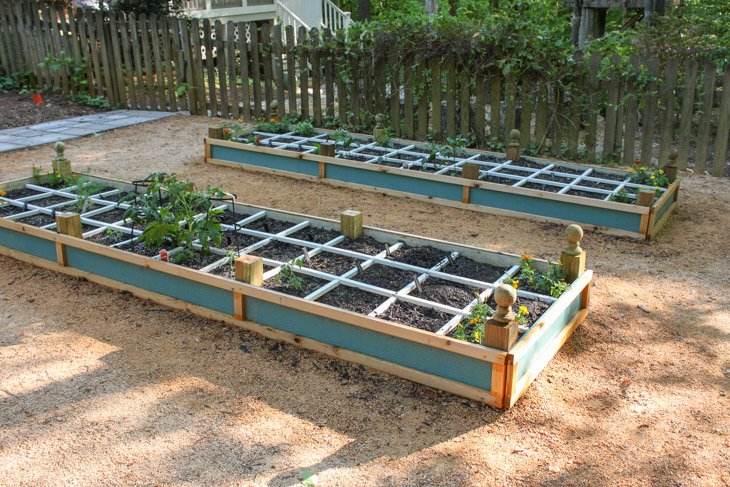
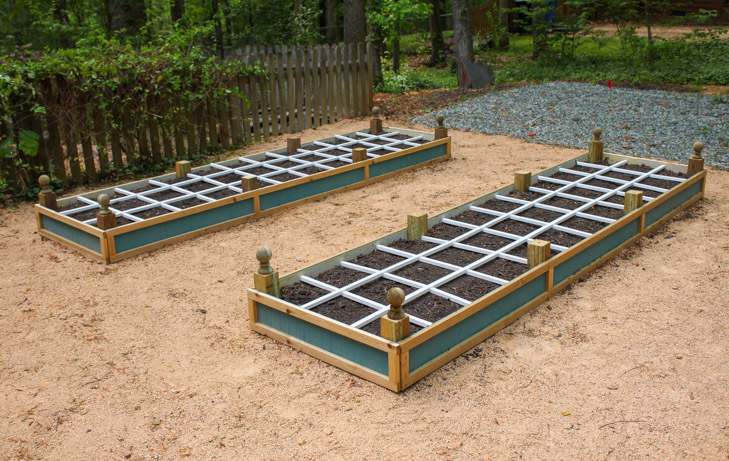
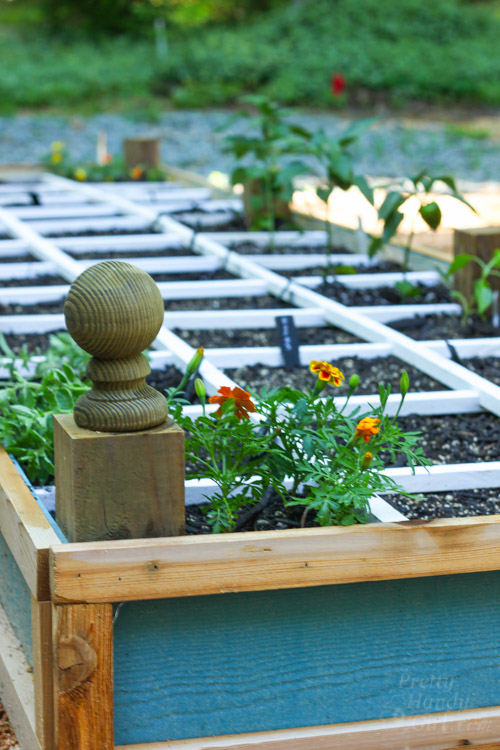
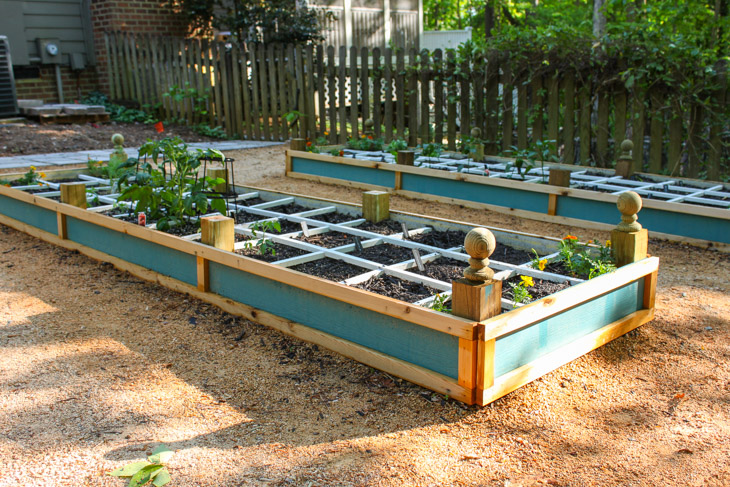
Will you look at that handsome planter bed!
Tips for Planting Your Garden:
Your raised beds may be well built, but what you fill the beds with is equally important for a successful garden. I was recently introduced to EcoScraps and love that they re-use food scraps to create their own Natural and Organic plant foods, compost and soils (now available at Lowe’s and Walmart.)
Fill your planter with good quality compost. Ideally you’ll want to use EcoScraps Raised Bed Garden Mix. (Because I needed a lot of compost, I chose to buy it from our local county yard waste facility by the pick up truck full. Consequently, I had to mix in several bags of vermiculite to improve the soil quality in my beds.)
Time to feed my little baby veggies!
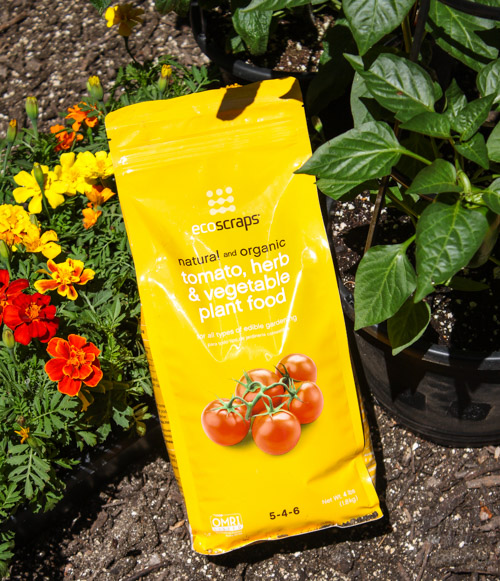
The EcoScraps Tomato, Herb & Vegetable plant foot can easily be spread by hand around your plants…
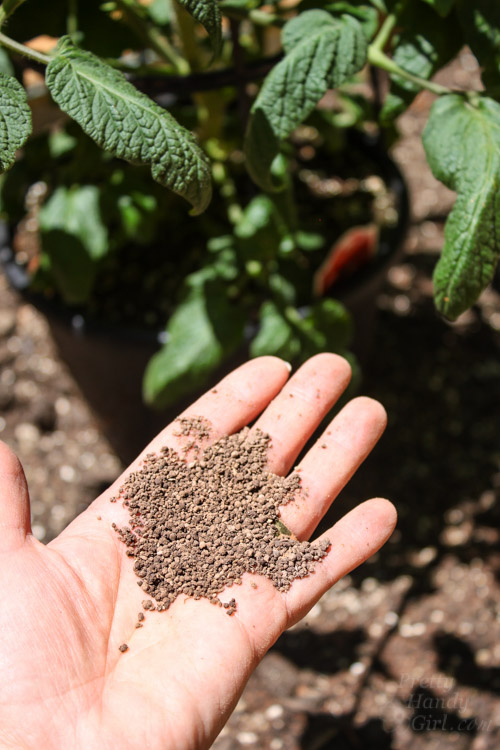
…or you can work it into your soil before planting.
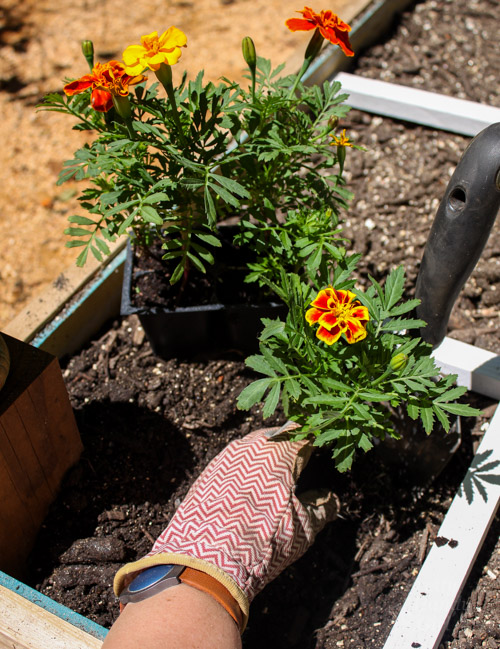
Add your plants to the raised bed.
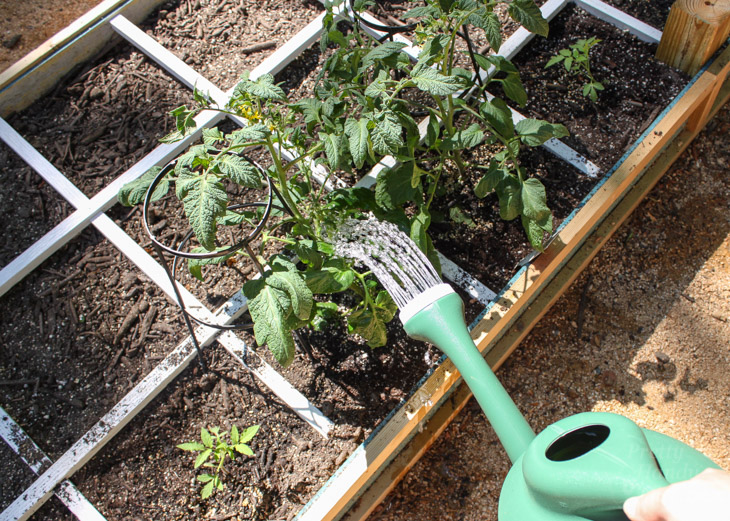
Water the plants and soil well. Water daily until the plants are thriving. Then keep an eye on them and water when the soil starts to dry.
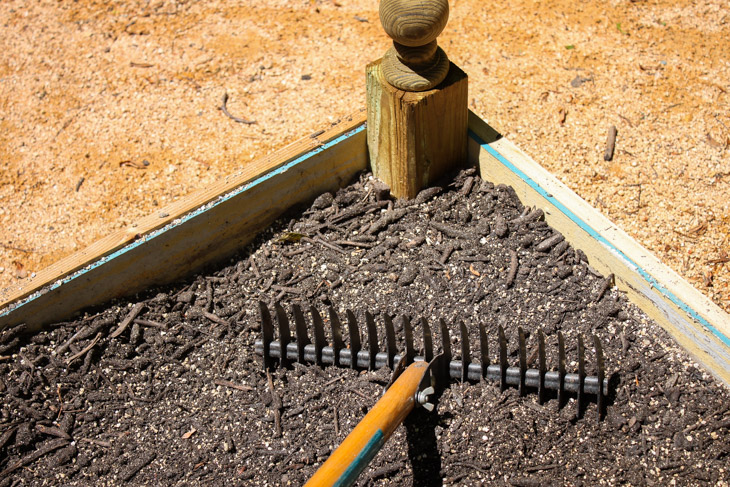
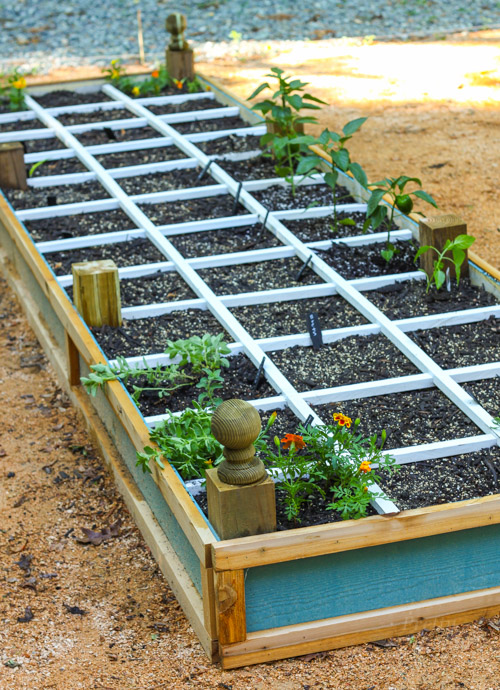
Do you see those pretty sections? I’ve utilized the Square Foot Gardening method (affiliate link). If you are a Square Foot Gardener, you’ll appreciate the tutorial I wrote to create those grids that won’t rot.
In my squares, I have some sections that are started from seed and others that were purchased as plants. Plus, there are a few self-starter plants from my compost pile! Hello, pumpkins.
For more information on using EcoScraps, check out these tips for using EcoScraps and how the product is made.
You’ll also love these ideas for building and utilizing raised garden beds.
What do you have growing in your garden?
Stay tuned for another gardening tutorial! Here’s a tutorial to make vegetable trellis supports for all my climbing vegetables on a cheap budget! And don’t forget to read how to make the grids that look pretty and won’t rot.
You may also like this ultimate guide to composting!

![]()
Disclosure: This is a sponsored post for EcoScraps. I was compensated for my time and for writing about EcoScraps. I was not told what to write, all opinions are my own. As always, I am extremely particular about the brands I work with. Only my favorites make it to the pages of this blog.

Thank you for posting this. I have extra Hardi board left over from our house. I was doing google searches to see if it was safe for gardening, which is how I came across your post. Glad to know I will be able to put it to use.
There are a number of different products available. I agree with Barry that the fiberglass reinforced sheet, commonly used as a substrate for tile in a wet area like a shower, is completely rot proof. I constructed six raised beds with this material about five years ago and have absolutely no rot. I used no trim on my raised beds, and instead tilted them inward at about a 10 degree angle to resist the outward pressure of the soil. Corners were finished and held in place by aluminum “L” sections long enough to be hammered into the ground. Filling the beds with soil provided the pressure needed to hold the sides of the bed securely in place. No fasteners of any kind were used and the beds have withstood the elements (including a couple of hurricanes) for five years with little wear. Overall, I love this material for raised garden beds.
Thanks for the update Brittany, I’m looking at making raised garden beds with hardie plank and haven’t found much information about it. I’ve painted both inside and out with a safe outdoor paint and will line inside with garden weed mat too, but not doing a timber frame at all as termites are a big problem up on the north Queensland area here.
Quite cheap compared to say timber or galvanised raised beds, here in Australia a 2m x 1m galvanised bed costs around $400, this will cost around $100-120
I think. If it can last for 4-5 years or more hopefully that’s pretty good I’d say. I appreciate your post, very encouraging for me. Cheers Joanne in Aussie Land
Kathy is correct that builders leave hardy plank up 6” on housing because it is designed to be water repellent but not water proof. Hardy board concrete is mixed with wood pulp so it will eventually break down in a garden bed. Painting it like she did in this tutorial would help it last longer, as would lining the bed to prevent moisture from reaching the walls but a better alternative would be to use cement board instead. It wouldn’t be quite as cheap but the blend contains fibreglass instead of wood pulp so it is in fact rot proof as this article incorrectly claims.
It’s been four years and the hardie plank is holding up fine.
Why not put the posts on the outside to help prevent rot?
Because I liked the inside look better, but you could do that.
I was planning to do this, and then I heard from several people who tried it and said it rotted out nearly as fast as wood. Builders keep it 6 inches above the ground, as it is not supposed to touch the ground. So I am still looking. Wood rotted out in 2 years.
Kathy, I haven’t had any issues with our’s rotting and it has been over two years since I made the planter beds.
This is a great tutorial! Is the material listed for one or two garden beds?
Also, do you need to line the bottom/floor with anything to keep water from draining too easily? I live in the desert, and my yard is gravel. Will this work there? Or will the gravel keep the soil from holding water?
Thank you!
One bed. Given your conditions, you may want to put a weed barrier or something to slow the water absorption down. Even lots of newspapers laid down might help. You do want your soil to drain, but not too quickly.
I was hoping you would give us some idea of what it cost to do this.
I love the idea of using siding for the walls of the planters! It gives a great pop of color. We have a parking strip outside our house (the area between the street and the sidewalk) that is about 8 feet wide. I’d love to make some planter boxes, and these would give it some curb appeal as well!
Thanks Vineta! Definitely send me a picture if you do make one.
Hi PHG, I had just read your post when I saw an article in The Family Handyman April 2016 magazine for a new product called CemDeck by PlyCem. This is a decking material made from fiber cement. It might be the answer to the panels not being rigid and requiring reinforcement. You can check it out at architecturalproducts.com/plycem.
Carla, wow, that’s interesting! I’ll have to look for that product. Thanks for sharing.