
How to Frame a Dated Mirror
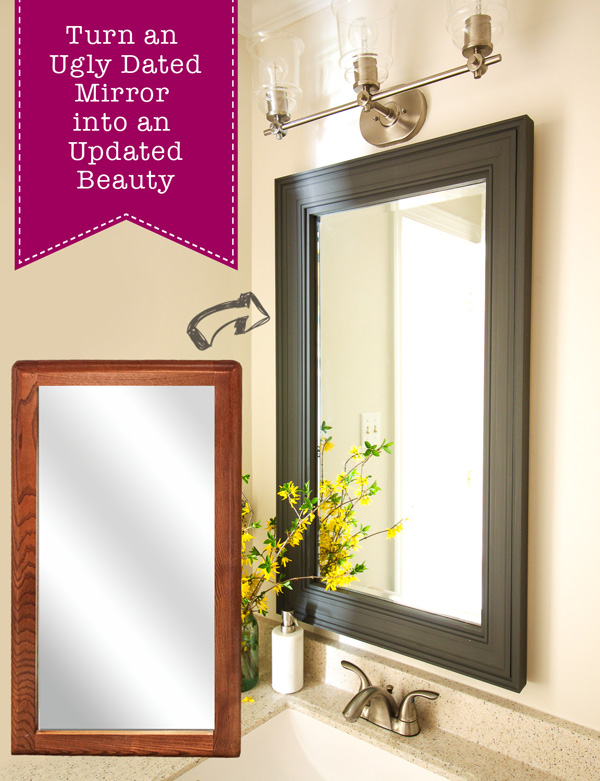
Have you ever wished you could ditch that ugly dated mirror and replace it with a beautiful updated mirror? You may have held off doing so for several reasons. Your budget may be tight or you can’t stand to throw away a perfectly good mirror. Learn how to frame a dated mirror.
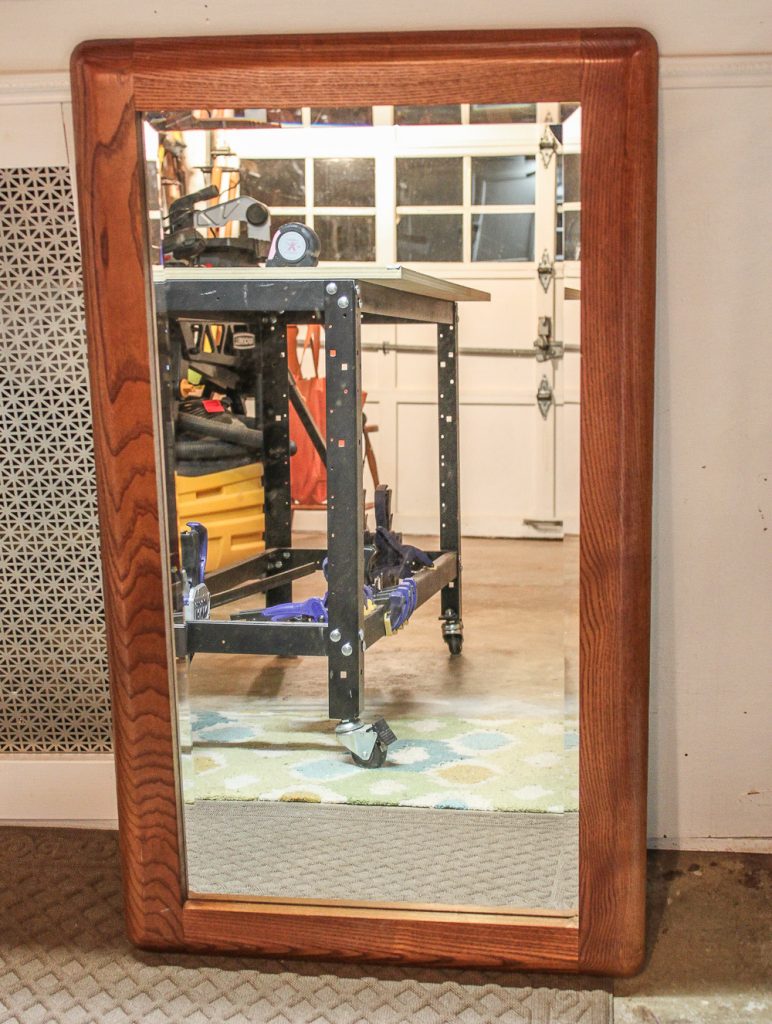
Today I have the answer for both of your concerns! How to Frame a Dated Mirror for next to nothing! Behold this ugly specimen mirror straight from the 1980’s:
Want to see how to turn it into this beauty?

Does your bathroom need a life buoy to save it from a bygone era? Do you wish you had the budget to replace that dated mirror over your vanity?
Wait no longer, today is the day to learn how to build a new frame for that dated mirror.
(I’ve included affiliate links for your convenience. I earn a small percentage from a purchase using these links. There is no additional cost to you. You can read more about affiliate links here.)
Materials:
- Old mirror with solid wood frame
- Door casing
- Backer band moulding
- Wood glue
- 1 ½” Finish nails
- Pencil
- Miter saw
- Painter’s tape
- Chalk paint (Chalk paint doesn’t need a primer base)
- Paint brush
- Wax or Top Coat
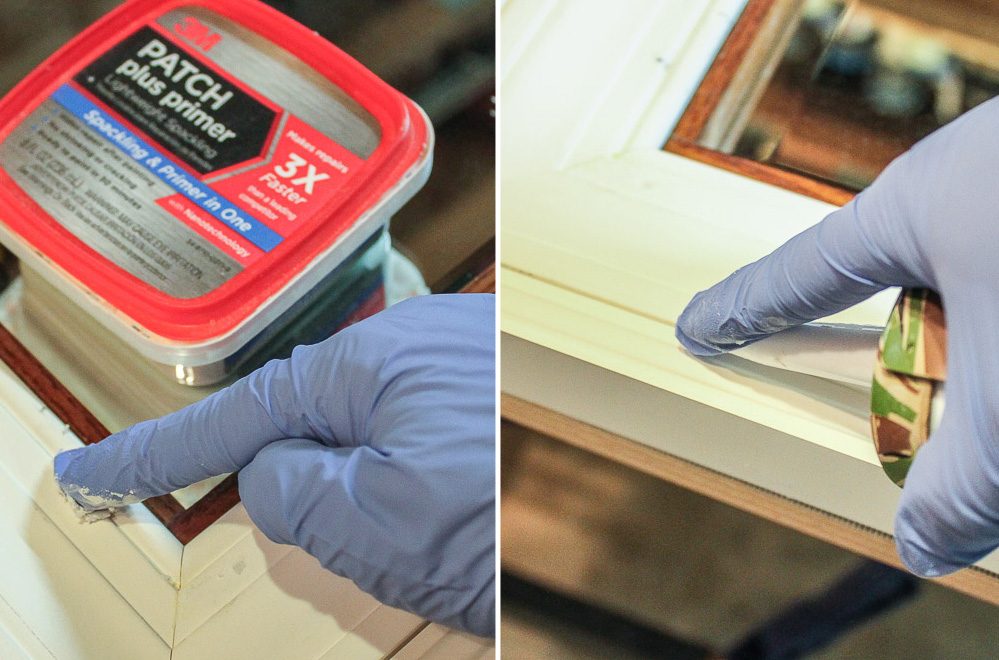
- 3M Patch Plus Primer
- Paintable caulk
Instructions:
Shop for inexpensive mirrors in thrift stores, Habitat ReStore, Craig’s List, yard sales or flea markets. Look for a mirror with a solid wood frame and good condition glass. Shop at your local home improvement store for decorative moulding to frame your mirror. Window and door casing is a good base moulding to use. Chose a thicker moulding like backer band to cover the sides of your mirror. Alternatively, you could use a simple piece of lath to cap the edges.
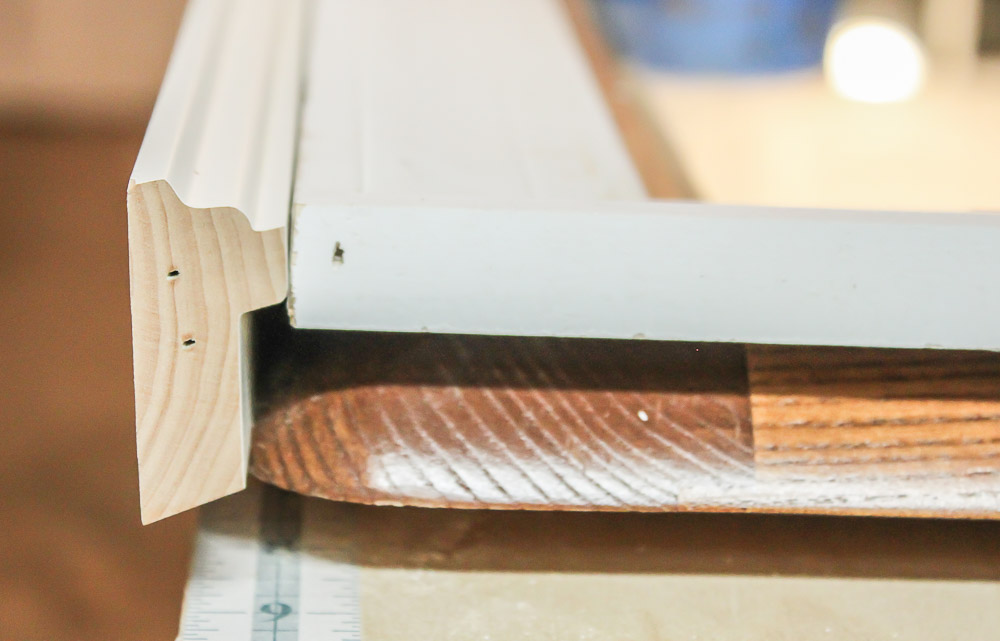
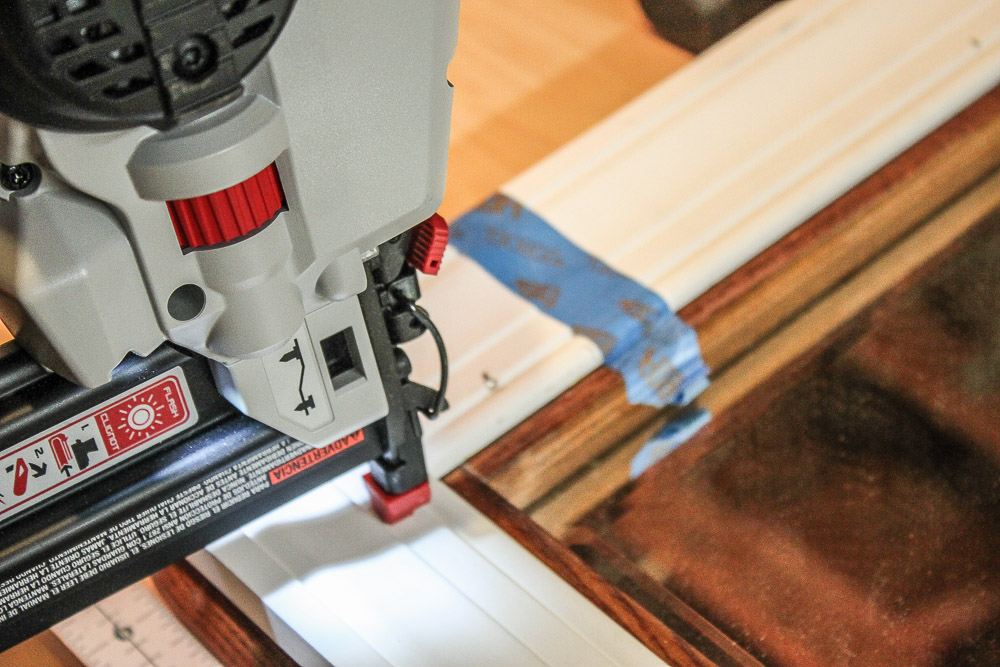
Measure and cut your moulding to fit around the mirror. Leave 1/4″ of the old mirror showing for more visual interest. Tape the moulding in place to make sure your miter cuts are a perfect fit.
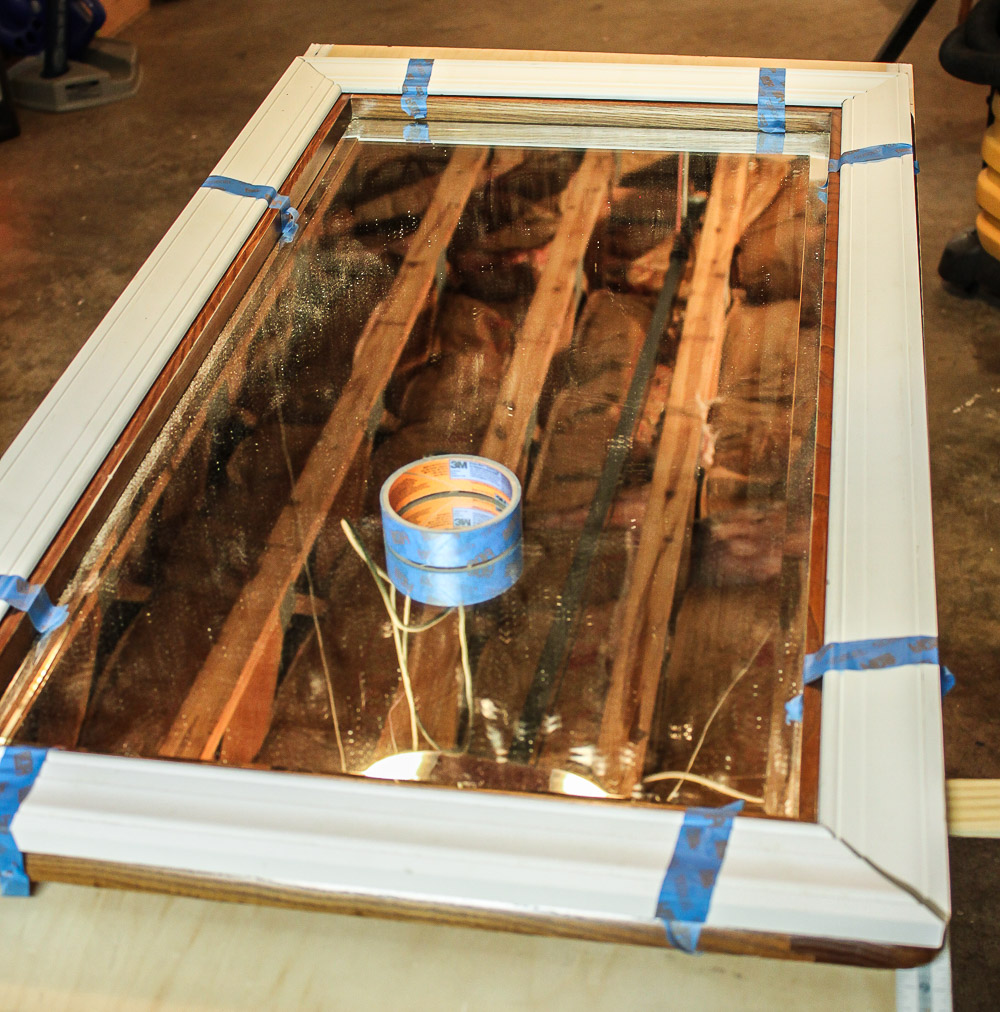
Lift up the casing and add a line of wood glue onto the mirror frame.
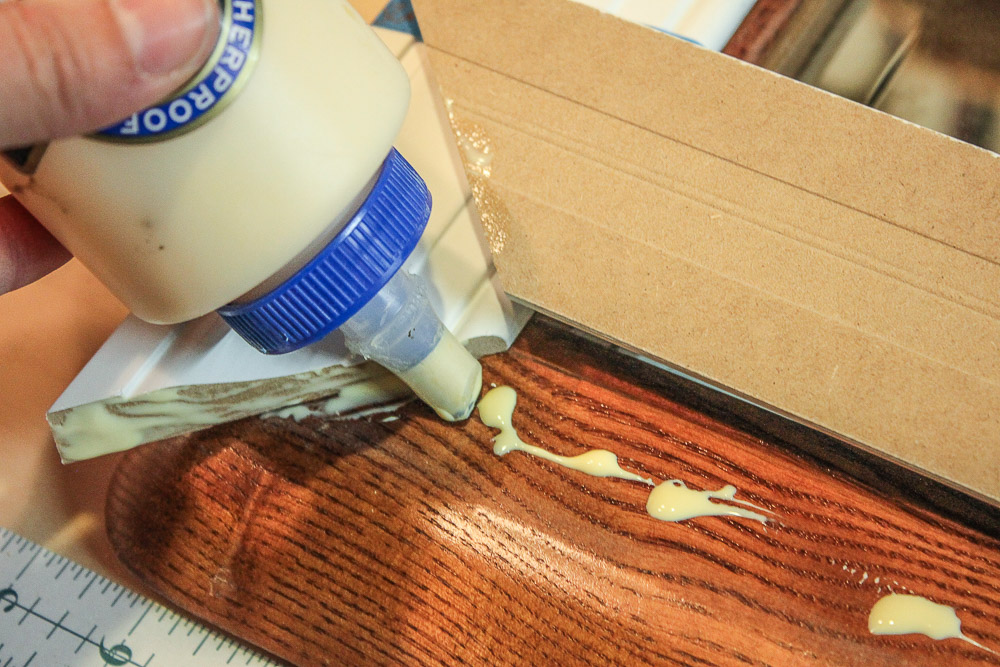
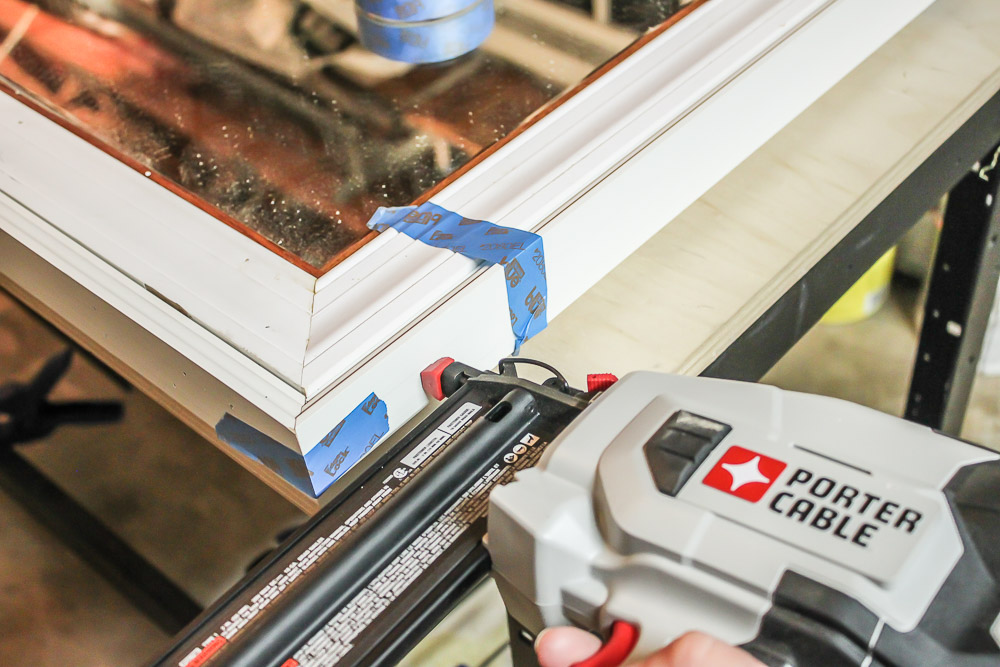
Secure the casing with finish nails.
Add the backer band to the sides and secure with finish nails into the mirror frame.
The frame is finished, but you need to fill nail holes and seams before painting.
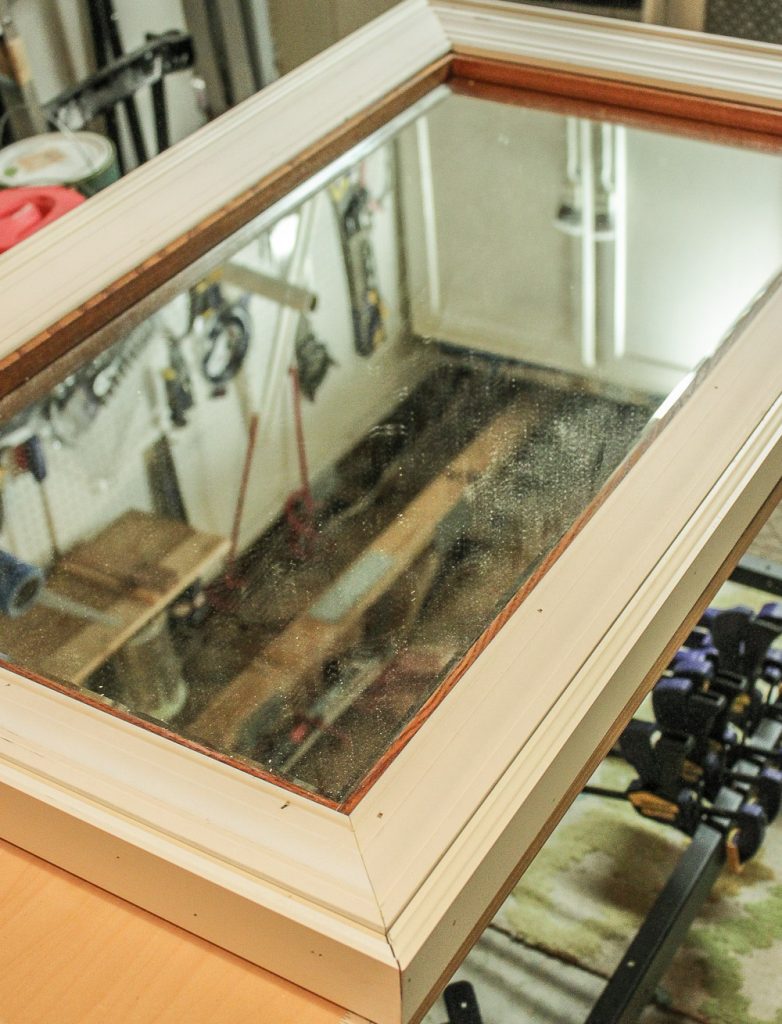
Fill nail holes with joint compound or 3M Patch plus Primer and fill seams with caulk.
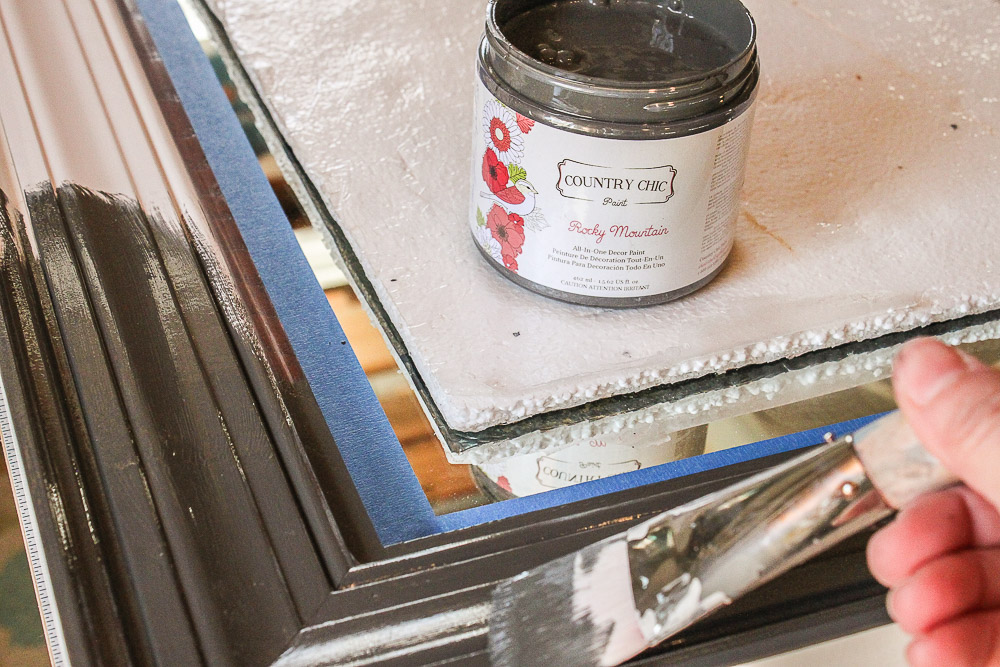
Allow the caulk and patch to dry. Line the edge of the mirror glass with painter’s tape. Paint two coats of chalk paint on your frame.
Protect your finished frame with a coat of wax or at least two coats of polycrylic. Hang up your new mirror and enjoy the money you saved.
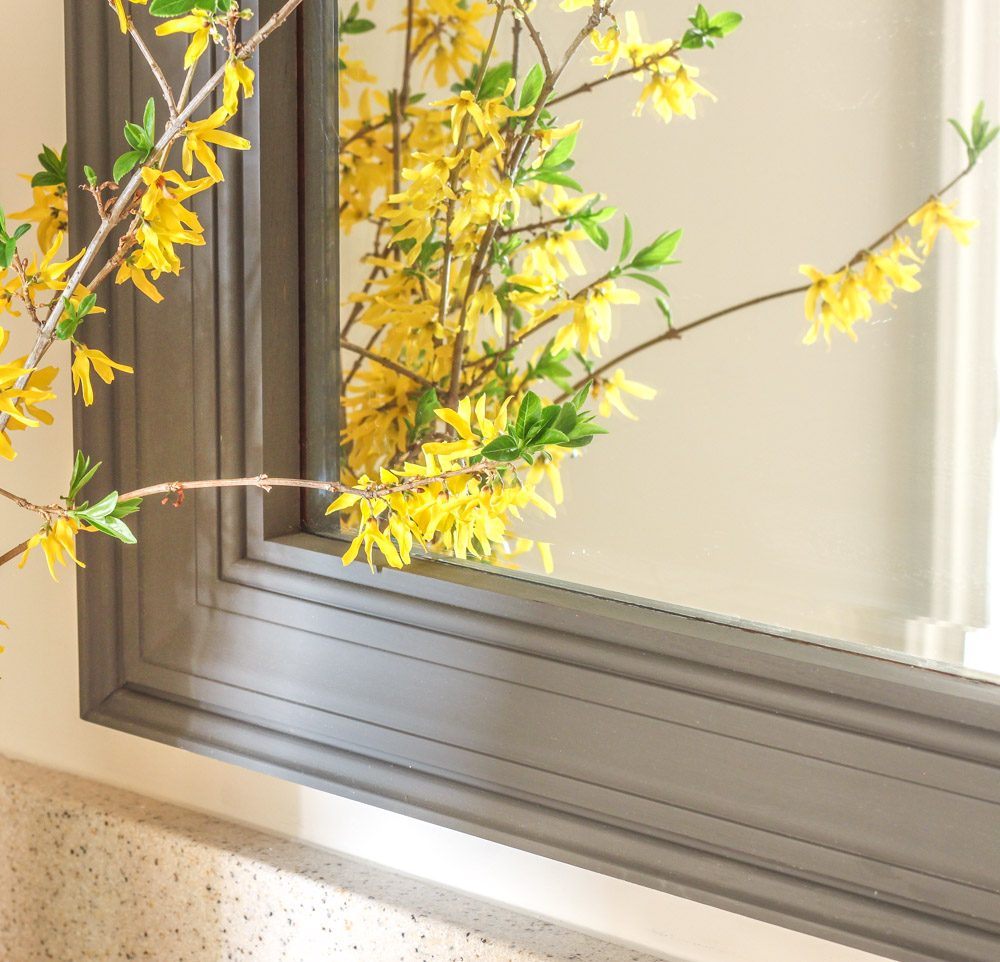
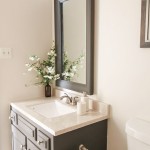
Can you even believe your eyes! This new mirror frame is exactly what this bathroom needed. Want another simple mirror frame update tutorial? Check out how I used an old picture frame as a mirror frame here. Or see how you can cover your frameless mirror quickly and with professional results in this tutorial.
![]()
I’d love to do this, but having trouble getting through to the link. I’m not sure if it’s my computer or that the link isn’t working. Is anyone else having the same trouble?
I don’t know if my husband or I am more excited that I read this post! I was ready to gut our hall bath, but after reading your post was inspired to see if I could pop off the fluer de lis overlays on our vanity – I could! Now I can sand our beautifully shaped vanity and paint it and the walls and potentially reframe the existing mirror. THANK YOU!!
I love this look! I want to do this for our bathroom mirrors!
Oh dear, I think that might have been my mirror from back then, garage sale in Colorado all the way to your neck of the woods! LOL
LOL, well, that would be quite a trip for an ugly mirror.