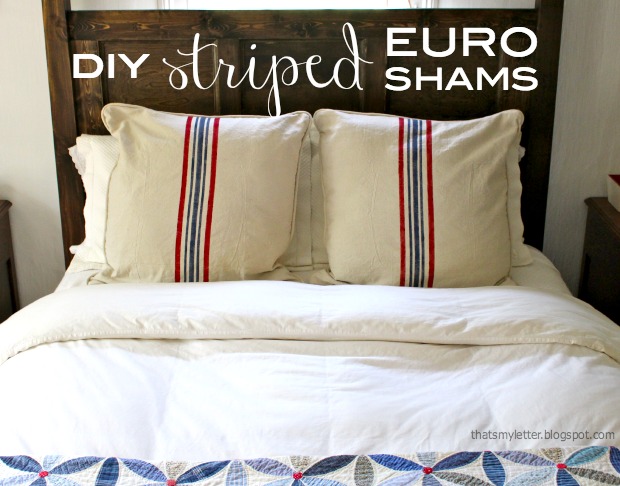
DIY Striped Euro Shams
Every DIYer loves a little drop cloth project right? Jaime from That’s My Letter here to share how to make striped euro shams.
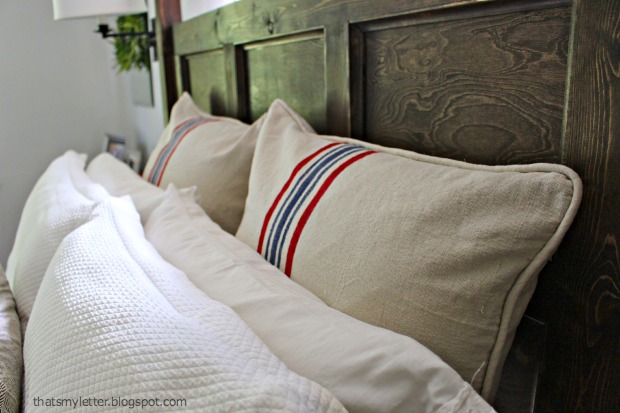
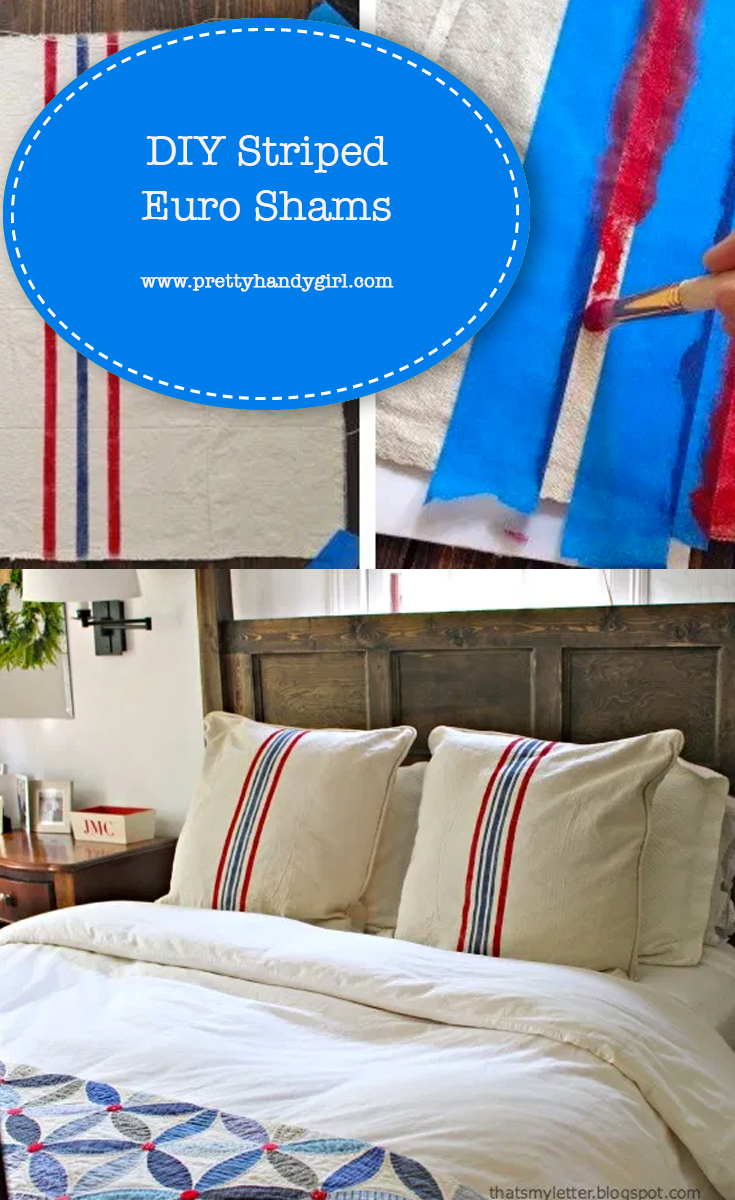
Using drop cloth and acrylic craft paint, I made these grain sack inspired shams to finish off our new poster bed.
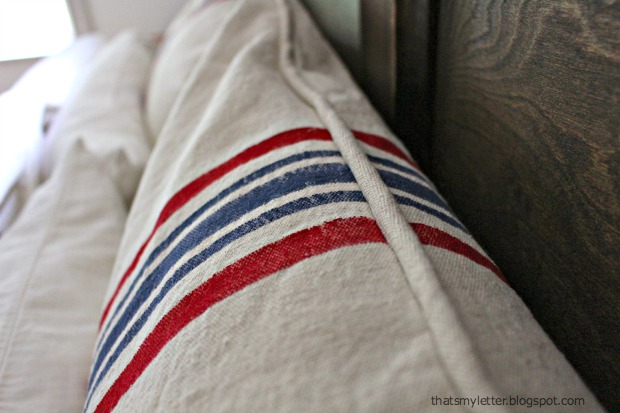
I added piping to finish the edges. It wasn’t too hard, and it was worth the extra effort. Brittany has a great piping tutorial here or you could always leave off the piping if you choose.
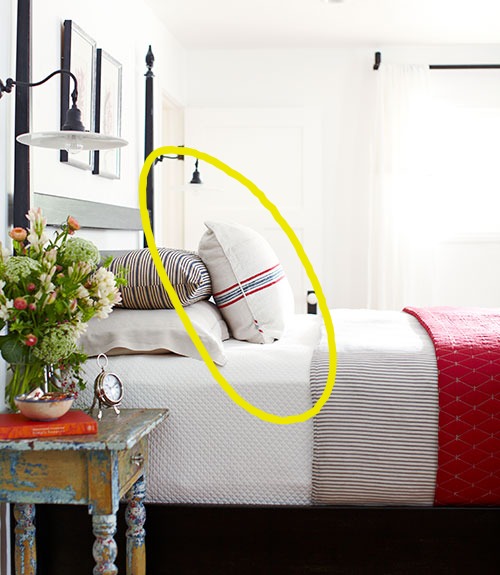
I found my inspiration for these shams from a Country Living article in the June 2013 issue. The master bedroom in the featured home had the perfect striped lumbar pillow and I knew I just had to have my own!
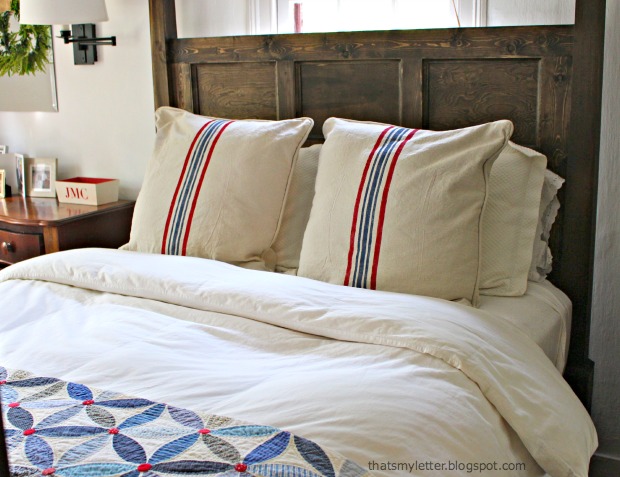
Similar but different, these striped shams coordinate well with my Joseph’s Coat quilt. Check out how easy it is to make your own shams:
Materials:
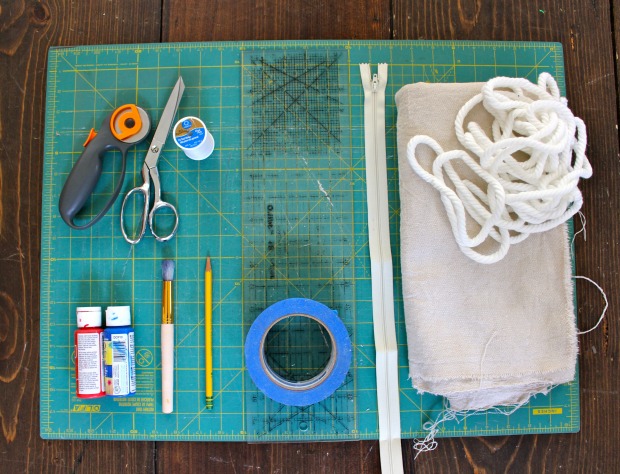
- drop cloth (2 – 26″ x 26″ square piece per sham)
- cotton cording (2 yards per sham)
- 22″ zipper
- painter’s tape
- stencil paintbrush or stiff bristle brush
- acrylic paint
- pencil
- clear quilting ruler
- rotary cutter
- self healing cutting mat
- scissors
- thread
- sewing machine
- iron & ironing board
Instructions:
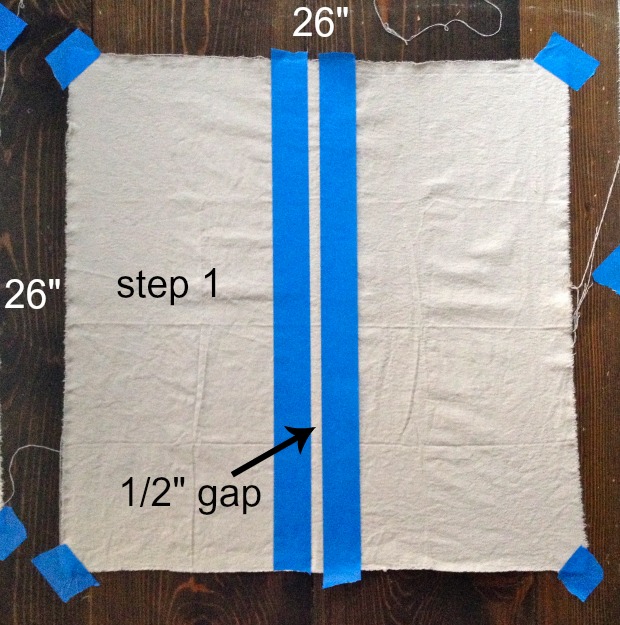
Step 1: Measure your sham inserts and add 1″ to each side. (My inserts measured 25″ x 25″ therefore I cut the drop cloth at 26″ x 26″.) Tape the corners of the drop cloth to a hard surface. Slide a piece of cardboard under the drop cloth to protect your surface. Mark a 1/2″ wide stripe at the center and secure painter’s tape down either side of gap.
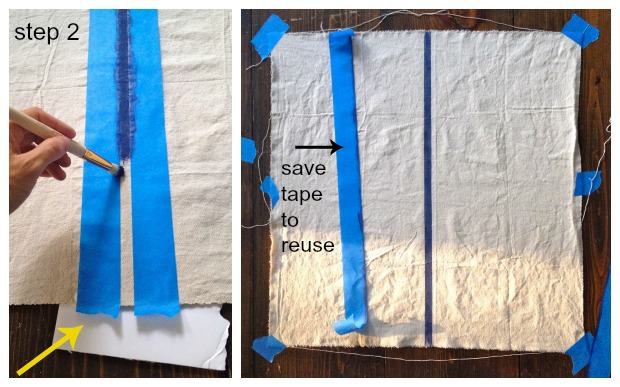
Step 2: Using a stiff stencil brush, paint inside the gap. Use paint sparingly as you can always go back over. (Now is when you’ll appreciate having the cardboard underneath.) Remove tape and save for the next step.
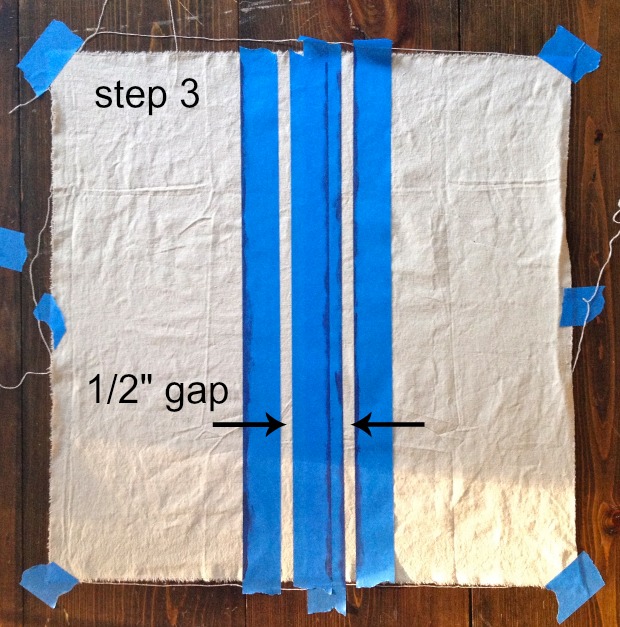
Step 3: Mark the 2 red side stripes. Allow 1″ between the blue stripe and each red side stripe. Use the tape again to mask off a 1/2″ gap.
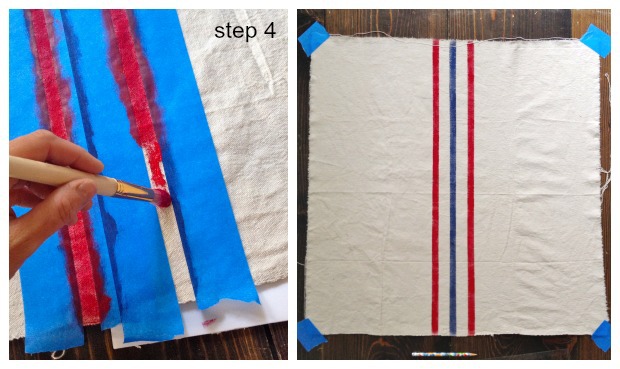 Step 4: Paint red inside the side stripes.
Repeat this process again for the thin (1/4″ wide) blue stripes on either side of the center blue stripe.
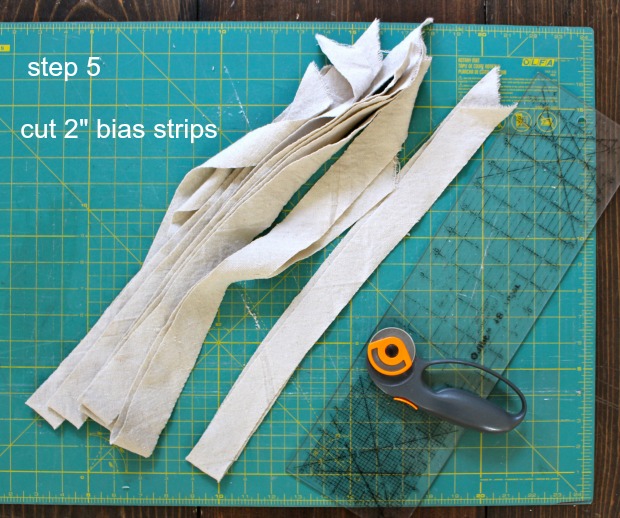
Step 5: Cut 2″ wide bias strips for the piping. Each pillow requires 100″ of piping.
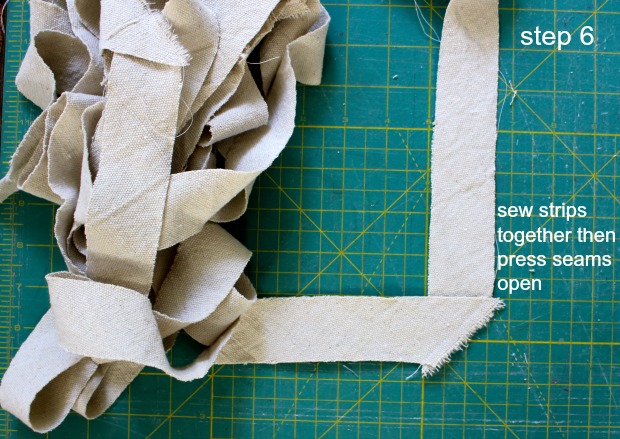
Step 6: Sew bias strips together then press open.
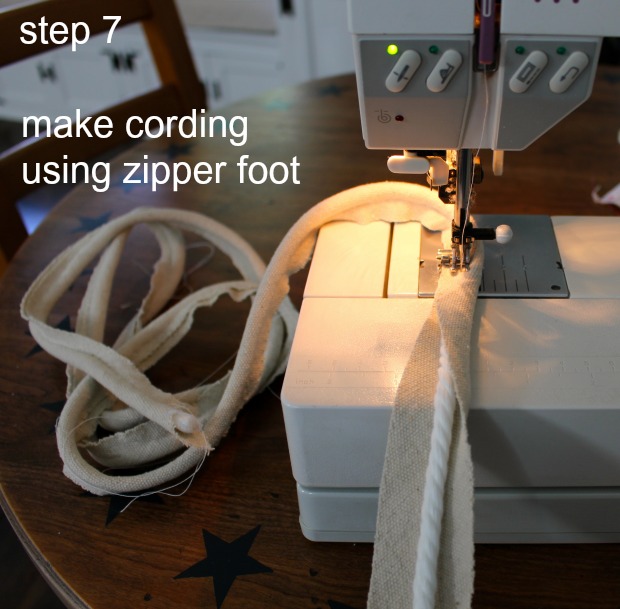
Step 7: Sew cording inside the bias strip using a zipper foot.
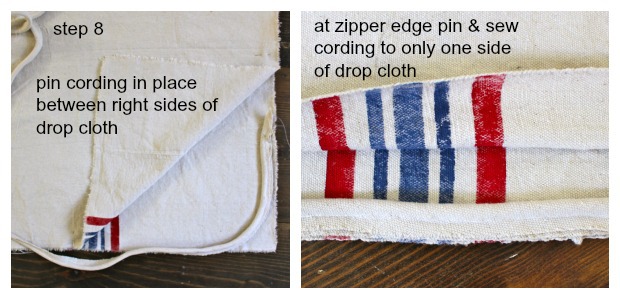
Step 8: Pin piping in place between the right sides of drop cloth pieces. At the zipper edge, pin the piping to just one side of drop cloth.
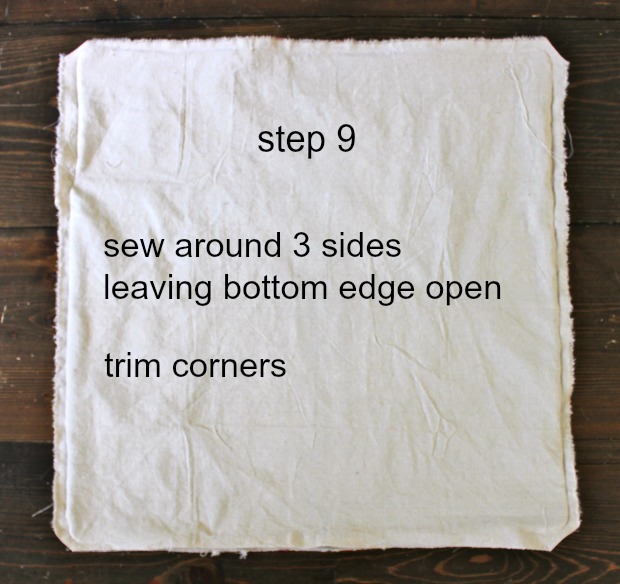
Step 9: Sew piping in place around 3 sides, leave bottom zipper edge open but do sew the piping to one side of drop cloth. Trim corners.
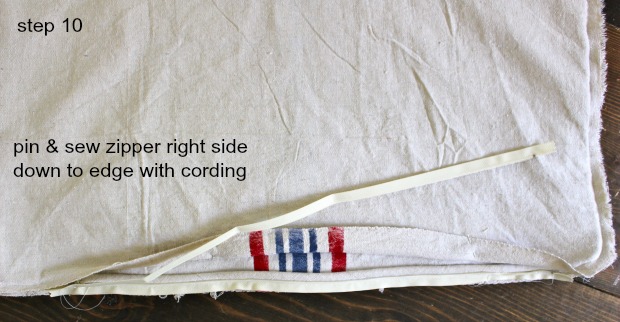
Step 10: Pin and sew the zipper right side down to the edge of drop cloth that has the piping attached.

Step 11: Pin and sew the other side of the zipper to the raw edge of the other side of the drop cloth.
Turn right side out and insert your pillow inside the cover.
Striped euro shams add just the right amount of color and style to otherwise neutral bedding. Hope you have a chance to make your own set soon!


Check out more easy sewing projects!
Pin for later!


Hi there. I love these! I’m embroidering some linen to make euro shams. Can you tell me about what diameter you’ve used for your cording? Thanks so much fro the tutorial!
I love how these came out!! I especially love the cording around them. I think it gives a nice finish to pillows. Stopping by from DIY Showoff – That DIY Party.
Here is what I shared this week: http://craftybrooklynarmywife.blogspot.com/2014/07/another-button-down-shirt-for-e.html
Jaime, is there anything that you cannot do? You are amazing. I love your pillows. I may have to relocate to live nearby so I can take DIY classes from you. 🙂