DIY Interior Cedar Shutters

Hello Pretty Handy friends, Jaime from That’s My Letter here today to share how to build functional interior cedar shutters using inexpensive AND readily available hardware.
I have been itching to build some cedar shutters for our living room for quite some time now. I had two requirements: 1) they had to be completely functional to block out the hot summer sun (which also makes them great for privacy) and 2) use no fancy hardware. I didn’t want to special order any shutter hardware and I like to build using readily available supplies.
You can find the cedar planks and hardware at your local home improvement store. Ready to learn how to build the shutters and install these beauties?

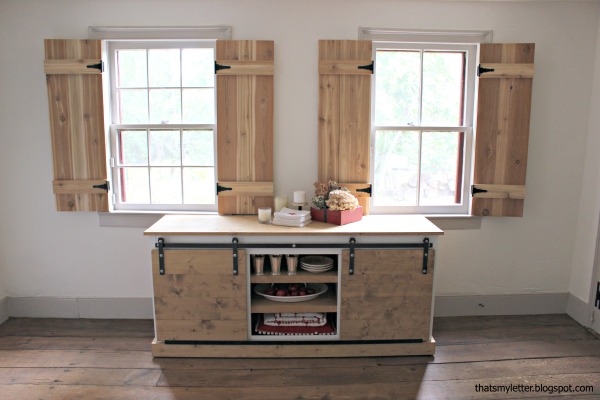
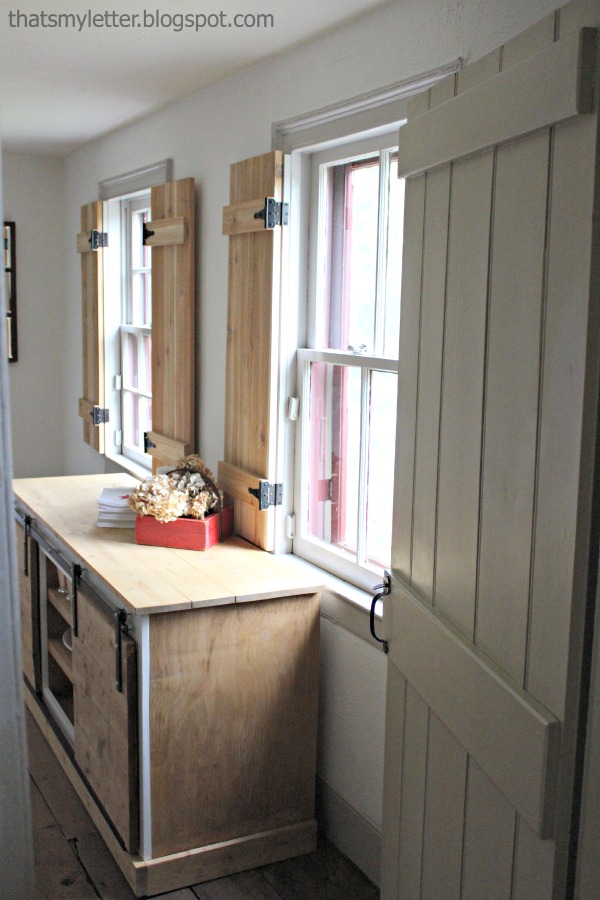
You can see just how much light the shutters will block out once closed. I plan to keep the shutters open except during the extremely hot summer days.
Interior cedar shutters make a great alternative window treatment if you’re not into fabric panels. They truly are a statement piece (and hopefully distract from the fact that my windows don’t match!). I also built the sliding door console last Spring, a link to all the details on that piece is in this post.
Materials:
- cedar boards (1×6 and 1×4)
- saw
- nail gun
- 1 1/4″ finish nails
- 1×2 pine board
- 2″ wood screws
- drill & bits
- pencil
- measuring tape
- wood putty
- sandpaper
- paint
- hinges (pictured below) & screws
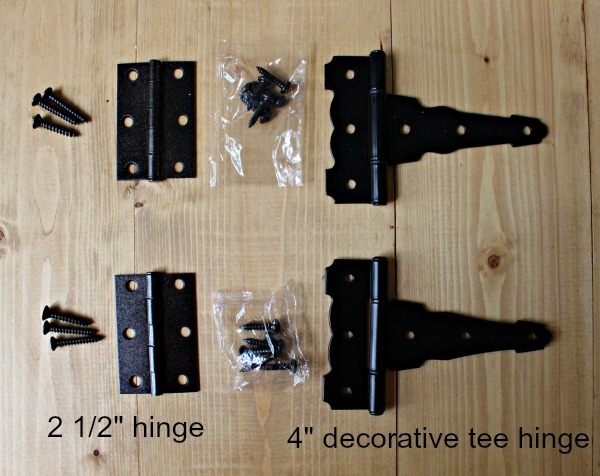
Hardware: (for one pair of shutters)
- 2 – 2 1/2″ hinge (spray painted oil rubbed bronze) & 12 screws
- 2 – 4″ decorative tee hinge & 12 screws
Instructions:
MEASURE YOUR INTERIOR WINDOW SPACE. MEASURE IT AGAIN. MEASURE IT AGAIN. The top of the window may vary from the bottom.
Shutter length = interior window height – 1/2″
Shutter width = (interior window width – 3/8″) divided by 2.
My shutters are 44 1/2″ l x 13 5/8″ w.

Step 1: Cut cedar boards to length. Push all boards together to determine width, if too wide rip down one board.
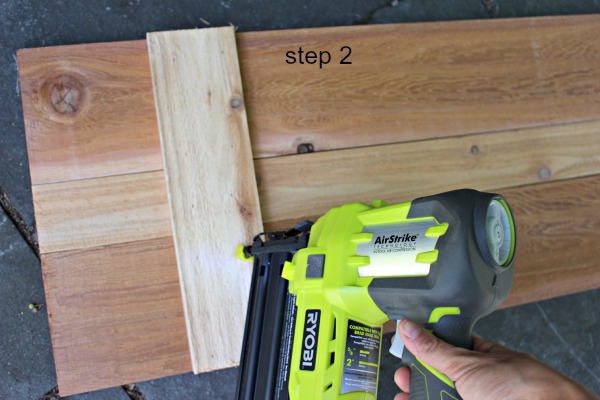
Step 2: Cut 1×4 cedar boards to width. Mark long boards 5″ from the ends. Place the short cross board in position and attach using finish nails. Repeat the process for the other end of long boards.
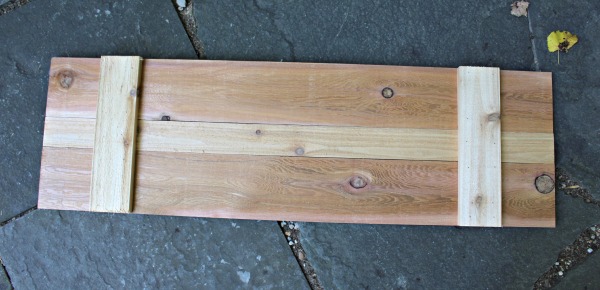
Congrats! Your shutter is built!
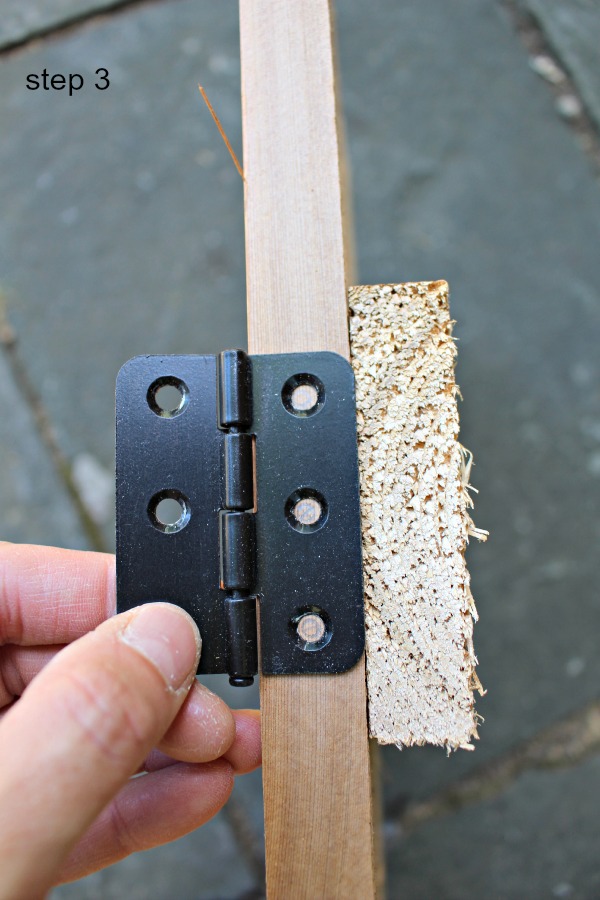
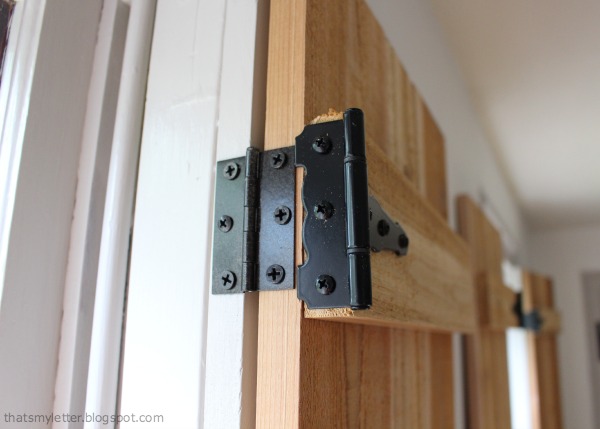
Step 3: Center the hinge on the short cross board and on the side of the shutter. Mark the holes with pencil. Pre-drill holes and secure the hinge with screws.
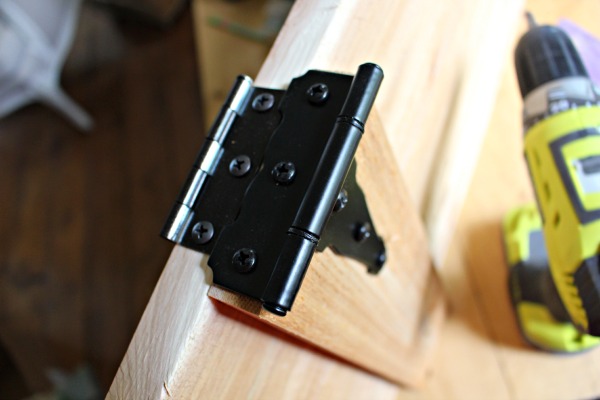
Step 4: Attach the decorative tee hinge first to the end of the short board and then onto front of the short board. This hinge is purely decorative and has no function.
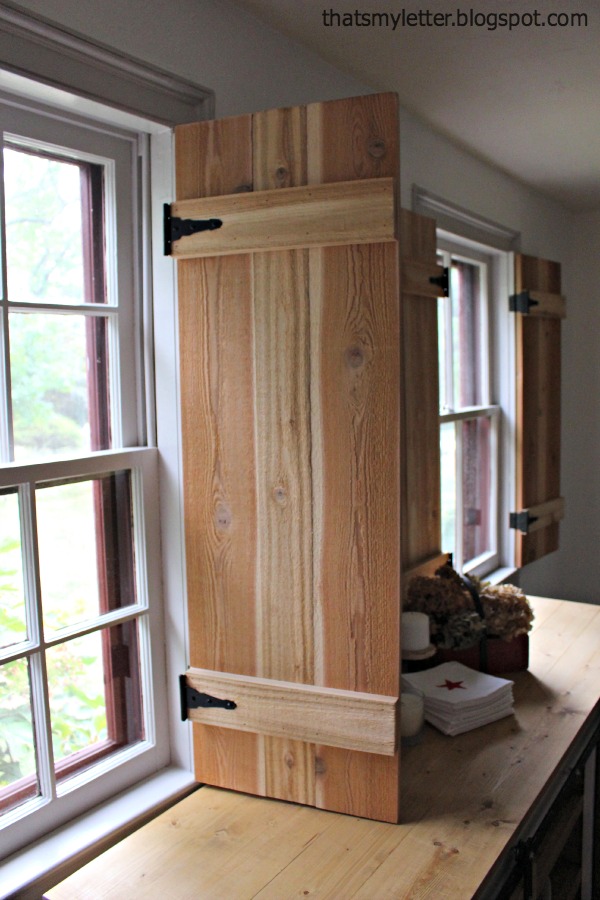
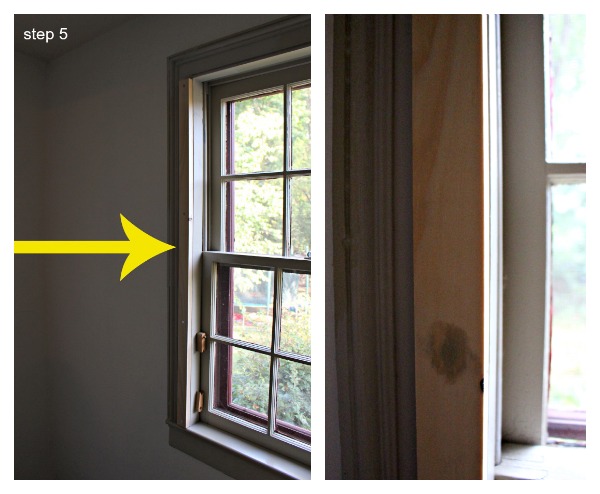 Step 5: Depending on your window you may need to add depth using a 1×2 pine board in order for the shutter and hardware to sit flush when closed without bumping into the window. The additional depth also allows the shutter to open entirely without bumping into your moulding. Attach the 1×2 to your existing moulding using countersunk 2″ screws then putty, sand and paint. On the right you can see the pine board is flush to the edge of the window, consider installing the board with a 1/4″ overhang to allow space for the hinge on the decorative hardware to rest.
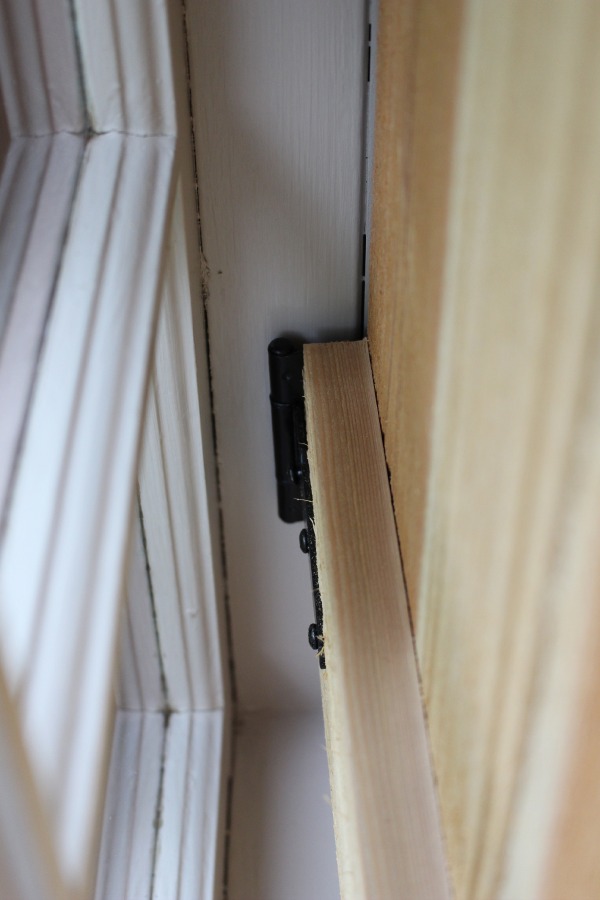
In the above picture the shutter is closed and you can see the extra depth the 1×4 cross board plus hardware needs in order to close without bumping into the window.
Step 6: Hold the shutter in place and mark hinge screw holes with pencil, pre-drill holes then attach the hinge with screws. You want equal spacing at the top and bottom.
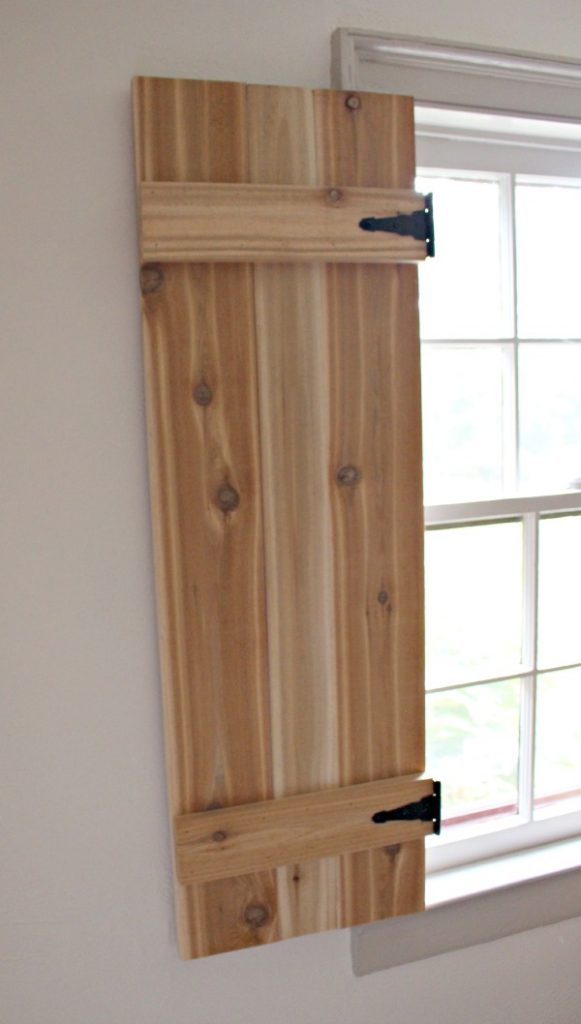
Stand back and admire your work!
This is a fairly simple DIY project using readily available supplies that makes a great addition to any room. Do you have the perfect place for a set of interior cedar shutters?


Hey there Jaime! It looks like this will be our last minute weekend project. I LOVE these shutters! I have one question: did you purchase oil rubbed bronze hardware and spray paint them (black)? Or did you spray paint metal ones to look oil rubbed bronze? I will be featuring this project on my blog and be sure to give you credit! Thanks!
Hi Jaime!
Thanks for the details in making your shutters. I wanted to ask if you also made the door I saw a snippet of in your last pic?? If so, do you have a post on that project?
Thanks!
Where did you get the sliding hardware for the cabinet? I’m looking for something like that to build an entertainment center. Thanks! Nice job!
AMAZING job with these shutters! I’ve always seen the boring looking shutters that were too modern but these have a warm home touch to them and I absolutely love them! Great job!
Wow wow wow! These are so awesome and I love the cedar look. Totally adding to my list.
Very cool look, great tutorial.
WOWWWWWW…I’m loving this! Such an easy project and it sure dresses up the windows, definitely gonna give this one a try 😉
These look awesome! I would love to see photos with them closed from inside and out.