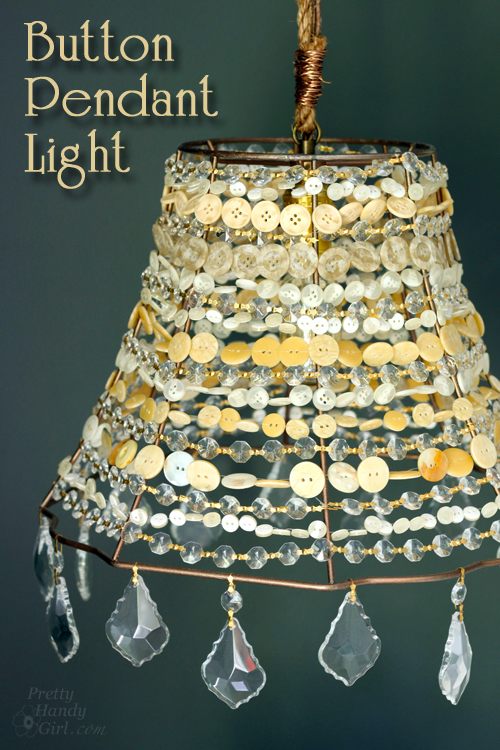
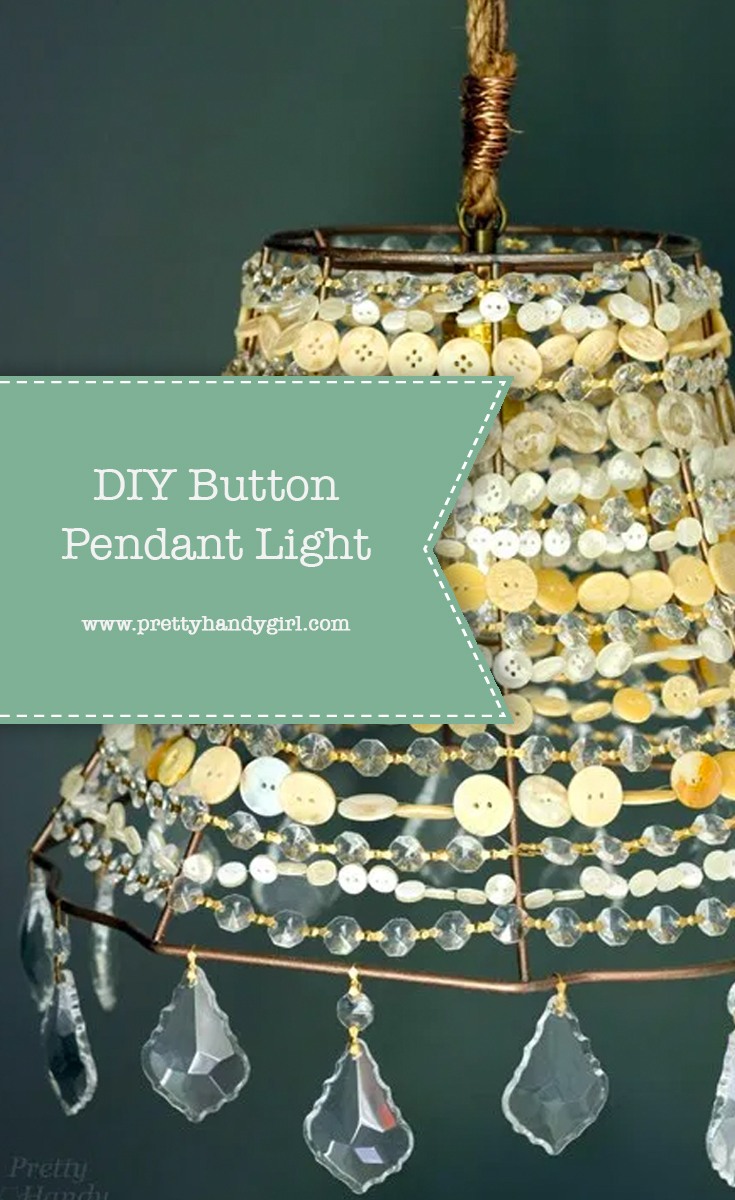
DIY Button Pendant Light {#LowesCreator Idea}
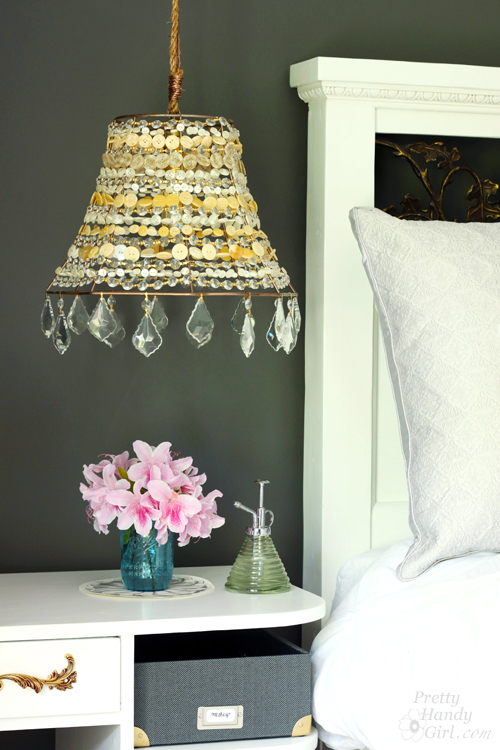
While I was house touring on Tybee Island and having fun antique and salvage shopping in Savannah, I spied some bare lamp shade frame hanging lights. They immediately inspired me to design a DIY Button Pendant Light for over my bedside table in our master bedroom. Part of the desire was born out of the necessity to have more space on my bedside because the table actually doubles as my makeup vanity.
Making a Button Pendant Light is an easy DIY project, but you’ll need some patience while threading the buttons. I’ll also show you how to wire a lamp socket and lamp plug! Ready to get started?
(I’ve included affiliate links for your convenience. I earn a small percentage from a purchase using these links. There is no additional cost to you. You can read more about affiliate links here.)
Materials:
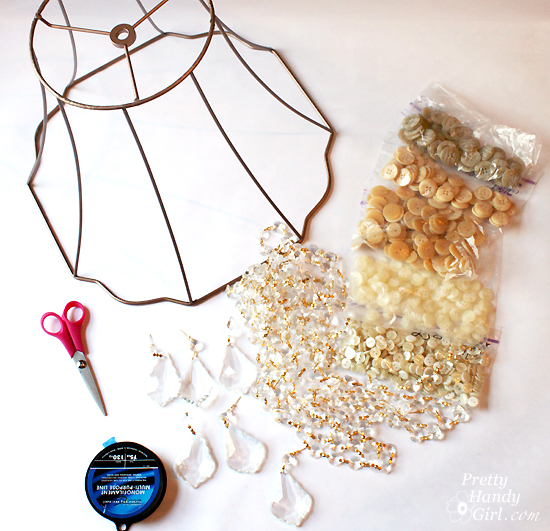
- Lamp shade with an interesting shape
- Scissors
- Lamp socket
- Lamp rod nipple
- Threaded cap with loop top (as shown in this kit)
- Lamp cord
- Two prong plug
- Wire strippers
- Nylon Clear Fishing line
- Buttons (bought lots from eBay)
- Chandelier pendant drops
- Chandelier crystal swags
- Sisal Rope
- Copper Wire
Optional:
Instructions:
Begin by cutting the fabric or paper off of your lamp shade. You can spray paint the metal frame if you wish. I painted mine with Rustoleum copper spray paint. Let the frame dry.
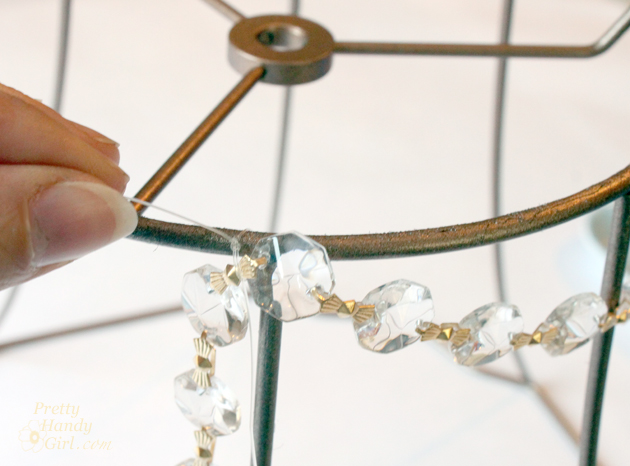
Begin decorating the lamp shade frame by attaching the crystal swags. Use small lengths of nylon line to attach the chain to the lamp frame. Remove a link to trim the excess crystal swag.
For the button strands, unwind a length of nylon line. Don’t cut it off. Begin threading buttons onto the line. Check your width around the lamp frame as you thread until you get the right length. When you have enough to run the circumference, you can trim your line several inches longer than you think you’ll need.
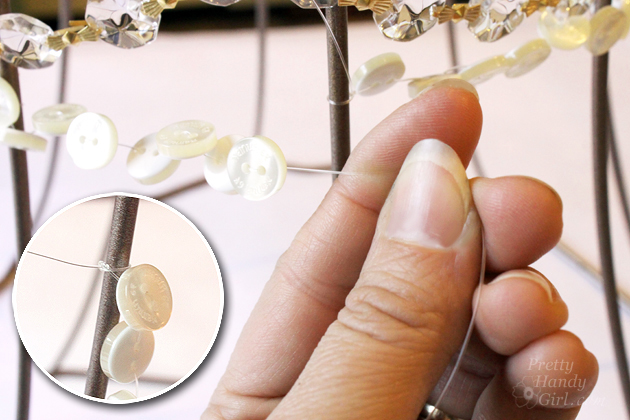
Tie the end of the nylon line around one of the vertical metal pieces. Wrap the line around each vertical piece on the lamp shade. When you reach your starting point, add or remove buttons as needed. Tie the line in several knots and trim any excess.
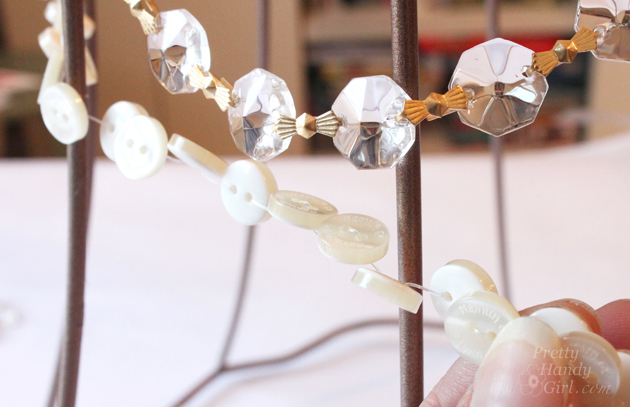
Continue adding rows of buttons and crystal swags until your lamp shade is covered.
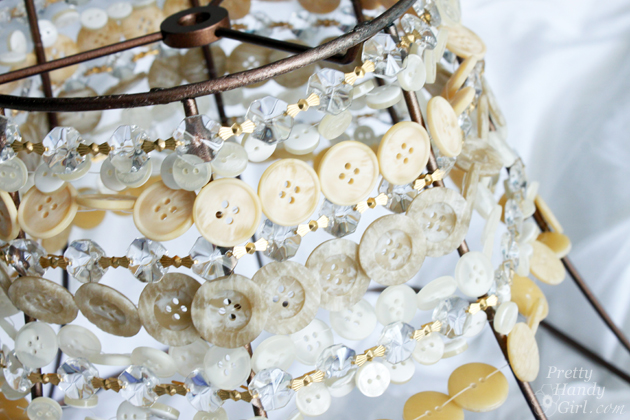
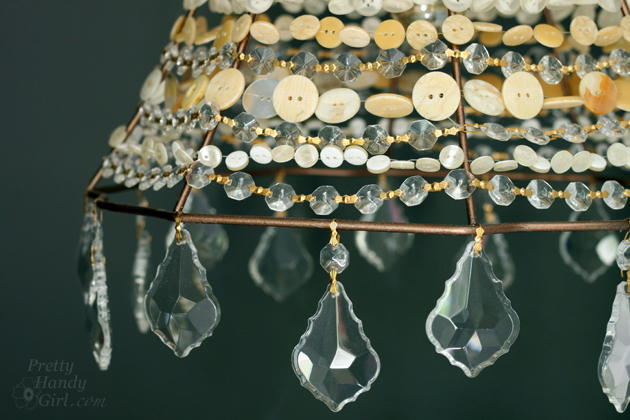
Hang tear drop crystals around the base of the frame. You can hook them over the frame or tie them onto the frame with a small length of nylon line for a more secure hold.

Assembling the Pendant Light:
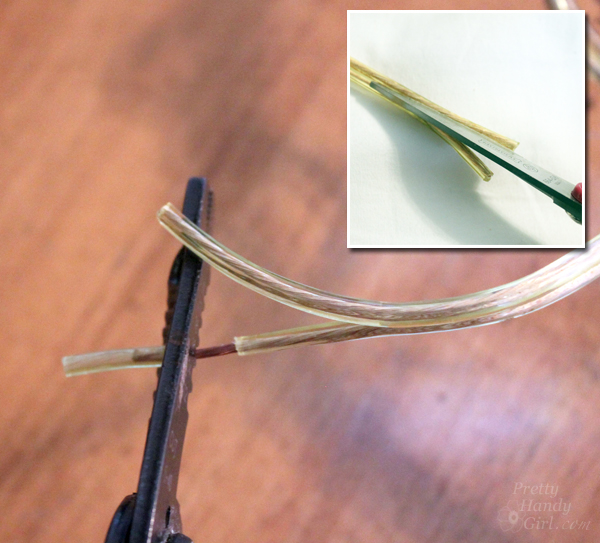
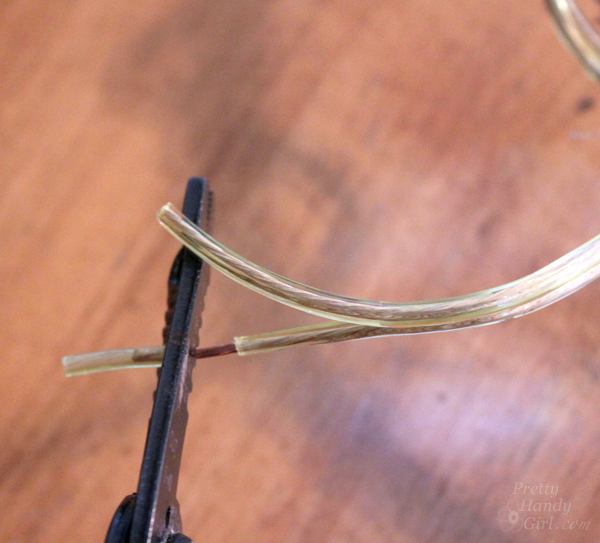
Unroll more lamp cord than you need, but do not cut it from the roll. Split the end of the wire into two and strip off an inch of the plastic insulation.
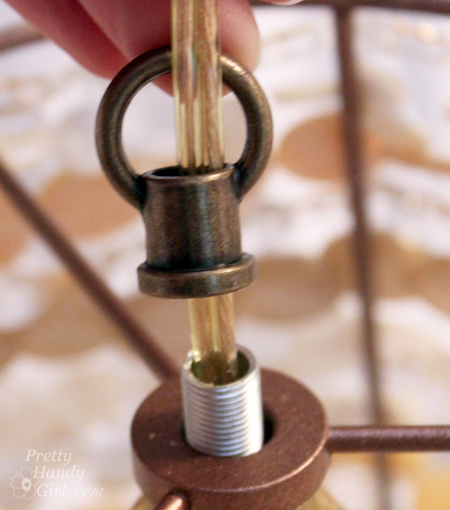
Important: Thread the wire through the threaded cap with loop top; next thread the threaded lamp rod nipple; and finally the lamp shade. If you skip this step, you’ll be threading them on from the end of your long length of wire which could be a real PITA!
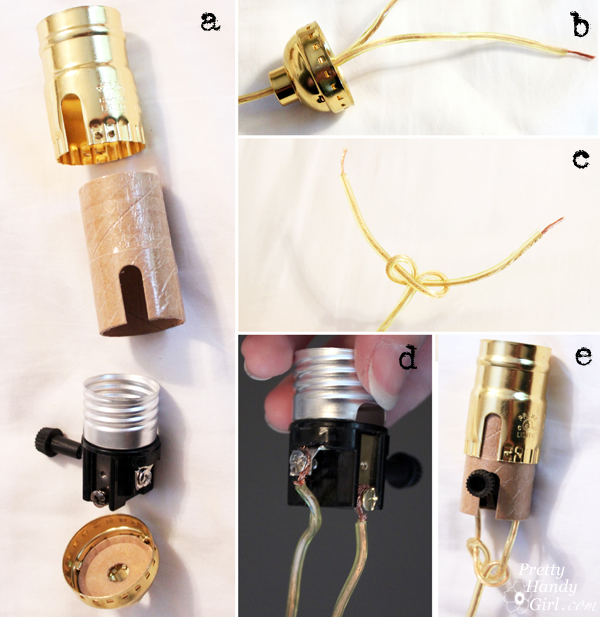
Wiring the lamp socket:
a) Disassemble the lamp socket. b) Thread the stripped wires through the base of the lamp socket. c) Tie the stripped ends in an underwriter’s knot as shown below. d) Attach the ribbed or marked side of the lamp wire to the silver screw. Attach the smooth side to the brass screw on the socket. e) Replace the cardboard sleeve and the brass cover onto the socket. Re-attach the base.
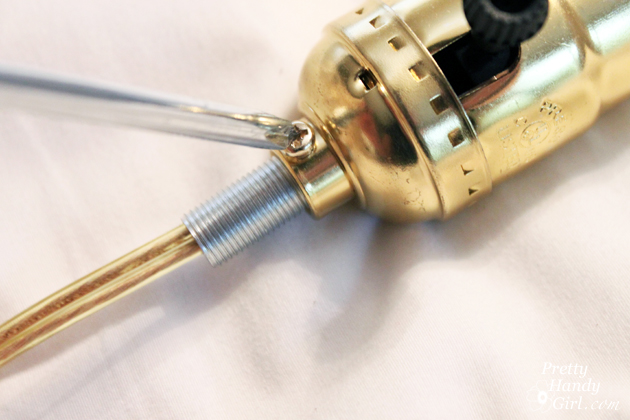
Insert the threaded nipple into the light socket and tighten the screw on the side of the socket to secure the threaded nipple.
Pull the socket up and into the lamp shade.
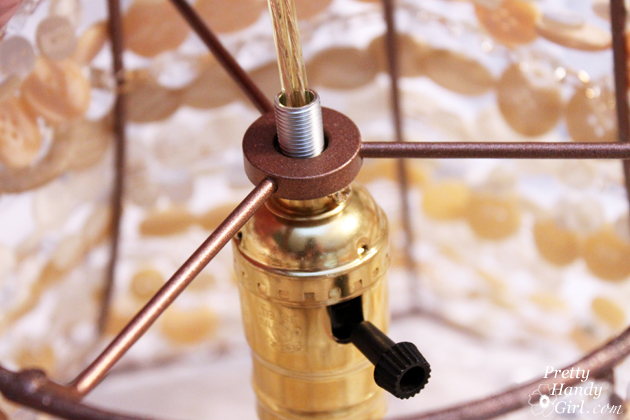
Screw the threaded cap onto the threaded nipple. Tighten to secure the socket onto the lamp frame. Thread the end of the sisal rope through the loop end of the cap. Secure the rope around the lamp wire by wrapping some copper wire around it.
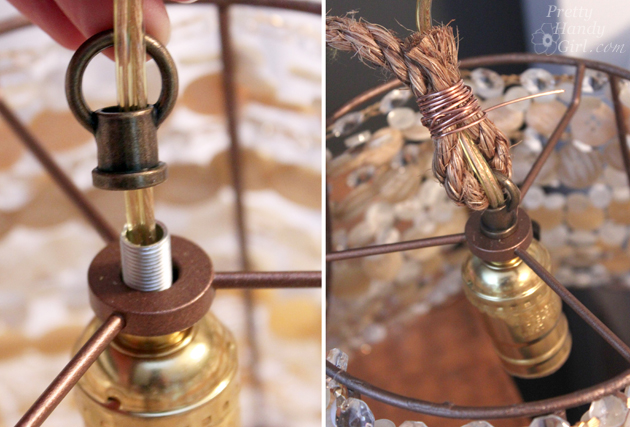
Figure out how much length of lamp cord you need for your pendant and cut a little extra.
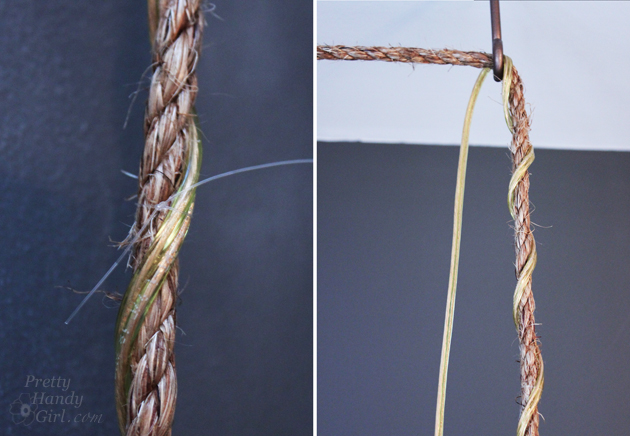
Twist the rope and lamp cord together, securing with nylon line every foot. Cut the excess short.
Mount your lag screws into studs in the ceiling. Thread the rope and cord through the lag screw(s).
Important Note: If you are going to be threading your cord and rope through the screw eyes, do that BEFORE you attach the lamp plug! If you wait until after, you won’t be able to thread the plug through the screw eye hole. (Not that I know anything about that—who me—make a mistake? It actually happens a fair amount, but I learn from my mistakes so you don’t have to make them.)
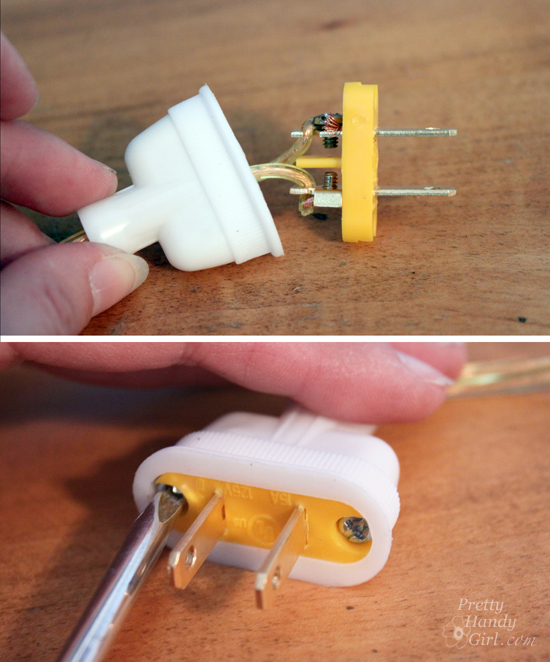
To attach the plug, split the ends of the lamp cord like you did on the other end. Strip off about an inch.
Unscrew the prongs from the plug. Feed your wire through the narrow end of the plug. Create another underwriter’s knot. Attach your stripped wires to the screws inside. The ribbed or marked side of the wire attaches to the silver screw. The smooth side attaches to the black or brass screw. Replace the prongs into the plug and tighten the screws.
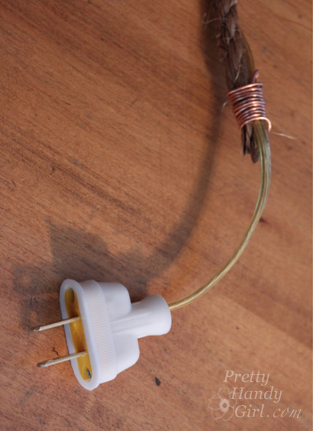
Secure the end of the rope and lamp cord by wrapping copper wire around them. For safety reasons, I wrapped the wire a few inches away from the plug.
Adjust the cord/rope until your pendant is hanging at the height you desire.

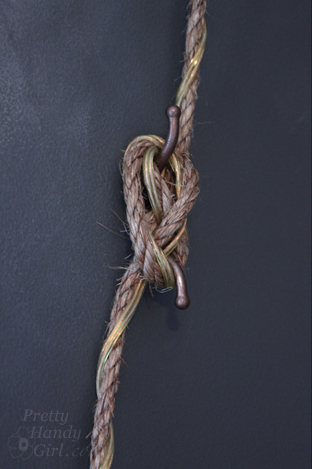
Attach a rope cleat into a stud on your wall. Wrap the rope/cord loosely around the cleat to secure it in place.
Enjoy your new button pendant light.
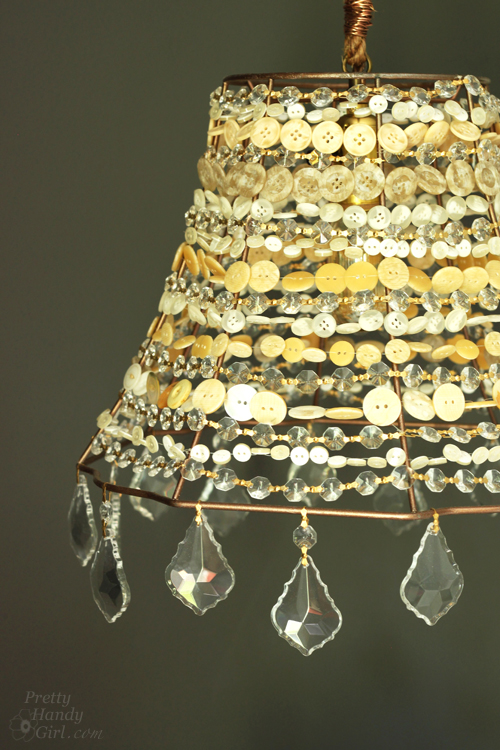
The lamp is beautiful when turned on at night. It produces a soft glow. I worried that the bare bulb would be blinding, but the buttons act like a shade filtering the light.
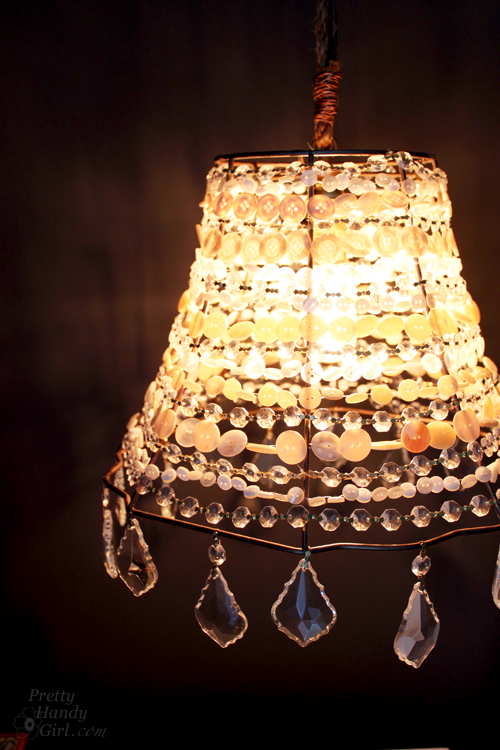
She’s got loads of bling…and you know I like bling!
This was one of those projects that turned out as gorgeous in real life as it looked in my imagination. Woot!
If you use my idea please mention and link to this post. It’s nice when credit is given to inspiration sources. If you make one, I’d love to see it!
Tell me, what you think of my pendant light? Do you love it as much as I do, or am I blinded by my love of buttons and bling?
![]()
Want more creative lighting ideas? Subscribe to the Lowe’s Creative Ideas magazine:

Or view more creative ideas from the Lowe’s Creative Idea bloggers !
There’s also a magazine app so you can have inspiration on the go! And, don’t forget to follow Lowe’s on Pinterest or on Instagram!
 Disclosure: As a #LowesCreator, I was provided with a Lowe’s gift card to purchase supplies for this post. I was not told what to write. All ideas and words are my own.
Pin for later!

Beautiful 🙂
Could I just ask, did you use fishing line for threading the buttons, or nylon picture hanging cord (as came up on you link for the fishing line)
I am trying with fishing line, but it is tricky!
Emily, I used multi-purpose nylon line. I admit, I don’t know the difference between the two. But, now that I think of it, the fishing line might be harder to see.
Lovely! And so much patience to thread all of those buttons! I love the addition of the rope on the cord and the cleat. It looks great over your nightstand.
It’s pronounced like Tay-uh 🙂
Thank you, that’s very sweet.
This is gorgeous! One of the best button projects I have seen.
Very doable idea. I like the natural colors of buttons that matches with crystal beads… Thank you Brittany
What an awesome idea Brittany! This turned out really cool!
Thank you Ashley! I see you’ll be at Haven. Looking forward to meeting you. Be sure to grab my arm if I miss you 😉
Who would’ve thought it would be so easy to revamp a lamp shade! I’ve seen so many lamp shade skeletons at goodwill and always knew there was a craft for them, just couldn’t figure out what it would be. Such an awesome post, thank you!
Thank you Taiya! BTW, love your name. How is it phonetically spoken? Tay-yah? Tie-ya? Regardless, I love different names.
This is so darling Brittany! I love the look of this one but I could also see a theme of buttons used for a child’s room. I’ve been known to do even more tedious things than this. A lovely post!
Oh that would be cute…as a button 😉
That is super cool! I love it … would need a good movie and a glass of wine or two to help pass the button threading time for sure. 🙂
Thanks. I did watch a fair amount of reality TV while working on it ;-D
Very, very cool, Brittany. I had just decided to strip down an old lampshade and revamp it, too. I think I’ll do something a little less labor-intensive though. 🙂
Cindy, thanks. I hope you’ll share your lampshade. I love seeing upcycled lights.