
Decorative Metal Flashing Orbs
Happy July friends! It’s Jessica from Decor Adventures. I hope you are enjoying all things summer and have a close friend or relative with a pool, if you don’t have one yourself. It is super hot here and I’m glad my sister finally opened hers. Otherwise, to stay cool I hang out in our basement where my craft area is set up. I have an easy project for you this month, it’s how to make metal flashing orbs for your home.
I’ve seen these orbs used in all types of home decor items: from pendant lights to garden decorations. I always thought it would be easy to DIY your own. Here is how to make decorative orbs from metal flashing in five easy steps.
Materials:
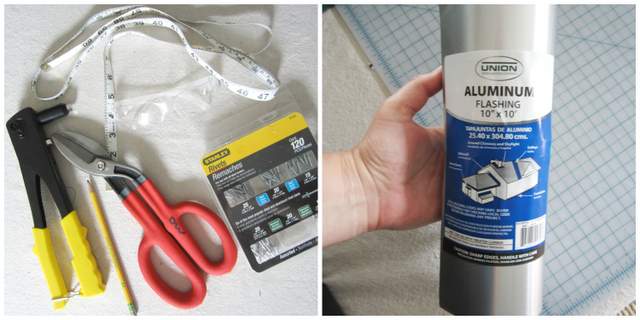
- Metal flashing
- Tin snips
- Rivet gun
- Rivets
- Ruler
- Gloves
- Pencil
- Safety eye glasses
- Drill and drill bits
- Clamp
- Clothespins
- Glue gun and glue sticks
- Optional – Spray paint and respirator if you will be painting your metal
Instructions:
1. Pick up your supplies at the home improvement store. The metal flashing can be found in the roofing section and comes in different sizes. The 10″x10′ is about $10 and is the smallest that they sell. It will be plenty for your project.
2. Cut the flashing. Be careful when opening it as it will unravel quickly. Place the flashing on a long table and weigh down one end so it will stay in place for you.
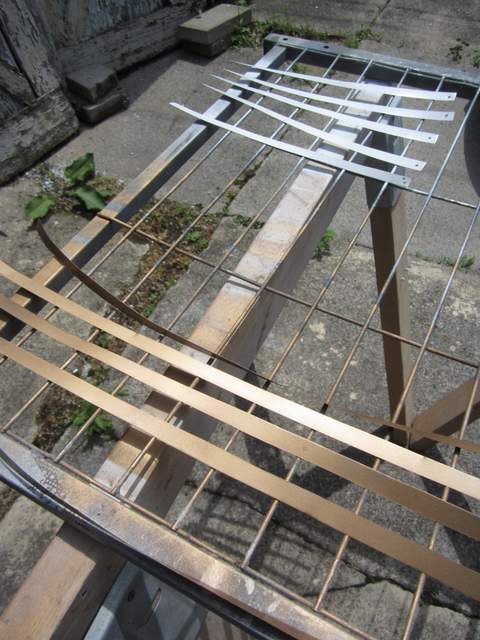
To make the straps for the orbs, cut up the flashing into long pieces. The two I made are 24″ and 12″ lengths by 1/2″ wide.
Mark the flashing with a pencil and then use the tin snips to cut it into pieces. Make sure to wear protective gloves as the metal is very sharp. Cut 7 pieces of the same length and width.
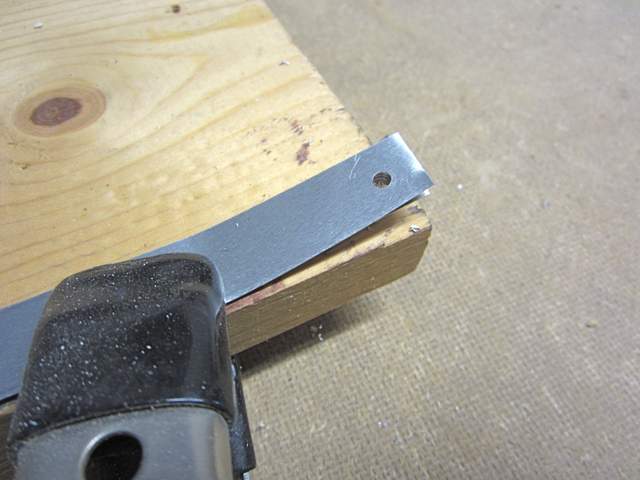
3. After you cut the flashing, drill two small holes at each end of the strips so that it can be riveted together in a circle to make the orb. To do this, line up your pieces and clamp them to a piece of wood. Since my rivets were 1/8″ I used the 1/8″ drill bit for making the hole. Make sure the hole is the same size in all the pieces.
4. Once you cut and drill the holes, spray paint the flashing if desired. Choose a bright color to add a fun pop of color or spray paint your orbs in a rusty metallic color for a more aged and neutral look.
5. Once the paint dries, assemble the orb. Take each piece and form a circle. Since the flashing came rolled, it’s easier to go with the curve of it when making the circle. Place a rivet into the two holes of the first piece and then continue putting on the other pieces until you have a total of four. Two in a + and two in an X.
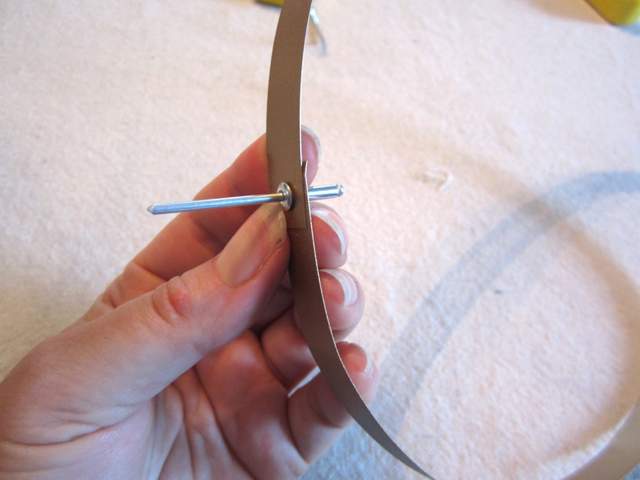
First you’ll make circles with the four pieces, then use one piece to make a perpendicular circle around all of the ones you just connected. Make an “X” with the two last pieces around that. You’ll see the shape of it come together. For a different look, use more or less pieces of flashing.
To keep the pieces together, you can glue them where the cross and overlap. This will hold the shape well. Clamp them together with a clothespin until the glue dries.

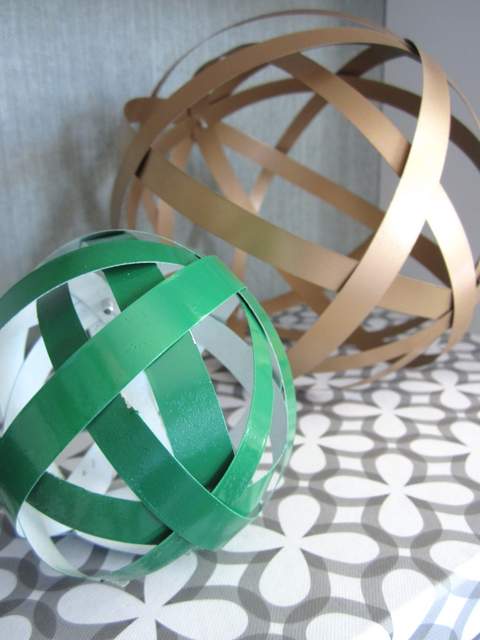
These look beautiful on a bookshelf, coffee table or maybe even hanging from the ceiling or patio umbrella for an outdoor decoration. I could also see a very large one in a garden or several small ones for a mobile in a child’s room.
For the small orb I painted the inside (one side) of the flashing in white and the outside (other side of the flashing) in Meadow Green by Rust-Oleum. The larger one is in Krylon’s Metallic Gold.

For other ideas of art to make with metal flashing, see these projects from around the blogosphere:
- Galvanized Metal Bunting at Unskinny Boppy
- DIY Drum Shade at From Gardeners 2 Bergers
- Aluminum Flashing Headboard at Renew Redo!
- DIY Tiered Pendant Light by Sarah M. Dorsey
And recently at my place, we had a new flagstone patio installed and redid our backyard landscaping. Hope to see you soon!

Trackbacks & Pingbacks
[…] Metal Flashing Orbs […]
[…] At Pretty Handy Girl I showed you how to make Decorative Metal Flashing Orbs. […]
Leave a Reply
Want to join the discussion?Feel free to contribute!