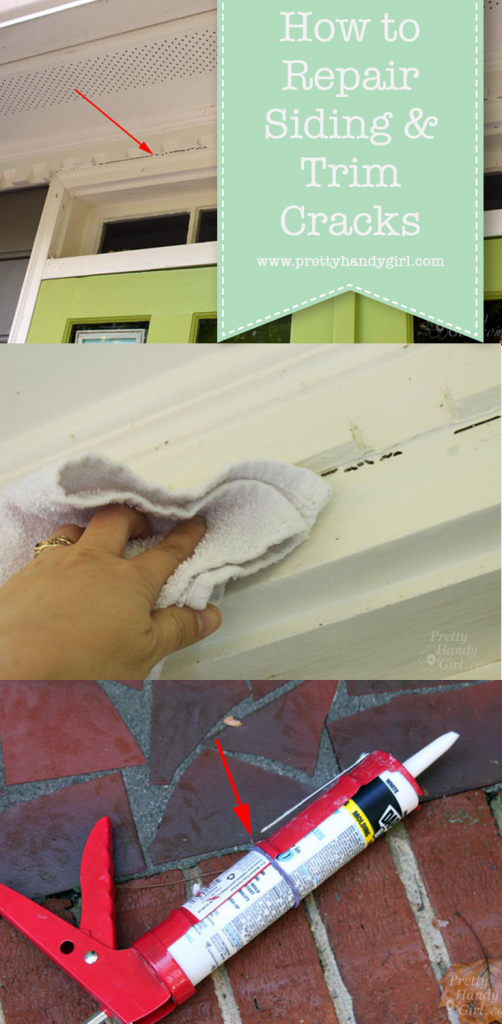
Day 29 – Caulk Cracks in Siding and Trim

One of the best thing you can do to save money is to prevent water from getting through your home’s exterior. Now is a good time to walk around your home and look for gaps and cracks around doors, windows, trim and siding. If you see any, I’ll show you super quick way to caulk and fill them.
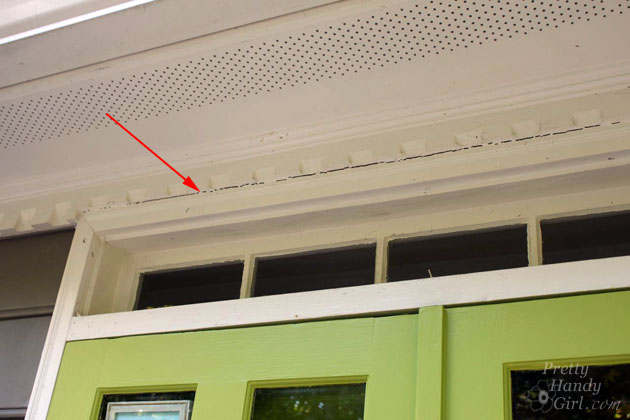
Here’s a big crack over our front door.
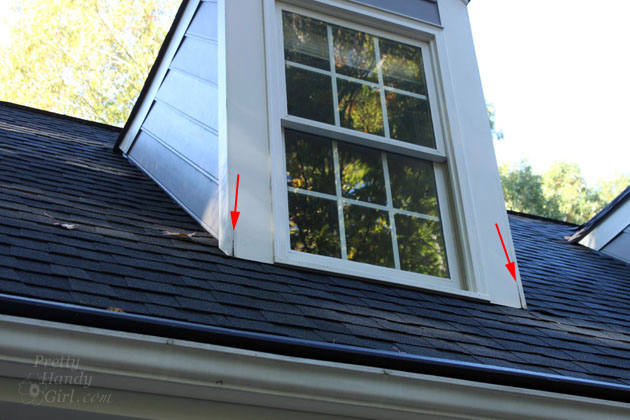
Gah! Two more gaps:
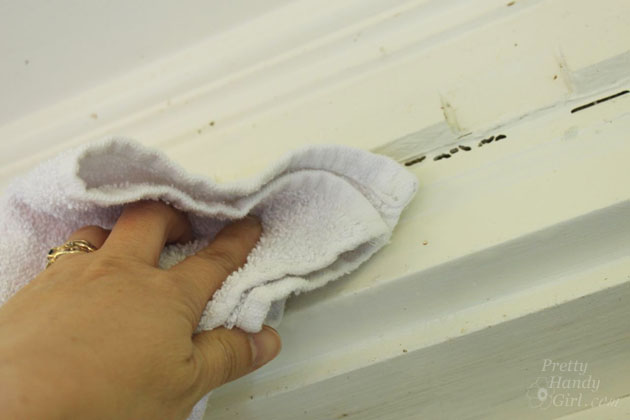
Clean off around the crack with a wet rag dipped in mild soap and water. If there’s mold or mildew, a water and bleach solution should get rid of it.
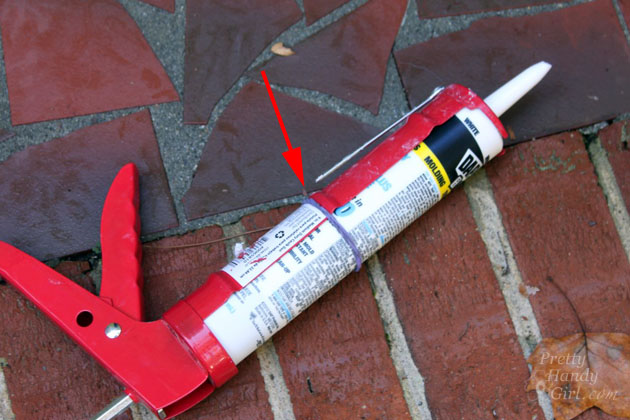
Thanks to my reader, Susan Cole, for this tip. If you are caulking upside down or the tube keeps slipping out of the gun, slip a rubber band around the tube and gun to hold it in place.
Here’s a quick video tutorial to show you how I breeze through caulking cracks and gaps:
That’s all there is to it! Now our home is protected from water and insects.

In case you were wondering, I was able to lean out the dormer window while keeping my feet on the floor.

If I had needed to lean out any further, I would have used a sturdy ladder or hired someone to do it for me. Recently I’ve been leaning (pun intended) toward hiring out any task that involves climbing higher than one story. Falling from a ladder is just too risky for this DIY Mom. Just because I can do it doesn’t mean I always will.
![]()
Pin for later!

Hi, Brittany! We have a house that is both brick and siding. Do you think I could use silicone caulk to fill in the missing mortar outside and around the windows? We’re looking into having the house re-mortared, but have no idea how much that will be. We also need new windows, but that’s an expensive project for the future. Thank you!
No, you should use mortar between bricks and where there was mortar before. Sorry if I’m the bearer of bad news.
I’ve never been able to perfect my caulking skills as hard & as often as I’ve tried. I’ve been given tips from professional painters I’ve worked with but I guess they just have more practice at it than I have. I do an ok job & I tend to be a perfectionist but I’ve learned it ok not to be perfect (I think)
Great tip with the rubber band & oh yes, I stay off ladders now as much as I can. Smart thing to do. I was lucky with not falling very hard or too far down as long as I’ve been on one in the past.
Colleen, I can relate. I was usually able to perfect after smoothing it 50 times ;-). The finger over the tip of the caulk works brilliantly! Try it.
I bought a home this year and have been learning how to do home improvements as the home is very old and needs a lot of work. So working with a caulk gun looks incredably easy. Not so much if you have never used one before. I tried to do my bathroom and was so mad there were alot of words coming out of my mouth that don’t usually happen. What a mess I made. I had no clue how to do it. First I couldn’t get the caulk to come out. I snipped the end and nothing. took it to the store and told them it was a dud. they showed me how to use the wire thing on the gun to poke a hole in the cover that is way down where it can’t be seen. then how to snip the end and how to run your finger along the caulk. So easy yet if you don’t know it can be a horrible expereince. Since then I have completed the entire interior and exterior of my home and am proud of myself. In the beginning it was a teary experience I never wanted to do again. Now to take off all the bathroom mess and re do it the correct way. i think it would have been easier to start on the outside around the windows where a little bit of a glop wouldn’t have been such a big deal as in the bathroom. I appriciate your posts and am buying tools now to use. one learning curve at a time.
Lizzie, I can so relate. It took me a while and lots of practice to get a decent “bead of caulk”. Glad to hear you never gave up.
And of course you are putting the whole month’s of tips in a printable version and offering them to your most loyal readers….right? (hope hope wink wink)
Nancy. I will put up a page with the links to each post on one page. Hope that helps.