5 Minute Light Upgrade – Converting a Recessed Light to a Pendant

This post really should be titled: How to convert a can light in 5 minutes or less (if you aren’t shooting tutorial photos every 30 seconds), and why did it take me 6 months to do this?! But, that would be a looooonnggggg title. I’ll spare you the extra word count and just get right down to it.
Do you have can (or recessed) lights in your ceiling? Do you have enough to have a full line up of gals doing the can can?

Yup, that’s what we have, a full half dozen cans in the bonus room ceiling. I decided to break up the monotony with a little lighting rebel: meet my new bronze sphere cage pendant light.

She kicked up the “WOW” factor in this room in a matter of minutes! (Get it? Kicked…can can. I know, my sense of humor is bad. But, my tutorial should hopefully convince you to forgive me.)
(I’ve included affiliate links for your convenience. I earn a small percentage from a purchase using these links. There is no additional cost to you. You can read more about affiliate links here.)
Converting a Recessed Light to a Pendant Materials:

Converting a Recessed Light to a Pendant Instructions:
1. Remove the light bulb from your recessed light fixture.

2. Measure the height (from the ceiling) that you would like your pendant light to hang. (side note: Because this fixture will be over our craft table, I chose a height slightly lower than if I was installing it where we would walk underneath.)

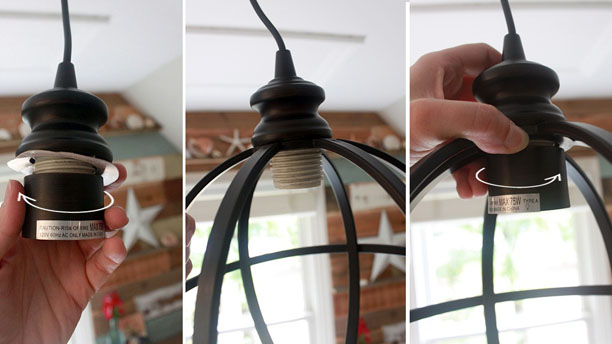
3. Loosen the compression nut from the canopy on your light kit.

4. Pull the cord through the canopy until the light fixture will hang at your preferred height. Wind the excess cord tightly around spindle bracket on the adapter.

5. Screw the adapter into the light bulb socket exactly like screwing in a light bulb.

6. Raise the canopy until it is flush against the ceiling. Screw the compression nut back onto the canopy until it is snug.

7. Remove the socket ring (and shipping cardboard ring.) Slide the shade, globe or decorative cover over the socket. Replace the socket ring.
8. Screw in a pretty light bulb.
Side note: I have been buying these halogen bulbs for the fixtures that you can see the bulb. They use less energy (not as little as an LED or CFL) but still look pretty.

9. Bam! Stop your timer. Okay, I know it says six minutes, thirty seconds and not five minutes, but I mentally subtracted the time it took to snap photos and to re-adjust the light to a higher height. Therefore, I feel confident that you can replace your can light in five minutes or less.

10. Admire your new beautiful pendant light.

What do you think? The kids like the pattern it makes on the ceiling. They think I did it on purpose for Halloween since it looks like a giant spider on the ceiling and wall. I just nodded, yes, of course!
Are you keeping up with all the changes I’ve made in the bonus room on its path to being converted into an art & craft studio? No? Well, get crackin’, here are the details:
The Master Plant to Convert Our Bonus Room into an Art & Craft Studio
Painting Your Ceiling Fan to Blend into the Ceiling
How to Remove and Re-Install Baseboard Trim
How to Install a Scrap Wood and Pallet Wood Wall
and speaking of Pallet Wood: How to Harvest Pallet Wood the Easy Way
You might also like:
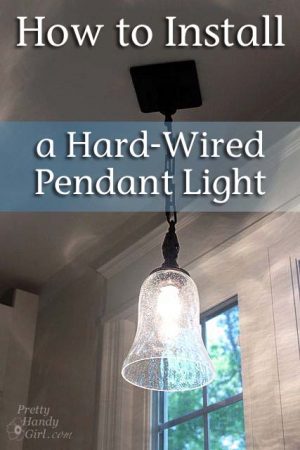
How to Install a Hard-Wired Pendant Light
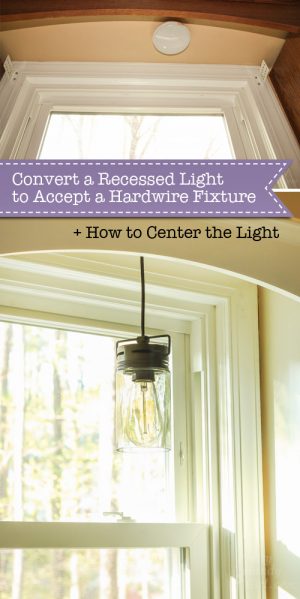
Convert a Recessed Light to Accept a Hardwire Fixture
Later Alligator! I’ll be back after a while Crocodile.
 Disclosure: This is NOT a sponsored post. Worth Home Products sent me the pendant light to try (ages ago!) And then they waited patiently for months — and they wondered if I didn’t like the kit but was afraid to tell them so. In all honesty I was too swamped to install it, not realizing it would only take six minutes to install and photograph!
I accept complimentary DIY related products for product reviews. The products I don’t like usually don’t make it on the blog, so if you see a product here, you know I like it! I will be honest with you in my reviews. Cool?!

If only these worked anywhere nearly as easily. The design is horrendous and dangerous. Unless the can for the recessed light is fixed to the framing of your house or at the very least to your ceiling, the pendant light WILL pull the can out of the ceiling, eventually; if not when you install the pendant, then eventually, as gravity works on it and temperature and humidity fluctuate. When that can fails and the light falls into your kitchen sink, hopefully you won’t be washing dishes…or a baby.
All of that assumes you COULD actually install the light as described, with the parts provided. With an engineering degree, an extra pair of hands and an hour on my hands I was not successful – and was quite grateful for that once I realized that there was no way to fix the can to the framing/ceiling or the light cover (medalian) to the ceiling.
The wire is supposed to wrap around the bracket part of the screw-in adapter; and then magically stay that way with 0 unwinding/slackening. This won’t happen – there’s no securing of the wire to that bracket and it WILL slacken after winding. [When you pull on the wire to try to find the length that it will extend to when ANY tension is applied, this is when you’ll find out how much tension is necessary to pull the whole can from the ceiling].
So, if ny some miracle your can hasn’t pulled out of the ceiling YET, when you push the medallion against the ceiling and tighten the set screw, the medallion will pull away, at least a bit, so that this part floats up under your can light, around, but in no way connected to or even held again the ceiling. It will not securely sit up against the ceiling. There’s no physical reason that it should: there would need to be tension between the wire that’s in the can light and the the bottom (outside part) of the medallion and the set screw does not fulfill this need.
I hope everyone in this supply chain from manufacturer to the handy girl has good liability insurance. And that no babies are bathed in sinks under these lights.
Recessed lights that are installed in new construction are secured between two studs. That being said, yes, if you choose to install a heavy pendant light it can back out and fall. I highly recommend using common sense and only installing light weight pendants. Thanks for your comment.
All of my recessed ceiling lights are square, not round. The sockets come out from the side of the can, not straight down from the middle.. I want to change to pendant lights. Any suggestions?
YAY!! I am so excited to try this!!
We tried to install one of these lights over our sink but the existing recessed light socket (the part up in the ceiling) wouldn’t hold the weight of the light fixture. Any suggestions??
I think you have two options. Use a lighter light fixture. Or you need to install a true junction box for a wired light and make sure it is attached to a ceiling joist or use a ceiling fan brace kit.
I have pendant lighting over my island but want to change it out. I love the decorative piece you have. Where did you find it?
Alisha, you can buy it here: http://www.build.com/worth-home-products-pbn-4034-0011-120v-instant-pendant-light-with-bronze-8-cage-brushed-bronze/p2025454
I love this idea. I have can lighting in my kitchen and would like to do this with the lights over the peninsula but I have soffits and am wondering if I can use these but not hang them too low. ??
Sandy, you can wrap the cord around the adapter until it is the height you prefer.
Greate article. Keep posting such kind of info on your page.
Im really impressed by it.
Hey there, You have performed a fantastic job. I’ll definitely digg
it and individually recommend to my friends. I’m confident they will be benefited from this web site.
Would this conversion kit also work on eyeball recessed lights. The “eyeball” can itself protrudes below the ceiling line and I’m wondering if the canopy will accommodate the little extra “eyeball” can and lay flush with the ceiling. Thanks.
Jeff I am also replacing my “eyeball lights”. I’m having trouble with the canopy mounting flush against the ceiling.
You might need to contact the manufacturer for ideas. Have you removed the “eyeball”?
perfect step by step instructions.I was trying to tell a person how its done and she couldn’t quite understand until i found this site. Along with her looking at the pics and explaination with it she understood right away. Now she is going to purchase a few of these lights and put them in herself.
great site..thanks ,mike
Once installed, how do you get the pendant wire to hang straight down? Mine wants to bend all over the place. 🙂
Pam, mine straightened over time. You might also be able to heat up the cord with a hair dryer and try bending it straight. Just a thought, no idea if that would work or not.
where can I find different pendant fixtures that just screw in?
Debbie, at Lowe’s or you can look online at http://worthhomeproducts.com/, they usually have links to where you can buy them.
I tried these on a recessed light from the late 70’s in my kitchen. They did not work. The windy thing left the cord off center and the whole thing wobbled and did not fit well to the ceiling, because of the off-center cord winding, in my opinion. I tried to adjust the brackets up inside the ceiling, but that didn’t work either. These lamps looked bad and acted badly. Took them back.
Janet, I’m sorry to hear that you had a bad experience with your pendant light converter. I did try to end the cord in the middle of the spindle so the canopy would be centered on the can light hole. I also had to pull the cord taut before slipping the canopy up. Was that the part that was wobbling? Or was your actual light socket wobbling?
Hi! We did this in our kitchen over our island. I love the new look — but I found the kits in a little booklet that came in the mail and they only had a few choices for light shades. Where did you find the one you installed? And the bulbs? I haven’t seen those near where I live. Love it!
Please let me know if you get the chance.
Thank you!
Brittany, I love this!! I might have to try something like this soon!
Brittany…I have these can lights (or in the words of Candace Olsen “pot lights”)…all over the house….so you think I can do this without getting terribly shocked!?…What a great light pendant and you have truly inspired me…or my hubby…:)
Shirley, do you change your own light bulbs? Yes? I thought so, honestly, this is exactly the same as changing a light bulb. I promise you won’t get shocked. If you are really paranoid, you could turn off the power to the fixture while you screw in the adapter.
Exactly Shirley, I’d agree with Brittany. As precautions, you could switch off the power in order to avoid any accident. Otherwise, that upgrade doesn’t take time more than changing a light bulb.
Hi Brittany,
Love the frame of the lighting, I can only imagine that at night when the lights are on with shadows being cast of the walls that it provides a wonderful warm feeling to the room. Even from that close up image with shadows you can tell that there is a real sense of warmth.
Great job and we will let you off the additional minute and thirty seconds 🙂
Great and convenient upgrade Brittany, many thanks you at least gave me some encouragement and tips to do something of the recessed can lights in my dining room.
Sooo…..let me get this straight. The pendant light has to be one that ALREADY has a socket screw-in…. NOT a regular pendant that you add something to. When you buy it, it has the adapter, wind-y thing attached already?
Anna Marie, correct. The Worth Home Product pendant is all one light fixture. The adapter is hardwired to the pendant light. That’s what makes it so easy to install!
OMG! I have been wanting to get rid of a ton of can lights. YAY! A feasible solution. Thank you!
Shut the front door! New pendant light in my kitchen as soon as I can get to the store! Thanks!
Thank you, thank you, thank you! I told my husband there was such a thingie, but I haven’t been able to find them to prove it to him. Maybe calling it a thingie is my problem? One question- I’m a little confused about how the power gets to the light fixture- how does the cord connect to the adapter?
Oh, and I love the new light fixture. And your humor. 😉
Sheila, LOL. Yup, calling it a thingy might not help. The cord is built into the adapter. The adapter screws in just like a light bulb and gets power by being connected to the metal socket. You really don’t have to do anything. 😉
We joke that the lights install so easily, that even a husband can do it. Like the demonstration shows above, it really installs quickly. A “how-to” video may also help explain the process: http://www.youtube.com/watch?v=yjw2FUs4ank
Thank you!
So awesome!!
Who knew? I had no clue this even existed!! So happy!
So, will this same tutorial work for a “pot light”? I have a few of these and a few recessed lights that could all use this quick update. I cannot find a photo of the type of light I have anywhere, it’s an 80s style light that looks like it’s in a white can stuck to the ceiling (so it comes down from the ceiling, not recessed). You make it look so easy!
Vonnie, I know exactly what you are talking about. Do the pots extend below the ceiling? If so, the canopy won’t fit flush with the ceiling ;-(. But, you could have an electrician change out your pots for recessed if you want ;-D.
Thanks for this! You motivated me to change out my can lights.