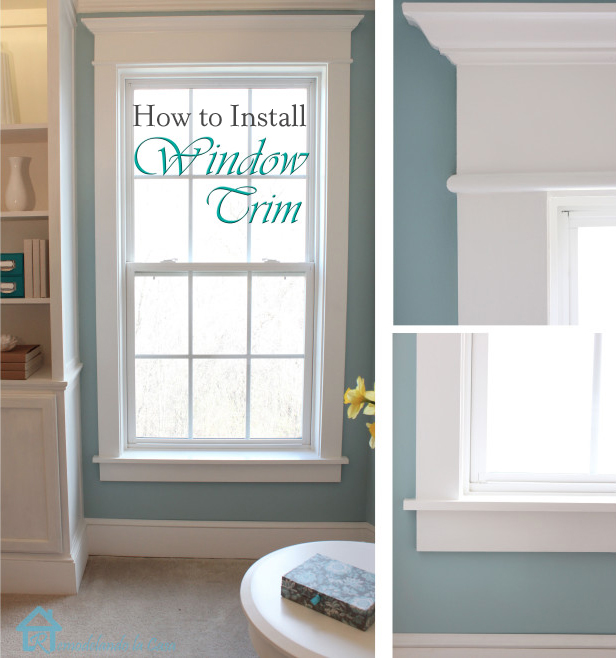
How to Install Window Trim
Hi everyone, I’m Cristina from Remodelando la Casa, and I’m beyond excited to join the team of Pretty Handy gals and guys! I’m still pinching myself at such a wonderful opportunity.
Today I’m going to show you a fairly easy way to transform your builder grade windows from plain and boring to beautiful with loads of character and with a more finished appearance.
Right now I’m working on updating my bedroom, where I have a couple of these windows.
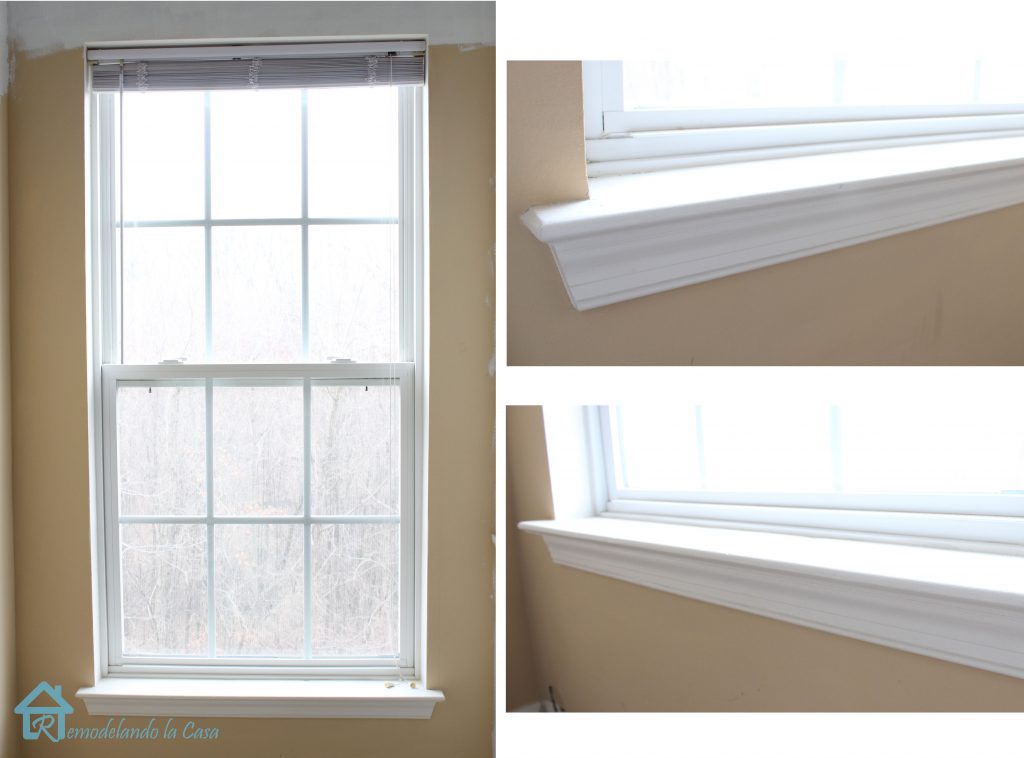
They look like they are wearing skirts, but forgot to put on the tops! 🙂 Yeap, naked!

Let’s change that by dressing up those windows!
This is only a decorative treatment. All the wooden material (Poplar or Pine), can be found at your local home center.
(Affiliate links are included for your convenience. Brittany earns a small percentage from a purchase using these links. There is no additional cost to you. You can read more about affiliate links here.)
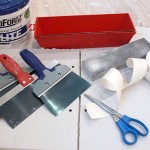
Tools:
- Miter saw (but you can use a Miter box and hand saw)
- Jig saw
- Sander
- Pneumatic nail gun
- Pry bar
- Utility knife
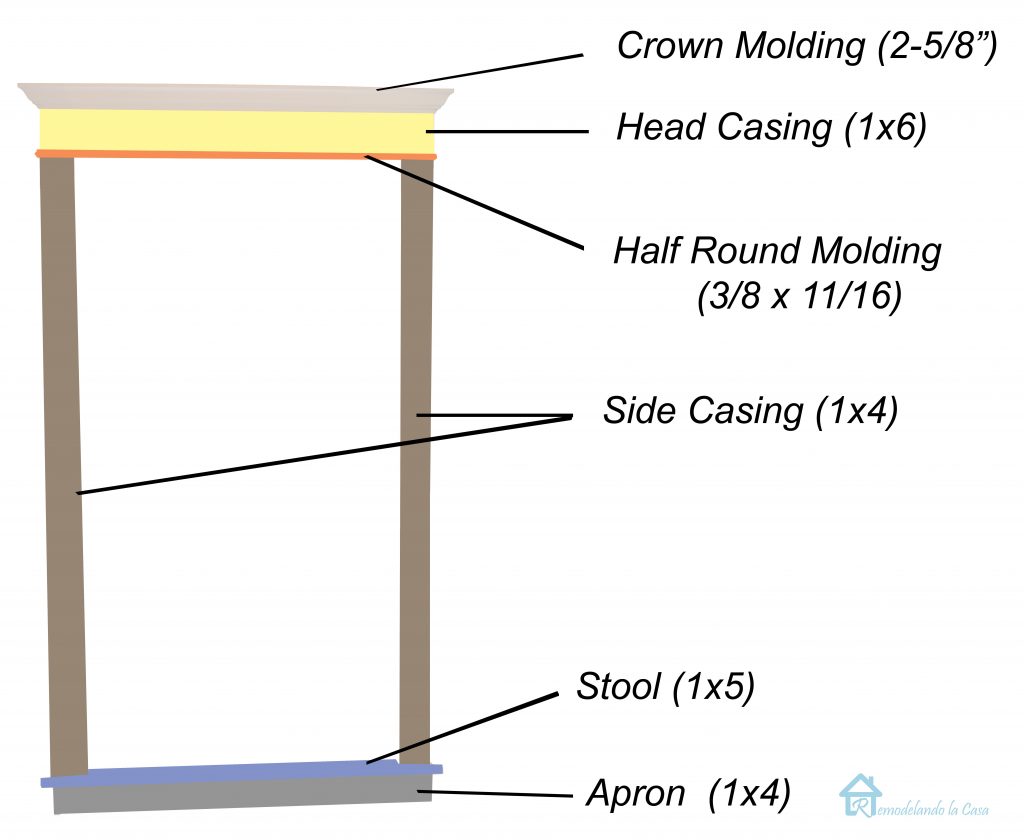
How much material you need depends on the size of your window, but this is what I used:
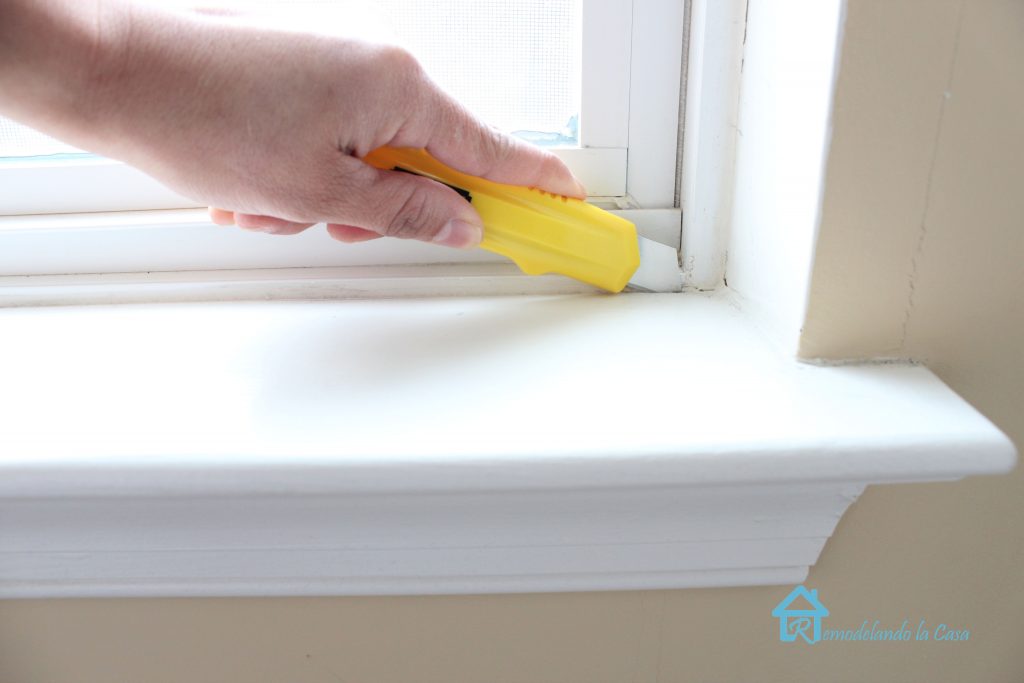
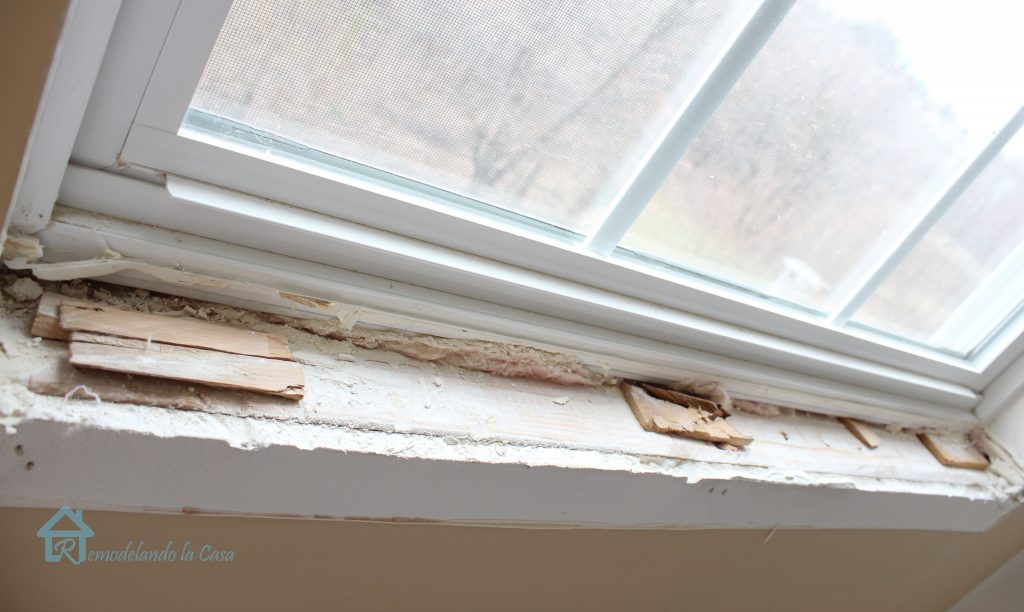
The first thing to do is getting rid of the old window stool and apron.
Using the utility knife, score around the window cutting the caulking. This is very important to prevent rips in the drywall.
Using the pry bar begin lifting the apron, use a wood shim as support to prevent damage to the wall.
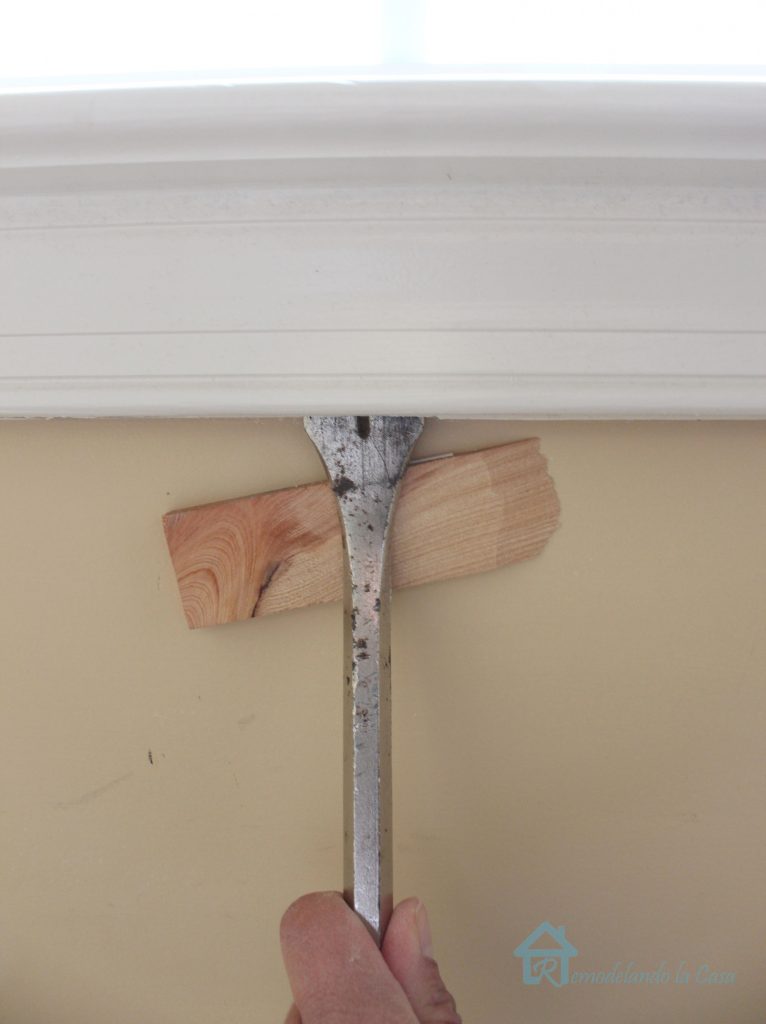
Once the apron is off, you can begin lifting the stool.
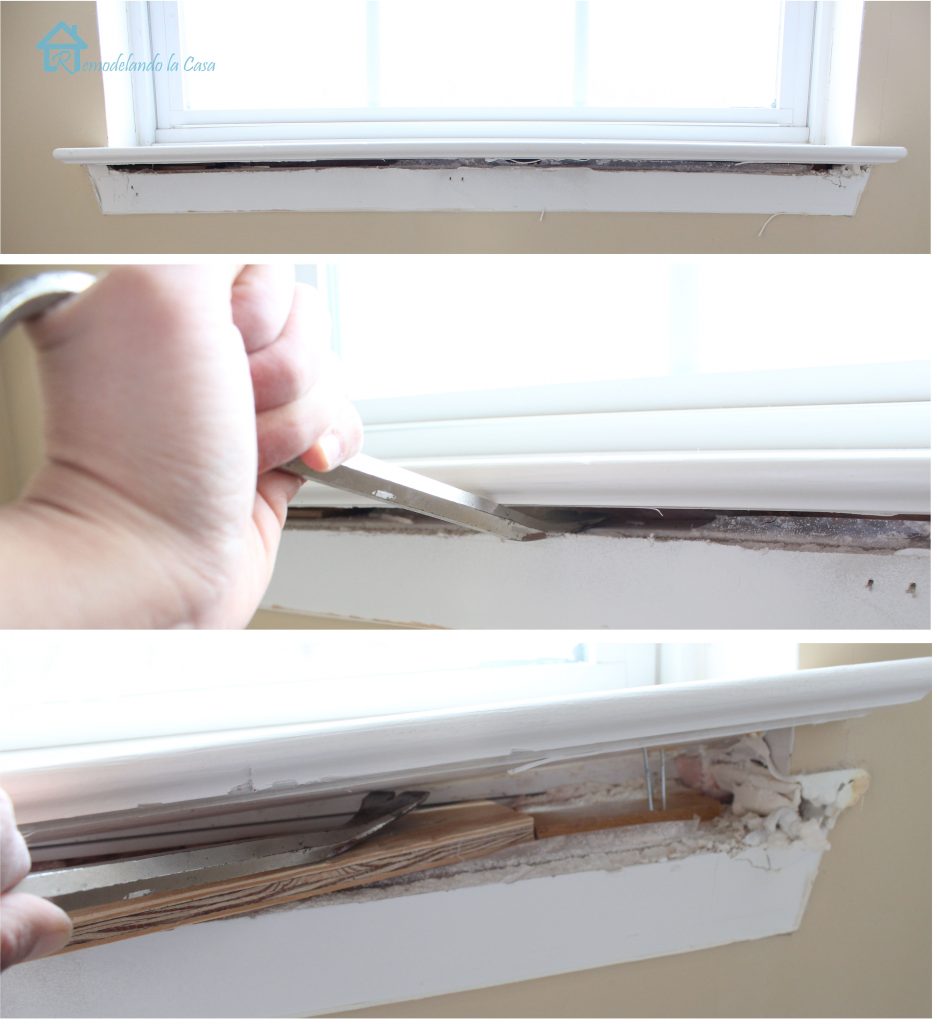
Underneath I found lots of wood shims that were used to level the stool. They were left in place. Scrape the old caulking from the window and wall.
Don’t throw away the old window stool, you can use it to trace the pattern onto your new stool. Measure the width of your window, add the width of both side casings: 7 inches, add 1/2″ for reveals (1/4″ on each side) and add 2 more inches for the “horns” (The horns are those extra parts on the window stool that go beyond the apron. Allow one inch on each side of the stool.)
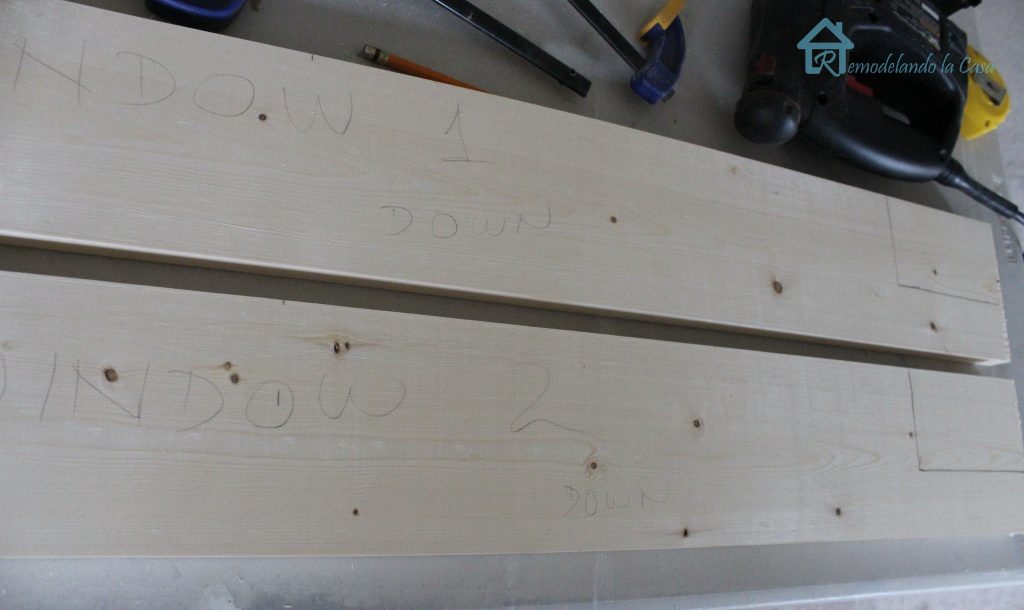
Mark the center on the old and new stool boards, align those centers and trace the new pattern.

If you are working on more than one window, it is a good idea to mark each board, even though they look pretty much the same, their measurements can vary.
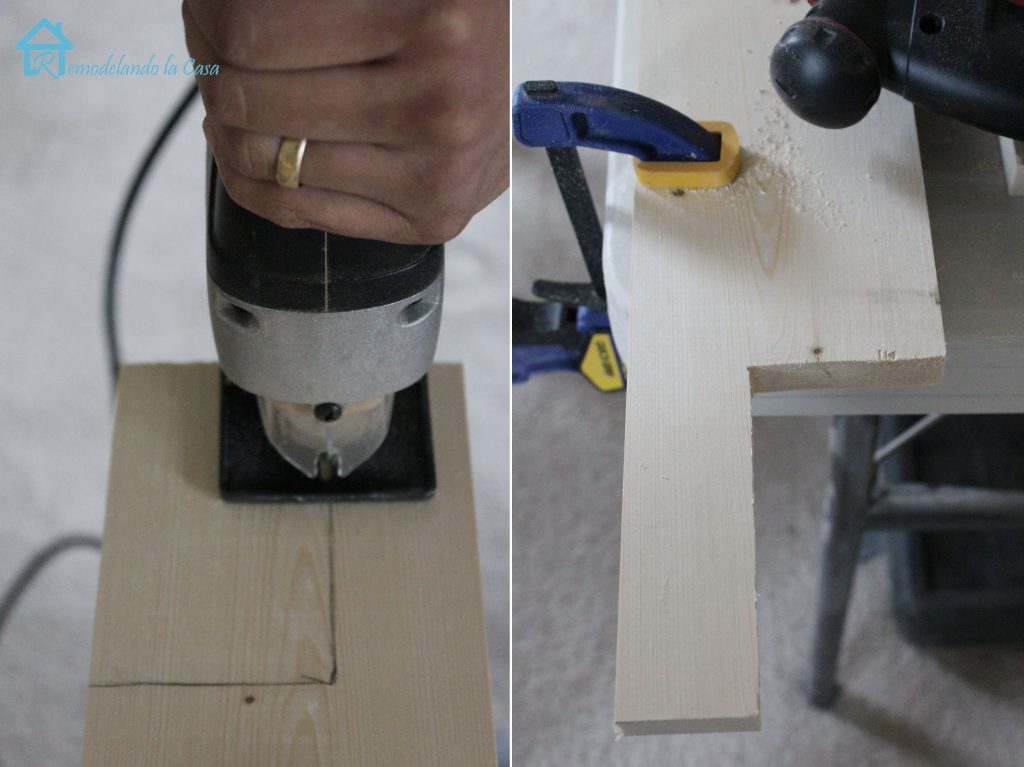
Use your jig saw to cut away those marked ends.
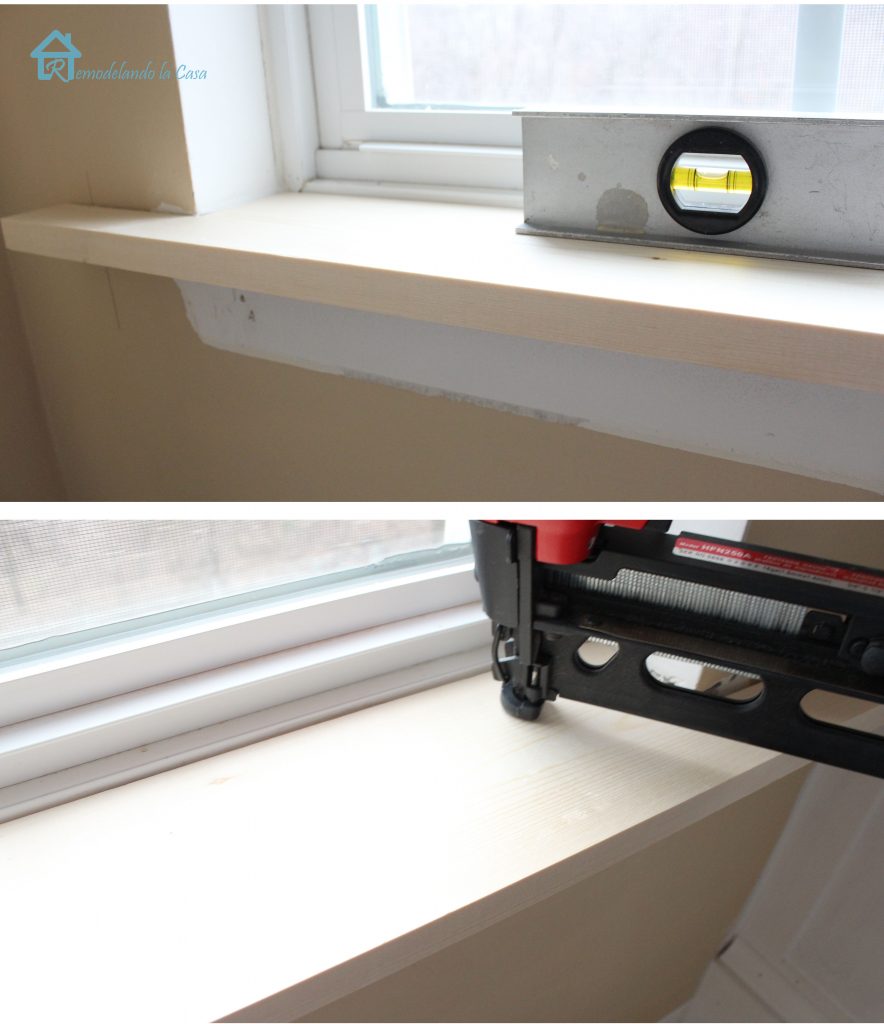
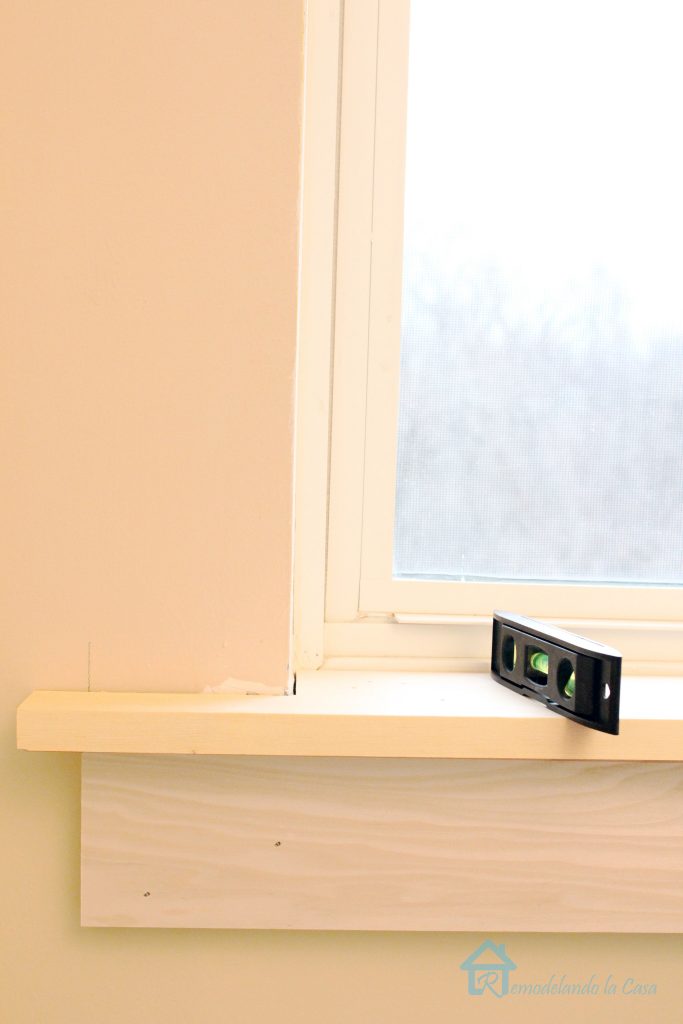
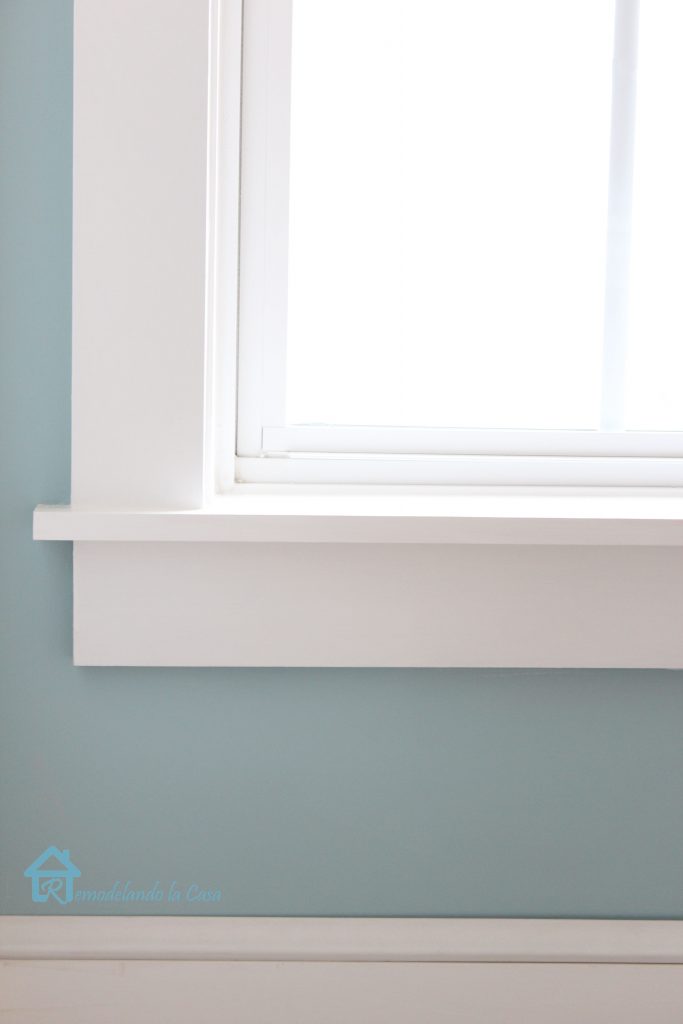
Place it on the window and make sure the new stool is level. Nail it in place.
The apron can be installed by centering it underneath the stool. The dimensions are the same as for the stool, but without the horns (2″). As shown below, the horns protrude an inch on each side beyond the apron.
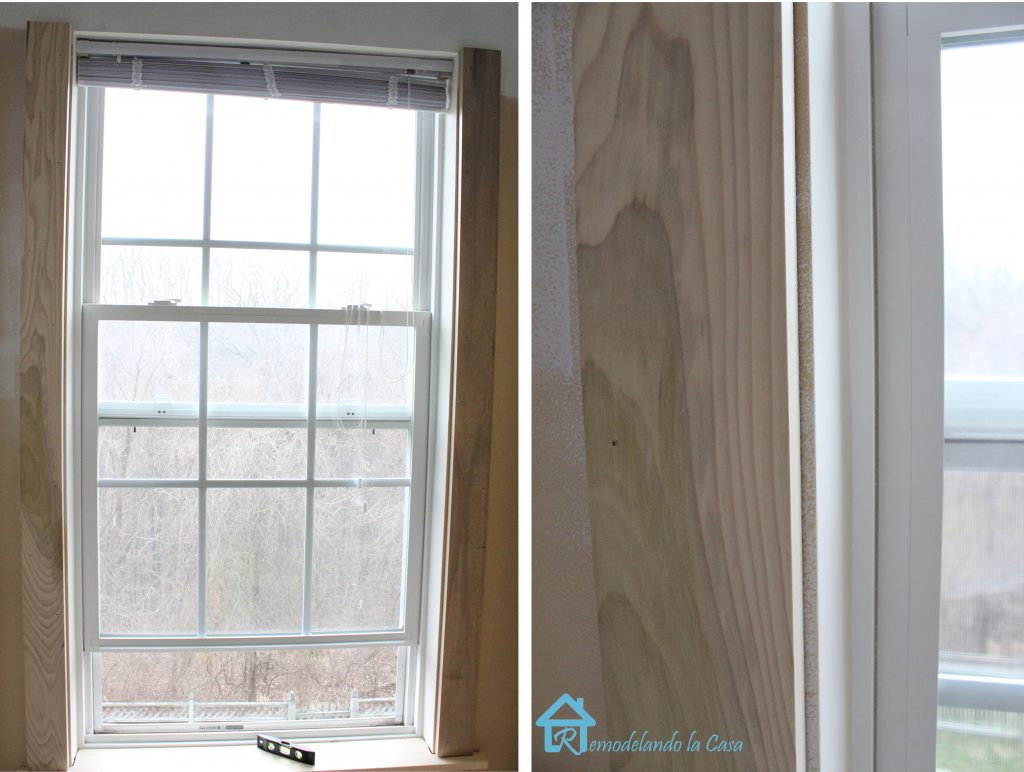
The side casings can be installed now. To figure the length of the side casings, measure the distance from the stool to the top of the opening of the window, add 1/4″ for reveal line. Secure the side casings with nails.
After the side casings are installed, measure the distance from the outer edges of the side casings. That will give you the head casing length.
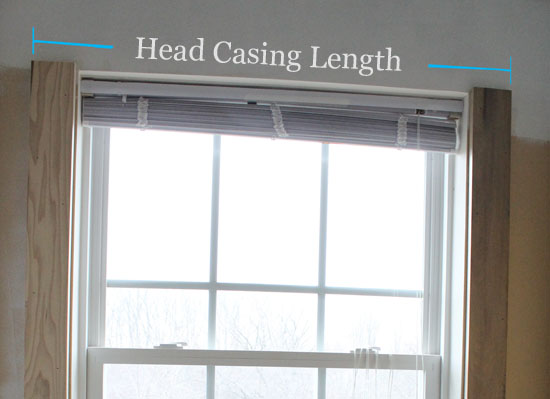
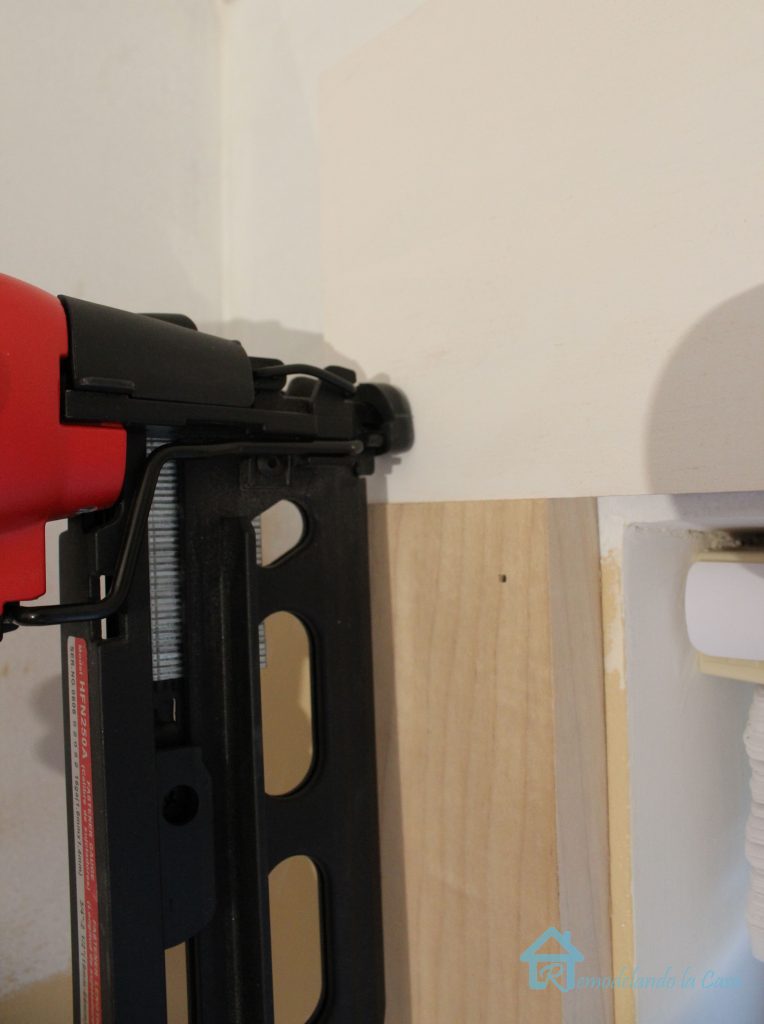
Nail the head casing in place.
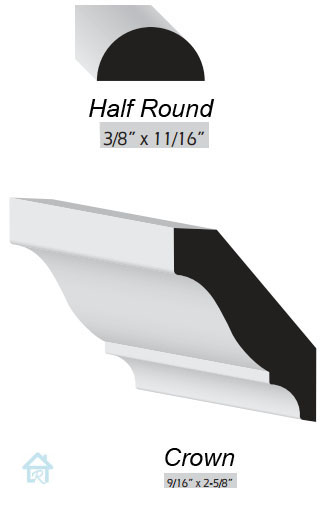
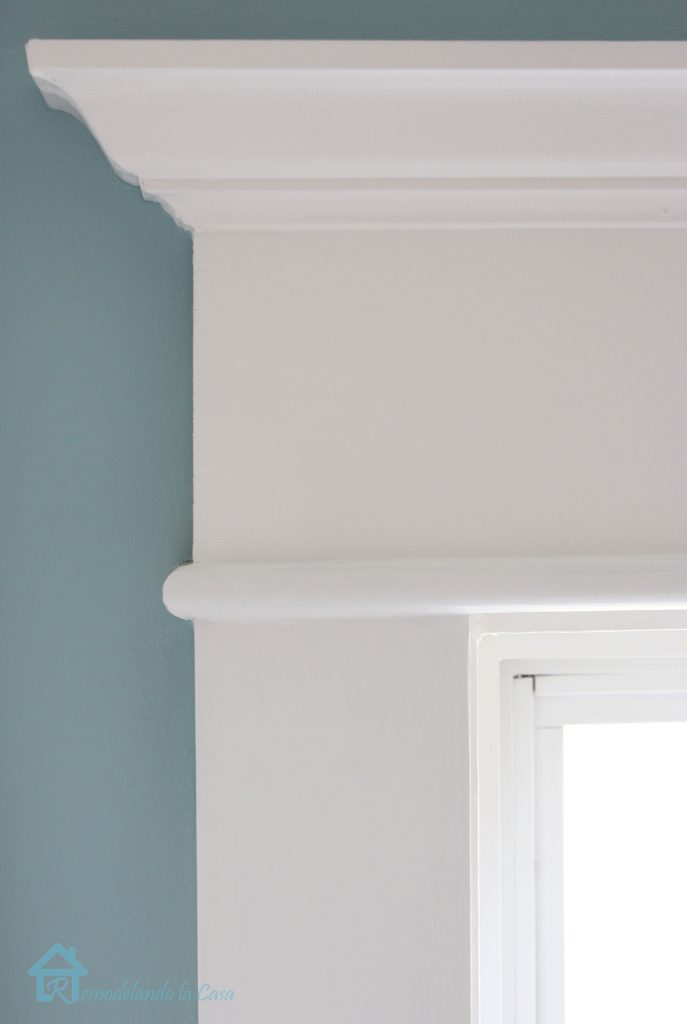
Cut the decorative molding, crown and half round.
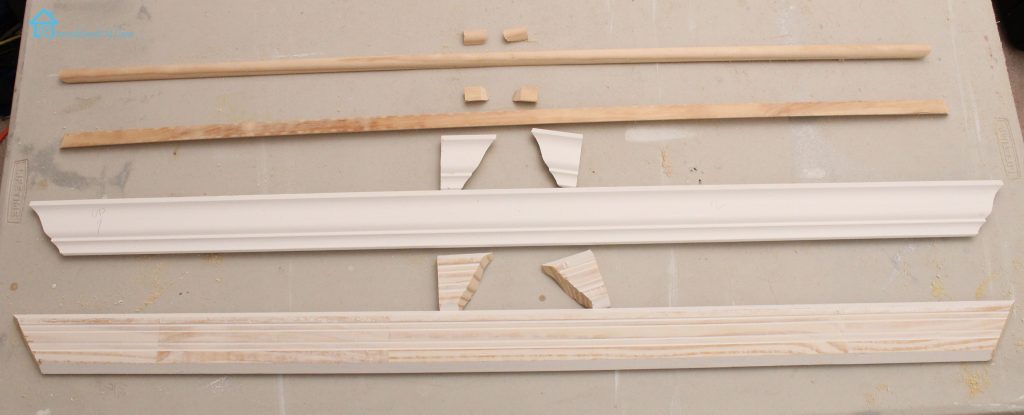
When cutting the decorative molding, miter the ends (cut at a 45 degree angle as shown below.) Remember to cut the molding upside down.

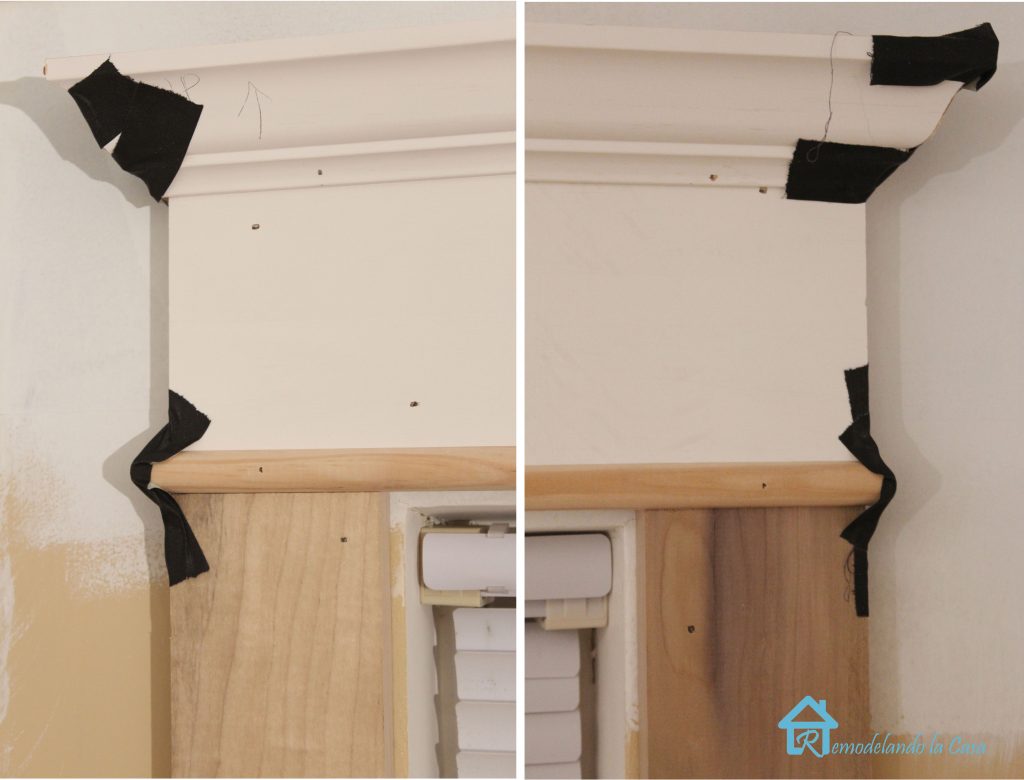
The crown is installed at the very top of the head casing and the half round is attached to the bottom of the head casing.

The returns (side pieces of the decorative molding) are glued in place and held overnight with tape.
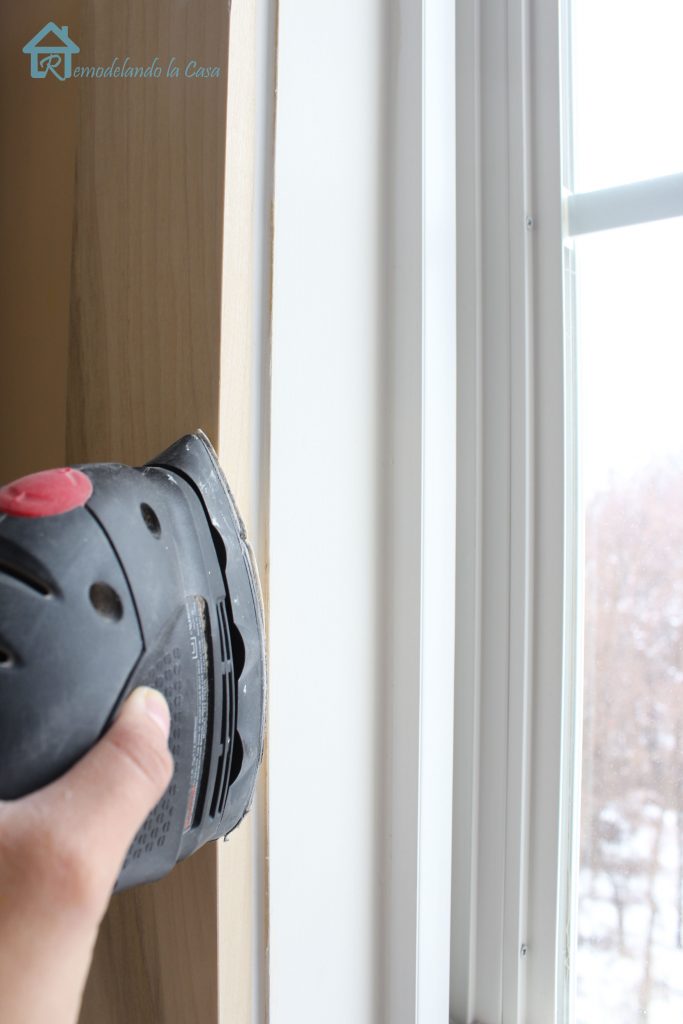
Fill the nail holes and gaps with caulking. After the caulk is dry, a good sanding is a necessity. Don’t forget to sand those sharp edges too.
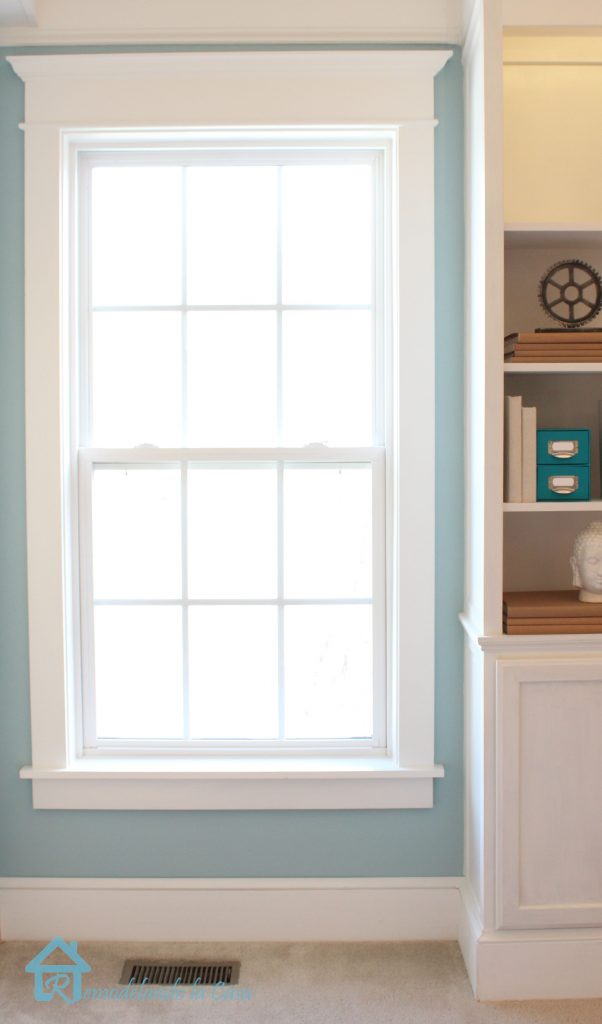
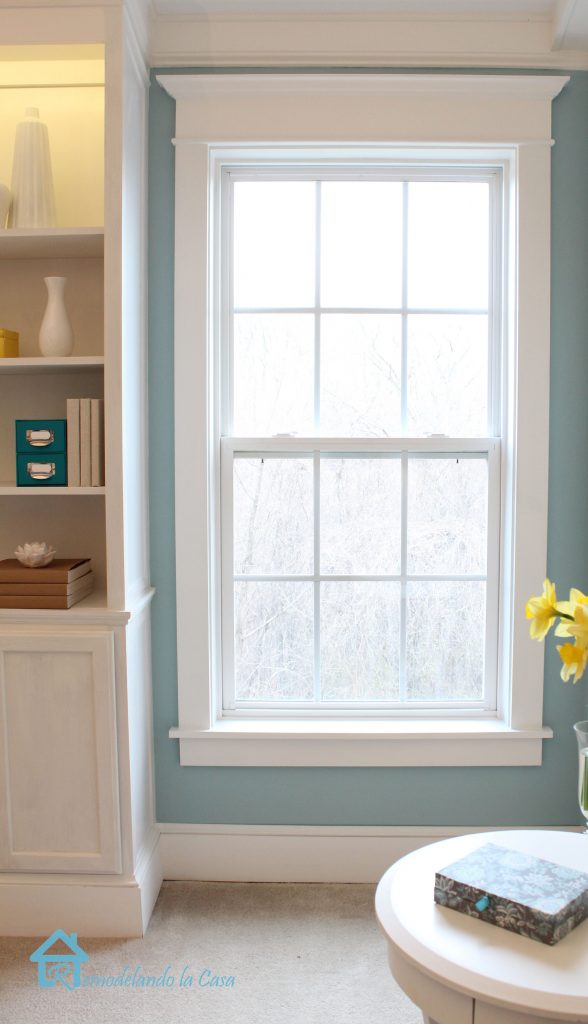
Paint the trim with one coat of primer and two coats of paint. Then you’ll have good looking windows in your room!
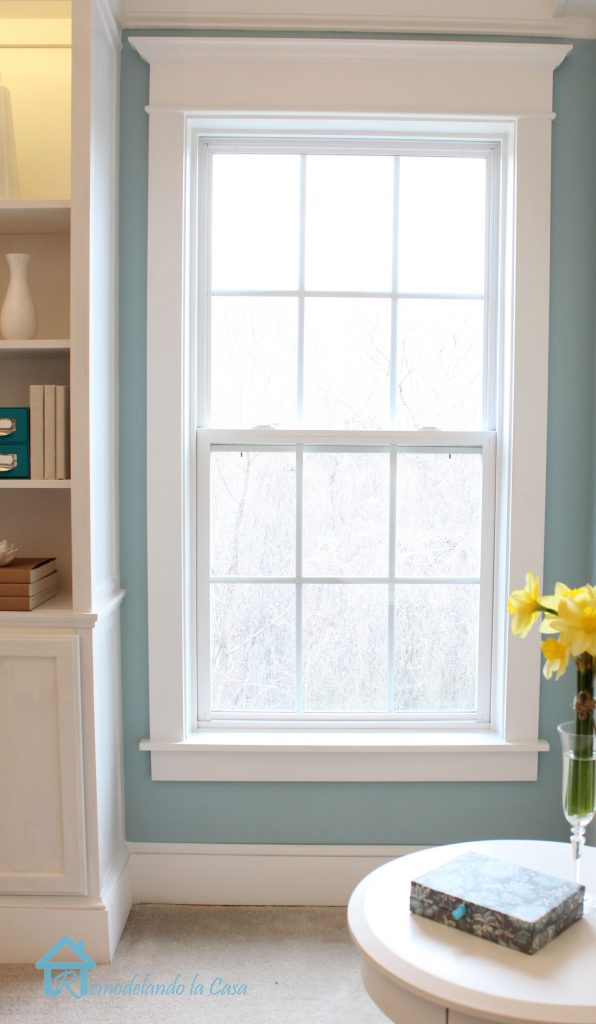
Add new paint in a contrasting color on the walls and the room is almost ready!
I had some leftover paint that I mixed to achieve this hue.
These twin windows really add a lot of character to the room.

The trim makes a big difference, wouldn’t you agree?
Thank you so much for having me here at Pretty Handy Girl! I can’t wait to share more with you!
Don’t miss Brittany’s great tutorial for trimming a casement window: How to Install Trim and Casing Moulding on a Casement Window by PrettyHandyGirl


Thank you for the precise instructions. I have two sets of 3 side by side windows, I cased all three as if they were one. They turned out beautifully!
Wow!! Perfect! Exactly what we r going to do thanks to ur great tutorial!
If the stool is in good shape – do you need to replace it?
Not at all!
Yayyyy
I’m so glad I found it!!!!!
Thank you Cristina and Brittany!!!!!!!!!! ?
Very informative, thanks for sharing!
What is that beautiful color blue for the room?
I’m confused… so is the side casing trim 4inches or 3.5? Because if they were 4″ as per your materials diagram, adding the side casings together would be 8″, not 7.5.
I would like to use your exact measurements 🙂
She is using the nominal measurements. When you go to the store and buy 1 x 4’s, they are actually .75″ by 3.5″.
What’s up, its nice article concerning media print,
we all be aware of media is a wonderful source of
data.
Hi,
I am installing the window trims and the crown on the top. We have our present windows exactly like what you had before installing the new trim. I just want to know if we need to install any wood to the inside dry wall of the window (just inside and next to the trim). I am not sure if we need to paint white inside the window or if that goes with a wood panel.
Appreciate your help!
Hi this tutorial is excellently dictated. I have seen other types and have been left without complete instructions. This was clearly shown with pictures of the items needed, the tools used and descriptions of the window trim pieces. I plan on doing this to my home office window as a trial before tackling the others. I will have to rent a nail gun with the pneumatic. Thank you so much for the details!! awesome.
I don’t have any wood around my windows, just the wall material. Where would you suggest I start? Should I add wood around the window first then start off at the first step of your tutorial?
Hello! I’m so glad I found this post. We recently bought our first home and overlooked the fact that every window is dry walked in without trim… I hate it!! Our problem is that one window is set very deep and the dry wall is textured. Also, each window has a about 2″ piece of trim over the drywall next to the frame of the window. How do I go about this? I can send pictures if you need clarification! I would appreciate any insight you might have!! Thank you!!
Kate, feel free to send me a separate email describing what you are trying to do and send me a picture or two. [email protected]
About how much did it cost you to do that window, I have 14 of them to do?